Foodbuzz

Monday, May 30, 2011

Triple Quake Bars

Have you ever realized that ice cream desserts have gotten smaller as the years have passed?  Maybe its because you have grown up, but some things just are not what they used to be.  I remember an ice cream treat from Dairy Queen called Buster Bars.

These treats were shaped like a big upside down Dixie cup.  It was all covered in chocolate and inside was stacked layers: one of ice cream, one of fudge and one of salted caramel peanuts.  The bottom was bigger around than the inside of a standard coffee cup and the top was the size of a full roll of scotch tape.

Well, I have not had a Buster Bar in quite a while.  Probably because the last time I got one the size was a little disappointing.  I am not even sure they make them anymore.

Anyhow, I thought I would make some sort of ice cream treat with layers.  This one is sure to please-it is a rich chocolate brownie with pecans topped with one layer of vanilla bean ice cream.  If that was not enough, there is a third layer on top of rich, chocolate fudge.  It would satisfy any ravenous chocoholic and, of course, you can choose to cut whatever size piece you want.

Triple Quake Bars
by flourtrader

Ingredients/ Brownie Cake layer
1 cup chopped, toasted pecans
1 1/2 cup flour
1/2 tsp salt
1 3/4 cup sugar
3/4 cup cocoa (I used Hersheys special dark)
2 tsp vanilla extract
4 eggs
3/4 cup butter

Ingredients/Ice Cream layer
1quart vanilla bean or homemade vanilla ice cream -softened

Ingredients/Fudge Layer
1/2 cup heavy cream
1/2 cup (1 stick) and 2 tbs butter
2 tsp vanilla extract
2/3 cup cocoa
2 oz (2 squares) unsweetened chocolate
2 cups confectioners sugar

To make the cake layer, preheat the oven to 350 degrees.  Butter the inside of a 9X13 inch pan and dust with flour.

Using a medium size saucepan, melt butter over low heat.  Then whisk in sugar and cocoa until smooth.  Remove from heat and empty into a mixing bowl.   Add each egg to the sugar batter, beating about 30 seconds before adding the next egg.  Once all four eggs are blended into the batter, stir in the vanilla extract.  Then set aside.

In a separate bowl, sift together the flour and salt.  Fold these dry ingredients into the chocolate batter until no dry flour spots remain.  Then stir in the pecans.

Place pan in oven and bake for about 35 minutes or until tester indicates done. Then remove cake from the oven and place pan on a cooling rack.  Once pan is cool to the touch, place it in the freezer for 15-20 minutes.

Take out the softened ice cream. It should have the consistency of soft serve ice cream.  You do not want it too watery because it will soak into the cake.  Remove the cake from the freezer and spread the ice cream evenly on top.  Place back in freezer.

Now to make the top layer, you will need another saucepan.  Place it over low heat and put in the butter and the chocolate squares.  Stir constantly until all is melted and blended to a smooth consistency.  Add the cocoa and continue to stir.  Then pour in the heavy cream and vanilla extract and mix until incorporated into batter.  Remove from heat and transfer batter to a mixing bowl.

Sift confectioners sugar into the chocolate batter and beat with an electric mixer for about 2 minutes.  Fudge batter should be shiny and smooth.  Set aside to cool for about 1 hour.

Once fudge batter is cool, take out cake and put 1/2 of fudge on top.  If  ice cream shows through, do not worry, the second layer will cover.  Place cake in the freezer for 30-45 minutes.  Remove and smooth on 2nd layer of fudge and place back in freezer until top is no longer sticky.  About 1 hour.

You can serve after the hour is up or leave cake in freezer for another time.  Should it be frozen for a long time, soften at room temp for 20-30 minutes or more before serving.  Cut into squares with a sharp knife and place each on a plate and serve.

Saturday, May 28, 2011

Cajun Chicken Carter

I like a little bit of spice, but not to the point of eating habanero peppers. Sweating and eating at the same time is just is not my thing.

I was in the mood for Cajun but did not want all the cayenne heat that it usually has.  I found this recipe for Chicken Carter that foot the bill.  It is flavorful but on the mild side.

The cookbook, Fork in the Road, offers up recipes that are a bit healthier than traditional Cajun cuisine. The first thing I noticed was that this recipe had quite a number of spices in it but it did not include cayenne.  Also, the roux (typically made with oil) is replaced with flour that is browned in a pan.  While being more healthy, the absence of roux makes this dish easier to prepare.

Cajun Chicken Carter
courtesy of  A Fork in the Road Cookbook

Ingredients
1 whole chicken ( skin removed and cut up but skip this for the wings)
3 cups cooked long grain rice
2 cups chopped fresh tomatoes
1 cup chopped onions
1/2 cup chopped celery
1 1/2 cups sliced, chopped mushrooms
1/2 tsp minced garlic
2 cups chicken stock
2 tbs flour

Seasoning Ingredients
1/4 tsp garlic powder
1/4 tsp black pepper
1/4 tsp white pepper
1/4 tsp allspice
1/2 tsp dried majoram
1/2 tsp ground cumin
1/2 tsp ground sage
1/2 tsp ground mustard
1/2 tsp onion powder
1 tsp salt
1 tsp paprika

After all your prep work of chopping the vegetables is done, take out a heavy, non-stick skillet and preheat over high heat (350 degrees) for about 3 minutes.  Add the flour and stir with a wooden spoon to get out the lumps.  Once the flour starts to brown, turn down the heat to low-stirring constantly.  In about 4 minutes, you should have a toasty, brown looking flour.  It should be about the same hue as chocolate milk. Flour has a tendency to reach a point where it can burn easily, so you must be careful in this process.  Remove pan from heat and set aside.

In a small bowl, whisk all the seasoning together so it is evenly dispersed.  Then take out a 5 quart pot (preferably non stick)and place over 350 degree heat to for about 4 minutes.

For the seasoning, measure out half and rub on all the chicken pieces..  Place the chicken in the pot to brown.  Let each side cook for about 3 minutes without moving and then turn.  Remove and set aside chicken.

Pour in 1/2 cup of chicken stock to the pot and scrape up all the brown bits from the side and bottom of pan.  Measure out half of the chopped onions and place in the pot.  Then add the celery, garlic and the rest of the seasoning mix.  Continue to stir a few times while the mixture is cooking.  Cook until  there is no more liquid in the pan. That should take about 4 minutes.

Pour in another 1/2 cup of the stock and let it come to a boil.  Add the browned flour and keep stirring until the flour turns into a paste.  Then cook for an additional 2 minutes.  Scrape the bottom and sides of the pot.  Add another 1/2 cup of stock and stir until there are not any clumps sitting on the bottom inside of the pot.

Add the rest of the vegetables (tomatoes, mushrooms, remaining onions) and the last half cup of the chicken stock.  Mix together.  Lastly, put the chicken pieces back in the pot and cover.  Bring the mixture to a boil, cooking for at least 4 minutes.  Reduce heat and simmer for an another 15-25 minutes.  Once done, plate servings by putting chicken pieces on a bed of rice and ladle with the vegetables and sauce.

Tuesday, May 24, 2011

Romany Creams

Well, yesterday was quite a busy day, I am now halfway to my 12 dz cookies for donation.  I always strive to make something a little different so the recipients will have more variety. These cookies, called Romany Creams, are not very well known in the US.  However, they have been a long time favorite in South Africa.  Not only is the  recipe all across the internet (Baking101, ifoodtv, food.com), but this cookie is actually packaged and sold in several grocery stores in Africa.

The most unique thing about these treats are the texture.  One bite and they quickly melt into several tiny crumbs to reveal the chewy taste of coconut and a rich chocolate center.  Since the cookie part is very lightly sweetened, the chocolate filling really pulls the flavors together. Also, the filling is not a thick cream like most sandwich cookies, but just pure chocolate.

I know, some 10 flavors-in-one dessert may be all the rage now, but there are some simple flavors that will always endure. Chocolate and coconut are two that are on that flavor list.

Come back home to classic, simple flavor by experiencing the taste of Romany Creams.  And they say you can never go home again. What a sad mistake.


Romany Creams

Ingredients
1/2 cup vegetable oil
1 tsp vanilla extract
2 eggs (room temp)
9 oz or 2 sticks and 2 tbs of butter (room temp)
1 1/2 cups dessicated or unsweetened coconut
1/4 tsp baking soda
2 tsp of baking powder
2 tbs cocoa
2 1/2 cups of flour
3/4 cup sugar
8 oz or more of chocolate (chips or chopped)

In a medium size bowl, sift together the flour, cocoa, baking soda and baking powder.  Sift a second time and set aside.

Using an electric mixer on medium speed, beat butter, oil and sugar together until fluffy.  This should take about 3 minutes, depending on how soft the butter is.  Add the vanilla extract. Then add the eggs, one at a time, beating 30 seconds after each addition. 

Using a light touch, fold the sifted ingredients into the batter in three increments until no dry areas remain.  Stir in the coconut .

The dough will be softer and lighter than most, so it will need to be formed and chilled.  For sliced cookies, place the dough in plastic wrap and roll into a cylinder or log, about 2 1/2 inches in diameter.  If using a cookie cutter, roll out the dough between two pieces of  wax paper.  It should be about 1/4-5/8 inch thick.  Place the wrapped dough on a cookie sheet and chill for 30 minutes.

Preheat the oven to 350 degrees. Line two cookie sheets with parchment paper. Place wax paper on a smooth surface for the cooled sandwiched cookies. The cookies will rest on the wax paper as the chocolate filling hardens.

Once the dough is cold enough to work with, pull out and slice or cut into cookies. Place on a baking sheet about 1 1/2 inches apart.  Bake for 15-20 minutes or until edges are lightly toasted.

Transfer cookies from baking sheet to rack to cool. Once cooled, match cookies (since they all will not be perfectly sized) together in pairs facing upside down with bottom part of sandwich cookie in one row and top cookie in the next row.

Take out a double boiler and fill bottom with water (making sure that water will not touch bottom of top pan when stacked).  Put chocolate in top pan and stack on top of water pan.  Bring to a simmer, stirring occasionally as chocolate melts.  Remove from heat once all is melted.

With one hand, grab a cookie from the bottom chosen row   In the other hand, use a spoon and scoop out some melted chocolate and drizzle it on to the bottom side of the cookie.  Place cookie back on cooling rack and then put the corresponding chosen cookie on top.  Put cookie on wax paper for filling to harden. Continue until all cookies are filled and sandwiched together.

This recipe makes about 32-36 sandwich cookies.

Tip:  I froze sheets of dough until hard and then cut with the cookie cutter.  It is easier to handle and you can peel the frozen dough off the wax paper and place it on the cookie sheet.  Also, it is a good fix if your are in a humid climate.

Friday, May 20, 2011

50/50 Biscuits

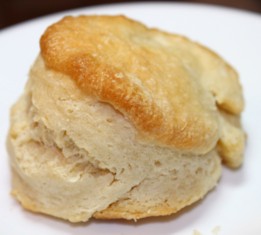
It has been about 10 months since I started my blog.  I started out privately blogging and have been making use of the Internet as well as cookbooks for my recipes.  Now, it is time I put my own creativity to work and make some recipes that I can call my own.

This one I created some time ago because my husband needed a breakfast to carry to work due to his long commute.  We usually split these in half and fill with egg and sausage to make a breakfast sandwich. 

The texture of the biscuits are a little bit different from the standard.  Perhaps because they have 2 types of leavening ingredients, baking powder as well as yeast.  They hold together quite well and are not as crumbly as regular biscuits.   Another unusual thing is that they do not rise in warmth, they are actually refrigerated overnight prior to baking. This recipe makes about 10-12 biscuits, but the amount will vary depending on the size of the cutter and how thick you roll the dough.

50/50 Biscuits
by Flourtrader

Ingredients
3/4 to 1 cup of buttermilk
1 package of rapid rise yeast
2 tbs cold butter
3-4 tbs melted butter (for dipping dough prior to baking)
1/4 cup cold shortening
1/4 cup warm water
2 tsp baking powder
2 1/2 cups self rising flour

The night before:
 In a small bowl, sprinkle yeast over warm water and set aside.

Sift together flour and baking powder into a large bowl.  Using a pastry cutter, cut in the shortening and 2 tbs of cold butter.  Once the mixture becomes crumbly, add 3/4 cup of buttermilk and yeast mixture. Using a wooden spoon or a large fork, toss mixture together forming a soft dough.  If mixture is too dry, add additional buttermilk, blending until the right consistency is achieved.

Cover bowl with plastic wrap and place in the fridge to chill overnight.

The next day:
Preheat the oven to 400 degrees farenheit.  Prepare a few baking sheets by lining with parchment paper.  Also, have your bowl of melted butter ready.

Dust a smooth surface with flour and roll out the dough to 3/4-1 inch thickness.  Cut into rounds with a biscuit cutter or squares with a knife.  Once all the dough has been cut, dip each piece into the bowl of butter and flip, coating all sides.  Then place on baking sheet, about 1 1/2 inches apart.

Bake in oven until lightly browned, about 10-20 minutes.  They usually take about 15 minutes in my oven.  Remove from oven and place each biscuit on a wire rack to cool.  Should you want a toastier looking biscuit, put oven on broil and place pan back in oven.  Watch closely and remove when desired color is met. 

Wednesday, May 18, 2011

Coconut Banana Coffee Cake


Coffeecakes are good, but sometimes the basic cake part with cinnamon or streusel just does not have the depth of flavor that I am looking for. However, this tropical treat really satisfied my craving. The bold, yet complimentary, flavors of rum, bananas and coconut are all tied together in this 9 inch cake.  It has a moist texture with a wonderful little bit of crunch from the topping of macadamia nuts and cinnamon sugar.

Coconut Banana Coffee Cake
courtesy of Coffee Cake Cookbook by Lou Pappas 

 Ingredients
2 large eggs (room temp)
1 1/4 cups mashed bananas (about 3 large)
1/3 cup olive oil or canola oil
1 1/2 tsp vanilla extract
1/2 cup sour cream
2 tbs dark rum or amaretto
1/2 cup finely chopped macadamia nuts
1/2 cup sweet coconut flakes
3/4 cup brown sugar
2 cups flour
1/2 tsp salt
2 tsp baking powder
1/2 tsp baking soda
mixture of 1 tbs sugar and 1 tsp cinnamon

Prepare a 9 inch springform pan by greasing the inside with butter and dusting with flour.  Then preheat the oven to 350 degrees (farenheit) or 175 degrees centigrade.

Sift together flour, baking powder, baking soda and salt in a large bowl. Whisk in the brown sugar and set bowl aside.

With a food processor, pulse together the wet ingredients (bananas, oil, rum or amaretto, sour cream, vanilla and eggs).  Then sprinkle in the coconut into the batter.  Make sure that there are no big lumps dropped into the batter.  Stir to combine.

Fold batter into the flour mixture with a wooden spoon until it has a smooth consistency and no dry spots remain.  Pour batter evenly into pan.  Then cover the top with the chopped nuts.  Lastly, sprinkle on the cinnamon sugar mixture.

Place pan in the oven.  Baking time should be about 30-35 minutes. The cake is done when tester inserted into center comes out clean and top is golden brown.

Remove cake from the oven and place pan on rack to cool.  Once pan is cool to the touch, remove the pan sides.  Can be served warm or at room temperature.

Monday, May 16, 2011

Foggy City Meatloaf

Meatloaf is one of those comfort foods, but it is not something I really crave for or order at a restaurant.  Yet, there is something very special about this particular slab of ground beef and pork. Look closely at the picture above and you will see a pink smoke ring on the edge of this slice, indicating that this meatloaf was smoked.

Smoked meatloaf may sound weird, but after one bite I was hooked.  The meat includes a combination of spices and a tomato/onion saute.  It would probably be good enough baked in the oven, but it is the smoking process that really imparts a wonderful dimension of flavor to this hearty loaf.

Preparing the meatloaf was an easy task, so the only real time involved is the smoking process. So, take some time to celebrate summer. Get outside and smoke up the backyard by preparing this unusual and tasty main course.

Foggy City Meatloaf
courtesy of Barbecue America:A Pilgrimage Cookbook 

Ingredients
1 dash hot pepper sauce
1/2 tsp dry mustard
1/2 tsp dried thyme
1/2 tsp dried oregano
1 tsp garlic salt
1 tsp lemon pepper seasoning
1 1/2 cups Ritz or Waverly crackers
1/4 cup red wine
1 egg
3 tbs barbecue sauce (additional for brushing on meatloaf)
1 tbs minced garlic
2 tbs olive oil
1 minced, medium size onion
1/2 cup sun dried tomatoes
1/2 lb ground pork
1 1/2 lbs ground beef
non stick cooking spray

Prepare your smoker and let it preheat up to 220 degrees.

Fill a small bowl with the sun dried tomatoes and cover with hot water.  Set timer for 10 minutes for tomatoes to soften.  Once the timer goes off, drain water.  Then mince the tomatoes, either pulsing in a food processor or by hand. Set aside.

Heat olive oil in a saucepan over medium heat.  Place minced tomatoes and onions in the saucepan and cook for 3 minutes or until all vegetables have become soft.  Remove from heat and set aside to cool for 15 minutes.

In the meantime, place all other ingredients in a bowl and mix thoroughly with your hands or a wooden spoon.  Then take out pan or rack that has holes in the bottom.  This can be a perforated pizza pan, cooling rack or screened pan designed for the grill.  I used a pan made for grilling fish.  Spray pan with non stick spray.

Take meat mixture out of bowl and place on pan, forming into a loaf shape.  Place the pan of meatloaf in the center of grill over a water pan.

Then cover and cook for about 2 1/2 hours or until meat thermometer registers 165 degrees Fahrenheit.  The cover should stay on as much as possible during this process and meat should not be moved.  Once done, open the cover and brush with barbecue sauce. Cover again and cook for an additional 10 minutes.

Remove from the grill and transfer to large heat proof serving platter.  Cover with foil and let meat rest for 10-15 minutes.  Then slice and serve with additional barbecue sauce as needed.

Friday, May 13, 2011

Armenian Dinner Rolls

Dinner rolls can change in texture and size, depending on where they originate from.  The typical dinner roll in the US is usually as high or higher than its width.  This particular recipe stems from Armenia and the recipe turns out rolls that are three times wider than their height.

As you can see by the picture, even though made with white flour, they have a tan exterior.  The rolls have a light crust with a soft,chewy inside. They have a taste similar to Portuguese sweet rolls. Quite a delicious change of pace from the standard dinner rolls.

If you do make these, be aware that the dough is very gloppy and sticky.  The dough is not kneaded, so it will not be close to the standard dough that you may be used to.  This recipe makes 2 dz rolls.

Armenian Dinner Rolls
courtesy of recipelink.com 

Ingredients
1 cup lukewarm milk
1/2 cup lukewarm water
3 beaten eggs
1 beaten egg with 1 tsp water (for egg wash)
1 stick or 1/2 cup butter
6 cups flour
1 tsp baking powder
1/2 tsp table salt
1/2 cup sugar
2 packets of yeast
2 tbs bread topping or sesame seeds

In a small bowl, sprinkle yeast over lukewarm water and mix until blended.  Set aside for 15 minutes to form bubbles.

Whisk (do not sift) the flour, salt and baking powder together.  Set this aside also.

Take a large bowl or Pyrex measuring cup (must be able to hold 4 cups), add the stick of butter and microwave for 45 seconds or until completely melted.  Grab another bowl and pour in milk.  Place bowl of milk inside the microwave and heat until lukewarm.  Then pour milk into melted butter and whisk together.  Blend the sugar in with the butter mixture.

 Mix the beaten eggs into the batter, continuing to whisk. Pour the yeast liquid into the batter.  After all has been blended together, add the flour mixture.  Stir with a wooden spoon until no more flour remains at the bottom of the bowl.

Cover bowl of dough and put in a warm place to rise for 2-3 hours or until doubled. During the rising time, oil the surface of 2 baking sheets.

Once rising time is complete, uncover dough.  Then, with greased/oiled hands, carefully scoop out about 1/4 of a cup of batter and place on cookie sheet.  As stated before, dough will be very wet, gloppy and sticky.  Continue to fill up baking sheet, placing each ball 2-4 inches apart from the other.

After all the dough has been placed on the sheets, let rise for another hour to 1 1/2 hours (or until doubled in size).  This is the last rising session. At the halfway point in rising, preheat the oven to 350 degrees. Note that the size of the rolls (after rising) will be about 3 inches across and 1 inch tall.

At the end of the second session of rising, take out the egg wash and bread topping.  Lightly brush on the egg mixture, covering the tops of the rolls.  Then sprinkle with topping.  Place each pan in oven to bake for 20 minutes or until golden brown.

Remove baking sheets from oven and transfer rolls to rolls to cooling rack.  Serve warm.

Wednesday, May 11, 2011

Espresso Cream Cake

I have been looking at this recipe for quite awhile now and am glad I finally did make the cake.  Let me mention, however, that this is a "semi homemade" cake- it requires a boxed cake mix and melted ice cream.  I suppose you could make your own ice cream for this recipe, but I did not.

Semi homemade is a devil/angel concept.  Sometimes the chemical preservatives used in mixes can be drawn out in the baking process and ruin the final taste.  Other times it can improve an otherwise so, so dessert.  One particular thing that I do steer away from and that is cake "enhancers"- it seems as if they enhance the shelf life of the cake, but add a chemical taste.

This cake was very light in texture, not like most bundt cakes which are closer to a pound cake.  The chocolate chips with the melted espresso ice cream is a classic flavor combination that most coffee drinkers cannot ignore. Again, I posed as the purist and did not frost this cake.  You can click over to Dozen Flours if you are interested in making the chocolate marshmallow frosting.

Also, if you want to create your own flavor combination with the ice cream, just be sure that you get a plain flavored ice cream.  Do not use ice cream that is already laden with a secondary flavor (fudge swirl, caramel swirl, rocky road, etc)  Strawberry or pistachio would be good, adding chopped white chocolate.

Espresso Cream Cake
courtesy of Dozen Flours 

Ingredients
2/3 cup mini choc chips
2 cups melted ice cream (I used Hagen Dazs coffee)
1 package white cake mix (make sure no pudding in mix)
1 tbs instant coffee or espresso powder
3 eggs

Prepare 12 cup bundt pan or tube pan by greasing all of the inside and dusting with flour.  Make sure that all crevasses are covered. As shown by the picture, my cake top has places where you can see the flour, however, I would rather have the floured edges than a cake that sticks to the pan. Preheat oven to 350 degrees.

In a large bowl, beat together all ingredients except chocolate chips.  The first session should be on low for one minute and then second session (after scraping down sides) should be on medium speed for 2 minutes. Set aside.

In a small bowl, mix 1 tbs of flour with the mini chocolate chips.  This will make sure that your chips do not sink to the bottom of the pan.  Fold chips into batter.

Pour mixture into prepared pan and place in oven.  I used a 10 cup pan and the cake took exactly 30 minutes.  The original recipe stated 38-42 minutes, but bake for 30 and then use toothpick test, adding an additional 5 minutes after each test if needed.

Once the cake is finished baking, set pan on wire rack to cool for 20 minutes.  After 20 minutes, you should see that the edges have separated from the pan.  If not, run a knife around edges and then invert pan on cooling rack so the cake is right side up. It should take 30 minutes to completely cool.

You can leave the cake plain or, if  desired frost or dust with confectioners sugar. 

Monday, May 9, 2011

Strawberry Kuchen

There are some foods that I would say I am a purist about.  For instance, I do not put butter on brioche or biscuits that are already buttery.  Also, if a steak is good, I do not want to slather steak sauce on it, I would like to actually taste the meat.

Which brings me to my father.  He loves strawberries and is very particular about them.  Buy the smallest you can get, he says, they are the sweetest.  Funny thing, because it is obvious that the farmers are trying to grow bigger strawberries.

The most popular strawberry pie is actually a cold one with a transparent red glaze.  Not being real keen on the glaze or cold part, I opted to find something different.  This particular recipe hit the spot.  It is served slightly warm and the strawberries cook in their own juices.

There are few recipes that celebrate the pure flavor of strawberries.  Strawberry shortcake is one for a cold dessert and this Kuchen is the other for a warm dessert.  The simple ingredients combine to make a juicy concoction of strawberries surrounded by a buttery crust.

Strawberry Kuchen
courtesy of sundaynitedinner.com

Lemon zest from 1 lemon
5 cups of halved strawberries
1/2 cup butter (cubed)
1/2 cup sugar plus 2 tbs
1 cup flour plus 2 tbs
1/8 tsp salt
1 tbs white vinegar
1/2 tsp vanilla extract

Take out a 9 inch springform pan.  Preheat the oven to 400 degrees.

In a small bowl, sift together 1 cup of flour, salt and 2 tablespoons of sugar.  With a pastry cutter, cut in the butter cubes until no dry spots remain.  Mixture should be crumby without any dusty flour at the bottom of your bowl.  Pour in the vinegar and shape into dough form.

Place dough in sprinform pan and flour hands and fingers.  Press on the dough to form a 1/4 inch bottom with 1 inch high sides.  Set aside.

In a medium size bowl, combine the 2 tablespoons of flour and the rest of the sugar.  Then add the lemon zest and vanilla extract, stirring until evenly combined.  Fold in 3 cups of the strawberries, making sure that sugar mixture evenly coats pieces and there is no loose sugar in the bottom of the bowl.  Spoon strawberry mixture into prepared springform pan.

Place pan on center rack in oven and set timer to 40 minutes.  After timer goes off, check and see if strawberry juices have thickened up.  It should be like syrup.  If not place back in oven to cook for an additional 5 minutes and check again.  Original recipe states that baking time will be 40-50 minutes.

Once the juices have reached the correct consistency, remove pan from oven and place on cooling rack.  Let cool in pan for at least 30 minutes. After cooling, run a small knife around the inside of the pan, between the inside crust and pan.  Remove the sides of springform pan by opening the side latch.

Take the remaining strawberry halves and place them on top of the filling.  Serve while warm and (if desired) add a scoop of vanilla ice cream.

Friday, May 6, 2011

Jalapeno Cheese Squares

This appetizer is like a mini quiche without the crust.  A fluffy egg texture with onions and jalapenos, all topped with crispy toasted cheese.  According to my husband, an avid egg and jalapeno lover, these squares are acceptable for any meal and for a snack.

The recipe does not advise if you are to leave the seeds in when you are mincing the jalapenos. I guess that is personal preference. You are welcome to take the seeds out if you want a more mild tasting dish.

While baking, the cheese will puff up in the pan.  However, do not be alarmed when it deflates upon cooling, that is normal. 

When preparing a dish with hot peppers, it is best to use metal utensils.  Plastic may absorb some of the oils in the peppers.  Also, when mincing or grinding fresh or dry peppers with a machine, use one that can be taken apart and cleaned.  For example, a mini food chopper is better than a coffee grinder.

This recipe makes 36 squares.  You can double the recipe and bake in 2 nine inch square glass baking pans.  If using metal or a dark pan, the baking time will need to be adjusted.

Jalapeno Cheese Squares
courtesy of Bon Appetit/ prior to 2005

Ingredients
2 cups grated cheddar cheese
2 cups grated monterey jack cheese
1 cup chopped green onions
3/4 cup whole milk
2 tsp ground cumin
1 tbs chili powder
2 tbs of minced jalapeno peppers (I used 2 peppers)
5 large eggs


Butter a 9 inch square glass baking dish.  Preheat the oven to 350 degrees.

In a large bowl, combine the last 4 ingredients on the above list.  With a wire whisk, blend all the ingredients until evenly
distributed.  Then blend in milk.  With a metal spoon, mix in the onions and monterey jack cheese.

Pour mixture into baking dish.  Sprinkle all of the cheddar cheese evenly on top.  Place pan in oven and bake for about 45 minutes. The appearance should indicate when the squares are done. The top should be brown and puffy. In addition, the batter will be pulling away from the inside of the pan.

Remove from oven and cool slightly.  Cut and serve.  If not serving right away, place the squares on a cookie sheet and cover.  Store in fridge and rewarm at 350 degrees for about 10 minutes to serve.

Wednesday, May 4, 2011

Lemon Lattice White Chocolate Cupcakes

This recipe was originally for a 3 layer white cake.  There have been several comments that this is a good recipe for a wedding cake.  The assembly of the cake is cake layer, then curd, then frosting.  The top of my cupcakes is the same as the cake would be and, of course, the cake sides would need to be frosted.

The texture of the cake is like a pound cake.  Even though it is dense, it is quite moist. If my actions are any indication how good the cake is, note that I greased the inside of the cupcake papers prior to baking. I just wanted to make sure that very little of the cake was wasted by being stuck to the paper!

The frosting and curd do require a minimum of 6 hours for chilling prior to putting on cupcakes.  I found it best to make the frosting and curd one day before.  The next day you can bake and decorate the cupcakes.  This recipe makes about 2 1/2 dozen cupcakes.

Lemon Lattice White Chocolate Cupcakes
courtesy of Bon Appetit /Feb 1991

Ingredients/Lemon Curd
2 tbs grated lemon zest
3/4 cup fresh lemon juice
2 tbs cornstarch
1 cup and 2 tbs sugar
3 eggs
6 egg yolks
1/2 cup (1 stick) and 2 tbs butter (room temp/cut into cubes)

Ingredients/Frosting
3/4 tsp vanilla extract
2 1/4 cups whipping cream
4.5 oz imported white chocolate, chopped

Ingredients/Cake
1 tsp vanilla extract
1/2 cup plus 2 tbs milk
1 cup whipping cream
4 oz imported white chocolate, chopped
1/2 cup (1 stick) butter (room temp)
2 cups sugar
4 eggs (separated)
3/4 tsp salt
1 tsp baking powder
2 3/4 cup flour

Due to the required chilling time, the curd and frosting will be made first.  For the curd, take out a medium size saucepan.  Fill with cornstarch and lemon juice and blend until cornstarch dissolves.  Add all the other ingredients and whisk together.  Then place saucepan over medium heat.  Whisk and cook until mixture just comes to a boil. This should take about seven minutes, resulting in a thick smooth texture.  Remove saucepan from heat and pour into strainer over a heat proof bowl.  Once all is strained, cover curd and bowl with plastic wrap.  The wrap will need to be touching all of the surface of the curd, so none of it will dry out.  It is important for the piping that there are no lumps to clog the tip.  Place bowl in fridge to chill for 6 hours or more.

Now, the frosting will need to be mixed and heated.  Take out a small saucepan and fill with only 1/2 cup of the cream and the 4.5 oz of white chocolate.  Place over a low burner and stir until all chocolate is completely melted and mixture is smooth.  Pour the chocolate cream into a large heat proof bowl.  Add the vanilla and rest of the cream, stirring until blended. Cover bowl with plastic wrap and place in fridge to chill for 6 hours or more.

Prepare your pans by greasing the top edge of the muffin inserts and place cupcake papers inside muffin holders. Preheat the oven to 350 degrees.

Using a medium size bowl, sift together salt, baking powder and flour.  Then sift ingredients a second time. Set aside.

Fill a medium size saucepan with 1/2 cup of cream and 4 oz of chocolate and place over low heat.  This will need to be stirred until chocolate has melted.  Stir in the remaining amount of cream, vanilla and milk until blended.  Set aside.

Using an electric mixer, cream butter and 1 cup of sugar together in a large bowl. Once the mixture has a fluffy texture, add the yolks and continue to beat.  Fold in 1/3 of the sifted ingredients, then mix in 1/2 of the cream chocolate batter.  As you are stirring, continue to add the remaining sifted ingredients and cream chocolate batter in increments, ending with dry.  Set aside this bowl of cake batter.

Find the bowl of egg whites and beat with an electric mixer until the eggs turn into a glossy white mixture that holds soft peaks. Continuing to beat, slowly add the remaining 1 cup of sugar. The egg whites should be beaten until they hold stiff peaks without being dry.  Then fold 1/2 of the whites into the cake batter, repeat until all whites are blended.

Pour batter into each muffin cavity, filling about 3/4 full. There is not a lot of rise in the batter during baking. Place filled pan in oven and bake for 18-24 minutes.  Cupcakes are done when edges are toasty and tester comes out clean.  Remove pan and let cool for 4 minutes, then remove cupcakes and place on racks to finish cooling.

Once cupcakes have cooled as well as frosting and lemon curd, a cone should be cut out of the center of each cupcake.  Discard cone.  Then prepare a pastry bag with a large decorating tip or you can use a plastic freezer bag with the corner cut off.  Add the lemon curd to the bag.  Using the bag, fill each cupcake cavity with the lemon curd.  After filling, smooth top of curd so it is flush with the top of the cupcake.

Take out the frosting and beat with an electric mixer until stiff peaks form.  The consistency should be glossy and thick, not dry.  With a butter knife, frost the tops of the cupcakes.  This will be the bottom layer of the cupcake topping, so just use enough frosting to cover the cupcake (see above picture).

If not serving right away, refrigerate cupcakes.  Let come to room temperature 1/2 hour before serving.

Monday, May 2, 2011

Lemon Blueberry Loaf


This loaf cake has a wonderful springtime flavor of two fruits.  It is a blueberry cake that is offset by the tang of lemon.  There is only a cup of sugar in the cake (which is really tame for the amount of blueberries) but the tart lemon syrup drizzled on top upgrades the flavor to a whole new level. I believe the lemon is a crucial ingredient in the recipe.

There are certain tricks that bakers have when it comes to creating a moist cake. The addition of some type of dairy product is the favorite method. You can use buttermilk, sour cream or yogurt. Some people also use mayonnaise.  This particular recipe uses yogurt.  It did as expected, making the cake exceptionally moist and tender.

Lemon Blueberry Loaf
courtesy of Ina Garten via Smitten Kitchen 

Ingredients
1 1/2 cups blueberries (fresh or frozen/thawed and rinsed)
1/2 cup vegetable oil
1/2 tsp vanilla extract
1/3 cup fresh lemon juice
3 eggs (room temp)
1 cup plain yogurt
2 tsp lemon zest
1 cup plus 1 tbs sugar
1/2 tsp salt
2 tsp baking powder
1 1/2 cup plus 1 tbs flour


Prepare a loaf pan (8 1/2 X 4 1/2) by greasing all the insides.  Then line the bottom and two long sides with parchment paper, letting the parchment overhang on the long sides of pan. Grease top side of parchment.  Lastly, flour all the parchment on the inside of pan.  Preheat the oven to 350 degrees.

In a medium bowl, sift together 1 1/2 cups of flour with the salt and baking powder. Set aside.

In a second bowl, add the eggs, yogurt, 1 cup of sugar, lemon zest, vanilla and oil.  Whisk together until ingredients are evenly distributed and a smooth batter is formed.  Then, with a wooden spoon, fold in 1/3 of the flour mixture. Continue folding in the dry ingredients by 1/3  cup increments until no flour streaks remain in the batter.

In another small bowl, mix together 1 tbs of flour and the blueberries (making sure that they are well drained). Then gently fold the blueberries into the batter.  Do not stir too much or you will have a blue batter.  You actually want to keep the batter color yellow so the blueberries stand out in the cake's appearance.

Pour batter into pan, smoothing the top so all is even.  Bake until cake tester comes out clean, which should take about 50 minutes.

While the cake is baking, prepare the glaze.  Place the lemon juice and remaining tablespoon of sugar in a saucepan over medium heat.  Stir and cook until the mixture is no longer grainy, then remove from heat.

Once the cake is done, remove from oven and let cool in pan on rack for 10 minutes.  Then pull on parchment handles of long sides and lift cake out of pan.  Flip and remove parchment paper and flip again, placing cake on cooling rack.  Then set rack over a rimmed baking sheet. 

Using a toothpick, poke several small holes in the cake.  Brush lemon sugar glaze over cake, allowing it to soak in before adding more.  Let cool to room temperature before cutting.

Friday, April 29, 2011

Blackout Cookies


As promised earlier, here is the chocolate indulgence cookie. It is a slice and bake cookie in which a log of dough is rolled in chocolate cookie crumbs prior to baking.  The wonderful flavor comes from being packed with chocolate chips, more cookie crumbs and toasted walnuts.

If you are familiar with the Brooklyn Blackout cake, the cookie envelopes the same flavors that exist in the cake. That makes me think about when New York really did have their blackout and everyone was walking home in the dark.  Having this cookie on hand at the time probably would have made things easier.  One bite would have transported them directly to dark Chocolate town. There just are some moments in life when there is no better place to be....

Blackout Cookies
courtesy of Good Cookie Cookbook
Yield- 42 cookies

Ingredients
3/4 cup coarsely chopped and toasted walnuts
1 cup chocolate chips (I used mini or you can chop after measuring)
3/4 cup chocolate wafer cookie crumbs
1/2 cup dutch processed cocoa powder
3/4 cup granulated sugar
1/2 cup packed light brown sugar
1 1/4 tsp baking powder
1/4 tsp baking soda
1 cup flour
1/8 tsp salt
1 egg
9 tbs or 1 stick and 1 tbs butter (room temp)
1 1/2 tsp vanilla extract

If you choose to chop your chocolate chips, pulse in food processor 20 or 30 seconds. Place the chocolate chips in a bowl and stir in 1/2 cup of the cookie crumbs. Set aside.

In a medium bowl, sift some of the dry ingredients together-salt, baking powder, baking soda, flour and cocoa. Set this bowl aside also.

Take out an electric mixer or stand mixer.  With the mixer at medium speed, cream together both sugars and butter in a large bowl. After two minutes of beating, your batter will be at the correct consistency. Scrape down the sides of the bowl and add the vanilla extract.  Add the egg and beat the mixture again until well blended. Turn off and remove the mixer.

With a wooden spoon, fold sifted dry ingredients into the batter until it just turns to dough.  There should not be any flour remaining in the bottom of the bowl.  Then stir in the walnuts and chocolate/cookie crumb mixture until distributed throughout the dough.

Lightly flour a work surface (not too much because to dough has to have cookie crumbs stuck to it). Empty the dough from the bowl onto the surface.*  With floured hands, roll the dough into a 13 inch long log that is 1 1/2 inches in diameter.  Then sprinkle the remaining cookie crumbs in a rectangle below the length of the log.  It should measure 13 X 2.  Roll the log in the cookie crumbs, pressing lightly.  Wrap the log in plastic wrap, twisting to cover the short ends of the log and place in fridge to chill for at least 2 hours and no longer than 3 days.

Once the dough has been properly chilled, preheat the oven to 350 degrees and line 2 baking sheets with parchment paper.

Take the log out of the fridge and place on work surface.  With a sharp knife, cut the log into 1/4 inch slices and place on baking sheet about 1 1/2 inch apart.  Due to the nuts and chocolate chips, cutting may be not result in round perfect slices and pieces may come apart.  Do not worry, just push the pieces back together to make a round shape the best you can. The dough will spread when baking anyway.

Place one sheet of cookies in the oven and bake for 11-13 minutes.  The cookies are done when the dough has lost its sheen or shiny look.  The cookies will still be very soft when you remove them, however, they will firm up as they cool. Place cookies on rack to finish cooling.

*Should you want cookies that are more uniform and perfect in size, there is another method to form the cookies. Just roll the dough between two pieces of wax paper prior to chilling.  Dough should be 1/4 inch thick. Once chilled, use a cookie cutter to cut out rounds.  You can skip the crumb coating or try greasing or wetting the bottom edge of the cutter and then dipping it into the crumbs prior to cutting out each cookie. I have not tried the cut out method.

Wednesday, April 27, 2011

Chinese Almond Cookies

I am baking cookies in the kitchen this week that are at opposite ends of the spectrum. Today, I wanted to make something tasty, but not over indulgent. For those that want to indulge, check back later this week for a  chocoholics favorite treat of darkness.

Since you usually cannot find any caramelized, fudge treats at a Chinese bakery, I decided that Asian desserts was a good topic to start looking under.  I came across several recipes for egg custards, moon cakes and almond cookies.

One particular recipe for almond cookies seemed to be easy and I had all the ingredients in hand.  After baking, I decided this recipe is a keeper. It resulted in wonderful little nut-filled rounds that were crispy with a delicious taste of buttery almonds. Just perfect for afternoon tea or a cup of coffee. This recipe makes about 3 dozen cookies.

Chinese Almond Cookies
courtesy of  Classic Stars Desserts

Ingredients
1/3 cup sliced almonds
36 whole almonds
3/4 tsp almond extract
1 tbs water
1 cup or 2 sticks of butter (room temp)
2 eggs
2 cups powdered sugar
1 tsp baking powder
1/2 tsp baking soda
2 cups flour (additional for dusting)

The first step will be to toast the almonds.  Preheat oven to 300 degrees.  Place sliced almonds in a shallow pan and put in oven.  Set timer for 5 minutes and when timer goes off, take pan out and stir.  Then put pan back in oven for an additional 5 minutes.  Remove and pour almonds in a bowl to cool.  Set aside.  Follow the same steps for the whole almonds.  Then turn the oven off.

Take a small bowl out and fill with water, baking soda and baking powder.  Stir until blended and set aside.

In a large mixing bowl, beat butter with an electric mixer until smooth and creamy.  This should take about 2 minutes.  Then add the sugar and beat at medium speed for 30 seconds or until batter is smooth again.  Give the small bowl of water mixture one last stir and then beat it into the butter mixture. Once combined, blend  in one egg and vanilla into the batter, still using the electric mixer.

Switch the mixer to low and add the flour and almonds.  Run the mixer just until the batter turns into a dough.

Transfer the dough to a medium bowl and cover.  Place in fridge for 1 hour to chill.

Once an hour has passed, take dough out of fridge and divide in half.  Roll each half of the dough into a log measuring 9 inches long and 1 inch in diameter.  Cover with plastic wrap and place each log in fridge for an additional 30 minutes or until firm enough to slice.

In the meantime, line 2 baking sheets with parchment paper and turn oven on to 325 degrees to preheat.

After chilling the logs, remove one from fridge.  Slice log into 18 pieces measuring 1/2 inch thick.  Place on baking sheet(s) about 2 inches apart.  Place 1 almond in the middle of each piece, pressing gently.  Then get a small bowl and add the remaining egg.  Lightly beat with a fork.  Take a pastry brush, dip into the egg and brush over the top of each cookie.

Place baking sheet in the oven.  Let bake for about 10-14 minutes.  Rotate pan halfway though baking process.  Cookies are done when the egg wash and cookie edges turn a light golden color. Remove cookies and leave on baking sheet to cool.  Repeat process with additional log from fridge.      

Monday, April 25, 2011

Dark Chocolate and Orange Muffins

The flavors of chocolate and orange really got popular with the chocolate orange balls over in the UK.  I know, most of you are not familiar with this candy. It is a big round piece of candy covered in foil that is compiled of segments made up of milk chocolate and flavored with orange oil.  The segments resemble the segments of oranges in appearance. In order to eat, you unwrap and tap the top onto a counter which causes the pieces to separate, just like the segments of an orange.

This flavor combination is not found in many American recipes, however, it was easy to find when looking through some food blogs in the UK. I made the choice to make muffins, since I had not made any in awhile.

To those of you that have the same standard breakfast every day, these muffins are a great way to add some variety. Also, these can be a sweet pick me up for an afternoon snack.   I find that they are the most tasty when warmed and served with butter.

Note that the muffins, since they have chocolate in them, have a tendency to stick.  It is best not to use paper liners.  Make sure you grease your pans well. To make things even easier, line the bottom of each holder with a parchment round.  Grease the side of the parchment that faces up.

Dark Chocolate and Orange Muffins
courtesy of I love milk and cookies blog

Ingredients
1 cup plain yogurt
2 tbs orange juice
2 eggs (room temp)
1/4 cup butter (room temp)
1 tbs orange zest
3/4 cup sugar
1 1/2 tsp baking powder
1 3/4 cup of flour
1 cup chopped dark chocolate or chips

Grease inside and top edge of muffin holders of 12 holder pan. Cut parchment rounds to go in bottom of holders, place inside each muffin cavity and grease top side of parchment. Preheat oven to 355 degrees.

In a large bowl, sift together the baking powder, flour and sugar.  Stir in the orange zest.  If you are using fresh zest, take care that all is evenly distributed and not lumped together.  Zest from a spice jar will mix easier, but may not impart the same flavor as fresh.  Then add the chocolate, stirring until blended. Set aside.

Then place all the wet ingredients (butter, yogurt,eggs, juice) in a small bowl and beat on low for 1 minute. Batter will still be lumpy with some chunks of butter, but that is okay.

Fold the wet batter into the flour mixture by using a wooden spoon. Once no dry areas remain in the batter, spoon it into the muffin holders.  The batter should be evenly divided among the twelve.  Since muffins do not rise like cupcakes, the 12 cavities will be very full of batter.  Transfer to oven and bake for 30-40 minutes or until tester comes out clean.

Remove muffin pan from oven and let cool for 2 minutes. Then remove each muffin and place on rack to finish cooling.  Serve warm with butter.

Friday, April 22, 2011

Orange Chicken

This may look like my previous recipe for three cup chicken, but it is quite different. The interesting thing about this recipe is the short cut method of frying.  With a little oil and a whole lot of heat from your oven, you can make this chicken just as crispy as fried.  However, you must be very careful in sliding the pan of oil in and out of the oven.  I used the bottom pan of the broiler that came with the oven.  This is a good choice if you do not want to mess up a baking sheet and the pan is a little deeper.

The ginger and the fresh orange juice really make a tasty sauce. Also, the measure of cayenne is just right. It is enough to add a little heat while letting the other flavors come through. So, if you are craving Chinese take out, try making this at home instead. To really round out the meal, consider steaming some snap peas or broccoli florets to add to the sauce with the chicken.

Orange Chicken
courtesy of Cooks Illustrated via Tracey's Culinary Adventures

Ingredients/Marinade
2 tbs cold water
3/4 cup chicken stock
1/4 cup and 2 tbs vinegar
1/4 cup soy sauce
3/4 cup freshly squeezed orange juice (about 2 oranges)
1 tbs grated ginger (about 1 inch piece)
1 tbs minced garlic (about 3 cloves)
1/4 tsp cayenne
1/2 cup dark brown sugar (packed)
1 1/2 lbs of chicken tenderloins, diced in 1 1/2 in pieces
1 tbs plus 2 tsp corn starch
1 1/2 tsp grated orange zest

Ingredients/for chicken dredge & frying
1/2 cup canola oil
3 egg whites
1/2 cup flour
1/2 cup cornstarch

First, you will need a saucepan to mix up the marinade. Mix together orange zest, orange juice, brown sugar, vinegar, cayenne pepper, soy sauce, garlic, ginger and chicken stock in saucepan.  Continue to mix until brown sugar is evenly distributed.

Take a ladle and spoon out 3/4 of a cup of marinade into a gallon zip lock storage bag. Then add the chicken pieces and seal bag.  Place bag in the fridge for at least 30 minutes and no longer than 1 hour.

In a small bowl, mix together cornstarch and water until cornstarch has dissolved.  Place the saucepan of the remaining marinade over medium high heat and let it come to a boil.  Then pour in the cornstarch mixture and whisk.  Let the mixture cook for about 1 minute and remove from heat.

Preheat the oven to 500 degrees.  Take out two plates or pie plates for the coating mix.  In one, beat 3 eggs whites with a fork until frothy.  In the other, sift together flour and cornstarch.

Once the chicken has completed the chilling process, remove the bag of chicken from the fridge.  Pour all of the ingredients into a colander to drain.  Then dry chicken pieces by pressing in a paper towel.

Take each piece of chicken and dredge in egg whites, letting excess drip off.  Then coat in the dry mixture and put all the coated pieces on a plate. Set aside.

Put the empty baking pan inside the preheated oven for 5 minutes. Remove and pour canola oil into pan. This is where things get a little smoky and very hot, so use caution. Return pan to the oven and set timer for 5 minutes.  When the timer goes off, remove the pan.  Add chicken pieces to the pan, spacing evenly.  Bake in oven for 7 minutes, then turn with tongs and bake the other side of the chicken for 5 minutes. Turn off oven.
 
Remove pan and take the tongs and put chicken pieces in the pan with the sauce. Place pan over medium heat and stir, making sure all the chicken is evenly coated.  The sauce should reach the desired temperature again after 3 minutes.  In the meantime, cook up some minute rice according to directions.

Ladle chicken and sauce over the rice to serve. Enjoy!

Wednesday, April 20, 2011

Tapioca Cheese Rolls

The texture of bread varies quite a bit.  Some breads are more dense than others and some more crusty. Also, the texture should be in accordance to how it is served.  Pizza dough does not make very good dinner rolls, nor can biscuit dough be used for pita bread.

As for this particular type of roll, it turned out with a crusty outside and a very chewy inside.  The inside looks hollow, like a popover.  The dough does not brown in the oven, so they are pale, even after baking.  The tapioca flour and cheese ingredients contributed to the texture and lack of color. These rolls are meant to be an appetizer and are best served with a thick dipping sauce such as marinara. The dough is not appropriate for dinner rolls. 

There were several factors that may have contributed to me not liking this recipe. I had some difficulty due to my measurements being in cups and tablespoons (volume) versus the recipe being in ounces (weight).  I may have an aversion to Tapioca flour or the original recipe is actually lacking a vital ingredient.  I will not be making this again.

Tapioca Cheese Rolls
courtesy of  Disney

Ingredients
1/4 cup Parmesan cheese (freshly grated)
1/4 cup sunflower oil
pinch of sea salt
1 3/4 cup tapioca flour (or more)
1 beaten egg
1/4 cup plus 2 tbs of plain yogurt 
1/4 cup plus 2 tbs water
 optional bread topping-you can use whatever you like (salt & garlic powder, bagel topping, etc)


Line a baking sheet with parchment paper and preheat the oven to 450 degrees.  Take out a small saucepan and fill with water, salt and oil.  Turn heat to medium high and let mixture come to a boil.  Remove from heat.

Sift the flour into a medium size bowl.  Then add the boiled water/oil mixture and stir with a wooden spoon.  It should form a stiff dough.  Let the dough sit for 10 minutes to cool.

Add the beaten egg to the dough and mix until evenly distributed.  Stir in the yogurt until blended.  At this point your dough should be thick enough to roll and keep its shape.  If not, continue to add more flour until right consistency is achieved. Then fold the cheese into the dough.

Using greased hands, divide dough into 12 pieces and roll into balls.  Place each ball (evenly spaced)on the prepared baking sheet.  Sprinkle topping on the rolls, if desired.

Put rolls in the oven and immediately turn oven temperature down to 350 degrees. Bake for 25-35 minutes.  When done, rolls will be cracked on top and the inside of the crack expansion will no longer be shiny.  Also, tester will come out clean.  Cool rolls on a wire rack and serve with marinara dipping sauce.

Monday, April 18, 2011

Toasted Coconut Bars

Most of us feel that no matter how good the food is at a restaurant, it will never be good enough to overlook  negative aspects such as poor service, bad location and a pricey menu.

However, there are some types that I call innovative when it comes to their love of food.  It kind of goes like this.."Hey, Reggie when you drive by Catherine's Cafe can you pick up our dinner for Valentine's?" The food is only eaten on special occasions (price), they do not have to worry about the problems with the location (Reggie is picking it up) and they have no dealings with the wait staff (to go order).

Wait...that type of innovation means that Catherine's Cafe still has your business, in spite of their problems.  The best innovation, of course, is to make it yourself as close to the original as possible.  Most foodies are very much in favor of that idea!

The recipe below is from a restaurant as requested by a reader of Bon Appetit.  These coconut bars have a two luscious layers. The bottom is a buttery shortbread cookie and the top is layered with chewy coconut.  The coconut layer is very close to German chocolate cake icing, somewhat thicker and without the pecans.

Toasted Coconut Bars
courtesy of Bon Appetit Magazine/prior to 2005

Ingredients/Crust
1 cup or 2 sticks of cold unsalted butter
1/2 cup powdered sugar
2 1/4 cups flour

Ingredients/Topping
2 tbs canned cream of coconut
1 tsp vanilla extract
3 large eggs
3 tbs melted unsalted butter
1 tbs milk
1 cup light brown sugar (packed)
1/2 cup granulated sugar
1 tbs flour
1 1/2 cups sweetened shredded coconut

Preheat oven to 325 degrees and line a 9X13 inch pan, covering bottom and two long sides with some overhang on each side for handles.

For the crust, sift together the flour and sugar in a medium bowl.  Then pour in a food processor.  Cut cold butter into cubes and put in with dry mixture.  Pulse processor with on off turns until mixture turns into a dough.  Pat dough into pan, reaching all sides and corners evenly.  Place in fridge to chill for 15 minutes.

Remove pan from fridge and place in oven. Bake dough for about 25 minutes.  Dough should have golden edges when done.  Remove and let cool. Turn oven off.

Once crust has cooled, preheat oven to 300 degrees.   Then sprinkle coconut evenly over the crust and set aside.

In a small bowl, place all the remaining ingredients, except for melted butter.  Whisk together until no lumps remain.  Then fold in melted butter.  When butter is all blended, slowly pour mixture over the coconut layer in the pan.  Take care to make sure that it is poured evenly over the top.

Bake for about 45 minutes.  When done baking, topping should be golden brown, crusty on edges and set.  Let cool in pan over rack for 30 minutes.  Then take a knife and slide between the pan and the pastry on the short sides.  Lift pastry out of the pan, using the parchment handles on the long sides and place on rack.  Once completely cool, cut and serve.

Friday, April 15, 2011

Lemon Cream Sandwich Cookies


Easter is right around the corner, but I am opting out of the traditional colored eggs and chocolate candy. That food sounds too heavy for a hot day. Instead, I will be munching on these lemony morsels while drinking some fresh lemonade.

These cookies are a great choice for any barbecue or any family get together. They are easy to transport and easily served.  The zest of the lemon is prevalent in the cookie as well as the cream, but it is not tart like a lemon cooler cookie. This recipe makes about 24 cookies and the dough has to rest in the fridge at least 4 hours or overnight prior to baking.

Lemon Cream Sandwich Cookies
courtesy of Bon Appetit/Jan 2009

Ingredients/Cookies
2 eggs
2 egg yolks
1 cup or 2 sticks of butter
1/2 cup fresh lemon juice
1 tbs grated lemon peel
1/2 tsp baking soda
1 tsp salt
3 3/4 cups flour
1 1/2 cups sugar

Ingredients/Filling
1/2 cup or 1 stick butter
1/8 tsp salt
1 1/2 tbs lemon peel
2 cups powdered sugar

To make the cookies, put the lemon zest and lemon juice in a sauce pan and boil for four minutes or until only 2 tablespoons remain.  Remove from heat and pour liquid into heatproof bowl to cool.  Set aside.

In a medium bowl, sift together salt, baking soda and flour.  This bowl will also be set aside.

Place butter in a large bowl and cream with an electric mixer until fluffy and smooth.  Continue to beat and add sugar, blending all ingredients together. Then,one by one, beat each egg and yolk into the batter until completely blended.  Each addition should take about 30 seconds.  Add the boiled lemon mixture to the batter and beat again for another 30 seconds.

Form the dough by adding all the sifted ingredients into the batter and mix with a wooden spoon.  Once no dry streaks remain, cover and place dough in fridge.  Dough will need to chill at least 4 hours and up to 1 day.

After the chilling stage, line two baking sheets with parchment paper.  Prepare a smooth surface for the dough by sprinkling with flour.  Also, lightly dust your rolling pin with flour and take out a 2 inch biscuit or cookie cutter.  Then preheat the oven to 375 degrees. 

Remove bowl of dough from fridge and split dough in half. Place one piece on the floured surface and return the other to the fridge. Roll dough out to about a 3/8 inch thickness.  Using your cutter, cut out cookies and place on cookie sheet.  12 cookies fit on a standard size sheet.

Put cookies in oven and bake for about 12 minutes.  They are done when the edges are toasted.  Remove pan and let cookies cool on baking sheet for about 5 minutes.  Then transfer to a rack to finish cooling.  Repeat the forming and baking process for the remaining piece of dough.

Once all the cookies are baked, team them up for the sandwiches.  Even though you used a cookie cutter, they all will come out a little different. The tops and bottoms should be closely matched in size.

To make the filling, mash together the lemon zest with the salt until a paste is formed. Put paste in a medium size bowl and add butter.  Using an electric mixer, beat the three ingredients together until it reaches a creamy consistency.  Add 1/2 cup of the powdered sugar and beat for 1 minute.  Continue to add the sugar in 1/2 cup intervals, beating after each addition.

Place 2 teaspoons of the filling on the flat side of each bottom cookie chosen for the sandwiches.  Once all the filling is distributed evenly on the bottom cookies, place the other matching cookie on top, flat side down.  Evenly press the cookie pieces together to form each sandwich.

Wednesday, April 13, 2011

Cinnamon Walnut Horns

These rustic walnut horns are a nice change of pace from the big fluffy Boardwalk Cinnamon Rolls that I made back in February. Cinnamon rolls, traditionally with lots of dough and a little bit of filling, originated in Sweden. I believe that pastries with the thinner dough came from France. In addition, the use of walnuts in this recipe points to France. Lots of walnuts are harvested out of the south of France and used in many desserts.   

The little crescent gems have a thin dough that is embedded with cinnamon and walnuts.  Then, before the dough is rolled up, it is sprinkled with more cinnamon and walnuts.  The result is a crispy, caramelized pastry that is overflowing with nutty goodness. Note that this recipe yields about 20 horns and the dough is refrigerated overnight.  The original dough recipe is double what you need, you can either double the filling for 40 horns, keep extra dough for other use, or cut the dough recipe in half (like I did as given below).  Cutting it in half means a specific measurement for the egg yolks and the yeast, for the original recipe called for 3 eggs and a packet of yeast.

Cinnamon Walnut Horns
courtesy of  Great Coffeecakes Cookbook by Carol Walter 

 Ingredients/ Dough
1/2 tsp vanilla extract
1/4 cup milk
1 egg yolk and 1 1/2 tsp of egg yolk (scramble for measurement)
2 tbs warm water
2 tbs sugar
4 tbs butter or half stick (softened and cubed)
1 1/2 cups flour
1/2 tsp salt
1 tbs and 3/4 tsp yeast

Ingredients/Filling
1 egg beaten with 2 tsps of water for egg wash
1 1/4 tsp ground cinnamon
1 2/3 cups walnuts
5 tbs granulated sugar
3 tbs light brown sugar


Make the dough the day before serving. Place warm water in a small bowl and add 1 1/2 tsp of the sugar.  Then sprinkle in the yeast and do not stir.  Put a small saucer over the bowl and set the timer for 5 minutes.  After the 5 minutes, uncover and stir with a fork and then cover again. Letting it set for at least 2 minutes or more until it is called for in the next steps.

Sift together the flour, salt and remaining sugar in a large stand mixer bowl.  Add the cubes of butter and mix on low until it reaches crumb texture.  It should take about 2-4 minutes.

In a separate bowl, mix together the vanilla,egg yolks and milk with a fork.  Pour this mixture and the dissolved yeast into the bowl of dry ingredients.  Mix on low speed for 15 seconds, scrape sides of bowl and mix again for 30 seconds.  The result is a very soft dough.

Take another bowl out and butter the insides.  Empty the dough into the bowl and use floured hands to smooth the top.  Then smooth a thin amount of butter over the top and cover with plastic wrap.  Place bowl in the refrigerator for dough to chill at least overnight or up to 3 days.

The next day, the nuts will need to be prepped in a food processor for the filling.  Put nuts in the processor and pulse 5 or 6 times so they are coarsely chopped.  Take out 1 cup of the chopped nuts, place in a bowl and set aside.

Put 3 tbs of granulated sugar, all of brown sugar and 3/4 tsp cinnamon inside processor bowl with remaining nuts.  Pulse processor 6-8 times until the nuts are medium chopped.  Pour in another small bowl and set aside.

In a third bowl, mix the remaining cinnamon and granulated sugar.

To assemble the crescents, first line baking sheet with parchment paper. Then remove the bowl of dough from the fridge. Divide dough in half and put one half back into fridge.

On a clean workspace, sprinkle 1/4 of the coarse walnuts and 1/4 of the cinnamon sugar mixture.  Roll the dough in the sprinkles on the workspace, shaping it into a log. Continue to roll until the log has picked up all of the sprinkled mixture.

Take out a rolling pin and roll the dough into a 6X15 inch parallelogram.  The 15 inches should be parallel to the counter in front of you.  I rolled the dough thin and then kept pushing in sides and smoothing to get to the right size and shape.  The rolling pin should be rolled at an angle from bottom right to upper left and vice versa to help achieve the desired shape.

Now that you have the correct size, brush top side with egg wash.  Then sprinkle on 1/2 of the remaining nut and 1/2 of the remaining cinnamon mixtures and press it into the dough.  Cut the dough into 10 triangles, by making a zig zag.  There should be five-cut point down and five-cut point up, each being 3 inches at the widest point.  Also, cut a nick in the middle of the 3 inches about 1/2 inch long.  The nick will help you stretch the dough when rolling.

Each piece of dough is to be rolled into a crescent.  The 3 inch side is the start with the point at the end. Try to stretch the dough as you roll and roll tightly.  Put pressure on the end to make sure it is sealed, but do not roll backwards.  Place on baking sheet and curve ends to form a crescent.

Repeat the process with the other piece of dough. Then cover crescents and let rise in a warm place for 45-60 minutes.  15 minutes prior to completion of rising time, preheat the oven to 350 degrees.  Bake horns for 18-20 minutes, switching racks and rotating pans halfway through baking time.

Remove and place on cooling rack.  Dust with powdered sugar when warm and dust again prior to serving.