Foodbuzz

Sunday, August 28, 2016

Polish Pound Cake


Let's face it, there are a lot of different types of cakes out there to choose from. As a food blogger, I have found my food cravings are a lot more specific than they were prior to blogging. Recently, I found myself craving a buttery moist, slice of cake with tender crumb.

This particular recipe was spot on when it came to my preferences at the time. It teams both butter and shortening together to create a velvety texture. It also uses a vanilla/ butter/ nut flavoring which makes it unique, yet memorable. Lastly, sprinkled throughout this delicious cake are crunchy walnuts and sweet maraschino cherries.

Now that the craving has hit home, let's move on to the the details of this special recipe. You will need a 10 cup bundt pan in order to make this.

Polish Pound Cake
adapted from All Recipes

Ingredients
2 tbs vanilla butter nut flavoring
5 eggs
1 cup evaporated milk
1-4 oz jar maraschino cherries (drained/chopped)
1 cup chopped toasted walnuts
1 cup or 2 sticks of butter
1/2 cup shortening
2 2/3 cups flour
1/4 tsp salt
3 cups sugar

Prepare a 10 cup bundt pan by greasing and flouring the interior. Make sure all cracks and curves are well coated.

Toss the cooled walnuts in 1/3 cup of flour. In another bowl, whisk together 2 1/3 cup of the flour and salt. Set both bowls aside.

Fill the bowl of a stand mixer with the butter and shortening. Cream together until completely blended. Add the sugar and the flavoring and beat on medium speed for 1 minute, stopping occasionally to scrape down the sides. Once the mixture is fluffy with no lumps, add one egg and beat for about 20 seconds to distribute into the batter. Repeat the process with each egg, adding them one by one.

Remove the bowl from the stand mixer and stir in the evaporated milk. Fold in the flour/salt blend in three increments until no dry streaks remain. Mix the floured walnuts into the batter. Lastly, toss in the cherries and distribute throughout the batter by stirring with a wooden spoon.

Pour or scoop the batter into the pan, making sure it is smooth and even. Place pan in cold oven and turn the temperature gauge to 300 degrees. Let bake until toothpick comes out clean. The cake will bake for 1 hour and 30 minutes up to 2 hours. Start checking at the 1 hour 30 minute mark. Mine took about 1 hour and 45 minutes.

Let the cake rest in the pan on a rack for 20 minutes. It will be crusty on top, so take a small knife and run along the top edge. Then invert cake onto rack to finish cooling.

Tips and Notes:
1. Probably adding more nuts and cherries would be a good idea, be sure to dust all the walnuts prior to mixing in.
2. Do not slice until completely cool.
3. I used LorAnn vanilla butter nut flavoring and just added 1 tbs, since it is strong then regular extract.
4. Prior to serving, you can dust with powdered sugar. You can also glaze the cake, but it really is sweet enough on its own.
4. The batter in the pan was only 1 inch below the top edge. There is no leavening ingredient in the recipe so the cake does not rise very much.
5. I used Luxardo brand maraschino cherries, which you can find at some liquor stores. However, one jar is double the amount called for in the recipe.
                                           **LAST YEAR: Boo Boo Pie**

Sunday, August 21, 2016

Sierra Nuggets


Sometimes variety can be a bad thing. We get too much to choose from and then we don't want anything. That situation can also be too overwhelming. For instance, I have always wanted to go to this place that has a selection of 1000 styles of eyeglass frames. It is a nice thought, but in reality I know that I would spend all day there and probably could not make up my mind between several frames. Eventually, I would either leave with nothing or settle on one; thinking I should have got the other.

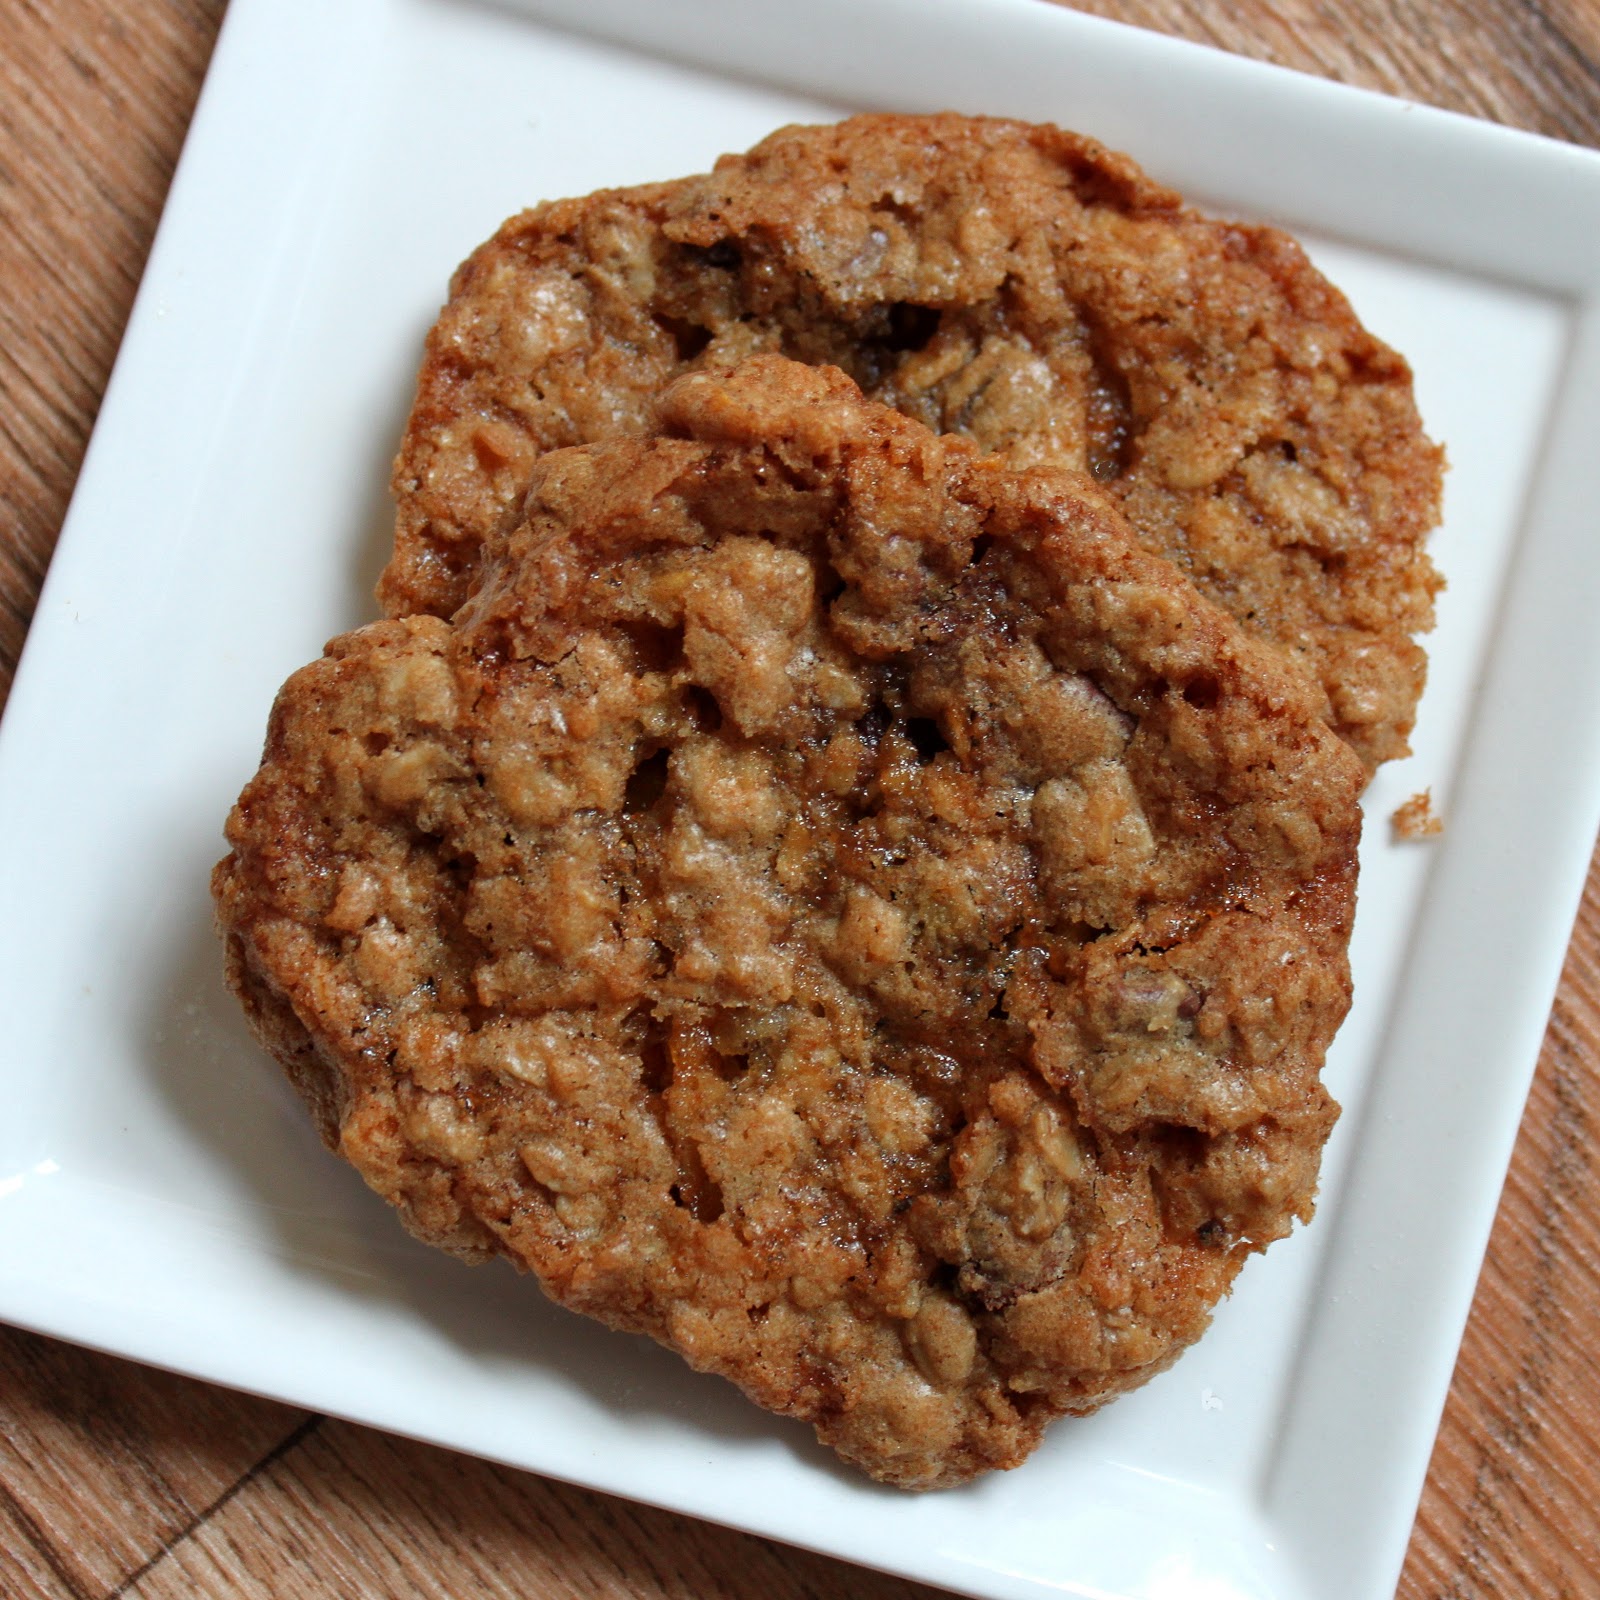
This particular cookie recipe can be the solution to having too many types of cookies to choose from. One of these gems holds a lot of flavor and texture. As you are eating these cookies, your taste buds will recall a myriad of different cookies.

They have crispy edges and an inner chewiness.You may also come across some crunchiness from the walnuts in the cookies. With oatmeal, cornflakes, spices, coconut, nuts and chocolate, they are bursting with a variety of flavor. The variety is there, but it is nicely balanced. Labeling these as simply oatmeal cookies or spice cookies would be more deceptive instead of descriptive.

In reality, taste is the major concern here, not the label. So, let's move on to the baking.....This recipe makes 6-7 dz cookies.

Sierra Nuggets
adapted from Guittard 

Ingredients
1 cup chopped, toasted nuts
2 cups or 12 oz milk chocolate or semisweet chips
1 cup cornflakes
1 cup sweetened,shredded coconut
3 cups of rolled oats
1/2 tsp mace
1/8 tsp ground cloves
1/4 tsp nutmeg
1 1/2 tsp cinnamon
1 tsp salt
1 1/4 tsp baking soda
1 1/2 cups flour
2 eggs
3 tbs milk
1 1/2 tsp vanilla extract
1 cup or 2 sticks of butter
1 1/2 cups granulated sugar
1 cup packed brown sugar

Prepare 2 baking sheets by lining with parchment paper. Preheat the oven to 350 degrees.

Sift together all four spices, flour, baking powder and salt in a medium size bowl. In another bowl, whisk together eggs, milk and vanilla extract. Set both aside.

Place butter and both kinds of sugar in the bowl of a stand mixer. Cream together the butter and sugar by beating at medium speed until fluffy. Add the egg mixture and then beat on low until combined. Remove bowl from stand mixer.

Now, it is time for the add-ins to the batter. Using a wooden spoon, mix in one add-in at a time until evenly distributed. Blend in the order as listed: corn flakes, oats, sifted ingredients, coconut, chocolate chips and nuts.

Using a scoop or spoon, drop by heaping teaspoons onto prepared baking sheets. They mounds should be placed about 1 to 1 1/2 inches apart. Bake for 5 minutes and rotate and bake for an additional 5 minutes. Check cookies to see if they are a golden hue and spring back when lightly touched, if not, bake for an additional few minutes.

Remove pan and let rest on rack for 2 minutes. Then transfer cookies to rack to completely cool.

Tips and Notes:
1. Walnuts, pine nuts and peanuts were the suggested type of nut in the recipe, but you can choose whichever you prefer.

2. For a thicker cookie, add more flour to absorb the butter and refrigerate dough prior to baking so it does not spread as much. Test your dough to see how it bakes up.

3. The recipe does suggest making a bar cookie if you are short on time. Use a 10x15 pan and bake for 20 to 25 minutes.

4. Be sure to use plain corn flakes, not frosted. The cookie is sweet enough without this added sugar.

5. A note on ounces when it comes to brands of chocolate chips. Nestle still carries the 12 oz bag, however the more gourmet chocolate brands have been reduced to 11.5 oz. Keep this in mind when buying ingredients.
                                    **LAST YEAR:Honey Glazed Berry Scones**                      

Sunday, August 14, 2016

Peach Upside Down Rum Cake


Well summer is at an end. School is right around the corner as well as cooler weather. In order to say goodbye to summer, I decided to make this peach upside down cake. The addition of rum makes it a delicious adult dessert.

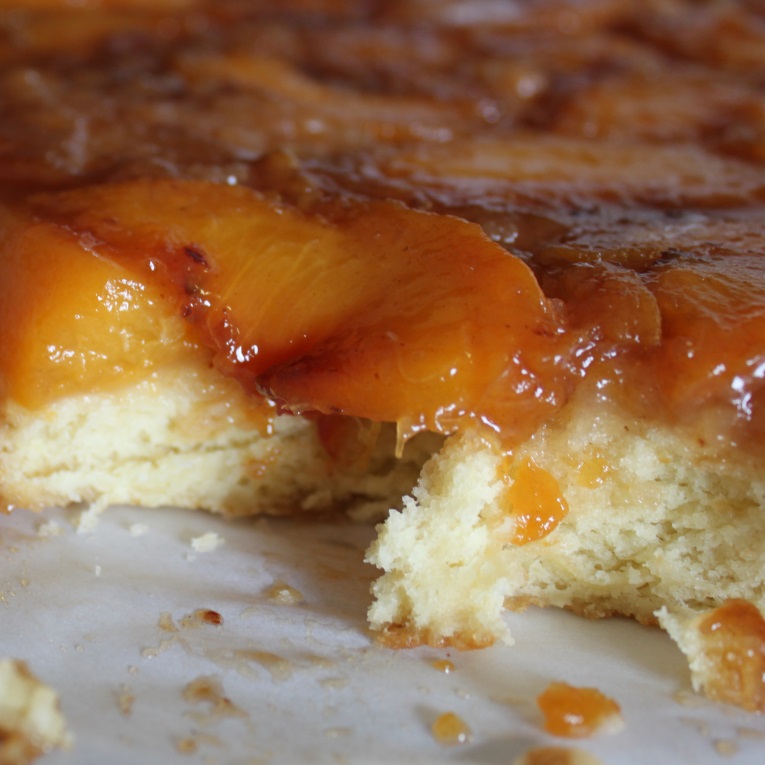
Teaming juicy carmelized fruit with fluffy tender cake is nothing short of an amazing combination. These days, upside down cakes are not just limited to pineapple. I have seen cranberry and pear- the list goes on. The only thing to take into consideration would be the juiciness of the fruit. For instance, an orange upside down cake would be quite different from apple. Peaches put out quite an amount of juice, so please review tips and notes on this issue in particular if you plan to make this.

In this recipe, the caramel is made in a skillet and then the fruit goes in. After that, the batter is put on top and it then goes in to bake. You can use a cast iron skillet or a springform pan. It comes together quite quickly once all the prep work of peeling and slicing the peaches is completed.

Peach Upside Down Rum Cake
adapted from the LA Times

Ingredients
1 tsp almond extract
3 tbs lemon juice
3/4 cup dark rum
1/4 cup honey
2 eggs
6 tbs and 3 tbs butter at room temperature
2 lbs peaches peeled
1/2 cup light brown sugar
1 cup white sugar
2 tsp baking powder
1 3/4 cup flour
1/4 tsp salt

Start by preparing the peaches by slicing into 1/2 inch pieces. Place in a bowl and toss with the lemon juice and set aside.

Preheat the oven to 350 degrees. If you are not baking this in a cast iron skillet, you will use a 9 inch springform pan. This pan should be lined on the bottom and 1 inch up the sides with parchment paper.

Fill a 10-12 cast iron skillet (if you intend to bake the cake in it) or saucepan with the 3 tbs of butter. Place pan over medium heat and melt. Once melted, stir in the brown sugar. Continue to stir until brown sugar is no longer grainy, it will become smoother as it cooks. Then, mix in the honey and lower the heat.

As that is cooking, drain the peaches in a sieve. Slowly add the peach slices to the brown sugar mixture, stirring to insure that all sides are coated. Stir gently until all slices are glossy. This should take about 2 minutes. Remove from heat. If you are baking in a cast iron skillet, make sure all the peaches are spread evenly along the bottom of the pan and let the pan cool. Otherwise, empty the saucepan into the springform pan and spread peach mixture evenly along the bottom. Set aide.

Sift together the flour, baking powder and salt into a medium size bowl. Then take out a larger bowl and add the 6 tbs of the butter and white sugar. Cream together the butter and sugar until fluffy and light. Add one egg and almond extract, then beat for 30 seconds. Add the remaining egg and beat.

Once all is blended, fold in 1/3 of the sifted ingredients into the egg batter. Pour in 1/2 cup of rum and stir until blended. Add 1/2 of the remaining dry ingredients and fold in. Stir in the remaining amount of rum and lastly, fold in the rest of the sifted ingredients.

Using a large spoon, drop spoonfuls of batter on top of the peach mixture. Once all is on top of the peaches, smooth the batter to the edges. Place pan or skillet in oven to bake until tester comes out clean. This should take about 45 minutes if baking in a cast iron skillet or longer with a springform. pan. Let the cake cool in the pan for about 10 minutes before flipping over and removing parchment. The cake is best served at room temperature.

Tips and Notes:
1. I baked my cake in a 12 inch springform pan. There was still enough of a peach layer to cover the bottom completely, so there was no change there. I believe a 9 inch pan would have a much thicker coating of peaches at the bottom. Regarding the batter, it was 1 1/2 times the ratio of the above recipe.
2. My caramel mixture turned quite watery after adding the peaches. In order to compensate, I added another 1/2 cup of brown sugar and 1/4 cup more of honey.  I let it cook down a bit more to let some of the juices evaporate, so it became more like caramel again.
3. The rum flavoring of the cake was quite prevalent. As you know, the flavor gets stronger with time. Should you not want to use rum, feel free to use peach nectar or some peach liqueur.
                                                **LAST YEAR: Citrus Snap Cookies**


Sunday, August 7, 2016

Breakfast Muffins


Today I wanted to test some muffin recipes I found on line. The first is a lemon poppy seed muffin that is made with oil and in comparison is a muffin made with butter.

As far as taste, the lemon muffin was moist and had a well balanced flavor of lemon. The syrup soak on top really gave it a nice pop of citrus.This muffin, even though moist, was denser than the other.

The spice muffin rose a lot taller and fluffier than the other. It was more like the traditional muffin you find in bakeries and coffee houses. However, I wished it was a little less dry. Also, a lot of the streusel ended up on the pan instead of on the muffin. Next time I would try an extra tablespoon of oil in the batter and a different type of streusel. This muffin had a cinnamon-nutmeg flavor, but it could use some more spice.

Overall, my vote is for the lemon poppy seed. Using oil seems to bring out a moister baked good. Better in texture and stronger in flavor than the spice muffins, the decision was not a difficult one. Both recipes are below and each make about 1 dozen muffins.

Buttermilk Spice Muffins
adapted from Mimi's Cafe 

Ingredients/Batter
2 1/2 cups flour
2 tsp baking soda
1 tsp nutmeg
1/2 tsp cinnamon
3 eggs
1 cup sugar
1/2 cup butter
3/4 cup plus 1 tbs buttermilk

Ingredients/Nut Topping
1/2 tsp nutmeg
1/2 tsp cinnamon
1 cup finely chopped walnuts
1/2 cup sugar

Preheat the oven to 375 degrees and grease or line muffin tin cavities with paper cups.

Sift together the flour, baking soda, cinnamon and nutmeg. Set aside. Fill another bowl with the butter and sugar. Beat together until light and fluffy. Add one egg and beat until blended thoroughly. Continue with this process for the each of the remaining eggs until all is blended in.

At this time, the nut topping should be made. Simply add all topping ingredients to bowl and mix together until everything is evenly distributed. Set aside.

Now, back to making the batter...Add 1/2 of the sifted ingredients into the batter and fold in, using a wooden spoon. Then blend in the buttermilk. Lastly, stir in the remaining sifted ingredients just until combined.

Using a scoop, fill the muffin cavities 3/4 full of batter. Once all the batter is used up, sprinkle 1 tablespoon of topping over all the muffins. There is a time factor here, the longer you take the more apt the topping will sink, so act quickly.

Place in oven and bake until tester comes out clean. This should take about 20-25 minutes. Let muffins cool in pan for a few minutes then transfer to rack to finish cooling.

Lemon Poppy Seed Muffins
adapted from LA Times Food Section, 05/08/2002

Ingredients
2 1/2 cups cake flour
1/4 tsp salt
1 tsp baking soda
1 tbs poppy seeds
1 cup plus 2 tbs sugar, divided
1/2 cup oil
1 egg
1 cup buttermilk (well shaken)
1/4 tsp lemon extract
1/4 cup lemon juice ( for syrup)
2 tbs lemon zest

Preheat the oven to 375 degrees and prepare a muffin tin by greasing the cavities and upper edges with butter. As an alternative, just grease the upper edges of the cavities and line with paper cups.

In a medium size bowl, sift together the flour, baking soda and salt. Set aside. Using another bowl, whisk together the buttermilk, oil, egg, zest, extract, poppy seeds and one cup of the sugar. Fold in the sifted ingredients until just combined.

Using a scoop, fill the muffin cavities evenly with the batter. Place pan in oven and bake until tester comes out clean. This should take about 20 minutes. The muffins will be slightly golden in color on top when done.

While the muffins are baking, prepare the syrup. Fill a small microwavable bowl with the remaining 2 tablespoons of sugar and the 1/4 cup of lemon juice. Heat on high for 1 minute.

Once the muffins are done, let cool in pan for 5 minutes. Then dip the top of each in warm syrup and place on rack to finish cooling. After dipping if any syrup still remains, spoon on top of the muffins to soak in.
                            **Last Year:Almond Marzipan Roulade**


Sunday, July 24, 2016

Chocolate Walnut Scones


This scone is more on the cookie side than biscuit/bread side. In fact, the mouth feel and texture remind me of the same sensation you get when you bite into a cookie. Not just any cookie, but the Mexican wedding or Russian teacakes in particular. That buttery, melt in your mouth crumb is nothing short of amazing.

Part of the texture can be contributed to the ground walnuts in the batter. The combination of nuts and rich bittersweet chocolate makes for a delicious way to start the day. Pair this treat with tea, coffee or a tall ice cold glass of milk for a wonderful mid-day snack or morning brunch.

The dough comes together quickly with basic ingredients. The most time you will spend is forming and freezing the dough prior to baking. This recipe makes about 1 dz scones.

Chocolate Walnut Scones
adapted from La Brea Bakery

Ingredients/Dough
1/4 cup sour cream (or cream fraiche)
1 cup plus 2 tbs whipping cream
1/2 cup (1 stick) plus 2 tbs cubed frozen butter
1 tbs vanilla extract
1tbs and 1 tsp baking powder
2 3/4 cups pastry or cake flour
6 tbs sugar
pinch of salt
1 cup walnuts (toasted and cooled)
1 cup finely chopped bittersweet chocolate

Ingredients/Topping
1/4 cup walnuts, grated with a microplane
2 tbs sparkling sugar
2 tbs whipping cream

Prepare 2 baking sheets by lining with parchment paper. Dust a flat surface lightly with flour.

Fill a food processor with the nuts and 3 tbs of sugar. Pulse until it becomes sandy and fine. In another bowl, sift together the salt, baking soda, and flour. Stir in remaining 3 tbs of sugar.  Pour dry flour mixture into the food processor and combine in pulses until evenly distributed.  Once all is blended, drop in butter cubes and run processor until mixture can be clumped together, like damp sand. Empty into a large bowl.

Fold in chocolate pieces and make a well in the center of the mixture. Then take out a small bowl and stir together the whipping cream, sour cream (or cream fraiche) and vanilla extract.  Pour the liquid into the well and fold together until just combined. Mixture will still be a bit crumbly.

Empty contents onto prepared flat surface. Lightly dust your hands and knead the dough a few times and shape into a ball. Roll out the dough, forming a disc 1 1/2 inches thick. Dust a 1 1/2 inch cutter with flour or spray with non-stick oil. Cut dough into circles, re-rolling scraps as needed.

Once all the circles are made, take 3 circles and form a shamrock by pressing them together on the baking sheet. Continue with this process, spacing the shamrocks 1 inch apart.

Take the filled baking sheets and place them in the freezer for an hour. At the halfway point, preheat the oven to 350 degrees. Once the freezing time is complete, the scones will need to be topped. Brush each with whipping cream, sprinkle on the sparkling sugar and walnuts.

Bake for 30 to 35 minutes or until lightly toasted on the edges. Place pan on rack to cool for 10 minutes. Transfer to rack until completely cool.
                            **LAST YEAR: Almond Marzipan Roulade**   
 

Chestnut Cake


I have to admit, this one is a violation of the seasons. However, the can of chestnut spread has been calling from the pantry ever since I purchased it. I decided to put an end to it by finally making this cake. Also, I seem to be stuck in the realm of duo layers when it comes to icing or frosting my cakes. I like the taste as well as appearance, but that does not mean that I will not go back to the traditional buttercream.

The issue with the duo flavors is that the white layer is a whipped cream frosting, which is not the best type of icing in the heat of the summer. The remedy for that is some stabilizer and refrigeration.

Regarding taste and texture, this cake was a success. The blend of chestnut flour and butter created a tender and moist slice of heaven. Should you be a cake lover and not one for icing, I suggest making this in a 9x12 inch pan and just dusting with confectioner's sugar. If you like all the components of a layer cake, then you will find that the sweetened chestnut spread with the light whipped cream frosting is nothing less than delicious. Chestnut spread was new to me, but it has now been added to my "special" flavors list.

This is not an "everyday" recipe due to the specialty ingredient of chestnut, however, it is definitely one worthy enough to be at the top of the list when it comes to holiday baking.

Chestnut Cake
adapted from Chestnut Hill Tree Farm

Ingredients/Cake
1 or 2 sticks of butter
2 cups sugar
4 eggs, separated
1 1/2 tsp vanilla extract
1 cup milk
2/3 cup chestnut flour
2 1/4 tsp baking powder
2 cups all purpose flour
1/2 tsp salt

Ingredients/Topping
12 oz sweetened chestnut spread
2 cups heavy cream
2 tbs of stabilizer (optional)
2 tbs of sugar
1 tsp vanilla extract
chocolate sprinkles (optional)

Preheat the oven to 350 degrees and grease the interior of  one 9x12 pan or two 9 inch round cake pans. If making layers, Line the bottom interior of the round pans with parchment paper and grease the face up side.

In a small bowl, sift together the two types of flour, baking powder and salt. Set aside. Fill the bowl of a stand mixer with the butter and sugar. Beat until mixture is fluffy and light. Add one egg yolk and blend on low speed for 30 seconds. Repeat the process with each egg yolk until all 4 are mixed into the batter.

Empty 1/3 of the sifted ingredients into the batter and fold in, using a wooden spoon. Then, using a small bowl, mix together the vanilla extract with the milk. Pour half of that mixture into the batter and stir together. Follow with 1/2 of the remaining dry mixture. Mix in the rest of the milk/vanilla blend and fold in the last of the sifted ingredients. Set aside.

Place all the egg whites in a bowl of a stand mixer and beat until stiff. Fold the stiff egg whites into the batter, gently, so volume is not lost. Fill prepared pan(s) with batter. For the two round cakes, the batter should be divided equally. I found that it worked out to 3 cups of batter for each pan.

Put pan(s) in oven and bake until top springs back when lightly touched and tester comes out clean. This takes about 30-35 minutes. If making a layer cake, let cake cool in pans about 10 minutes and invert onto to rack to finish cooling. Parchment paper can be removed right after cake is inverted onto rack. Regarding the 9x12 inch cake, it is served from the pan, so it cools completely in the pan.

During the cooling time, the sweetened whipped cream icing can be prepared. Pour the cream and vanilla extract into a bowl. Add the sugar and stabilizer (if using). Using clean/dry beater blades, beat mixture until cream is fully whipped and light. Cover and refrigerate until ready to use.

For the layer cake, spread 6 oz of the chestnut puree onto the top of one round cake, leaving a 1/4 inch border around the edge. Then spread the whipped cream frosting over the top, covering all the way to the edge. Place the other cake layer on top, the cover the top surface the same way as the other cake layer. Smooth the remaining whipped cream frosting on the sides, covering all the cake. As a last touch, if you prefer, cover the top of the cake with the chocolate sprinkles.

Frosting the 9x12 inch cake is just a matter of smoothing the chestnut spread on the surface and then topping with the whipped cream frosting.

Refrigerate until ready to serve.

Tips and Notes:
1. The cake sides can be also covered with the puree, but special care has to be taken when frosting with the whipped cream so you do not mix the two. Refrigerating the cake for about an hour after being covered with the puree before frosting with the whipped cream to help stabilize it more.

2. I added 1 tbs of oil to the batter to insure a moist texture.

3. Chocolate is a great pairing with chestnuts, so covering the whipped cream topping with chards of chocolate is also an option.

4. The batter could be baked up in individual servings as well, using rings or muffin tins. Just be sure to adjust the bake time accordingly.
                           **LAST YEAR: Brownie Bread Pudding**

Sunday, July 17, 2016

Hummingbird Cookies


There are cake spin offs from cookie recipes and vice versa. Some of the spin offs prove to be a delicious genius idea and some miss the mark all together. Most of the cake to cookie recipes result in cookies with a cake-like texture. I have to admit, that type of texture is usually not my preference, but this recipe is tasty enough to make me reconsider that.

The special combination of flavors and texture in this recipe offers the best of both worlds. Without icing, the are subtly sweet with crunchy pieces of pecans and chewy bits of dried pineapple. If you are in the mood for something sweeter, top these gems with cream cheese frosting and sprinkle on some banana chips and pecans. Whichever way you decide to prepare them, they will quickly disappear. This recipe makes about 4 dozen cookies.

Hummingbird Cookies
adapted from Southern Living

Ingredients/Cookies
1 1/2 cups of regular oats
2 tsp cinnamon
2 cups flour
1 tsp baking soda
1/2 tsp kosher salt
1 cup firmly packed light brown sugar
2 eggs
1 cup or 2 sticks of butter
1 tsp vanilla extract
1/2 cup finely chopped dried pineapple
1 cup finely chopped pecans
1/2 medium sized ripe banana (mashed)

Ingredients/Frosting and Topping
1/4 cup cream
1 tsp vanilla extract
4 oz cream cheese
1/4 tsp salt
2 cups powdered sugar
1/2 cup crumbled banana chips
1/2 cup chopped toasted pecans

Preheat the oven to 350 degrees and line 2 baking sheets with parchment paper.

Sift together the salt, flour, baking powder and cinnamon. Set aside. Fill the bowl of a stand mixer with the butter, vanilla extract and brown sugar. Cream together until fluffy, beating for about 3-4 minutes, stopping occasionally to scrape down the sides. Add one egg and mix at medium speed for about 30 seconds. Repeat the process with the other egg.

Using a wooden spoon, stir in the mashed banana until evenly distributed into the batter. Pour in the sifted ingredients and fold into the batter until no dry streaks remain. Mix in the oats. Lastly, fold in the pineapple and nuts.

Place mounds of the batter 2 inches apart on the prepared baking sheets, using a tablespoon or small  melon ball scoop. Using a glass with the bottom dipped in water, press down mounds into flat circles, about 1 3/4 to 2 inches in diameter. Place prepared sheet in oven and bake for 10-12 minutes or until done. Cookies will have a golden edge and be firm on top when done.

Let cookies cool for 10 minutes on baking sheet prior to transferring to a rack. Frost cookies once completely cooled.

To make frosting, mix together salt, heavy cream and vanilla extract. Add cream cheese and beat for 3 minutes, stopping to scrape down sides of bowl when needed. Sift 1/2 cup of the powdered sugar into the cream cheese mixture and beat until blended. Repeat the process until all the powdered sugar has been mixed in.

In a small bowl, mix together the pecan and banana pieces. Using a knife or spatula, spread frosting onto the cooled cookies. Once a dozen have been frosted, sprinkle pecan/banana chip blend on top of the frosting and lightly press to adhere. Repeat the frosting and sprinkling process until all the cookies are covered.

Tips and Notes:
1. The recipe states to use a glass that is floured on the bottom to flatten the dough. The water method works much better.

2. I am in a high humidity area and the moist surface of the cookies (unfrosted) had me cautious about stacking them together, so I let them dry out overnight before storing. Also, I waited until the night before serving to frosted them.
                                **LASAT YEAR:Banana Fudge Bundt Cake**

Sunday, July 10, 2016

Bourbon Cherry Bars

In the heat of summer, a lot of us are taking advantage of the fresh berries at the store. A dessert made with fresh berries is always welcome, however, these types of items must be kept cold or served right away. The alternative to that is turning to the "dried" form of fruit. I am very picky when it comes to dried fruit. It must be somewhat chewy and gummy, not hard. Some brands miss the mark and the fruit part of your dessert is leathery instead of chewy.

Regardless if I plan to plump the fruit in a type of liquid or use it as is, I look for the biggest and freshest prepared pieces. I know the size is not an option when it comes to berries, but a bag that is clumped or stuck to the dried fruit inside is better than the alternative to a package that is loose and airy. Also, spending the time to seeking out big slices of dried apples or pineapple is well worth it.

Some people may see this recipe as a little "off season" but when it comes to tasty desserts, but seasonality has little influence on the decision to eat or not. One bite of the delicious layer of pecan topped with bourbon soaked cherries and a nutty glaze will give you the realization that eating a piece is the only thing to do.

Bourbon Cherry Bars
adapted from The Oregonian


Ingredients
1/4 cup orange juice
1 egg
1/4 cup bourbon
3/4 stick or 6 tablespoon of butter
1/2 tsp cinnamon
1/2 tsp salt
1 cup flour
3/4 cup brown sugar
1 cup plus 1/4 toasted, cooled pecans
2 cups dried cherries
3/4 cup powdered sugar

Preheat the oven to 350 degrees. Butter the interior of an 8 inch square baking pan. Line bottom and two sides of the pan with parchment, leaving an overhang on 2 of the sides.

To make the bottom layer, start by creaming the butter with the salt and only 1/2 a cup of brown sugar. Blend in the egg. Set aside.

Using a blender or food processor, pulse together the flour with only 1 cup of the pecans. Pulse until the mixture has fine pieces of pecans in the flour. Be careful not to over process the mixture causing the pecans to become a nut butter. Once the processing is done, empty the contents into the creamed butter/sugar batter and blend with a wooden spoon.

Put all of the pecan dough into the prepared pan and press into the bottom. Form it into a smooth, even layer covering all along the bottom of the pan. Place pan in oven and let bake for about 20 minutes. It will have a golden brown hue when done.

While the first layer is baking, create the second layer. Empty the cherries into a blender or food processor and pulse until cherries are chopped into 1/4 inch pieces. Take all the cherry pieces and place in a saucepan. Add the bourbon, remaining 1/4 cup of brown sugar, cinnamon and orange juice. Cook over medium heat, stirring constantly until all sugar is dissolved and mixture resembles pie filling. All the liquid is to be cooked out.

Smooth the cherry mixture over the pecan layer. Let cool completely before icing. Mix powdered sugar with 3-4 tablespoons of water and drizzle over the top. Then sprinkle the remaining 1/4 cup of nuts evenly on top. Once icing has set up, remove from pan by using the parchment. Then cut and serve.

Tips and Notes:
1. Using bourbon or a bourbon/water mixture for the icing is an option. Remember the bourbon will remain strong since the icing is not cooked, so do not over do it.

2. Don't panic because the bottom layer (prior to baking) is like a very thick frosting instead of a dough, that is the way it is supposed to be.
                                      **LAST YEAR: Peach Kolaches**
                              

Sunday, July 3, 2016

Neopolitan Zebra Cheesecake


This fourth of July finds me looking forward to a leisurely day without anything in particular scheduled. Sometimes the lack of a schedule is the best way to spend a holiday. It makes me think of the scene in the Crocodile Dundee movie. You know the one..where the tour guide is talking with Mick Dundee about time. Of course, Mick has no watch and is clueless to what time or even what day it is. Face it, just the idea of anyone leading such a carefree life does make us all jealous.

A lot of people are running around today, getting ready for guests. Since it is sweltering hot outside, a cold dessert can be a delicious escape. This ice cold creamy cheesecake, has a trio of the favorite flavors you find in a Neopolitan.

While this recipe has a lot of flavor to offer, it also includes an instruction for achieving the "artsy" zebra effect. Creating the flavor batters is a snap. The steps required for making the zebra effect requires time, especially if you measure each layer of batter. I initially started by measuring, but soon was pouring the layers without measuring. It turned out with a "zebra" effect, but not with 10 or 15 stripes as would measuring the batter by 1/4 cup increments.

As with any cheesecake, it requires several hours of chilling time prior to serving. Take this into consideration if you intend to make this 9 inch cake.

Neopolitan Zebra Cheesecake
adapted from Something Sweet

Ingredients/Crust
6 tbs melted butter
1 1/2 cups graham cracker crumbs
1/4 cup sugar

Ingredients/ Filling
Chocolate Layer:
1/4 cup unsweetened cocoa powder
1/4 cup flour
1/2 cup sugar
1/4 cup milk
8 oz cream cheese (room temp)
2 eggs
1/2 cup sour cream
1 tsp vanilla extract

Vanilla Layer:
6 tbs flour
1/2 cup sugar
2 tsp vanilla extract
2 eggs
8 oz cream cheese (room temp)
1/2 cup sour cream
1/4 cup milk

Strawberry Layer:
1/2 cup strawberry puree (derived from 1 cup frozen strawberries, defrosted prior to puree)
1/2 cup sour cream
8 oz cream cheese (room temp)
2 eggs
1/2 cup sugar
1 tsp natural strawberry extract
1/4 cup flour
red food coloring

To make the crust, stir together all the ingredients in a small bowl. Pour the crumbly mixture into a 9 inch springform pan and press evenly, forming a crust in the bottom and up the sides. Place pan in freezer until ready to fill.

For the chocolate layer, add all ingredients to a medium size bowl and beat until blended. Place in refrigerator. Then do the same with the vanilla layer and strawberry layer. The end result is three bowls of batter.

Preheat oven to 350 degrees. Remove crusted springform pan from the freezer. Pour 1/4 cup of the chocolate batter into center of the pan. Follow that with 1/4 of the vanilla batter, pouring it into the center of the chocolate pool of batter. Then do the same with the strawberry batter. Repeat this process until all the batter is in the pan. The end result will be several concentric circles, with hues of white, milk chocolate and pink.

Bake for 55-65 minutes. Cheesecake is done when the center barely moves when jiggled and it is no longer shiny. As you can see by the picture, the surface turns a golden brown. Once baked, turn off oven and leave cheesecake inside for about 1 hour. Then remove and place in fridge to chill for at least 3 hours prior to slicing and serving.

Tips and Notes:
1. Cream cheese is a solid mass, so when mixed with the liquids the end result is not a smooth batter. It will be very liquid with lumps of cream cheese. The batter resembles a watery cottage cheese. Even after baked, slices reveal little white dots of cream cheese (as shown in the picture). While it does not affect the taste, this situation does detract a little from the appearance.

2. For a less ivory look to the vanilla layer, try using clear vanilla extract.
                             **LAST YEAR: Key Largo Cupcakes*

Sunday, June 26, 2016

Chocolate Babka


I have a confession to make concerning holiday baking. Unlike most people, I do not have a secret stash of recipes that are on reserve for just the holidays. Sometimes special recipes are better received as a surprise than received when expected. Answering that question of "what is this for?" with "just because" always elicits a smile.

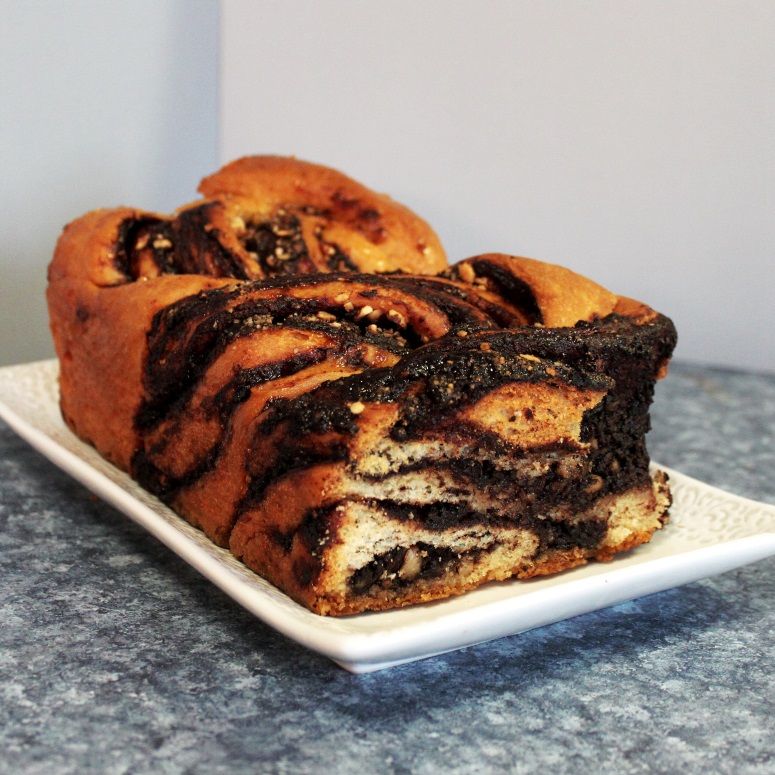
Today, I bring you a delicious recipe for chocolate babka. Since there are numerous recipes for this tasty and stunning dessert, I had to go through an evaluation process regarding the filling. After reviewing recipes with brownie bits, cinnamon and streusel, I came to the conclusion that I wanted a rich, dark chocolate filling. After all, this item should be more upscale and different from a coffee cake.

This particular babka recipe was exactly what I was looking for. It has just the right amount of decadent dark chocolate filling with a wonderful crunch of hazelnuts. Also, the Amaretto syrup soak does give the outer edges of babka a delicious texture. Regarding the dough, it actually stems from a donut recipe which lies somewhere between bread and cake.

Most of the time in this recipe is rise time and the chilling process for the dough. It rises 2 hours, chills overnight and then is formed and rises again 2 hours before baking. The recipe is in grams, so if you work in cup measurements, you will need a conversion chart. It makes 2 loaves, using two 5X10 inch loaf pans.

Chocolate Babka
adapted from Violet Bakery

Ingredients/Dough
3 eggs
125 grams butter
120 milliliters warm water
50 grams sugar
1 package yeast
2 tsp sea salt
500 grams flour

Ingredients/Filling
200 grams dark chocolate (60-70% cocoa bar or chips)
60 grams cocoa powder (I used dutch, but since type not specific either is acceptable)
160 grams butter
160 grams brown sugar
1/2 tsp sea salt
160 grams finely chopped and toasted hazelnuts

Ingredients/Syrup Soak
160 grams sugar
200 grams water
4 tsp honey
2 tbs Amaretto
pinch of salt

For the dough, you will need a stand mixer fitted with a dough hook. Pour the yeast in the bowl and whisk in the sugar. Then add the warm water. Let sit for 2 minutes to dissolve and then stir. Sprinkle in the salt and then add the flour in 100 gram increments, running the mixer about 1 minute and scraping down the sides after each addition. Add the eggs, one by one and beat for 1 minute after each addition. Once all the eggs are blended, beat mixture for about 10 minutes on medium speed. While the mixer is running cut the cold butter into cubes.

After the 10 minutes of beating, beat for an additional 10 minutes, this time dropping the cubes of butter into the dough. The end result will be a big ball of dough that has pulled away from the sides of the bowl. Pull out a medium size bowl and oil the interior. Transfer the dough to this prepared oiled bowl. Cover with plastic wrap and let rise in a warm place for 2 hours. Then, eliminate the air in the dough by punching down with your fist. Cover again and place in refrigerator to chill overnight.

The next morning, prepare 2 loaf pans by buttering the interior and lining the bottom and long sides with parchment paper. Set aside.

Now it is time to make the second component of this dessert. With the exception of the hazelnuts and salt, place all the filling ingredients in a medium saucepan. Set the saucepan over medium heat and whisk until every thing is melted and blended together. Set aside to cool for about 20 minutes.

Prepare a flat surface by lightly dusting with flour.  Divide the dough in half, placing one piece on the flat surface and returning the other piece to the refrigerator. Using a floured rolling pin, roll out the dough on the flat surface into a 12 inch by 12 inch square. Spread half the filling onto the dough, leaving about 1/4 inch border, and sprinkle with 1/4 tsp salt. Then sprinkle half of the nuts on top.

Roll the dough up tightly, like a jelly roll with the seam on the bottom. Lightly press the top of the roll to make sure the bottom seam is sealed. Using a sharp knife, cut the roll lengthwise, forming 2-12 inch ropes. Twist the ropes together into one piece and place in prepared pan, folding under the ends. Repeat this process to form the other loaf.

Lightly cover each loaf with plastic wrap and let rise for about 2 hours. During rise time, prepare the syrup soak by putting all the ingredients in a saucepan. Then place over medium high heat and let come to a boil. Remove and stir. Set aside to cool.

Preheat the oven to 350 degrees. Place both loaves in the oven and bake for 30 minutes. Then check on the loaves to make sure they are not getting too brown on the surface. At this time, you can lightly cover with foil if the loaves have the desired hue. Bake for another 15 minutes or until tester comes out clean.

Remove loaves and place on cooling rack and immediately pour half of the syrup over top of each warm babka. Let cool completely before taking out of pan.

Tips and Notes:
1. Do not expect the filling to be smooth after melting everything in the saucepan, mine was grainy but was not that texture after baking the bread.

2. Both doughs should have an even amount of rise time in the last session. Form one into a jelly roll and set aside. Then form the other. Slice each into 2 pieces and then twist each and place in pan. Cover and  set the timer for 2 hours

3. Having the filling exposed to the surface does not harm the flavor of the filling. You can have a toasty bread-like surface or a surface with many threads of chocolate. For the most exposure of chocolate filling, twist each dough log with cut side face up.

4. There is a lot of syrup, but it soaks in quickly, so there is little chance of it running off the sides.
                                        **Last Year: Butternut Cookies** 

Sunday, June 19, 2016

Circus Cookies


This post is dedicated to my Dad, the sugar cookie connoisseur of the family. To this day, my Dad can never get enough homemade sugar cookies. Dad, here's hoping that your day is better than expected, filled with lots of love and of course- many sugar cookies! Happy Father's day!

Making these little animals sure did transport me back to the days of childhood. The sweet, yet distinctive smell of homemade cookies filled the house while I peered over the counter to watch as my mom rolled out and cut the dough into different shapes. 

After the cookies came out of the oven, I was ready to eat. I was quickly told that they were not ready to eat. Disappointed, I thought that she made it up as a story to get me to go away, after all, the cookies were baked. Stubbornly, I sat and watched just to see what she was talking about.

Then my mom reached for a big white bag of powder and put several cups in a bowl. She added a few more ingredients and beat it all together. She moved to the cupboard, opened it and pulled out several containers. Some of the containers held brightly colored sugar and some had a rainbow of colored grain-like looking things in them. I curiously watched the artwork unfold as my mom iced and decorated the cookies.

This was the first indication to me that there was way more to baking than just making something that tastes good.

This particular recipe has its pros and cons in preparation, but these crisp little cookies have a almond-vanilla flavor that is unbeatable. Also, the almond bark coating is a must if you want the exact replica of the circus cookies that you find in the pink bag at the grocers. Note that the cookie dough must chill at least 8 hours, so allow for this time. The recipe makes about 4 dz little cookies. Be sure to read the tips at the end.

Circus Cookies
adapted from the Cooking Channel

Ingredients
1 egg
1 tsp vanilla extract
1/2 tsp almond extract
1/2 cup of butter
1/4 cup plus 2 tbs sugar
3/4 cup flour
1/4 tsp baking powder
1/8 tsp salt
1/2 lb almond bark or white chocolate coverture
sprinkles for decorating

Start the night before (or 9 hours prior to baking) by making the dough. Sift together the flour, salt and baking powder in a small bowl and set aside. Place the butter and sugar in a mixing bowl and beat together until fluffy and light in color. Add the extracts and egg to the mixture and blend on low speed with the mixer. Stop in increments to scrape down the sides. Once all is blended, fold in the sifted ingredients.

Shape the dough into a flat disc and cover with plastic wrap. Refrigerate dough for at least 8 hours or overnight.

When the dough is done chilling, preheat the oven to 325 degrees and line 4 baking sheets with parchment paper. Place the baking sheets in the refrigerator.  Prepare a flat surface by dusting with flour and dust a rolling pin as well.

Take a piece of dough (about 1/4 of the mass) and place on flat surface. Re-cover the remaining dough and place in freezer. Remove 1 baking sheet from refrigerator.

Roll out the dough on the flat surface to a 1/8 inch thickness. The dough will be very soft and has a tendency to stick. Be generous on the flour. If the dough sticks to the flat surface, dust the top of the dough and use a bench scraper to scrape off and flip the dough. Dust again and roll out to proper thickness. Dip the cutting part of the cookie cutter in flour and cut out one shape. Keeping the dough in the cutter, move the cutter over the baking sheet and lightly press dough out of the cutter onto the sheet. Repeat process until baking sheet is filled and put filled baking sheet in freezer.

Continue rolling and cutting the dough until all is formed into shapes and placed on a baking sheet. Remove one sheet from the freezer to the oven. Bake until cookies have golden edges. Cookies take about 12-13 minutes to bake. Remove from oven and let cool for about 2 minutes then transfer to rack to finish cooling. Bake the rest of the cookies as instructed above.

For the icing, melt the coverture or almond bark in a double boiler. Once melted, you can ice the cookies by using a knife or dipping them.  If you choose to dip them, make sure you have a sheet of wax paper on a flat surface in order to place the dipped cookie on. If you just choose to ice the top, they can be placed back on the cooling rack . After dipping or frosting about 4 of the cookies, decorate with sprinkles if desired. Continue with the process until all cookies are iced/dipped.

Before storing, make sure that icing has set/hardened on the cookies.

Tips and Notes:

1. The emphasis on the amount of flour when rolling and the butter to flour ratio in this recipe, had me concerned so I added 1/4 cup more of flour when making the dough.

2. The cookies came out thin and crisp, but the icing seemed to be too heavy for the cookie. If I made these again, I would adjust for a thicker cookie.

3. I like more cookie than icing, so I did not dip the whole cookie in the icing. The top or half dipped is fine for a good icing to cookie ratio.

4. I was expecting a thinner consistency of the almond bark, but remembered that it is considered as a candy coating rather than icing.

                                       **LAST YEAR: Pesto Potato Rolls**


Sunday, June 12, 2016

Pineapple & Spice Cupcakes


I think sometimes that the health industry has gone too far.  Especially in the area of supplements/pills that you can take that have healthy benefits. I am not sure of whatever happened to actually eating something natural as opposed to taking a pill.

As I strolled through the "healthy supplement" aisle at the drug store, I saw cinnamon pills. Maybe I am wrong, but I do not think there are a lot of people that hate the taste of cinnamon. Think about it: cinnamon toast, cinnamon rolls. Yes, doesn't just the thought make you want to take a cinnamon pill instead? I think not. I also saw cardamom pills.

Today's recipe contains cardamom. It is one of the many wonderful spices brought to us by India that has lots of health benefits. I imagine right now in southern India, there is someone looking across their backyard which is filled with wild cardamom. Most of us are not so lucky and actually have to pay to have some of the same.

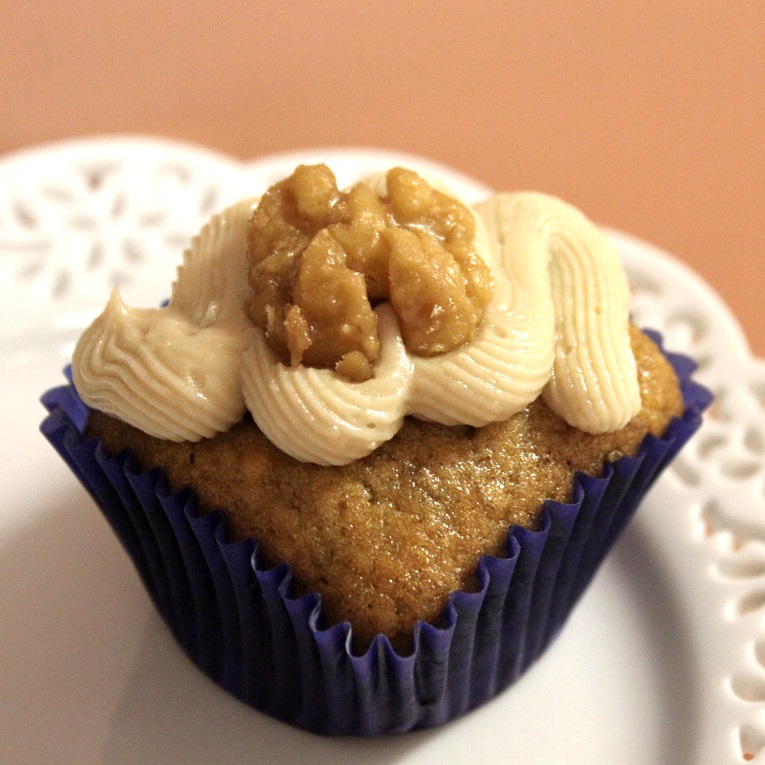
So, for these special cupcakes,we start with a base of cardamom cake. After that, I have added a pineapple curd filling. Then topped them off with a frosting that has a unique blend of goat cheese and butter nut flavoring. Since you are not here to taste these, I will give you the run down of what your taste buds are missing.... first you taste a lightly spiced cake. Then there is a pop of the tart flavor of pineapple. After that comes the frosting, which is tangy but is followed by a chaser of nutty flavor. If you are unfamiliar with butternut, I think it tastes about like Frangelico liqueur. The last part your taste buds experience is the crunchy walnuts on top. Enough said, so lets head to the kitchen!

Pineapple & Spice Cupcakes

Ingredients/ Pineapple Curd
adapted from Alaska From Scratch

1/3 cup sugar
3 egg yolks
pinch of salt
2 tbs cornstarch
2 tbs butter
1 cup of strained pineapple puree

Ingredients/Cardamom Cupcakes (makes about 20-22 cupcakes)
adapted from Chowhound

3/4 cup or 1 1/2 sticks butter
2 egg whites
2 eggs
3/4 cup milk
2 tsp vanilla extract
1 1/2 cups sugar
2 cups cake flour
2 tsp baking powder
1/2 tsp ground cardamom
1 1/2 cups sugar

Ingredients/Goat Cheese Frosting
from Flourtrader

6 oz goat cheese (room temp)
2 tbs milk
1 tsp butternut flavoring
2 cups powdered sugar
3/4 cup butter (room temp)
1/2 -3/4 cup toasted chopped walnuts

Start by making the pineapple curd. Whisk the egg yolks together in a medium size bowl. Then sift in the cornstarch and stir. Add the pineapple puree and the sugar. Mix together and empty into a mid-size saucepan. Place the saucepan over medium heat and stir constantly. As it heats up, it will thicken. Once your spoon leaves a streak in the bottom of the pan, it is done cooking. It will be as thick as custard. Remove from heat and add butter. Stir until the butter is melted into the mixture. Let cool to room temp, empty into bowl and cover. Place in refrigerator until ready to use.

For the cupcakes, preheat the oven to 350 degrees. Grease the top edge of 12 muffin cavities of a muffin tin(s) and place paper liner in each cavity.

In a small bowl, sift together baking powder, flour, cardamom and salt. Set aside. Place butter and sugar in the bowl of a stand mixer and cream together by beating for about 3 minutes, taking a moment or two to scrape down the sides. Mixture should be fluffy and pale.

Add one egg white and beat for 30 seconds. In separate intervals, repeat the process with the remaining egg whites and each egg. Once completed, scrape down the sides of the bowl. Then beat again, this time on low. As you continue to beat, add the extract and then slowly stream in the milk. The end result will be a curdled-looking batter.

Remove the bowl from the stand mixer. Using a wooden spoon or spatula, fold the sifted ingredients into the batter. Then fill the lined cavities with the batter, using an ice cream scoop or spoon. The cavities should be about 2/3 full. Place tins in oven and bake for 8 minutes, rotate and bake for an additional 8-12 minutes more, or when tester comes out clean.

After baking, place tins on rack for about 2 minutes to cool. Then take cupcakes out of tin and place on rack to completely cool.

As they cool, you will make the frosting. Place the goat cheese and the butter in the bowl of a stand mixer and beat until smooth and creamy. Add the milk and butternut flavoring and beat again for 10 seconds. Stop and scrape down the sides, then repeat the process 2 more times. Lastly, you will add the powdered sugar in 1/2 cup intervals, beating to combine and scraping down the sides at each interval until all the powdered sugar is combined into the dairy frosting.

To assemble, use a pairing knife and core out a hole in the center of your cupcakes. Then fill a piping bag (coupled with a large tip) with the pineapple curd and fill each cupcake. Once all the cupcakes are filled, frost the cakes as desired and sprinkle with toasted walnuts. Now they are ready to serve.

Tips and Notes:

1. Regarding the pineapple puree, it took about 3/4 of a peeled, cored, chopped pineapple to make 1 cup. The pineapple was pureed in a blender and pressed through a sieve.

2. I had some left over after making the cakes. I consider the curd the best part of the cupcakes, so I easily found a use for the rest of it. You can also put a layer of curd on top of the cupcakes before frosting to use all of it up.

2. The recipe states that the batter makes 2 dozen. Mine, when filling the cavities as instructed came out to make 20.

3. These are not fancy, decorated cupcakes. However, if you desire something more like that, add more confectioners sugar to the frosting to get it thick enough to pipe onto the cupcakes. Of course you also will have to increase the recipe ingredients.

4. I used the Lorann brand of flavoring, which is much stronger than the regular flavoring so you will need to add more if using another brand.

5. Do not overbeat when adding the milk and extract, this will put more air into the batter and makes for a flatter cupcake.
                                      **LAST YEAR:Pecan Cream Cups**


Sunday, June 5, 2016

Mojito Bars


There are many stories of how the mixed drink the Mojito came about. The one that I chose to believe is that it started in Cuba as a way to curb the harshness of straight rum. However, even without the rum, the blend of lime and mint is nothing but tropical and refreshing.

These bars mimic that wonderful flavor. There is the tartness of the lime and the butter pecan flavor of the crust, followed by a subtle cooling mint. The little squares are just the thing to pull out of the fridge when you need a break from the hot, humid weather.

Mojito Bars
adapted from State Fair Recipes

Ingredients/Crust
1 cup chopped pecans
1 cup or 2 sticks butter (room temp)
3/4 cup sugar
1 3/4 cup flour

Ingredients/Filling
1/2 cup key lime juice
1 tbs mint (snipped into fine pieces)
2 tbs key lime zest
2 tbs milk
1/4 cup rum (optional)
4 eggs
1 1/2 cups sugar
1/2 tsp baking powder
1/4 cup flour
1/4 tsp salt
Powdered sugar and mint leaves (for topping)

Prepare a 9x13 inch baking pan by lining the interior with foil, leaving some over hang on the longest sides. Preheat the oven to 350 degrees.

For the crust, pulse together the nuts, sugar and flour in a food processor. Then cut the butter into 1/4
inch cubes. Drop the butter cubes into the dry mix and process until mixture forms a mixture that can be compressed into a dough.

Empty dough into prepared pan and press down, evenly covering the bottom interior of the pan. Prick the dough with a fork to keep crust from bubbling up when baking. Place in oven and bake for 20-25 minutes or until edges are golden brown.

During the baking process, the filling is to be made. Start by sifting together the baking powder, flour and salt. In another bowl, whisk together the remaining ingredients (less the items listed for topping). Then stir in the sifted ingredients.

Once the crust is baked, remove and pour the filling mix into the pan. Place pan back in oven and bake until edges start to brown. The bake time is 20-25 minutes.

Place pan on rack to cool completely. To serve, lift foil edges and pull out of pan. Pull foil away from sides of bars. Cut into squares and dust with powdered sugar and mint leaf (if desired).

Store bars in refrigerator until ready to serve.
                          **LAST YEAR: Strawberry Cream Cheese Coffeecake**


Sunday, May 29, 2016

Strawberry Hazelnut Tart


I recently realized that when I bake with fruit, I really do not mix them into one baked item. This preference can be limiting, especially when it comes to berries. There are lots of recipes that have strawberries as a single fruit, but they are cold desserts. That is why when I came across this recipe for a baked strawberry tart, I had to make it.

There are other things that make this dessert special. One is the hazelnut crust spiced with nutmeg and cinnamon. Also, there is a hint of citrus due to the zest ingredients. Regarding the filling, the liquid blend has a way of bringing out the best of the berries. With notes of orange, rosewater and vanilla bean surrounding the natural sweetness of the berries, the blend is not only unusual but quite tasty.

This recipe makes one 24 cm diameter tart. However, it converted to the 8.25 X 11.25 rectangular tart as well. Plan in advance for the 2 1/2 hr chill time on the pastry.  The instructions below are for a lattice topped tart, but feel free to tinker around with cookie cutters to create a unique looking pastry surface. The cut outs are a lot easier than the lattice.

Also, since this recipe comes from outside the US, a lot of the measurements are by grams. Use the internet to find a converter if you measure by cups.

Strawberry Hazelnut Tart
adapted from the Australian Gourmet Traveler Magazine

Ingredients/Crust
1 tsp baking powder
1 tsp ground nutmeg
2 tsp ground cinnamon
150 grams hazelnut flour
250 grams regular flour
175 grams butter, room temperature
150 grams confectioners sugar
zest of one orange
zest of one lemon
3 egg yolks (reserve one egg white for egg wash)

Ingredients/Filling
vanilla bean seeds (scraped from 1 bean)
70 grams of raw caster or demerara sugar
30 grams cornflour
zest and juice of 1/2 orange
3 tsp rosewater
700 grams hulled and chopped strawberries
egg white from above mixed with 1 tsp water.
confectioners sugar for dusting (optiona)

For serving (optional)
cream fraiche
extra chopped strawberries

For the crust, start by sifting together the regular flour, cinnamon, baking powder and nutmeg into a medium size bowl. Then stir in the hazelnut flour. Set aside.

Fill the bowl of a stand mixer with butter, confectioners sugar and both types of zest. Beat mixture until it forms a pale, light batter. Scrape down the sides of the bowl and add each egg yolk, one at a time and beating for 30 seconds after each addition. Then remove bowl from stand mixer and fold in the dry ingredients combined in the first bowl.

Clump together dough and shape into a disc. Cover completely with plastic wrap and place in refrigerator for 2 hours, firming up the dough.

Once the chilling process is complete, place a rectangle piece of parchment paper on a flat surface and dust with flour. Then remove dough and separate out 2/3 of the mass, placing it on the flat surface. Roll this piece out to a 3mm thick shape. The shape should be the shape of your pan, but exceed the size of the bottom and up the sides. After it is rolled out in the size desired, line your tart tin with the dough. Pressing down all of the dough so it adheres to the shape of the interior sides and bottom. Trim off any excess dough from the top edge. Then take the remaining dough and roll it into a rectangle on the parchment. It should measure about 24 centimeters long. Transfer the parchment paper with the dough to a baking sheet. Place both the dough lined tart tin and the baking sheet in the refrigerator to chill for 30 minutes.

During this above process, create the next component of the tart-the filling. Preheat the oven to 180 degrees Celsius or 355 degrees Fahrenheit. Place the first six items of the listed filling ingredients in a bowl and mix together. Once the dough is finished chilling, fill the tin with the strawberry mixture and smooth out evenly.

Remove the baking sheet from the refrigerator. Using a knife, cut the dough into 12 mm thick strips. Use these strips to form a lattice pattern over the strawberry filling. There will be excess dough to trim off from the edges. Lastly, brush the surface of the tart with the egg wash.

Place in oven and bake until golden brown. This should take about 30-55 minutes. Place tin on rack to cool for about 30 minutes. Remove and let tart come to room temperature. How you serve is optional, but some suggestions are dusting with confectioners sugar before slicing. Also, serve with a side of cream fraiche and extra strawberries.

Tips and Notes:
1. If you are in a place where it is humid, it is probably best to serve this dessert right away. With time, the crust loses its crispness. It still has good flavor but does not retain its texture.
                             **Two Years Ago: Hawaiian Loaf**

Sunday, May 22, 2016

Chocolate Wine Loaf Cake


Let's face it..there are many flavor matches that include chocolate. I think it is because chocolate is pretty much a universal favorite. Adding chocolate to any baked good rarely gets objected to, so when I came across a recipe that included chocolate wine, I was not really surprised.

Chocolate wine...I found a number of brands of wine with this flavor. Some of the wines looked like coffee while others kept their deep red color. After reading a few labels of different brands, I chose a red wine with natural chocolate flavor-Trentadue Chocolate Amore. The original recipe used a dark red wine called Chocolate Rouge that I was unable to find. Since I did not use it,I cannot comment on the flavor that this particular brand imparts on the cake.

The two things that intrigued me the most about this recipe when I read it was the amount of dutch cocoa and the amount of chocolate wine. For one loaf, it calls for 3/4 cup of wine. This amount does insure that the flavor will remain after baking. The 1/2 cup of cocoa also had me thinking of how rich and dark the chocolate flavor would be.

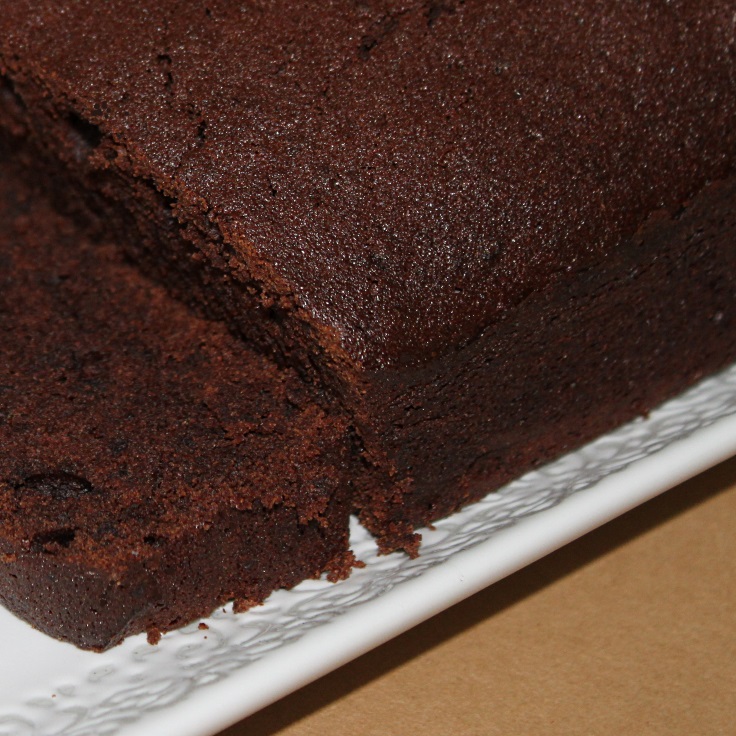
I was not disappointed. With a moist brownie-like texture and a heavenly flavor of sweet merlot enveloped by rich chocolate flavor, one slice was purely addictive.

This recipe makes 1 chocolate loaf. I used a 9X5 inch pan. The loaf was not that tall, so if I was to make it again, I would opt for something smaller.

Chocolate Wine Loaf Cake
adapted from Heather's French Press 

Ingredients
2 eggs
2 tsp vanilla extract
3/4 cup chocolate wine
1/4 cup white sugar
3/4 cup packed brown sugar
1/2 cup or 1 stick of butter 
1/4 tsp cinnamon
1/2 tsp baking powder
1-1 1/4 cup flour
1/2 cup dark/Dutch cocoa powder

Preheat the oven to 350 degrees. Butter the sides and interior of a loaf pan. Line the bottom and long sides of the loaf pan with parchment paper and butter the surface.

In a small bowl, sift together cocoa powder, cinnamon, baking powder and only 1 cup of the flour. Set aside.

Fill the bowl of the stand mixer with butter and both sugars. Cream together on medium high speed until light and fluffy. Add one egg and beat, stopping at one interval to scrape down the sides of the bowl. Repeat the process with the other egg.

While the mixer is still running, add the vanilla extract and then slowly stream in the wine. Once all is mixed in, turn mixer off and remove bowl. Using a wooden spoon, fold in the dry ingredients. If the batter still seems a little thin, stir in some of the extra flour to thicken.

Spoon into the loaf pan and smooth the top. Bake for 45-60 minutes or until tester comes out clean. Remove from oven and rest pan on rack for 15 minutes, then transfer to rack and remove parchment paper. Once completely cool, it is ready to slice and serve.

Tips and notes:
1. After you add the wine, the batter will look real soupy, but the dry ingredients will remedy that.
2. The recipe states bake for 1 hour, but mine only took 45 minutes which could be attributed to the size of the pan. The recipe did not specify pan size.
3. It is normal for the surface of the loaf to crack some while baking. 
4. This has a deep dark chocolate flavor, so some whipped cream would tone it down a bit.
                                   **LAST YEAR:Cannoli Cake Roll**

Sunday, May 15, 2016

Danish Butter Cookies


I am sure you are familiar with the Danish butter cookies that come in the blue tin. At one time, I was happy with these little cookies. The tin does contain a variety, but I favored the plain ones.

My love of shortbread or butter cookies is not based on grocery store or the cookies that are mass produced and stuffed inside a cookie tin. It is based on my first homemade shortbread cookies. After taking one bite of the crunchy sweet and buttery morsels, I was hooked. I will no longer even consider the blue tin cookies. It is homemade butter cookies or none and I have no regrets.

While the recipe comes together easily, it is the piping that takes the longest and most effort. Since the dough is thicker than buttercream icing, it does take some muscle to pipe the logs out and then shape into a circle. If you do not want to go through that, an easier method is to use a star nozzle on a meat grinder or cookie press to form them.

In order to achieve the same results, do not substitute or skimp on quality ingredients. I used Kerrygold butter, Madagascar vanilla bean and Bob Mills almond meal.

The recipe below contains weight measurements as well as cup measurements. I used a scale to measure my ingredients to be more exact, however, both measurements were on the original recipe. The measurements below make about 3-3 1/2 dozen cookies.

Danish Butter Cookies
adapted from Nordic Food Living 

Ingredients
7 oz or 3/4 cup plus 1 tbs butter
1 egg
1 vanilla bean
6 oz or 3/4 cup sugar
9 oz or 1 3/4 cup flour
3 oz or 1/2 cup almond meal or 1/2 cup almonds ground into meal

Preheat the oven to 400 degrees. Prepare 2 baking sheets by lining with parchment paper.

Add the sugar to the bowl of a stand mixer. Take out the vanilla bean and slice open the length of the bean. Open the bean flat and take a paring knife and scrape down the inside of the bean and place the scrapings or seeds into the bowl with the sugar. Continue to scrape until all seeds have been removed and add all to the sugar. Using clean hands, separate the clumps of seeds in the sugar by grinding the sugar together with the seeds.

Once the seeds are evenly distributed into the sugar, add the butter. Cream together the butter and sugar on medium speed until fluffy, scraping down the sides at intervals. Then add the egg and beat for about 30 seconds.

Remove bowl from stand mixer. Using a wooden spoon, fold the almond flour into the batter. Then add 1/2 cup of the regular flour and fold in. Continue with the process, ending with 1/4 cup flour.

Prepare the piping equipment and fill with cookie dough. Press the dough out of the piping mechanism into a 1 1/2- 2 inch circle or 1 1/2-2 inch long log onto the parchment paper. If making logs, shape each into a circle on the cookie sheet. Per the recipe, the dough circles on the sheet should be 1 1/2 inches apart. However, the cookies do not spread or expand much, so 1 inch should suffice.

Place baking sheets in the oven and bake the cookies for 4 minutes and then rotate pan. Bake for another 2-4 minutes or until the cookies have golden edges. Place baking sheet on rack and let cookies rest for about 1 minute, then transfer to rack and let cool completely.

Tips and notes:

1. How toasty you want these cookies to be is up to you, so please adjust your baking time accordingly.
2. Should these cookies be "too" plain, try dipping half in chocolate or sandwiching together with chocolate.
3. For a stronger vanilla taste, infuse the sugar with the seeds a few days prior to baking.
                                           **LAST YEAR: Peanut Butter Fudge Brownies**

Sunday, May 1, 2016

Southern Cotillion Peach Cake


After making this cake, I decided to deem it worthy of "high society" by naming it a Cotillion cake. For those that are unaware of the reference, a Cotillion is a formal party or dance that introduces a young girl into society and an opportunity for the father to introduce their daughter to proper suitors. Prior to the party, the girls have attended finishing school for learning social graces. This is something that came about in the South.

Regarding the cake, I believe that any special ocassion cake would need to be white. White makes for a good base to showcase any additional flavors. While you can add other flavors to chocolate, chocolate is not really subtle, so balancing with other flavors is more difficult.

I know you are wondering what makes this cake so special. Tasting it would truly tell you, but since this is in writing I will need to describe. The cake itself has the flavor of peach. The primary flavor  ingredients are peach cream liqueur, freeze dried fruit powder and a touch of almond. The cake is moist, since it is made with oil instead of butter. Between the cake layers is a filling made with peaches and then a layer of buttercream type icing with almond paste. The buttercream icing on the outside is flavored with the liqueur and fruit powder. The outer sides of the cake has slivered almonds pressed into the icing.

At the end of the post, you will find useful tips when making this cake as well as all other layer cakes. As with any recipe, careful evaluation is needed, because opinions vary on flavor and texture. The one thing I wanted to bring up is the almond paste-type filling. Almond paste does not break down smooth when mixing. This means that the filling imparts a nutty type texture which goes good with the fruit. However, should you want something smoother, you are welcome to use just regular buttercream and flavor it with almond extract.

Southern Cotillion Peach Cake
by flourtrader

Ingredients/Cake
4 eggs
1 cup of vegetable oil
1/4 cup sparkling white wine
3/4 cup peach liqueur
1 tsp almond extract
1/2 tsp salt
2 tbs peach fruit powder
2 1/4 tsp baking powder
2 1/2 cups flour 
2 cups sugar

Ingredients/2 kinds of filling
1/3 cup brown sugar
1 tsp lemon juice
3 cups peeled diced peaches (fresh or thawed & drained frozen)
2 tsp cornstarch
2 tsp water
1/4 cup confectioners sugar
1/2 cup butter
6-7 oz almond paste
1/2 tsp salt
1/4 cup peach liqueur
2 tsp fruit powder

Ingredients/Icing
3 or more cups of buttercream icing
2 tbs peach liqueur
1 tbs fruit powder
1 1/2-2 cups slivered almonds (if desired)

Prepare two 9 inch cake pans by greasing the interior with butter and then lining the bottom with parchment paper. Grease the face up side of the parchment paper and then dust the interior of the pans with flour. Preheat the oven to 350 degrees.

The peach filling will need to be made first, since it has to chill before use. Fill a small saucepan with brown sugar, 1 1/2 cups of diced peaches and lemon juice. Place saucepan over medium high heat and stir together. Let mixture come to a boil, then reduce heat. Simmer for about 10 minutes, stirring every so often. Remove from heat and let cool for 10 minutes.

Pour the filling into a blender and puree. Fill the same saucepan with the puree and add the remining fruit. Place over heat and let simmer again for about 5 minutes. In a small bowl, combine cornstarch and water. Then pour into the peach mixture. Let cook on low, stirring until thickened.  Pour into a heat proof bowl and place in fridge to chill. 

Now it is time to make the cake layers. Fill the bowl of a stand mixer with the eggs and sugar. Beat until well blended. Remove bowl from mixer and add the oil, champagne, peach liqueur and almond extract and stir together. In another bowl, sift together the flour, fruit powder, salt and baking powder. Fold the sifted ingredients into the liquid. Then place the bowl back into the stand mixer and beat at low speed until no lumps remain, about 1 minute.

Pour batter evenly into the two pans. Bake until the top is golden or a tester comes out clean. This should take about 35-40 minutes. Let cakes cool in pans on a rack for about 10 minutes. Invert and let cool another 10 minutes and remove parchment paper.

For the nutty filling, grate the almond paste into a bowl using a cheese grater and set aside. Then fill the bowl of a stand mixer with confectioners sugar and butter. Beat until smooth, about 2-3 minutes. Add the grated almond paste and salt. Beat on low for 30 seconds then on medium high for about 2 minutes. Scrape down the sides and beat for 1 minute more. Chill until ready to use. Take out a small bowl and then mix the fruit powder with the peach liqueur and set aside.

For the icing, mix together fruit powder and liquer in a small bowl. Then make your standard butter cream icing. Then pour peach flavor mixture into icing and beat until evenly distributed. Add additional confectioners sugar to reach desired thickness. Chill until ready to use.

Once the cake layers are completely cool, they are ready to be assembled into a delicious cake. Choose which of the layers you will be using for the bottom. Brush the top surface of the bottom layer with 1/2 of the fruit powder/liqueur blend. Then do the same on the other layer, this time on the bottom side of the top layer. Let mixture soak in for about 10 minutes. Place one layer in the center of a cake board or cake plate.

Take out the chilled peach filling and smooth it over the top surface of the cake, being careful to leave a small border around the edge. Then carefully smooth the nutty filling over the peach filling. Stack the top layer on top. Cover with plastic wrap and chill for about 1 hour.

Once chilling time is over, remove cake and frost as desired. If desired, press slivered almonds into sides of cake by the handful.

Tips and Notes:

1. Soaking a top cake layer on the bottom side instead of top insures that the icing on the top will be easy to spread. If your cake is wet on top, it makes for a slippery layer and is very difficult to ice.

2. Always measure your batter to insure even layers. "Eyeballing" it lends itself to uneven cake layers.

3. Invest in cake strips to go around your pans when baking so they will bake evenly and not be domed on top.

4. Fruit powder can be hard to find. However, I found packaged freeze dried slices of peaches that were called "fruit crisps." They are perfect for grinding into powder. Do not make the mistake of buying just dried fruit-the consistency is too gummy.

5. Chilling the two layers together with the filling helps prior to icing to stabilize the layers.This is good to do with any cake that has a filling different from thick buttercream.

6. This recipe was made with fresh Florida peaches. It has not been tested with frozen peaches, which may have excess water so more of the cornstarch/water mixture may be needed. You may need to experiment a bit when using frozen peaches.
                                    **LAST YEAR:Raspberry Picnic Pie**

Sunday, April 24, 2016

Hawaiian Breakfast Rolls


This is a great spin off recipe from the original cinnamon rolls.  Instead of cinnamon and pecans or raisins, these rolls have a delicious filling of coconut and ground macadamia nuts rolled up into a sweet dough. The extra zing is the icing on top that can be flavored with coconut or pineapple extract.

The alterations I did on this recipe was to use pineapple coconut juice in the dough instead of milk. Also, I brushed it on the dough prior to layering the filling. The end result was that it added more of a tropical flavor to the filling, but did little to flavor the actual dough. Also, I found that the filling develops more flavor with time, so these rolls were better the day after baked. I used an unsweetened organic juice, so using something like "Coco Lopez" may offer more strength in the flavor category.

These do look like they take a lot of time, but the looks are deceiving. The two "time consumers" are grinding the nuts and the rise time. There is only 1 rise time (1- 1/12 hrs) and no kneading of the dough. I ground my nuts in a blender and they turned fine but not into nut butter (see sprinkled nuts on top of the rolls above). This recipe makes about 1 dz rolls.

Hawaiian Breakfast Rolls
adapted from Fleischmann's Yeast

Ingredients/Dough Roll
1/4 cup shortening
1 cup scalded milk (cooled to lukewarm) or lukewarm coconut/pineapple juice
1 egg
1/4 cup lukewarm water
1 tsp salt
3 1/2 cups flour
1/4 cup sugar
1 package yeast

Ingredients/Filling
zest of 1 orange
2/3 cup sugar
1 tsp cinnamon
2/3 cup flaked coconut
2/3 cup finely chopped macadamia nuts
2 tbs melted butter
2 tbs coconut pineapple juice (optional)

Ingredients/Icing
2 tsp honey
2 tbs softened butter
3 tbs milk or juice
1 tsp coconut or pineapple extract
2 cups powdered sugar
1/4 cup ground macadamia nuts (optional)
pinch of salt

Start on the dough by sprinkling yeast into the bowl of warm water. Then fill the bowl of a stand mixer with the sugar, salt, juice or milk and shortening. Beat on low for about 15 seconds. Stir the bowl of yeast and then pour into the sugar/shortening mixture. Add the egg and 1/2 cup of flour.  Beat on low again until blended. Remove the bowl from the stand mixer. Using a wooden spoon, fold in the flour in half cup increments until all is incorporated into the dough.

Grease the interior of a small bowl. Form the dough into a ball and place it in the bowl. Lightly cover and let rise in a warm place until doubled in size. This should take 1-1 1/2 hours if you are using regular yeast (rapid rise would naturally be faster).

While the dough is rising, you will make the filling. Measure out the juice and melt the butter. Set aside. Then whisk together all the other filling ingredients.

After the dough has risen, prepare one 11.5 x 14 inch pan by greasing the interior. Also, preheat the oven to 350 degrees. Then dust a flat surface lightly with flour. Roll out the dough onto the flat surface into a large rectangle, measuring 11x14 inches.

Brush the surface of the dough with the pineapple coconut juice (optional). Then brush on the melted butter. Sprinkle all of the filling evenly on top of the dough and press down lightly to adhere. Starting from one of the longest sides, roll the dough tightly and evenly in a jelly roll fashion. Pinch seam together and flatten. Fold each end under and pinch/flatten the seams.

Using a serrated knife, cut jelly roll into 12 even slices and place inside prepared baking pan.  Put pan in the oven and bake until golden brown and toasty on top, about 20-30 minutes. Remove and set pan on rack to cool.

While rolls are baking, prepare the icing. Add milk or juice, honey, softened butter and extract to small bowl. Beat until the butter is broken up. Sift in 1/2 cup of powdered sugar and beat again until smooth. Continue with the process until all powdered sugar is incorporated into the icing.

Once rolls cool to lukewarm, spread the icing on top of each, smoothing out. Then sprinkle with ground macadamia nuts.

Tips and Notes:

1. Make sure you give the filling a chance to soak up the juice and butter that was brushed on the dough. You do not want a lot of liquid flowing out when cooking and too much liquid keeps the dough from rolling tightly.

2. Instead of the sprinkle of nuts on the top,try mixing drained pineapple chunks and/or ground nuts into the icing.
                                   **LAST YEAR:Charlevoix Cookies**

Sunday, April 17, 2016

Banana French Toast Muffins


Let's face it, banana-nut anything is always a welcome treat. However, it is very difficult to achieve a cake like quality when using them in baking. That is why I refer to these as muffins instead of cupcakes. They are not as dense as banana bread, but they do not have the lightness of cupcakes either.

Is this just a lighter banana bread in muffin form? In some ways yes and some ways no. Included in the muffin is chunks of candied walnuts. Like French toast, the maple flavor is on top. Swirled with a mixture of maple flavored cream cheese frosting, the flavor pairing of these muffins is quite tasty. Biting into one of these treats is just a great way to start the day or perk you up in the afternoon.

Also, I know that candied nuts can be quite expensive. In this recipe is a very simple and easy way to make them. If you are not into the whole muffin thing, the sweet nuts make a great snack-so read on...

This recipe makes about 2 dz muffins.

Banana French Toast Muffins
adapted from Wilton

Ingredients/Muffins
1 3/4 cup mashed bananas
3/4 cup sour cream
2 tbs maple syrup
3 eggs
1/2 cup or 1 stick of butter (cut into 1/4 inch cubes)
2 3/4 cup of flour
1 1/2 tsp baking soda
1/4 tsp salt
1 cup sugar
3/4 cup packed light brown sugar
1 cup chopped walnuts

Ingredients/Topping
1/4 tsp maple extract
3 cups confectioners sugar
8 oz package of cream cheese (room temp)
4 oz or 1 stick of butter
24 whole walnuts
1/4 cup of maple syrup

To start, you will make 2 batches of the candied nuts. Pour the chopped nuts into a saucepan set over low heat. Let the nuts cook until toasty, stirring at random intervals. After about 5 minutes, the nuts will be done. Pour in the 2 tbs of maple syrup and mix with the nuts. As the syrup cooks it becomes more solid, looking somewhat like praline candy. Once the liquid syrup becomes solid, remove from heat and transfer coated nuts to a bowl. Set bowl aside.

For the whole nuts, lay a piece of parchment paper on a flat surface. Follow the same coating process as noted above, this time using 1/4 cup of maple syrup. Due to the higher amount of syrup, the cook time will take longer. Once coated and solid, remove each walnut from the pan and lay on parchment paper, spacing apart.

Preheat the oven to 350 degrees and fill the cavities of a muffin tin with paper liners.

Prepare the batter by filling the bowl of a stand mixer with both types of sugar and drop in butter cubes. Cream together with the paddle attachment, beating for about 2 minutes and stopping at intervals to scrape down the sides of the bowl. 

Pour in the vanilla extract and add one egg. Mix together for about 30 seconds, with mixer on medium speed. Add each additional egg, blending after each addition. Then pour in the mashed bananas and mix on medium until just incorporated into batter. Remove bowl from mixer.

In a separate bowl, sift together the flour, baking soda and salt. Fold in 1/3 of the sifted ingredients into the banana batter, using a wooden spoon. Add 1/2 of the sour cream, then stir to blend.  Repeat the process, ending with the last 1/3 of the dry ingredients. Then mix in the candied chopped walnuts.

Using a spoon or a scoop, fill the cavities of the prepared muffin tin with the batter. Fill approximately 2/3 full.

Put pans in oven and bake until tester comes out clean. Bake time is about 20-25 minutes, so rotate pans at the halfway point. Remove pans and let rest about 2 minutes. Then transfer to rack to finish cooling.

For the frosting/icing, start by beating the cream cheese with the butter until it is silky and smooth. Then beat in the maple extract until distributed throughout the frosting. Sift in 1 cup of confectioner's sugar and beat into the cream cheese/butter mixture. Repeat the process until all confectioner's sugar is blended in.

Once muffins have cooled, ice with frosting as desired and top with candied walnut.

Tips and Notes:

1. This frosting recipe had an error which I corrected above. It did not have butter listed as an ingredient but listed 2-8 oz packages of cream cheese. I followed the recipe, resulting in a quite tangy frosting. Cream cheese frosting I have seen with an equal ratio of butter to cream cheese and 1/2 the amount of butter to cream cheese. I would chose the ratio of 1/2 to one, but either way you only need one 8 oz package of cream cheese.

2. A note on the cute squares: I used a heavy duty, non stick square cavity baking pan. After researching, I read that the square liners have a tendency to fold into the muffins when baked. However, the round liners expand to fit the square. So, if you use the square cavity pan, skip buying the square liners.

3. The candied nut coating can be as thin or thick as you like. I much preferred the thicker, so you may want to use more maple syrup in the pan when using the chopped nuts. Keep in mind that with more syrup, the nuts have a tendency to clump together.

4. How ripe the bananas you use is personal preference. The more ripe the banana, the stronger the flavor. Also, be sure to use a fork and mash the bananas. This method gives the muffins a more pop of banana flavor than adding pureed bananas.
                                   **TWO YEARS AGO: Black Walnut Madeira Cake