Wednesday, August 31, 2011

Showstopper Cookies

I still had a lot of white chocolate left after making those Lucid Dream Bars.  Since I am scheduled to make a cookie donation, I decided I would need to find a good cookie recipe using the white chocolate.

I found a recipe that I had kept from last year.  It is one in which the chef/blogger coerced the recipe from a local catering company.  After reading that information and looking at the list of ingredients, I knew that this was a winning recipe.

In addition to the white chocolate, these cookies are packed with toasted walnuts and toffee. The add ins to the cookie dough makes them extra special. The sweet "crispy on the outside and chewy on the inside" texture was just right.

I know you are thinking, last years recipe and now I am just getting around to making them.  What can I say but too many recipes and not enough time!  Most of you food bloggers can relate.  I would love to say that I am am now making the last recipe I have in my collection so I will need more, but not the case.  Anyhow-- on to the recipe, which makes about 4 dozen cookies.

Showstopper Cookies
courtesy of Oui Chef Network

2 eggs, lightly beaten
1 tbs vanilla extract
1 cup or 2 sticks of softened butter
1 cup granulated sugar
1 cup packed dark brown sugar
12 oz of toffee bits
12 oz white chocolate, chopped
3 cups chopped, toasted walnuts
1 tbs kosher salt
1 tsp baking powder
2 1/2 cups flour
1 tsp baking soda

Preheat the oven to 350 degrees.  Line 2 baking sheets with parchment paper.

In a large bowl, cream the butter and both sugars together until light and fluffy.  Then beat in the eggs, this should take about 30 seconds.  On low speed, mix in the vanilla extract until all is blended into the batter.

Then sift the baking powder, baking soda and salt into the batter.  Beat for 30 seconds on medium speed.  Lower the speed and add 1 cup of the flour and run mixer until no more dry streaks remain.  Repeat the process with the the remaining 1 1/2 cups of flour.

Using a large wooden spoon or clean hands, fold the toffee bits, chopped chocolate and walnuts into the batter, making sure it is evenly distributed.  Divide the dough into 4 equal parts and place 1 part in a small bowl and put the rest in the refrigerator.

Divide the 1/4 section of the batter into 12 pieces and drop onto baking sheet about 1 1/2-2  inches apart (I only could fit 9 on a sheet at one time).  Lightly flatten the top of the cookies. Place cookies in oven to bake for about 10-12 minutes.  Cookies are done when they turn a golden brown on the edges.

When you remove the cookies, they will be very puffy and will flatten out upon cooling.

Remove pan from oven and place on rack to cool for about 5 minutes.  Then transfer cookies to rack to finish cooling.  Repeat process with the remaining cookie dough.

The Seven Links

Recently, Farmer Kim tagged me for the 7 links.  This was kind of difficult to choose but here goes:

The most beautiful post: Chocolate Cinnamon Cookies.  Out of all my saved pictures, this one stands out.  I guess it is the bright green.
According to my stats, the most popular:Black Casino Cake


It was hard choosing the most controversial, but I fell it was Shrimp Po'Boys.  It was the first of my posts that went to top 9 and I felt there were better posts out there that should have won.
 For the most successful, it would have to be Bourbon Butter Pecan Ice Cream because I am still getting hits on this long after posting.
 The post that did not get the attention it deserved was easy because I had a lot of posts prior to Food Buzz and my blog was private:Avocado Egg Rolls
The post that I am most proud of is one that I had contemplated for a long time and really hunted down the right ingredients: Pink Squirrel Cheesecake
The most helpful one is the Chocolate Parthenons because I ventured out and attempted to use phyllo pastry and it turned out.  Therefore I feel it may have encouraged people to try this pastry.                
Now for the people that I have tagged.  I have tried to pull out some of the foodies that have been posting for longer than I have, so here goes.  Also, note that I have not inquired with any of these people to see if they are interested in participating.  I do hope that they participate, but understand if they do not. 

                                                 Amy-Vanilla Girl/Fragrant Vanilla Cake                           
              Maya-Foodiva's Kitchen
              Rosa-Rosa's Yummy Yums 
           Lori-Little Kitchen on the Prairie 

This was a fun little exercise but did take some thinking on my part.  I hope you found something interesting or inspiring her.  Thanks again Farmer Kim for tagging me!


Monday, August 29, 2011

In Remembrance: Princess Diana's Cake

It is really hard to believe that it has been nearly 14 years since the death of Princess Diana.  Her life of royalty started out as a fairy tale wedding when she was 21.  Thereafter, she was constantly in the spotlight of the press and was having difficulties with Britain's Royal Family.    As time went on, her relationship with Prince Charles started deteriorating due to infidelity.  However, she accomplished great works of charity and was dubbed the "people's princess" and the "queen of hearts".
I think of how young she was to have the burden of the press in her life as well as death on August 31, 1997.  Had she lived longer, I am sure she would have went on to do many more great things.  When I heard about the press putting something out there called "Diane at age 50", I assumed that was what was going to be the focus.  However, I was shocked to find out that it was mostly related to pictures that aged her appearance.

There is a recipe that claims to be Princes Diane's Wedding Cake.  After doing some research, I have found it to be similar, but not exact.  The actual wedding cake had fruit soaked in brandy and had a different type of icing.  I am not sure how this version came about, so that is why I did not title it as her wedding cake.  Also, it does not have the elegance of a wedding cake.  However, perhaps the simple, homemade appearance of the cake is more fitting for Diana.  I feel that she was more down to earth, rather than the type of person that put on airs due her relationship with Prince Charles.

The recipe is very similar to Hummingbird Cake, but it has the extra ingredients of coconut and apples. If you like the Hummingbird cake, you will enjoy this.

Princess Diana's Cake
courtesy of recipelink.com

Ingredients
3/4 cup chopped nuts
3/4 cup coconut
1 cup chopped apples
1 1/2 cups chopped bananas
8 oz crushed pineapple with juice
1 1/2 cups oil
3 eggs (beaten with mixer)
1 3/4 cups of sugar
2 tsp vanilla
2 1/4 cups flour
1 1/2 tsp cinnamon
1 tsp baking soda
3 cups powdered sugar
8 oz package of cream cheese

Preheat the oven to 350 degrees.  Grease the insides of a 9X13 pan and line the bottom with parchment paper.  Grease the top side of the parchment paper.  The parchment is only if you want to cut & frost the cake outside of the pan. Should you want to leave it in the pan, eliminate the parchment paper. Dust the inside of the pan with flour.

In a small bowl, sift together the cinnamon, baking soda and flour.  Set aside.

Add the beaten eggs, 1 tsp vanilla and 1 1/4 cup of oil to a large bowl and mix with a wooden spoon until all is blended.  Fold in the flour mixture until no dry streaks remain.  Then stir in the coconut, crushed pineapple, bananas, apples and nuts.

Pour batter into pan and bake at 350 degrees for about 48 minutes or until tester comes out clean. 

Cool completely in pan prior to serving. If you used parchment paper, cool in pan 20 minutes and then invert onto rack.  Invert again and let cool completely.

To make the frosting, mix the remaining 1/4 cup of oil with the remaining 1 tsp of vanilla extract.  then beat in the softened cream cheese.  Once blended, add 1/2 cup of powdered sugar and beat for 30 seconds.  Continue to add the powdered sugar in increments, beating after each addition.  After all has been mixed in, frost cooled cake as desired.


Time is too slow for those who wait       
  to swift for those who fear
To long for those who grieve
  to short for those who rejoice
But for those who love, time is eternity
          -------read by Lady Jane Fellows at the funeral of Diana

Friday, August 26, 2011

Lucid Dream Bars

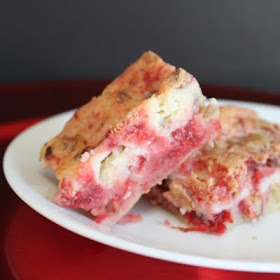
Have you ever had a dream and in the dream you realize it is a dream?  Experts on the subject will tell you that if this happens very often you can start to control exactly what happens in your dream.  I am not aware that I have had a lucid dream, but sometimes my thoughts prior to going to sleep may have had some influence.

The other night I was toying around with the idea of creating a recipe that had strawberry in it that had a strong enough flavor to work well with white chocolate. I did not want to use extract. As you know, white chocolate is quite sweet.   Anyhow, after falling asleep, waking up and then falling asleep again it came to me-canned strawberries in light syrup.

That is how this recipe came about.  It is very rich, having both white chocolate and cream cheese layers in it. Then to make it even better, it is filled with crushed canned strawberries and nuts.  Without the strawberries and nuts, the texture can best be described as a cross between white chocolate blondies and cheesecake.  The filling just adds another dimension of flavor.

You know some people say that dreamers are just people that can't face reality. To make sure you are not labeled as such, I have provided the recipe below so you can make these bars a reality in your own kitchen! :)

Lucid Dream Bars
by flourtrader

Ingredients
1 15 oz can of strawberries in light syrup
1 cup roasted chopped pecans
1 8 oz package of cream cheese (softened)
1/2 cup or 1 stick of butter
5 eggs
3 tsp vanilla extract
12 oz chopped white chocolate
2 cups sugar
1/2 tsp baking powder
1/2 tsp salt
1 1/3 cups flour

First, drain the can of strawberries and reserve 2 tbs of juice in a small bowl.  Using a fork or your fingers, crush the strawberries into smaller pieces and place pieces in a measuring cup of 1 cup capacity.  All you will need is one cup, if there is any strawberries left in the can, use them up as an ice cream topping. Cover both the strawberries and juice.  Place in fridge until needed.

Preheat the oven to 350 degrees.  Prepare a 9X13 cake pan by greasing the bottom. Then line with parchment paper, covering the bottom and leaving some to overhang on the long sides.  Grease the face up side of the parchment on the bottom of the pan.

Set up a double boiler and melt white chocolate chips together with the butter.  Once all is melted, pour into a large heat proof bowl. Beat in the additional ingredients of 1 1/2 cups sugar, 4 eggs, 1 tsp vanilla extract. 

In a smaller bowl, sift together baking powder, salt and flour.  Then fold into chocolate mixture and set aside.

Place the softened cream cheese, remaining 2 tsp of vanilla, remaining egg and remaining 1/2 cup of sugar in another bowl.  Beat until smooth.

To make the layers, pour half of the chocolate batter into the prepared pan.  Then sprinkle half of the pecans over the layer and drop 1/2 cup of  strawberry chunks evenly over layer.  Then drop the cream cheese on top by spoonfuls and use a knife to smooth it out evenly as best you can.  The cream cheese should cover the strawberries.

For the last layer, mix the nuts, strawberries and reserved 2 tbs of juice into the chocolate batter and pour it over the top.

Bake in oven for 35-40 minutes or until done. When done, you will see the toasted edges are starting to pull away from the pan and the whole surface should have a light crust.  Remove pan and place on rack to cool.  Once completely cool, lift out of pan and cut into squares.    

Wednesday, August 24, 2011

Chocolate Parthenons

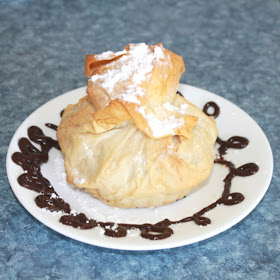
Well, I decided that I would try something different, using phyllo pastry sheets.  I was nervous, so I purchased double the amount required for this recipe.  I am glad I did, because I was halfway through making these little pouches when I finally felt at ease.  The sheets are not ideal for the heavy handed or the impatient, but I did get through it and still had some left over.  There were some sheets torn in the process, but less that I expected.

Dealing with the phyllo is probably the most difficult thing in this recipe.  The rest came together really quickly.  This is a perfect recipe for first timers, since I did not have any problem except for the few sheets that were torn.  I also needed more butter than recommended when I got to the stage where the outside is brushed after the phyllo package is formed.  Now that I have dealt with phyllo sheets, I am hooked. The smell of the baked buttery sheets is so intoxicating.   

By now you are wondering what is in this phyllo package?! Simply put- it is pure, sinful indulgence.  If you can imagine, think about crunching into these buttery flakes of phyllo and reaching a brownie-like chunk of cake packed with chocolate chips and walnuts. There you have it.  For those without a vivid imagination.....


Now on to the recipe...

Chocolate Parthenons
courtesy of Bon Appetit (prior to 2005)

Ingredients
20 phyllo pastry sheets (this will make 10 pouches)
1-12oz package of semi-sweet chocolate chips
2 cups chopped and toasted walnuts
4 eggs
1 cup and 2 tbs melted butter (2 1/4 sticks)
1 1/2 cups sugar
1 tbs brandy
1 tbs vanilla extract
1 cup flour
1/4 tsp salt
1/2 tsp ground cinnamon

Optional toppings:
Powdered sugar
Chocolate syrup

Prepare 10 tartlet pans (4x1 inch) by buttering all the insides.  Pans with removable bottoms are recommended but if you have the solid ones, place a parchment round in the bottom and butter it as well.

In a large bowl, whisk the eggs.  Then stir in the sugar until evenly dispersed.  Add the brandy, vanilla extract and 2 tbs of butter and mix together.  Set aside.

Sift together flour, salt and cinnamon.  Stir this dry mixture into the wet egg mixture.  Fold in the chocolate chips and walnuts.  Set the filling aside while you prepare the phyllo packages.

Place 2 phyllo sheets (one on top of another)on a work surface.  Cover the rest with a damp towel or plastic wrap so it will not dry out.  Brush the surface of the top phyllo sheet with butter.  Cut sheets in half, so you have two rectangles measuring 9X13.  The cut each half again to form 3 sections, measuring 9X4 1/2.  You should have a total of six sections.

Take one section and place the end inside one of the tart pans leaving the rest of the section to go up  over the edge of the pan and lay flat on the surface outside..  This will be like the first spoke of a wheel.  Continue the same process with the 5 strips, overlapping slightly and going around the outer edge of the pan like spokes.

Place 1/2 cup of the filling inside the pan on top of the phyllo.  Then gather all of the strips towards the center.  Carefully twist the phyllo  strips (1/4 turn) and squeeze slightly to form a top knot. Then brush with melted butter.

Preheat the oven to 350 degress. Then repeat the cutting and forming of the purses on the additional 9 tartlet pans.  Place tartlet pans on baking sheets and bake until the phyllo turns a golden color, which is about 40 minutes.  Once baked, remove from oven and cool slightly.  Carefully lift off or out of tartlet pans by holding the packages on each side, right above the pan edge.  You do not want to touch the top knot.  Place on dessert plate and if you want, dust with confectioners sugar and pour on chocolate syrup.

These purses can be prepared one day in advance and refrigerated.  Also, they are tasty both at room temperature or warmed.

Monday, August 22, 2011

Savory Soft Pretzels

I love soft pretzels, but sometimes the ones you buy at festivals and the ballpark can be a bit tough or too chewy.  I was looking through some recipes and came across this one for pretzels and it caught my eye.  This particular recipe had mustard, onions and cornmeal incorporated into the dough.

The downside was that the picture did not look like the traditional soft pretzel.  It looked like a puffed up roll.  As you can see by the above picture, it does not have the traditional large holes to the left and right.  To be honest, this pretzel was more picturesque than most of the ones I made.  If I was going to make these again, I would make my dough strands longer so the baking and rising process would not impact the shape as much.  Also, I would probably be a little more heavy handed with the salt, because the salt melted during the baking process.

These did turn out soft with a little chewiness. The mustard and onion did give the bread a nice flavor, so I did not feel that they needed to be dipped in mustard or anything else in order to enjoy.  The other good thing is that the recipe states they can be frozen for up to 2 weeks wrapped in foil.  In order to serve, just thaw and then heat in a 350 degree oven for 10 minutes.  This recipe makes 16 large pretzels.

Savory Soft Pretzels
courtesy of Bon Appetit (prior to 2005)

Ingredients
2 cups warm water
2 tbs regular mustard
12 cups water (for boiling)
1 egg yolk beaten with 1 tbs water
2 cups finely chopped onions
4 3/4 cups bread flour (or more)
1/2 cup yellow corn meal
1 tsp dry mustard
2 1/2 tsp salt
2 tbs baking soda
coarse salt (for sprinkling)
2 tbs butter (melted)
2 envelopes of yeast (I used rapid rise)
1 tbs plus 1 tsp sugar

You will need to prepare 4 baking sheets.  Sprinkle two with cornmeal.  This will be the rising pans for the pretzels.  Then butter 2 cookie sheets an sprinkle tops with cornmeal.  Those will be for baking them.  Also, butter the inside of a large bowl.  Set pans and bowl aside.

Add melted butter and chopped onions to skillet and place over medium high heat.  Saute onions until tender and golden, about 15 minutes. If you used a food processor to chop your onions they will be real watery, so this process may take longer.  You want to make sure that are cooked until almost completely dry.  Remove pan and set aside to cool.

In a large bowl of a stand mixer with a paddle attachment, add 1 1/2 cups of warm water.  Add 1 tbs of sugar and sprinkle all of yeast in.  Stir so that no dry ingredients remain.  Then set aside for about 10 minutes or until mixture becomes foamy on top.

Fill another bowl with remaining 1/2 cup water, mustard and ground mustard.  Stir to blend.   Then pour into the yeast mixture and stir again.  Whisk in 2 tsp salt and 1/2 cup of cornmeal.

Start your mixer on low speed and gradually add 4 1/2 cups of flour in 4 increments while mixer is running.  Then turn up speed and beat for 3 minutes.  Lastly, beat in the sauteed onions until evenly dispersed.

Put dough on a smooth floured surface.  It will be quite sticky.  My dough was more like muffin batter.  Knead the dough for about 8 minutes, adding as much flour required to get the dough to the correct consistency. Shape dough into a ball.

Place dough in prepared bowl and turn once.  Then cover and let rise for 1 hour in a warm place.

Once the dough has completed the rise time, punch down and divide into 16 pieces.  Roll each piece into a strand, about 15 inches or more (see 2nd paragraph of this post above regarding length).  Then take each end of strand and loop underneath towards center and cross one over the other.  You can cross again making more of a twist if you prefer. Then press ends into opposite side of loop so it sticks on top.  As you make them, place each one on one of the cornmeal baking sheets.

After you have formed 16 pretzels, let rise uncovered for about 20 minutes.  As they are rising, the water bath can be prepared.

Place 12 cups of water in a large pot and set over high heat.  Also, preheat the oven to 375 degrees.

When the water comes to a boil, add the baking soda, remaining 1 tsp sugar and remaining 1/2 tsp salt.  Then you will need to boil the pretzels in the pot about 3 or 4 at a time.  Use a spatula to lift each pretzel off of baking sheet and into boiling water.  Let one side cook for 30 seconds, flip and cook the additional side for 30 seconds.  Remove and place on buttered/cornmeal pans.

Then brush all 16 pretzels with the egg glaze and sprinkle with coarse salt.  Bake in oven for 10 minutes, rotate pan and bake for an additional 10 minutes.  Remove and let cool on baking sheets.  See third paragraph above regarding preparing and freezing in advance.

Friday, August 19, 2011

Tequila Sunrise Bars

Even though this is a popular bar drink, I cannot help but think of the Mel Gibson movie by the same name where he played Mac McKussic.  That was back in 1988 when Mel was such a hot commodity. 

Surprisingly, with all the bad publicity concerning his personal life, he is still writing screenplays and starring in them.  The most recent one is called "How I Spent my Summer Vacation".   He portrays a criminal in a Mexican prison.  There is no release date for the US yet, but it is going to be showing in Finland and Sweden later this month.

Anyhow, enough of Mel, lets get back to food!  These bars are two layers, the first and major layer being orange tequila and the second little layer is flavored with grenadine.  To make it look more colorful, I have sprinkled pink powdered sugar on top.  I am delighted with the flavor and the appearance of these bars and will definitely make them again.

I made a few changes that will help.  On the grenadine layer, the recipe calls for orange zest for sprinkling.  Since fresh orange zest is usually damp and clumpy, I used zest from the spice aisle at the grocery.  Also, the instructions are to color the dough after you put the flour in, but it is easier to color the batter before adding the flour.  It also makes for a more even tinting.

Tequila Sunrise Bars
courtesy of The Sophisticated Cookie Cookbook

Ingredients/Base Layer
3 tbs Tequila
food coloring (orange, or mix of red/yellow to make orange)
2 tbs fresh orange juice
2 tbs grated orange zest
1/2 cup powdered sugar
1 tsp baking powder
1 1/2 cups flour
3/4 cup butter (room temp) 

Ingredients/Grenadine Layer
2 tbs grated orange zest (for sprinkling)
1/2 tsp baking powder
3 tbs flour
1/2 cup sugar
2 eggs
2 tbs grenadine

To make the first layer, grease bottom and sides of an 8 inch square pan.  Then line bottom and two sides (leaving an overhang on the sides) with parchment paper.  Grease face up side of parchment lining the bottom of the pan.  Preheat oven to 350 degrees.

Cream together butter and powdered sugar in a medium size bowl.  Once it has a smooth consistency, add orange juice, zest and tequila.  Beat until evenly dispersed.  Add food coloring a few drops at a time and beat.  Continue with this process of adding the coloring and mixing until you are satisfied with the color.  Set aside.

In another bowl, sift flour and baking powder together.  Then fold into wet batter until no more dry streaks remain.  Empty dough into baking pan and, using damp hands, spread the dough evenly inside the pan.  Place pan in oven and bake for 12 minutes.

As the layer is baking, you will need to prepare the batter for the grenadine layer. In a small bowl, sift together flour and baking powder. Set aside.

Crack eggs into medium bowl and beat for about 10 seconds.  Then add sugar and beat at medium high speed for 3 minutes.  Add the grenadine and beat for an additional minute.  Stir the flour mixture into the batter.

Once the base layer has baked, remove from oven and pour the grenadine batter over the top, making sure it is even . Then sprinkle with the orange zest. Place back in oven for 17-20 minutes.  The top and edges should be brown when done.

Remove from oven and dust heavily with powdered sugar.  Let cool on a wire rack for a few hours or until top is set.  Then slide a knife around the edges and lift out with parchment handles.  Then it is ready to cut and serve.  Store at room temperature in an airtight container. Cheers!

Wednesday, August 17, 2011

Peach Heart Muffins

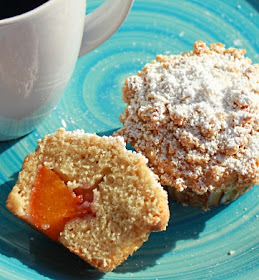
Well, I recently got some new equipment for baking.  It is a muffin pan with spikes in it.  I had to try it out.  The one thing I did realize is that in order for the spikes to suspend whatever you stick on them, they would have to be somewhat solid.  In this particular recipe, I cooked the peaches first, so they were a little too soft to be suspended.   I will be doing more experimenting to see what tasty things I can suspend in muffins or cupcakes.

This recipe does not require the special pan, you can place the peach piece on top of the batter before baking. I have only tested this recipe with the spike method, so I am not sure how much the fruit will or will not sink when baking if you place it it on top of the batter .

Peaches have not been the best this year and I have patiently waiting for some good ones. Most of them are the size of plums. However,  I recently found a good selection at a roadside stand. Now I  wish I had bought more.

This muffin recipe yields a moist cake that envelopes a juicy peach chunk that was cooked in peach schnapps (or peach nectar for the non alcoholic).  Each is covered with a crumb topping and sprinkled with powdered sugar.  The recipe yields one dozen standard size muffins.

Peach Heart Muffins
by flourtrader

Ingredients/muffins
12 chunks of peeled peaches
1/4 cup of peach schnapps (or nectar)
2 eggs
2 egg yolks
1/2 cup or 8 tbs of butter (room temp)
3/4 cup sugar
1/4 tsp salt
1 tsp baking powder
2 tbs vegetable oil
1 tsp vanilla extract
1 3/4 plus 2 tbs flour

Ingredients/topping
2 tbs peach schnapps (or nectar)
1 cup flour
4 tbs melted butter
1/3 cup light brown sugar
1 tsp cinnamon

To make the muffins, grease the top edges of the 12 indentations in the pan.  Then line with cupcake liners or slide over the spikes (special pan) making a small hole in the liner.

Take a small saucepan and fill with peach schnapps (or nectar) and peach pieces.  Place over medium high heat and stir a little.  Then let mixture come to a boil.  Turn heat to low and let simmer for 6 minutes or until all pieces are cooked through. Remove and let cool.

While this is cooling, preheat the oven to 350 degrees.  Sift together the salt, baking powder and flour.  Set aside.

In a large bowl, beat butter and sugar for 3-5 minutes or until light and fluffy.  Add each whole egg, one at a time, beating for 30 seconds after each addition.  Do the same with the yolks and then beat in the vanilla extract and the vegetable oil.

After cooling the cooked peaches, separate them from the sauce.  Then stir the sauce into the batter.

Mix the dry ingredients into the batter in 1/3 increments until no more dry streaks remain.  If using a regular pan, pour the batter into the cupcake liners and smooth the top.  Then place 1 peach chunk on top.  If using a spike pan, slide one peach piece onto the the top of the spike.  Piece should be pierced all the way through, but the spike should not show sticking out the top. Spoon batter over the piece, filling each cavity.

Then make the crumb topping.  Whisk together all the dry ingredients until evenly distributed.  Pour in the schnapps (or nectar) and the melted butter. Stir with a fork until it becomes coarse crumbs.  Sprinkle topping evenly over muffins.

Place pan in oven and bake for 18-23 minutes or until top is a golden color.  A tester can also be used, but be sure that it is stuck into the cake part to test and not the peach piece.

Remove pan and let muffins cool for 1 minute and transfer to wire rack.  Dust with powdered sugar.

Tip: the easiest way to peel a peach is by putting it in boiling water for 2 minutes.  Then remove and let cool a little and wipe with a paper towel.  The towel will pull the skin right off.  This beats peeling with a knife and there is less of the peach wasted.

Monday, August 15, 2011

Eggnog Cookies


My trials and tribulations in the kitchen did not turn out for my intended recipe, so I had to go to my back up plan.
 
It is another "out of season" recipe.  It may be out of season, but you can get your hands on eggnog via Amazon.com.  For some reason I have been thinking about making something with eggnog for a few months.  Maybe it is because I am ready for the cold winter weather and am looking forward to the winter holidays.  The aroma and the taste of these cookies did get me into a holiday spirit.  They are just the thing to get you motivated about planning your Christmas this year.

Some people think it is funny, but I buy Christmas presents all year long. I am always asking my family what they want or make notes when they are discussing something they want or need.  Based on that, you will not find me in the crowd of last minute shoppers. Now more about this recipe...

The standard recipe for these cookies states to drop them on a baking sheet, but that method does not make for a pretty cookie.  I used a big tip and swirled onto the baking pan.  The batter flattened out when it baked and they came out pretty even sized.

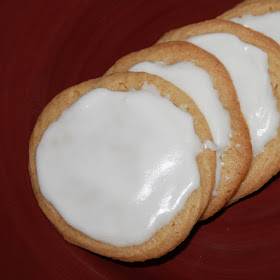
This cookie is not puffy, but more flat and crispy.  The eggnog along with the spices does make for a good flavor to the cookie.  Also, the rum flavored icing really pairs well with the eggnog flavor.  This recipe makes about 3 dozen cookies.

Eggnog Cookies
courtesy of All Recipes

Ingredients/Cookies
3/4 cup brown sugar
1/2 cup white sugar
3/4 cup butter (room temp)
2 egg yolks
1/2 tsp ground nutmeg
1/2 tsp ground cinnamon
1/2 cup eggnog
1 tsp baking powder
2 1/4 cup flour
1 tsp vanilla extract

Ingredients/Icing
1 1/2 cups of powdered sugar
3 tbs butter (room temp)
3 tbs rum


To make the cookies, first line two baking sheets with parchment paper.  Preheat the oven to 300 degrees.  Also prepare a piping bag by using a coupler and a large piping tip or cut off 1/4 of the corner of a zip lock bag.

Sift together the cinnamon, baking powder, nutmeg and flour.  Set aside

In another bowl, cream together the butter and both types of sugar.  Once the consistency is light and fluffy, beat in the vanilla extract, egg yolks and eggnog.  Then fold the flour mixture into the batter until no more dry streaks remain.

Then fill pastry or zip lock bag with batter.  Using the bag, push dough out into circles on baking sheet spacing about 1 inch apart.  The circles should be the size of quarters and any tips of dough sticking up should be pushed down.  Place filled baking sheet in oven and bake cookies for about 20-23 minutes.  Cookies will be done when edges are a golden color.

Remove pan from oven and let cookies cool on pan for 3 minutes.  Then transfer to a rack to finish cooling.  Repeat forming and baking process until there is no more batter.

To create the icing, place butter and powdered sugar in a bowl and beat until smooth.  Then add the rum and beat for 2 minutes more.  Once cookies have cooled, use a knife and frost as desired.  Icing should set up after 2 hours.

For additional flavor, you might want to sprinkle some toasted pecans on top of the icing before it sets. Enjoy!

Friday, August 12, 2011

Blue Cheese Crisps

Yes, it has been some time since I posted an appetizer or savory recipe.  I do not crave salty things as much as I do sweet, but the craving eventually comes along.  I wanted something cheesy, yet I did not want it to be deep fried.

Firstly, I have a lot of different cheeses in my fridge.  On those rare occasions when I go to Central Market, I take my time in the bread and cheese area.  They have such a great variety there and my husband is usually trying to rush me.  He is one of those "list" people, which means that impulse buying is out.  Sometimes that is a good thing and sometimes not.

Anyhow, if you have a craving for blue cheese or are looking for a quick appetizer, this recipe may be just the one.  The outside is fluffy bread dusted with smoked paprika and a sprinkling of cheddar and Monterrey jack cheese.  The creamy inside is a mix of 2 cheeses, the first being the tangy cream cheese and the other, blue cheese.  This mix provides a wonderfully sharp and salty flavor in every bite.

Outside of the taste, it is a pretty quick fix.  These morsels can be prepared in advance and frozen.    Once taken out of the freezer-just top and bake, no defrosting required!  The recipe states you can top and freeze but I am not sure how well the paprika or cheese on top will do in the freezer, so my suggestion is to top them the day you bake them. This recipe yields 48 appetizers.

Blue Cheese Crisps
courtesy of My Great Recipe Cards/packet 33

Ingredients
3/4 cup cold vegetable shortening, cubed
1/3 to 1/2 cup ice water
1 egg
2 tbs butter
3 oz cream cheese
2 tsp instant minced onion or 1 tsp onion powder
4 oz crumbled blue cheese
2 cups flour
1 tsp salt
smoked or regular paprika (for topping)
grated cheddar cheese (optional)

Line 2 baking pans with parchment paper.  Also, let your cream cheese, egg and butter come to room temperature before using.

Sift together flour and salt and set aside.  Fill another bowl with cream cheese, egg, onion or onion powder, butter and blue cheese. Beat on medium speed for 2 minutes or until it reaches a creamy consistency. Cover and refrigerate.

Add the cubes of shortening to the flour mixture and blend with a pastry cutter until it becomes a mass of pea-sized clumps.  Sprinkle 1/3 a cup of the ice water over dough and mix with a fork.  If it seems to dry, add more water until the dough holds together in a large ball.    Split dough into 2 equal pieces.

Lay one piece out on a floured surface and roll into a rectangle.  The rectangle should be 8X12.  Take out the filling from the fridge and smear 1/2 of it evenly on the dough, covering a space of 4 inches wide and 12 inches long.  The filling should leave a small border on the three edges, so the dough can be sealed without the filling coming out.  Place the rest of filling back in fridge. 

Take a spatula and run it underneath the dough that is not covered with filling.  This is to make sure that there is no sticking.  Then fold the dough in half, making it into a 4X12 inch rectangle. Press down lightly making sure all the air bubbles are out and seal the edges of the dough.

Preheat your oven to 425 degrees. Cover dough and place in fridge for about 30 minutes.  This will insure that the filling is not runny when you cut the dough.

After cooling, the dough will need to be cut. You can use a knife, a regular or crinkle edged pastry cutter or a small biscuit cutter.  I used a biscuit cutter and they turned out uniform in size but there was some wasted scraps.  Cut dough into 1 inch squares or circles and place pieces on baking sheet. These do not rise much, if at all, so they can be spaced closely together as long as they are not touching.

Sprinkle dough pieces with paprika.  If you opted to top with cheese, sprinkle that over the paprika.
Place pan in oven and bake for 12-15 minutes or until lightly browned.  Remove and let cool on pan for 5 minutes and transfer to serving tray. These are best served warm. Repeat process with remaining dough and filling.

If you plan to freeze, complete all steps up to and including the cutting instructions. Freeze in a single layer and wrap well.  To prepare, do not defrost, just put paprika and cheese (if desired) on top and bake.  Enjoy!

Wednesday, August 10, 2011

Jazzy Jam Cupcakes

Well, if any of you make your own jam, this recipe has a use for that!  Most of the times when you hear about jam being used in a baked good, it usually is a filling between cake layers or a pastry filling. However, in this case, the jam is actually mixed and cooked into the batter.

The cake part reminds me of a hummingbird cake. The subtle flavor of the pineapple jam goes well with the cinnamon and ginger spices.  The icing on top tastes much like a praline, especially since the edges are rolled in ground pecans.

I am now thinking of all the other jams that could be used to flavor a cake or cupcakes and the different icing combinations you can come up with. The only concern on a variation is the type of jam. It would need to be seedless, so you may have to do some straining. This recipe makes 3 dz cupcakes.

Jazzy Jam Cupcakes
by flourtrader

Ingredients/cupcakes
1 cup chopped toasted pecans
3/4 cup buttermilk
1 cup of pineapple jam
6 eggs
2 cups light brown sugar
1 cup or 2 sticks of butter (room temp)
3 cups flour
1/2 tsp salt
1/2 tsp ginger
1 tsp ground cinnamon
1 tsp baking soda

Ingredients/Frosting
3/4 cup dark brown sugar
1/2 cup heavy cream
1/4 cup butter
1 cup powdered sugar
1 1/2  tsp rum
1/2 cup ground pecans

To make your cupcakes, preheat the oven to 325 degrees and grease the top edge of the cavities of a muffin tin.  Line the cavities with paper liners.  Set aside.

With an electric mixer, beat butter until it reaches a creamy consistency.  Slowly add the light brown sugar and beat for an additional 2 minutes.  Beat in the eggs one at a time for about 30 seconds each.
Fold the jam in the batter with a wooden spoon until evenly dispersed, then beat for 1 minute.  Set aside.

In a medium size bowl, sift the flour, baking soda, cinnamon, salt and ginger together.  Fold in 1/4 of the dry mixture to the wet batter, then add 1/4 cup of buttermilk.  Continue with this process of adding and mixing in the dry mixture and buttermilk-ending with the addition of the last bit of flour.
Then stir in the pecan pieces.

Fill each cavity of the pan with the batter. Batter should be nearly to the top edge of each cavity.   Place pan in oven and bake until done, or when tester comes out clean.  Mine took about 20-25 minutes.

Remove pan and let cupcakes cool for about 3 minutes then transfer to a cooling rack.

To make the frosting, place first three ingredients into a saucepan over medium high heat.  Stir the mixture until the butter is melted.  As you stir, let the mixture come to a boil and then
boil for 3 minutes. Remove from heat and stir in rum.  Let cool for 20 minutes.

Then add wet frosting mixture to powdered sugar, stirring to blend.  Place a sieve over a large bowl and strain frosting mixture into bowl, using a spatula to stir out any lumps from the powdered sugar.

Using a spoon, smooth the frosting over the top of the first cupcake, making sure that the edges are covered. You should let excess frosting drip down into a bowl.  Place the cupcakes on a cooling rack for about 3 minutes for the icing to start to set up.  After about 3 minutes, roll iced cupcake edges into the bowl of ground nuts, pressing lightly. If icing still drips off into pecan crumbs, stop and wait another 3 minutes and resume rolling in the crumbs. I was able to frost about 6 cupcakes at each interval before rolling in nuts. After all the cupcakes are frosted and decorated with nuts, allow the frosting to set up. This should take about an hour.

Then you are ready to serve.

Monday, August 8, 2011

Chocolate Chip Swirl Coffeecake

I have not dealt with pastry that much and this recipe was difficult to form in the beautiful braid as the instructions stated.  One of the issues was that the filling kept falling out as you braided it.  I do not see how it couldn't since it was sliced open in the top prior to braiding.  It also did not help that I used chocolate disks instead of chips.  Anyhow, I have since found better instructions which still gives you a pretty loaf without all the difficulty.

The two things I did like about the recipe is that the yeast dough is easy to make and requires no kneading.  Also, the blend of flavors lends itself to something that is good at any time of day, not just breakfast.  I think that the filling for this cake is well balanced.  I do not like a lot of chocolate with bread, but this cake did meet my approval.

Below is the recipe with better instructions on how to form the cake/loaf.  The yeast dough does require an overnight rise, so start the day before you would like to serve this.

Chocolate Chip Swirl Coffeecake
courtesy of 365 Great Chocolate Desserts

Ingredients/Yeast Dough
3/4 cup milk
1/4 cup warm water (105-115 degrees)
3 eggs (room temp)
1 envelope (1/4 oz) yeast
1/2 cup or 1 stick of butter, cubed
4 to 4 1/2 cups flour
1/2 cup sugar
3/4 tsp salt

Ingredients/Filling
1 1/2 cups toasted and chopped walnuts
1 tbs cinnamon
1 tbs plus 1 1/2 tsp orange zest
6 oz or 1 cup semi-sweet choc chips
6 tbs butter
3/4 cup brown sugar

To make the dough, fill a cup with warm water and then sprinkle over the yeast.  Stir to dissolve and set aside.

Place a saucepan over high heat and add the milk.  Once it comes to a boil turn down to low and add the butter, salt and sugar.  Stir until butter is completely melted and remove from heat.  Let cool for 10 minutes.

In another bowl, whisk all the eggs together.  Then pour 1/3 of the milk mixture into the eggs and whisk for 30 seconds.  Continue the same process until all the milk is mixed in.  Take out a wooden spoon and beat in the yeast mixture until well blended.

Blend 1 cup of flour into the batter until no dry spots remain.  Continue adding flour in intervals until all is blended.  Dough will still be sticky, so flour your hands and form into a ball inside the bowl.  Grease top of dough and place plastic wrap over dough.  Then place aluminum foil over the top of the bowl and place in fridge overnight or up to 2 days.

The next morning, take dough out of fridge and punch down.

Mix together brown sugar, cinnamon, zest and walnuts in a large bowl. Melt butter in a microwave and stir into nut mixture.  Set aside.

Line a baking sheet with parchment paper.  Then flour a large surface and using a rolling pin, roll out dough to form a 8X22 inch rectangle, with a 22 inch edge closest to you.  Sprinkle the nut mixture evenly on the surface of the dough, leaving 1/4 of an inch border on three sides and 1/2 inch border on the 22 inch edge furthest from you .  Then sprinkle chocolate chips over nut mixture, leaving the same borders. Press the filling lightly into the dough.

Starting from the long side closest to you, roll up to form a jelly roll. Moisten end edge and pinch to seal.  Stretch edges to even out the tube if necessary. Then cut long tube into 2 pieces with each piece being 11 inches long.  Carefully lay each piece side by side and twist one over the other, braiding the tubes.  Bring each end of the braid around forming a circle or wreath and seal the ends.  Transfer wreath to prepared baking sheet, placing seam side down.  

Then cut slits in the top of each braided loop section about 2/3 deep, pushing slightly to open, exposing the filling. After the slits are cut, cover lightly and let rise in a warm place until doubled, about 40-50 minutes. 15 minutes prior to rise completion, preheat your oven to 350 degrees.

When rise is completed, place baking sheet in oven and bake cake for  20-25 minutes or until golden brown.  Serve warm or at room temperature.

Friday, August 5, 2011

Pink Squirrel Cheesecake

I have been thinking about this recipe for quite some time.  The delay has been because I have been searching for a particular liqueur.  In case you are not familiar with the bar drink called the pink squirrel it is a mixture of creme de cacao, creme de noyaux and whipped cream.  The first liqueur represents a chocolate bean with vanilla flavor and the second is apricot kernels (same as amaretto but not brandy based).

My problem was that I could not find creme de noyaux.  I went to upscale liquor stores as well as ones protected by burglar bars.  No one seemed to have it. Tired from all this running around, I decided it was time to give up the search.  Then I saw a bottle on my way out that really made me think that I really don't know anything about popular bar drinks.  I was a tall, greenish bottle and it said "Hideous Liqueur".  I did not see any flavor mentioned on it, but if it was hideously flavored, I was definitely not interested!

Anyhow I did some calling around and finally found a place that carried it, so now I am able to bring you this recipe!  This makes one 9 inch cheesecake.

Pink Squirrel Cheesecake
by flourtrader

Ingredients/ Crust
15 vanilla sandwich cookies, crushed
1/4 cup butter, melted
1/4 cup chopped toasted almonds

Ingredients/ Filling
1 tsp vanilla extract
1 tsp almond extract
1/4 cup creme de noyaux
1/4 cup creme de cacao
3 drops red food coloring
1/4 cup whipping cream
24 oz cream cheese (room temp)
3 eggs (room temp)
1 egg yolk (room temp)
1 tbs plus 2 tsp cornstarch
2/3 cup sugar

Grease bottom and sides of a 9 inch spring form pan.  Place nuts and cookie crumbs in a small bowl and mix.  Then pour in the melted butter and stir until no dry areas remain.  The mixture should be crumbly.  Empty bowl into spring form pan.  Using your fingers or a fork, press crumbs into the bottom of the pan.  Make sure it is evenly covers the entire bottom.  Set aside and preheat your oven to 400 degrees.

In a large bowl, whisk together sugar and cornstarch.  Then add the cream cheese and beat until smooth.  Add one egg and beat for 30 seconds.  Continue adding each egg and beating afterwards.  Then do the same with the egg yolk.

Pour both liqueurs, whipping cream and extracts into the batter.  Add the 3 drops of food coloring. Beat for about 3 minutes.  Then pour batter into the pan, covering the crust bottom. 

There are three intervals of time this cheesecake bakes in the oven.  The first session would be for 10 minutes.  Then turn the oven down to 200 degrees and bake for 1 hour and 15 minutes or until surface of cheesecake is no longer wet or glossy looking in the center.  Turn the oven off and remove cake.  Run a knife around the inside edge of pan and place back in the oven for an additional 30 minutes.

Remove pan and place on trivet or potholders in fridge and let chill, uncovered, overnight.  The next day it is ready to serve.  To make this extra special, you can garnish with white chocolate curls or use a stencil and powdered sugar to make a design on top.  I intended to spruce mine up, but I ran out of time.  Enjoy!

Wednesday, August 3, 2011

Oasis Tropical Mini Loaves

There are a lot of recipes out there that state "best recipe" or the "ultimate recipe".  Usually when I see that, I think that to the person that created or made the recipe believes that.  It is not that a poll of the world's opinion deemed it as such.

There are a lot of people in this world. As a food blogger, I am aware that most likely there are people out there that don't like my recipes.  However, I do not ponder on that, we can't please everyone.  I am pondering on the fact there are some people out there that do like them-but I would never go as far to say any of my recipes are the best or the ultimate.

Now this particular recipe is from a bed and breakfast.  The cookbook states that at the bed and breakfast this is their most requested recipe. "Most requested" is far more believable than the "best", so I decided to try it.

  One odd thing was that it called for 3 1/2 eggs.  In scaling down recipes, my method for 1/2 an egg is to crack the egg into a bowl and whisk lightly.  Then measure out 2 tablespoons for use in the recipe because one egg usually measures 1/4 cup.  The recipe also suggest using applesauce for a low fat version, but I used the canola oil. 

Other than that, I was very well pleased with the flavor and happy to bring you this recipe.  The batter, when baked, transforms into a moist, sweet bread flavored with cinnamon.  If that was not enough, then consider that it is loaded with mango, papaya, pineapple, macadamia nuts and apricots. The dried fruits are specialty ingredients, but after tasting these little loaves, I felt that those ingredients were well worth the trip to obtain and the expense.

If you do decide to make these, you may want to try your own variation of fruits since the batter is such a good base to start with.

One important point about this recipe is that the batter cannot sit, it has to go right into the oven.  This is because the ingredients start reacting with each other as soon as they are mixed. Doubling the recipe is not a good idea, if you do not have enough pans to bake all at once.  This recipe makes 5 loaves that are 6X3X2.  I used 6 loaf pans (steel rod connected) measuring 5X3X1 1/2 and had some batter leftover to make 2 jumbo muffins.

Oasis Tropical Mini Loaves
courtesy of Recipes from American Country Inns

Ingredients
1/2 cup chopped dried apricots or raisins
1/4 cup chopped dried papaya
1/4 cup chopped dried ginger (or any dried fruit, I used dried pineapple)
1/4 cup chopped dried mango
1/4 cup shredded coconut (I skipped this ingredient)
3/8 cup or 1/4 cup plus 2 tbs of chopped macadamia nuts
1 cup cubed mango
1/4 cup crushed pineapple
1 1/4 cups canola oil (or applesauce for low fat)
3 1/2 eggs (room temp-see comments above concerning 1/2 an egg measurement)
1 1/4 tsp vanilla extract
1/2 tsp salt
1 1/2 cups sugar
1 tbs baking powder
2 1/2 tsp ground cinnamon
2 1/2 cups flour

Prepare the loaf pans by greasing inside the cavity and line the bottoms with parchment paper.  Grease the face up side of the parchment paper.  Then dust all insides of the pans with flour.  Preheat the oven to 350 degrees.

In a large bowl, whisk together the oil, eggs and vanilla.  Then stir in the cubed mango and crushed pineapple. Set aside.

Take another bowl and sift the flour, sugar, salt, baking powder and cinnamon together.  Then add the dried fruits, coconut and chopped nuts.  Make sure that all these add ins are evenly mixed in.

Pour the dry mixture into the wet and stir just until no more dry streaks remain.  Fill each loaf pan equally with batter and place all inside the oven to bake at one time.  The loaves are done when the top is golden brown and a tester comes out clean.  Baking time should be about 30-45 minutes.  My batch took about 33 minutes.

Remove from oven and place pan(s) on rack to cool for about 5 minutes.  Then invert onto rack and take off parchment paper.  Flip loaves back over to finish cooling.  Loaves can be frozen up to one month.   

Monday, August 1, 2011

Potato Tarragon Bread

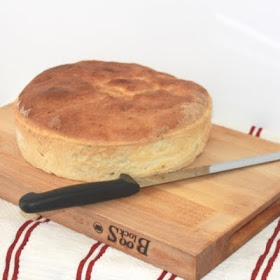
I recently went to a pot luck luncheon and was debating if I should bring dessert or something else.  I decided on making and bringing bread.  I am so glad that I did-the number of desserts were so many that the plates were hanging off of the edge of the table, almost too many to fit.  As far as bread was concerned there was only one store bought loaf there, so needless to say the homemade bread was a hit. I did find it strange however, that only me and one other person actually labeled our dish so people would know what it was.

This is another old recipe from Bon Appetit that I saved from years back.  As you can see, the recipe requires 2 cake pans for baking rather than 2 loaf pans.

The bread has a light flavor of tarragon and is moister than most since it does have potatoes in it.  Usually when I make bread my biggest concern is that the loaf will be heavy and dense.  I was well pleased with the texture.

One thing I always do is use rapid-rise yeast, even when they call for regular yeast.  I believe that rapid-rise yeast is a guarantee on making sure that your bread does rise as big if not bigger than it is supposed to.  This dough took a large bowl and by the time it got done rising, the dough had spilled  over the sides of the bowl, but it did not impact the end result. The original recipe just stated dry yeast and I have listed it as such in the ingredients below. You can use your own judgement on which type of yeast you want to use.

The other point I wanted to bring up was that I do not recommend using a stand mixer for kneading this dough.   After adding about 5 cups of flour to the batter, I realized that the amount of dough would be too much for a stand mixer.  I actually kneaded it by hand.  I remembered something in the original mixer instructions making a specific reference to the amount of dough allowed.

When I looked across at all the people at this luncheon it was nice to see that they had grabbed a piece of my bread to try.  I think that having people outside your family eat and enjoy something you have made is one of the biggest compliments.  

Potato Tarragon Bread
courtesy of Bon Appetit (prior to 2005)

Ingredients
1 1/2 cups buttermilk
1/2 cup water
1/4 cup milk
2 eggs, room temp
4 white potatoes, peeled and coarsely chopped
1/4 cup or 1/2 stick of butter, cut into cubes
2 envelopes of yeast
2 tbs sugar
5 tsp salt
3 tbs chopped fresh tarragon or 1 tbs dried
7 cups (or a little more) of flour

Using a large saucepan, cook potatoes in boiling salted water until fork tender.  Drain and empty into a heat proof dish.  Let cool for about 10 minutes.  The bread recipe needs 1 1/2 cups of mashed potatoes. For this task, a potato ricer, masher or hand mixer can be used.  However, since there will be some excess, you can choose just to mash the required amount for the recipe or mash them all.

Place 1 1/2 cups of mashed potatoes back into saucepan. Add buttermilk, 1/2 cup of water and butter cubes. Cook mixture over low heat, stirring constantly.  The butter will melt and the temperature should rise to about 120-130 degrees.  Remove from heat and set aside.

In another bowl, sift together yeast, sugar, salt and  1 1/2 cups of flour.  Whisk in the tarragon.  Then, with an electric mixer, slowly beat the potato mixture into the dry ingredients.  Add eggs and beat for 2 minutes, occasionally scraping down the sides of the bowl.  Then stir in the remaining flour, 1 cup at a time until a soft dough is formed.

Remove dough from bowl and place on a floured surface,  Knead by hand for about 10 minutes, until smooth and elastic, adding flour when needed.  Grease the inside of another bowl and transfer dough to the bowl, turning to coat.  Cover bowl and place in a warm, draft free area to rise for 1 hour.  It should double in volume.

Punch down and divide dough in half and shape into 2 rounds.  Place rounds on floured surface and cover and let rise for another 15 minutes.  During this time, grease the bottom and insides of 2 eight inch cake pans.

Place each piece of dough into a cake pan.  Cut slashes on the top of the bread in a crosshatch pattern.  There should be 2 horizontal cuts about 2 inches apart and 2 inches long in the center of each loaf.  Also, there should be two vertical cuts((same distance apart and size of horizontal) running through the horizontal cuts. Cover loaves and let rise again for another hour.

When only 15 minutes remain of the rising time, preheat the oven to 400 degrees. Once rising time is complete, brush top of loaves with milk and place pans in oven.  Bake loaves for about 40 minutes or until done.  Bottom of loaf will sound hollow when tapped and top will be brown.  Remove from oven and run a butter knife between the bread and the insides of the pan.  Turn out loaves onto rack and then turn face up and let cool completely.  Once cooled, slice and serve.