Foodbuzz

Monday, July 30, 2012

Juniors Triple the Fudge Brownies

A friend of mine recently had her 19th birthday and I had asked her what she wanted and the reply was brownies.  I had made a big batch, so there was plenty to go round.  They were well received by the whole crowd.  Even someone commented that they would have to take them home first and count all the nuts in them before anyone else can have them. I think I saw them scooping up on their fifth piece later that day, with no shame in admitting that they would not be sharing any pieces!

I would say after trying one of these rich and fudgy brownies, they even had me shamelessly reaching for a second piece.  The thickness as well as the layer of chocolate chips in the center really makes these perfect for the chocoholic in all of us.  These days it is hard to consider a plain brownie. The without nuts and without chocolate chips version does nothing but make me recall the word bland.

I have included the frosting recipe here, but I did not include these in the batch I made.  Considering it makes 6 cups to put on 24 brownies that are 2 1/2 inch square by 1 1/2 inch high, I did not want to induce anyone into a sugar coma.  Just by looking at the list of ingredients for the brownies, you can make a good determination about if you need to move on with the 1/2 inch layer of frosting on top.

Juniors Triple the Fudge Brownies
adapted from Juniors Dessert Cookbook

Ingredients/ Brownies
12 oz of mini semisweet chocolate chips
10 oz of bittersweet chocolate (at least 60% cacao)
4 cups coarsely chopped walnuts
2 tbs of vanilla extract
9 eggs
1 lb butter
4 cups sugar
2 tsp salt
3 1/4 cup of flour

Ingredients/Fudge Frosting
1 cup or 2 sticks of butter
1/4 cup vegetable shortening
1 tbs vanilla extract
3-4 tbs heavy whipping cream
2 tbs dark corn syrup
10 oz bittersweet chocolate (melted in double boiler)
1/4 tsp salt
4 cups or 1 lb confectioners sugar
1 tbs dark cocoa powder
whole pecans (optional)

Prepare two 8 or 9 inch square baking pans by buttering the insides.  Then line the bottom and two sides of the pans with parchment, leaving an overhang on the two sides.  Butter the face up sides and bottom of the parchment paper.  Preheat the oven to 325 degrees.

Place the butter and the chocolate in a large heavy saucepan and place over low heat.  Using a wooden spoon, stir until all chocolate and butter is melted and smooth.  Remove from heat to cool slightly.

In another bowl, sift together the flour and salt.  Set aside.  Place all eggs in the bowl of a stand mixer and beat with wire whisk blade for 3 minutes on high.  The eggs will turn a light yellow and thicken.  Keep the mixer running and add the sugar.  Once blended, turn the speed down to low and add the butter/chocolate mixer and beat until smooth.  Then add the vanilla extract.

Unhook bowl from mixer and take wisk blade out.  Pour in flour and mix with a wooden spoon until no dry streaks remain.  Then fold in walnuts until evenly mixed into batter.

Pour 1/4 of the batter into one pan and tilt pan until evenly spread.  Do the same with the second pan. Take the bag of mini chocolate chips and sprinkle them evenly over the batter in each of the pans.  Layer each pan again with 1/2 of the remaining batter.

Place in oven and bake for about 40-50 minutes, depending on the size of the pan.  Brownies are done when they are almost set in the center.  A tester should come out moist with some batter still clinging to it. Remove pans and place on rack to cool for about 1 hour.

Then run a knife down the two unlined sides of the brownies. Invert the pans and peel off the parchment.  Then invert onto cutting board to completely cool.

For the frosting, place the butter and shortening in the bowl of a stand mixer.  Cream together with the mixer on high for about 3 minutes.  After each minute, stop and scrape down the sides of the bowl.  Continue to beat and add the vanilla, cocoa and corn syrup.  Once blended, add the melted chocolate.

Sift together the salt and confectioners sugar in another bowl.

After the chocolate is evenly distributed into the batter, turn the mixer down to low.  Pour in 2 cups of sifted ingredients and beat on low until no dry streaks remain.  Add the rest of the sifted ingredients and blend.  Once smooth, beat in 2 tbs of cream for 3 minutes on high.  Continue to add the cream and beat until desired consistency is achieved.  Frosting should become very airy with a rich chocolate color.  Spread on cooled brownies.  Refrigerate for 1 hour so the frosting can set.

Then, if you prefer, top with one pecan half, rounded side up.  Press slightly into the frosting. Cut into squares with a serrated knife and serve.

Tips & Notes:
1. Like with most brownies, you want to avoid overbaking.
2. It is important that you divide the batter equally to make sure there is coverage of the chocolate chips.
3. For the top layer of the batter, it is best to spoon it on top and then smooth, that way there is less of a chance of shifting the chocolate chip layer.
4. I used two 8 inch square pans to achieve the thickness as shown in the picture.
                                  **LAST YEAR: Ivory Monkey Parfait**


Monday, July 23, 2012

Pineapple Polenta Cake


I have made a few recipes with pineapple.  However, I have always used canned and as we all know, fresh cut pineapple is more flavorful and juicy. So, after seeing fresh pineapple at the grocers, I could not resist buying some.

I am still perusing through Johnny Iuzzini's cookbook and I came across a recipe for pineapple-polenta cakes.  I do like the standard cake base for pineapple upside-down cake, but this recipe was a delicious step outside the box. The texture of the polenta cake made a great foundation for the juicy chunks of pineapple and was a smart choice for making individual cakes.

The best bite in this cake is when you get all three components: juicy pineapple, sweet polenta and a caramel topping.  I made sure that my pineapple pieces were nice and thick, so it would be evident in every bite.  Also, to really get the most out of this dessert, serve it warm.

This recipe requires four 3 1/4 inch or ten 2 1/4 inch rings.

Pineapple Polenta Cake
adapted from Dessert Fourplay

Ingredients/Fruit Layer
1/2 ripe pineapple
1/2 cup sugar
2 tbs water
pinch of salt

Ingredients/Cake
1/4 tsp salt
1/4 cup plus 2 tbs yellow cornmeal
1/4 tsp baking powder
1/3 cup flour
4 tbs or 1/2 stick unsalted butter
1 egg
2 large egg yolks
7 tbs sugar

Prepare the ring molds by covering the bottom with foil and wrapping up around the outside edges, so you have a little cake pan.  Place foil side down on baking sheet.  Set aside.

For the fruit layer, cut 1/2 pineapple into quarters vertically.  Then take each quarter and cut into 8 pieces and place in bowl.

Take a saucepan fill with sugar and water.  Place over high heat.  Let the sugar melt and cook until it starts to turn color.  Remove and swirl the pan so the sugar will brown even and place back on burner.  Continue with this process until the sugar mixture is a dark amber.  Remove from heat and fill one mold with about 1 1/2 tbs of sugar mixture for large and 2 tsp for small.  Lift and tilt mold so that all the sugar mixture evenly coats the bottom foil from edge to edge. Repeat the process so that all of the molds are bottom lined with the sugar mixture.

For the small molds, place one piece of pineapple on top of the sugar layer.  For the larger, use two pieces of pineapple. Preheat the oven to 375 degrees.

To make the cake batter, cream together the sugar and butter with a stand mixer fitted with the paddle. Mixture should be fluffy.  Scrape down sides and add one egg.  Beat for 30 seconds and scrape down sides.  Add one egg yolk and beat for another 30 seconds.  Then add the last egg yolk and beat until well blended.

In a separate bowl, sift together the flour, cornmeal, baking powder and salt.  Pour into the wet batter and stir with a spatula or wooden spoon until no dry streaks remain.  Take a small zip loc back and snip the corner.  Fill bag with batter and pipe between and over pineapple pieces in mold.  Then for larger molds add two more pieces of pineapple and smaller add one.  Then cover this layer with the batter as well.

Then pipe another layer of batter, smoothing out tops, molds should be 3/4 full.  Place in oven and bake for 8 minutes for the small cakes and 10 for the large.  Make sure the pan is rotated at the halfway point.  The cakes are done when a tester comes out clean.   Let cool for about 1 minute.

Remove from oven and run a knife around the inner edge of the mold.  Ivert mold onto serving plate and remove the foil and then remove the ring mold.  Then serve.

Tips and Notes
1. I used such big chunks of  pineapple that I needed an additional 1/2 recipe of the batter to fill mold and cover pineapple chunks.
2. Do not lift ring off of cake without taking off the foil, it will cause you to pull caramel as well as pineapple pieces off the cake.
3. I used a fork to help when peeling off the foil to make sure the topping came off the foil
4. Due to using more batter in my molds, the cakes took about 20 minutes to bake for 3 1/4 inch molds.
5. I made sure that the pineapple pieces were not stacked one on top of each other.  My first layer had two pieces placed vertically and the second had two pieces placed horizontally.
                            **LAST YEAR: Sunshine Grove Cookies**


Monday, July 16, 2012

Brown Sugar Peanut Squares


If you know me, then you know that I favor peanut brittle as well as pralines.  I was wanting to make some cookies and I did come across a few recipes, one had praline chunks mixed in and the other had crunched up caramelized peanuts on top.  Since the ones with the topper seemed to have more of the nut crunch for each cookie, I chose the ones with the topper.

These particular cookies hail from Columbia and are called "cucas" in their country.  The blend of brown sugar as well as peanuts are ingredients that seem to pop up a lot when it comes to baked goods for Central as well as South America.

The cookies, even though flat, have a soft texture.  They are basically a brown sugar
cookie and would be appropriate for high tea as well as brunch.  However, adding the frosting and caramelized peanuts on top, really turn them into an all around cookie.  It is those extras that really make me consider this recipe to be a definite keeper. Also, the texture contrast of the soft cookie with the crunch of the peanut topping makes for a great bite. This recipe makes about 30 cookies.

Brown Sugar Peanut Squares or Cucas
adapted from International Cookie Cookbook

Ingredients/Cookies
1 cup or 2 sticks of butter
1 egg
1 egg yolk
1 cup of packed dark brown sugar
2 1/3 cup flour
3/4 tsp baking powder

Ingredients/Topping
2 tbs packed dark brown sugar
3 tbs granulated sugar
1 cup finely chopped skinless unsalted peanuts
1/4 cup or 1/2 stick butter
1 1/4 cup powdered sugar

In one bowl, sift together the baking powder and the flour.  Set aside.  Fill another bowl with the butter and dark brown sugar and beat until smooth.  Add the egg and egg yolk and beat for about 1 minute.

Take out a wooden spoon and mix the sifted ingredients into the butter mixture until no dry streaks remain.  Place the dough between two long sheets of wax paper.  Roll out to a rectangle that it 1/4 inch thick.  I ended up with a rectangle 10X17 inches.  Place wax paper covered dough in the fridge to chill for 15-20 minutes.

During the chilling time, preheat your oven to 350 degrees.  Also prepare 2 baking sheets by lining with parchment paper.

Once chilled, remove the dough and lift off top sheet of wax paper.  Place back on top and flip dough over and then peel off the wax paper on the face up side.  Using a knife or pastry wheel, cut dough into rectangles, measuring 1 1/2 X 2 1/2.  Place each rectangle on a baking sheet about 1 1/4 inch apart. Continue to cut and place on sheet and then re-roll scraps, following the same instructions.

Place pan in oven and baked 8-10 minutes or until edges have turned more golden than the color of the cookie dough. Remove pan and let cool for 3 minutes and then transfer to rack to finish cooling.
 
For topping, place granulated sugar in a small saucepan over medium heat.  Once sugar has melted, stir in the peanuts.  Continue to stir and let cook until peanuts turn brown, crispy and fragrant.  If it starts to smoke and overheat, lift pan off burner to cool slightly and then place back on heat and stir. Do not let burn or over cook.  Empty contents into a heat proof bowl when done and let cool completely.  Once cool, you can break up any big clumps that formed.

In a small bowl beat together butter and brown sugar together until smooth.  Then beat in the powdered sugar until no dry streaks remain.

Then ice cooled cookies and immediately sprinkle the caramelized nuts on top and press them lightly into the icing.

Tips and notes:
1.  The nut mixture seemed too dry to me, so I added 1 tbs of glucose and let cook for about 15 seconds while stirring.
2. The frosting was too thick to spread, so I added some water and put in in a squirt bottle instead of spreading with a knife.
3. I used a 2 inch square cookie cutter, which was easier and insured straight edges.
                               **LAST YEAR- Black Casino Cake**

Monday, July 9, 2012

Croissant Pockets with Apricots and Brie

It has been some time since I have posted any bread type of recipe, so I decided I would try my hand at making croissants.  Since croissants do require some time, I wanted to make something out of the ordinary instead of the standard.

Since the details of the whole process is lengthy, I have done one post for the dough and this post here for the filling baking and assembly.  The dough in the ingredients is linked back to the original process of making it.

The filling is what really puts these over the top. Brie and walnuts are a pretty tasty blend.  However, this recipe does not stop there, it also includes brandied apricots.  These do have a way of really making your taste buds come alive.  In one bite you get buttery pastry, melted brie, apricots,walnuts and brown sugar.

A perfect treat for brunch, special occasion or just to brighten up any morning.

Croissants Pockets with Apricots and Brie
adapted from Great Coffee Cakes

Ingredients
1 batch croissant dough
8 oz ripe Brie Cheese, cut into 16 slices, 1/4 inch thick and 3 inches long
9 oz dried apricots, each piece cut into 1/4ths
1-2 tbs brandy
1 cup water
2 tbs sugar
4 tbs butter (softened)
1/2 cup toasted walnuts
1/4 cup and 2 tbs light brown sugar
1 egg beaten with 1 tsp water (egg wash)
1/4 cup milk
powdered sugar (for dusting)

Put the apricots and water in a small saucepan and bring to a simmer.  Cover and cook for about 20-25 minutes.  Your apricots will turn soft and some of the water will evaporate.  Drain the apricots and reserve the liquid.

Pour the liquid back into the saucepan and add the brandy and sugar.  Cook over medium heat until sugar has dissolved and brandy has evaporated, which should take about 3-5 minutes.  Remove from heat.  Put the apricot pieces back into the liquid and stir to coat.  Transfer mixture to a heatproof bowl and let cool.   Once cooled, stir in the walnuts and set aside.

Place the butter and sugar in a small bowl and blend with a fork until the mixture has a paste like consistency.  Set this item aside also.

Line 2 baking sheets with parchment paper.

Take out the dough and cut it in half and return one piece to the fridge.  Place the other piece on a flat, floured surface.  Roll the dough into a rectangle, measuring 10x12 inches with the 12 inches horizontal to the counter.  Then cut the dough into 8 rectangles, measuring 3x5.

Working with one small rectangle at a time, even out the shape to an even 3x5 size with the 3 inches horizontal to the counter.  Spread one teaspoon of the sugar/butter blend over the center of each piece, leaving a 1/4 inch border around the edges.  Then cover with one tablespoon of the walnut/apricot blend.  Take a slice of brie and place in center of dough so each end touches the edges of the 3 inch width. The folding with be much like a letter.  Fold the bottom of the dough up and over, with the end covering the brie.  Then brush the top dough edge not covered by the filling with the egg wash.  Fold this end of the dough so it overlaps the other and pinch to seal.  Place seam side down on prepared baking sheet.

Continue with the process for the additional 7 pieces of dough and the remaining dough in the fridge.  The end result should be 16 filled croissants, 8 placed on each sheet.  Brush the tops and sides with milk and let rise 20 minutes.  Repeat the brushing and rise time for 1 more time and preheat the oven to 400 degrees.  Brush again with the milk and let rise for another 20 minutes.

Brush pastries with egg wash from bottom to top, being careful not to get any on the parchment or baking sheet.  Place pans in the oven and bake for 10 minutes.  Reduce the oven temperature to 350 and bake for 5 minutes and turn.  Bake for an additional 5 minutes.

Remove and place pan on racks to cool for about 20 minutes.  Dust with powdered sugar prior to serving.

Tips and Notes:
-after filling and folding you can freeze for later baking, just be sure to thaw it at room temperature before baking
-sides are not to be sealed, however, if you see that some cheese has melted out, you can take a spatula and push it back inside.  Just do it right after removing from oven.
-The Brie might not measure out perfectly to 3 inches for every piece, so you can put pieces together to make the strip the right size.
-try not to flatten your croissants when assembling, it impedes the rising.
-do not over fill.  Too much butter/sugar will cause pools to run out and make your croissants soggy 
                           **LAST YEAR:Honey Bee Cookies**

Croissant Dough

This is the first part of a recipe for filled croissants.  Since the dough requires a long chilling time, I have made a separate entry here, just to create the dough.  There is another post on this day which completes the full recipe for the filled pockets. This makes 16 croissants.


Dough For Croissant Pockets
adapted from Great Coffee Cakes

Ingredients/Croissant Dough
For Sponge
1 1/8 tsp yeast or 1/2 package
1 1/2 tsp sugar
1/2 cup flour
1 cup milk

For dough
2 cups flour
2 tbs plus 2 tsp sugar
1 tsp salt 
1 tbs soft butter

For butter blend
2 sticks of butter
2 tbs flour

For the sponge, warm the milk in a saucepan over low heat until it reaches a temperature of 110 to 115 degrees.  Mix in the sugar and remove from heat.  Sprinkle the yeast over the top and cover. Let sit for 5 minutes.  Mix with a fork.  Then cover and let sit for another 5 minutes. By this time, the yeast should be dissolved and foamy.

Stir in the flour.  It may be lumpy, but thats ok.  Cover the mixture and let stand for 25-30 minutes.

To prepare the butter, take out a piece of wax paper and place it on a flat surface.  Dust the wax paper with 1 tbs flour.  Then place the sticks of butter on top and press together.  Sprinkle more flour on top and then pat it into the butter.  Using a rolling pin, roll the butter into one big 4 inch square, using additional flour as needed.  Cover with plastic wrap, place on plate and put in refrigerator.

For the dough,  sift together the flour sugar and salt.  Then pour the dry mix into a bowl of a stand mixer fitted with a paddle attachment.  Then add the tablespoon of the soft butter and blend on low for 30 seconds.  Turn off the mixer.  Pour in the sponge and mix on low until no dry streaks remain.  Be careful not to over mix.

Place the dough on a floured surface and knead for six turns.  Pat it into a 4 inch rectangle and let rest for a few minutes.  Then, using a rolling pin, roll the dough into a 6X8 inch square.  The six inch side should be horizontal with the counter.  Take out and place the butter in the center of the square of dough.  Fold the bottom portion of the dough over the butter, then fold down the top portion of the dough and pinch the seam together.  Also, seal the side edges of the dough together.

This dough will require 4 quarter turns and a roll out as follows:

Going in the clockwise direction, give the dough a quarter of a turn. Roll it out to a 10x6 rectangle with the 6 inch side horizontal to the counter top.  Any butter that seeps through should be coated with flour to seal.  Flip the dough over and fold the dough into thirds, letter style. Make sure all your edges are even.  Cover in plastic and place on cookie sheet in refrigerator.  Let chill for 20 minutes.

Take the dough out and start with having the open seam to your right.  Repeat the above process 3 times.   Chill for at least 6 hours or up to 3 days before moving on to the filling and baking stage.

Monday, July 2, 2012

Lemongrass Bars

I still had some lemongrass left over from my last creation, so I decided to make these lemongrass bars.  The good thing about lemongrass is that it does last for about 10 days in the fridge.

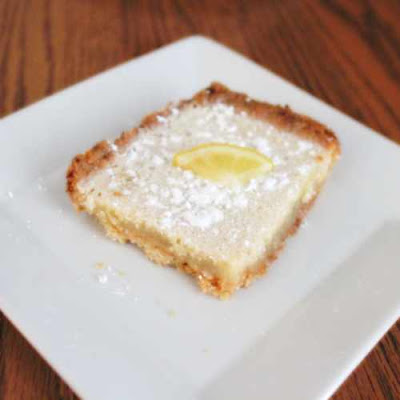
This particular bar has a coconut shortbread base and a lemony topping.  The filling texture does resemble more like a key lime pie than a baked bar.  The usage of lemongrass does make these bars quite different from the standard.  It reduces the tartness of the lemon and adds hints of mint and ginger.

While I do like lemon bars, I am pretty picky.  I do not like them to be dry, nor do I like them to be too strong.  Some I have tasted have been pretty bitter.  These bars do not have those issues.  Also, the extra flavors do bump them up to more of a gourmet quality dessert.

Lemongrass Bars
adapted from Bon Appetit

Ingredients/Crust
1 cups sweetened coconut
1/2 cup plus 3 tbs butter (room temp)
1/2 cup powdered sugar
1 1/2 cups flour
1/2 tsp salt

Ingredients/Filling
1/4 cup flour
1 1/4 cup sugar
3 finely chopped lemongrass stalks (outer layer removed, bottom 4 inches only)
3 eggs
5 tbs lemon juice
powdered sugar (for dusting)
pinch of salt

Preheat the oven to 350 degrees.  Prepare 9x13 inch pan by buttering the interior.

To create the crust, mix together powdered sugar, coconut, salt and flour.  With an electric mixer on medium, beat in the butter until the mixture clumps.  Pour into your prepared pan.  Place waxed paper over the dough and flatten it evenly into the bottom of the pan as well as about 1/2 an inch up the sides.  Bake for about 25 minutes.  Crust will be golden brown with darker edges.  Remove pan from the oven and place on cooling rack.

Reduce the oven temperature to 325 degrees.  Using a food processor, pulse together the lemongrass and the sugar.  The lemongrass should be finely ground with the sugar, which should take about about  a minute.  Add the lemon juice and process again for 30 seconds.  Put the eggs into the mixture and run the processor for about 10 seconds.  Lastly, pour in the flour and salt and pulse until smooth.

Pour the filling over the hot baked crust and place in oven.  Bake for about 22-23 minutes.  Remove and place on rack to cool completely.  Cut into pieces and dust with powdered sugar.
                                    **LAST YEAR: Austrian Apple Twists**