Foodbuzz

Saturday, December 31, 2016

Chocolate Tangerine Cannoli Cupcakes

There are a lot of cupcakes out there that are what I call as "whimsical". You know the type, the ones that look like santa claus or are smiley faces. Nothing against those, for those attract a lot of kids and kids are a cupcake eating bunch.

These particular cupcakes are not whimsical at all. In fact, they are very much adult in flavor. Yes, the chocolatey batter full of chocolate chips may be kid appealing, but add the cream cheese/ricotta filling loaded with tangerine zest and we start to get away from the kid appeal. Top with some ganache and a slice of candied tangerine zest and the end result is not only delicious but very appealing to adults.

The chocolate with the tangerine puts this cupcake in a sophisticated, more gourmet category. However, the recipe only makes a dozen cupcakes, so be sure to adjust recipe if you are expecting a crowd.

Chocolate Tangerine Cannoli Cupcakes
adapted from Food Network

Ingredients/Candied Tangerine Slices
3 tangerines (making a total of 12 slices)
granulated sugar

Ingredients/Cupcakes
3/4 cup of mayonnaise
1 cup hot water
1/2 cup chocolate chips
1 cup sugar
2 tsp baking soda
2 cups flour
3/4 tsp salt
1/3 cup cocoa powder 

Ingredients/Filling
1 cup ricotta cheese
1/2 cup cream cheese
zest from 3 tangerines

Ingredients/Ganache
1/2 cup heavy whipping cream
1/2 cup plus 2 tbs chocolate chips

Start by making the garnish. Fill the bottom of a frying pan with sugar, making the layer about 1/4th an inch thick. Then lay the slices of tangerines on top, making sure that they do not overlap. Then pour one spoonful of sugar over the top of each slice and smooth out until completely covered. Place frying pan over medium high heat and let cook. As it cooks, take out a cookie sheet and line with parchment paper.

The cooking will cause the sugar to melt and start to change color. Once it reaches a caramel color, quickly remove frying pan from heat. Take slices out of pan using tongs and place on parchment paper. Set aside.

Prepare for the cupcakes by preheating the oven to 325 degrees. Grease the top edges of your cupcake cavities and line with baking paper liners.

Sift the cocoa powder in the bowl of a stand mixer. Add hot water and mayonnaise and whisk together. Then change the attachment from a whisk to a paddle and add the sugar and beat together. In another bowl, sift together the flour, baking soda and salt. Take bowl out of the stand mixer and blend the sifted ingredients into the chocolate batter. Lastly, fold in chocolate chips.

Spoon batter evenly into cupcake cavities. Each cavity should be about 2/3 full. Place pan in oven and bake until tester comes out clean. Baking time should be about 25-30 minutes. Let cupcakes cool in pan on rack for about 3 minutes then transfer to cooling rack. Let cool completely before filling.

As the cupcakes are cooling, the filling can be made. Fill the bowl of a stand mixer with the cream cheese and ricotta cheese. Beat together until smooth and blended. Add the tangerine zest and sift in the powdered sugar. Beat again until zest is distributed evenly and there are no more streaks of sugar. Set aside.

Take the cooled cupcakes and cut a small core out of the center of each, using a paring knife. Prepare a bag of filling by snipping off the corner of a freezer bag and adding the filling to the inside of the bag. Hold the bag upright, with the open corner of the bag hovering over the empty core of a cupcake and squeeze the top of the bag, filling to the core to the top. Repeat this process until all cupcakes are filled. Set aside.

Make the ganache by filling a saucepan with the heavy whipping cream. Also, pour the chocolate chips into a shallow bowl ( much like a flat bottom heat proof pasta bowl) and smooth them out evenly. Place the saucepan over medium high heat. Once the cream has reached a boil, remove from heat and pour over chocolate chips. Stir until chocolate chips have melted and mixture is smooth. Place in refrigerator about 5 minutes to thicken. Spoon a dollup of ganache on top of the cupcake, to the left or the right of the filling. The chocolate should not cover the white/ cream filling in the core of the cupcake.

Lastly, place the candied tangerine slice on top. It can lay on top, be folded, stuck in the cupcake or stuck into the filling. Depending on how you place the garnish, it may need to be propped up with toothpicks until it sets with the ganache.


Tips and Notes:
1. Both the filling and the ganache recipe were scaled down to eliminate waste. You can always make more if needed.

2. The original filling recipe did not include cream cheese but due to the dry nature of ricotta, the cream cheese was added.

3. Feel free to experiment with other citrus when creating the filling.
                                            **LAST YEAR:Cherry Pie Bites**

             HAPPY NEW YEAR TO ALL-MAY 2017 BE YOUR BEST YEAR EVER!! 


Sunday, December 18, 2016

Chocolate Custard Tart


The smaller version of a fruit pie is a fruit tart. However, when it comes to cream pies, we do not think of cream tarts. There is a lot of different cream pies that can be converted over. So if you are ever wanting a taste of a cream pie, but a whole pie seems to much to have around-consider a tart.

With that thought, I bring you a recipe for a chocolate custard tart. One of the highlights of this special dessert is the silky dark chocolate cream filling. The other is an oatmeal shortbread shell with grated chocolate. If that is not chocolatey enough, the interior is brushed with chocolate ganache. Lastly, each piece has a dollup of fluffy whipped cream on top.

Lots of chocolate and lots of texture contrast come together for a delicious, one of a kind dessert. This makes one 10 inch tart or 12 small tarts (3-4 inch rings). Be sure to allow for the 8 hours needed for the custard filling to set up prior to filling the tarts.

Chocolate Custard Tart
adapted from The Olives Dessert Table

Ingredients/Chocolate Cream Filling
6 egg yolks
4 1/2 cups of milk
1 tbs vanilla extract
8 oz bittersweet chocolate (chopped or chips, room temp)
3 tbs butter
4 1/2 tbs cornstarch
3/4 cup plus 2 tbs sugar
1/2 tsp salt

Ingredients/Oatmeal Crust
1/2 tsp salt
1 cup flour
2 cups old fashioned rolled oats
1 cup or 2 sticks butter (room temp)
1/2 cup light brown sugar
1/2 cup grated semi-sweet chocolate (optional)

Ingredients/ Chocolate Ganache
1 cup semi sweet chocolate (chopped or chips)
1 cup heavy cream

Ingredients/Whipped Cream
2 tbs sugar
1/2 tsp vanilla extract
2 cups heavy cream
2 tbs of cream stabilizer (optional)


The custard will be the first component to make. Fill a bowl with the sugar and sift in the cornstarch and salt. Mix together and pour in 1/4 cup of milk. Stir batter until blended. Place the egg yolks in the bowl of a stand mixer and whisk the yolks together. Empty the milk mixture into the bowl of egg yolks and whisk together. Set aside.

Take the remaining amount of milk and pour into a saucepan over medium heat. Let come to a boil and remove. Turn the stand mixer on medium low and as it mixes, add the hot milk in a steady stream. Place a strainer over a saucepan and pour batter from the stand mixer bowl into the strainer. Discard the solids.

Take out a shallow heat proof bowl and add the butter. Microwave until butter is melted. Mix the vanilla extract into the melted butter. Add the chocolate and form an even layer on the bottom of the bowl. Pour the milk/egg mixture over the chocolate. Let sit, without stirring, for about 5 minutes. Once the five minute interval has passed, mix the custard until all is combined.

Empty custard into another shallow bowl, smoothing out evenly. Place plastic wrap over the custard and edge of bowl. Place in refrigerator for a minimum of eight hours and a maximum of 2 days.

For the oatmeal crust, start by creaming the butter and sugar together in the bowl of a stand mixer. Using another bowl, sift together the flour and salt. Stir the oats and chocolate (optional) into the sifted mixture. Empty the dry ingredients into the creamed butter/sugar mixture. Stir together until combined, making sure the oats and chocolate are evenly distributed throughout the mixture.

Flatten mixture into a disc and cover with plastic wrap. Refrigerate for 1/2-1 hours. While the dough is chilling, preheat the oven to 350 degrees and prepare a flat surface by dusting lightly with flour. Remove the chilled dough and roll out into one circle (about 10-10 1/2 inched in diameter) if making one tart. For several small, divide the dough into 12 of the same sized pieces. Each piece will be formed while the remainder are in the fridge. Take each piece of dough and roll out into a circle, exceeding your tart diameter by 1/2 an inch.

Place each piece of dough into the mold and press into the sides and bottom evenly. To have a smooth edge to the tart, press the excess dough down over the top edge of the tart, using the edge as a cutter.  Refrigerate lined tart(s) for a minimum of 30 minutes or covered, up to 3 days.

Once chilled, tarts are to be prepared for baking. Cover dough tightly with foil and fill with pie weights, beans or rice. Bake the covered tart shells for about 14 minutes. Remove from oven and carefully remove weights and foil. Place back in oven for an additional 2-3 minutes. Remove and let cool completely.

As it cools, the ganache can be made. Place the chopped chocolate or chocolate chips evenly in the bottom of a shallow bowl. Set aside. Take out a saucepan and fill with the heavy cream. Put filled saucepan over medium high heat and let the cream come to a boil. Remove saucepan and pour hot cream of chocolate. Cover and let sit for 2 minutes. Then uncover and whisk until smooth.

Using a pastry brush, coat the inside of the oatmeal shell with the ganache. Refrigerate coated shells for about 30 minutes. Then fill tart shell(s) with chocolate custard, mounding slightly beyond the height of the shell. Place in refrigerator again. Also place a steel bowl in the freezer for 30 minutes for the whipped cream topping.

Remove chilled bowl from the freezer and fill with all whipping cream ingredients. Beat until light and fluffy, about 3-5 minutes. Then prepare a piping bag and fill with whipped cream.

Take out tart(s) and pipe cream on top. Now it is time to serve.

Tips and Notes:

1. Dough for shell was difficult to work with due to whole oats and chocolate. Consider grinding up oats after measuring and eliminating the chocolate in the dough, for a smoother crust.

2. You may have excess filling if not mounding high enough. Should you not want such depth of filling try cutting back ingredient measurements.

3. I found I had too much ganache and whipped cream. Since they both do not take that long to prepare, start by making 1/2 the amount. You can always make more, this way you will not have so much wasted as excess.

4. The best shallow bowls to use are microwave safe pasta bowls.
                               **LAST YEAR:Dark Chocolate Fingers**         

Sunday, December 11, 2016

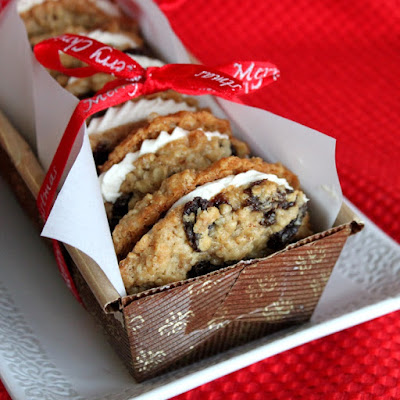
Spiced Oatmeal Raisin Sandwich Cookies


Oatmeal cookies were not my first pick of cookies when I was growing up. Actually, I do not think they were a pick at all. However, like most people as they grow older, tastes and preferences change when it comes to food. Now, I believe that an oatmeal cookie (when made just right) can be a first pick.

I like the chewy type of oatmeal cookie. When the batter and the raisins mirror the same type of texture-it is nothing short of delicious. Raisins, in my opinion, should always be "plumped" or rehydrated prior to use. No one likes a tough, hard raisin in a cookie.

While these sandwich cookies may have you thinking a great snack for the kids, think again. With raisins soaked in pumpkin moonshine and bourbon cream in the filling, they are very much adult. Also, the flavor addition makes these a perfect addition to the holiday dessert table. This recipe makes about 3 dz sandwich cookies, depending on the size of the cookies made.

Spiced Oatmeal Raisin Sandwich Cookies
adapted from Omni Nashville Hotel

Ingredients/Cookie
1 egg
1 tbs molasses
1 tbs vanilla extract
1 1/4 cups or 2 1/2 sticks of butter
1/2 cup granulated sugar
1 cup brown sugar
1 1/2 cups of flour
1/2 tsp salt
3/4 tsp cinnamon
3 cups oats   
2 cups hydrated raisins (instructions/ingredients below)

Ingredients/Raisins
2 cups raisins
1 cup pumpkin spice moonshine
1 cinnamon stick

Ingredients/Filling
3 tbs bourbon cream
1 tbs plus 1 1/2 tsp vanilla extract
pinch of salt
3/4 cup or 1 1/2 sticks of butter
3 cups powdered sugar

Start by plumping the raisins. Pull out a saucepan and place over medium heat. Add cinnamon stick and moonshine. Let the mixture heat up and flavors meld while stirring. The cook time will be about 4-5 minutes. Remove from heat and stir in raisins. Let sit for about 10 minutes, then strain and place raisins in a bowl and discard cinnamon stick. Set raisins aside to completely cool.

Before your start on the cookie batter, preheat the oven to 325 degrees and line baking sheets with parchment paper.

Sift together cinnamon, flour and salt in a small bowl. Then stir in the oats. Set aside.

Fill another bowl with both types of sugar and butter. Beat for about 2 minutes, stopping to scrape down the sides of the bowl. Add the egg, molasses, and vanilla extract. Beat again on medium speed for another 2 minutes. Remove bowl and fold the dry ingredients into the batter. When there are no dry streaks of flour in the batter, fold in the raisins.

Scoop batter out in 1 oz or tablespoon size mounds and drop onto baking sheet about 1 1/2 inches apart. Place baking sheet in oven and let bake for about 8-10 minutes. Cookie edges and bottom will be a golden brown when done. Let cookies rest on baking sheet for 2 minutes then transfer to cooling rack. Let cool completely prior to filling.

To prepare the filling, sift powdered sugar into the bowl of a stand mixer. Then add the butter and beat for 3 minutes until smooth. Add the bourbon cream, salt and the vanilla extract and beat again for an additional 2 minutes.

To assemble, pair up the cookies so they match in size. Then pipe a tablespoon of icing in the center of the flat side of one cookie. Place another cookie on top and press together until filling is near the outer edge of the cookies.

Tips and Notes:
1. Cookies do not spread, so it is best to flatten prior to baking to get the proper form for sandwiching together.

2. The liquor store may not have the exact thing you are looking for, so just look for something that has the spice of the season. I found gingerbread whiskey. When choosing the cream liquor for the filling, it is best not to choose one that has an added flavor. Since the liquor is not baked for the filling, a flavored one will be to strong.

3. If you prefer not to have a buttercream filling, there are many other options. You can use stabilized flavored whipped cream, cream cheese or marshmallow.

4. These cookies are also great without sandwiching them.

5. To make these without liquor, dissolve 1 tsp of  pumpkin or gingerbread spice in one cup of water for the raisins and use 3 tbs of milk instead of the bourbon cream in the filling. The other option is to use flavored coffee syrup and/or creamer.
                                      **LAST YEAR: Red Velvet Twinks**

Sunday, December 4, 2016

Peanut Butter Bundt Cake


My husband is very addicted to the combination of peanut butter and chocolate. Surprisingly, there have been very few posts on my blog with this flavor combination.

This peanut butter cake has a very tender crumb, which can be attributed to the cake flour in the mix. Having the peanut butter in the batter created a crispy caramel crust on the edges of the cake.

After creating this, I decided the next time I make this, it will be in loaves instead of a bundt pan. That way the batter will take less time to bake and not be as toasty on the edges. This one was a little too crispy in an effort to make sure the cake was done in the center.

Also, the peanut butter does pair better with milk chocolate instead of semi-sweet. Semi sweet is tasty but I found it a little too bitter strong when paired with the peanut butter. Another option is to put mini chopped peanut butter cups in the batter instead of icing the cake.

Peanut Butter Bundt Cake
adapted from Penzey's Spice Catalog

Ingredients
5 eggs
1 cup milk
2 tsp vanilla extract
1 cup butter
1 cup creamy peanut butter
3 cups sugar
3  cups cake flour
1/2 tsp baking powder
1/2 tsp salt

Icing
3/4 cup heavy cream
2 cups mini semi sweet chocolate chips

In this particular recipe, you do not preheat the oven. Prepare a 10 inch bundt pan by greasing and flouring the interior. Place a cooling rack over a sheet of wax paper.

Sift together the cake flour, baking powder and salt. Set aside.

Fill the bowl of a stand mixer with butter and sugar. Cream both ingredients together by beating at medium speed for about 2 minutes, stopping occasionally to scrape down the sides of the bowl. Add the peanut butter and beat until thoroughly blended. Add one egg to the batter and beat for 30 seconds. Repeat this process with each egg, until all eggs have been beaten into batter. Then add the vanilla and beat for about 30 seconds.

Fold in 1/3 of the sifted ingredients. Add 1/2 cup of milk and stir until completely blended. Fold in 1/2 of the remaining sifted ingredients then stir in the remaining milk. Lastly, add the rest of the sifted ingredients and blend together.

Scoop the batter evenly into the prepared pan and place in oven. Then turn the oven on to 375 degrees. Let cake bake for about 1 hour and 10 minutes and use tester to see if done. Cake may take up to 1 hour and 35 minutes to bake.

Once done, remove pan from oven and let cool for 20 minutes and invert onto cake rack to finish cooling.

For icing, place chips in a heat proof bowl with a wide bottom (like a pasta bowl). Level the chips out evenly in the bottom of the bowl. Fill a small saucepan with the heavy cream. Place over medium heat and let heat up. Once you see the first bubble from boiling, remove from heat and pour over chocolate chips. Let sit for 2 minutes and then stir until smooth.

Pour over cooled cake and let rest for 3 minutes. Scrape any chocolate off of the wax paper and spoon over cake. Wait 2 hours for icing to set before slicing and serving.

Tips and Notes:
1. A tube cake pan can also be used.
2. If you do not have cake flour, use regular flour plus cornstarch. Remove 1 tbs of flour per cup and replace with 1 tbs cornstarch. Sift together 5 times to insure cornstarch is dispersed evenly through flour.
3. Chocolate chips should be at room temperature for easier melting.
4. If you find that your cake does not come out when initially inverting, try setting the cake pan in a cold water bath a few minutes to quickly cool it for release.
                                     **LAST YEAR: Cheesecake Swirl Bars*


Sunday, November 27, 2016

Cabana Banana Bread


While citrus fruit does have a lot of acidity, it does have its place in sweet breads and muffins. Most of us do enjoy biting into a blueberry muffin and getting that unmistakable pop of juice and tartness from the berries against the moist vanilla cake.

Now this particular recipe does not contain any berries. It is the crushed pineapple which lends itself to the same flavor experience. Instead of a backdrop of vanilla cake, it is banana bread that is laced with a little coconut flavor. One slice is quite a mixture of tropical flavors and textures. The sprinkle of coconut adds a wonderful touch of chewiness to the other textures, so don't leave this step out.

This tasty banana bread is great when paired with tea or coffee to start your day, but it also makes for a tasty afternoon snack. The recipe makes 2 -9x5 inch loaves, one for your family and one to give as a gift.

Cabana Banana Bread
adapted from Recipelink.com

Ingredients
4 mashed medium size bananas
1/2 cup of shredded sweetened coconut
1/2 cup of crushed pineapple (well drained)
1 cup pineapple yogurt
1/2 tsp coconut extract
1 tsp vanilla extract
4 eggs
1/2 cup vegetable oil
1/2 cup butter, room temp.
2 cups packed light brown sugar
2 tsp baking soda
3 cups flour
1/2 tsp salt

Preheat the oven to 350 degrees. Grease the interior of 2 loaf pans and line bottom and two longest sides with parchment paper. Grease the surface of the parchment paper also.

In a medium size bowl, sift together the salt, flour and baking soda. Set aside.

Fill a bowl of a stand mixer with the butter and brown sugar. Beat until mixture resembles wet sand. Add the mashed bananas and mix on medium speed until well blended. Add the eggs, one at a time and beat for 30 seconds after each addition. Then stir in the vegetable oil.

Add both extracts, yogurt and crushed pineapple to the batter. Beat on medium speed until evenly distributed, about 1 minute. Remove bowl from stand mixer and fold in sifted ingredients. Fill the prepared pans evenly with the batter. Sprinkle 1/4 cup of coconut evenly over the top of each loaf.

Place in oven and bake for 50-60 minutes or until tester comes out clean. Place pans on rack to cool for 5 minutes. Remove loaves from pans and let cool another 15 minutes and take off of parchment paper.  Let cool completely prior to slicing and serving.

Tips and Notes:
1. The more ripe the bananas the stronger the banana flavor.
2. This batter can be made into mini loaves, just adjust the bake time.
                                   **LAST YEAR: Gothenburger Cookies** 

Sunday, November 20, 2016

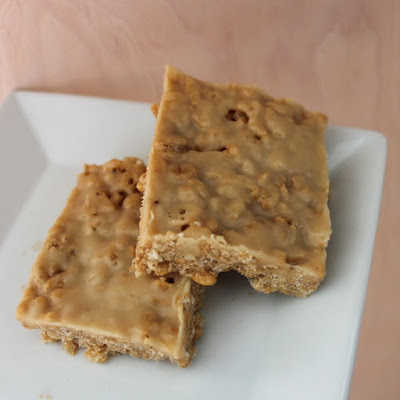
White Russian Crispy Bars


Cereal treats may remind you of your childhood, but with a few tweaks a kid's treat can easily be made for adults. All you need is a little spice and white chocolate.

This particular recipe takes the flavor components found in the mixed drink called the White Russian and incorporates them into the rice crispy bar. To create this distinct flavor, the first modification to the crispy treats is to add dissolved espresso powder. The espresso powder, while strong in flavor, mellows out when blended with the the melted marshmallows for a more balanced flavor. In addition,  a glaze of melted white chocolate and coffee liqueur is poured over the surface. The glaze enhances the bars even more. The final treats are much more than just a coffee flavored snack.

White Russian Crispy Bars
adapted from Chowhound

Ingredients/Bars
6 cups puffed rice cereal
1/4 tsp salt
4 tbs butter
1-10-10.5 oz bag of marshmallows
1 tbs espresso powder
1 tsp hot water

Ingredients/Glaze
8 oz chopped white chocolate (not chips, bar only)
2 tbs coffee liqueur
3 tbs heavy cream

Start by blending boiling water with espresso until the espresso is dissolved. Set aside. Then take out a large pot and add the butter. Place over medium heat and melt butter. Mix in the salt and the dissolved espresso. Add the marshmallows and stir until they are completely melted. Remove pot from heat.

Prepare a 9x13 inch pan by buttering the interior.

Than add the puffed rice cereal to the melted marshmallow mixture and blend until cereal is completely coated. Empty into prepared pan. With oiled hands, press down and spread evenly into pan. Set aside.

For the glaze, place a pan over low heat and add cream. Let cream get to lukewarm temperature (98 degrees farenheit/36 degrees celsius) then add the chopped chocolate. Mix both together and continue to mix until chocolate is completely melted. Remove from heat and stir in coffee liqueur.

Pour the glaze over the crispy treats. Acting quickly, use a knife or a spatula and smooth glaze evenly so surface is completely covered.

Once the glaze is set (takes about 1/2 hr) cut into 2 inch squares.

Tips and Notes:
1. These would be great cut into small squares and used as a garnish on the glass containing a white russian drink at parties.
2. Try other spices, such as cinnamon or apple pie spice or cocoa and mint, for an extra special treat.
                                     **LAST YEAR: Amaretto Cherry Bread**

Sunday, November 13, 2016

Caramel Apple Blondie Cheesecake

Caramel...there is a lot of recent posts with this component, but it does seem to be a good pairing with many of your winter desserts.

A nice layer of sweet caramel on top of cheesecake does sound and look delicious. However, sometimes cheesecake can seem a bit heavy for dessert. That is why we see a lot of "cream cheese swirled" desserts. This cream cheese dessert does increase the spectrum of texture and taste with its unique layering while being lighter than cheesecake alone.

The first and bottom layer is chunks of toasty pecans. They provide a crunchy texture and a subtle nutty flavor. The second layer is a blondie. Not just any blondie, but one with cinnamon spice and chunks of tart apples. Lastly, there is a creamy vanilla layer of cheesecake topped with caramel. To turn it up a notch, in my tips and notes I have included a recipe for a layer of caramelized apples that can be ladled on top prior to the caramel sauce.

Now that I have your attention, let's get into the recipe.....

Caramel Apple Blondie Cheesecake
adapted from Southern Living Magazine, 09/2012

Ingredients/bottom layers
1/2 cup brown sugar (packed)
1/2 cup of melted butter
3/4 cup chopped pecans
1 egg
1 teaspoon ground cinnamon
1 tsp baking powder
1 cup flour
1/4 tsp salt
1 1/2 cups peeled/diced apples (Granny Smith/tart green apples recommended)

Ingredients/Cream Cheese & caramel layer
2-8 oz pkg cream cheese (room temp)
3 eggs
1/2 cup granulated sugar
1 tsp vanilla extract
3/4 cup brown sugar (packed)
6 tbs melted butter
3 tbs whipping cream
3 tbs honey

Grease and flour the interior of a 9-10 inch springform pan. Preheat the oven to 350 degrees. Pour the pecans into a shallow or pizza pan and smooth out to a thin, even layer. Place pan in the oven and let the pecans toast for 4-5 minutes. Remove pan and stir, smoothing out to a thin layer again. Put pecans back in oven for another 4-5 minutes. Once toasted, sprinkle pecan pieces evenly into the bottom of the springform pan. Reduce the oven temperature to 325 degrees.

For the other layers, the process will be mixed. This is so the blondie batter will not sit for a long time, having the baking powder react too much prior to baking.

Start by sifting together the cinnamon, flour, baking powder and salt together into one medium size bowl. Then take out another bowl and fill with the brown sugar, 1 egg and melted butter, stirring until you have a smooth batter. Set both bowls aside.

Now you will use a stand mixer bowl. Fill it with the granulated white sugar, cream cheese and vanilla extract. Beat the ingredients together, stopping occasionally to scrape down the sides of the bowl. Once smooth, add one egg and beat until blended. Repeat the process with each of the remaining eggs. Remove bowl from stand mixer and set aside.

Go back to the first two bowls (one with brown sugar mixture and one with sifted ingredients). Combine the two, folding the dry ingredients in with the wet. Once thoroughly mixed together, stir in the apple chunks. Spoon this batter on top of the pecans in the springform pan. Carefully smooth the batter into an even layer. Then pour the cream cheese mixture on top.

Place pan in oven and bake until top is no longer shiny and cream cheese layer is set. This should take about 1 hour to 1 hour and 10 minutes (depending if you are using a silver pan or a dark pan). Once done, set pan on rack to cool. Run a knife around the edge of the pan, but do not remove the springform ring. Let cool for about 2 hours prior to topping.

To make the caramel topping, fill a saucepan with whipping cream, melted butter, honey and brown sugar. Place the saucepan over medium high heat. The mixture will need to be stirred constantly. It will heat up and come to a boil. Continue to stir and let boil for 2 minutes. Remove and let cool for at least 15 minutes prior to topping cheesecake.

Tips and Notes:
1. The smaller the pan the thicker the layers. I used a 10 inch springform pan.

2. The recipe stated to "spoon" the cream cheese batter over the other layer. The cream cheese batter was very pourable.

3. The cream cheese layer and blondie layer were of even thickness after baked. The photo with the recipe indicated that the cream cheese layer was much thicker and the blonde layer much thinner. This may have to do with the size of the pan used.

4. Should you want more of a pronounced apple flavor, below is a recipe for an apple topping. The apple topping goes on before the caramel layer.
Apple Topping:
Peel and core 5 apples. Slice apples into 1/2 inch wedges. Then fill a skillet with 1/4 cup butter, 1/2 cup of granulated sugar and 1 tsp lemon juice and place over medium heat. Stir constantly, letting mixture cook for about 5-10 minutes. Add the apple wedges. Mix, coating the apples with the sauce. The apples will need to cook with the sauce for about 15-18 minutes to become tender and caramelized. Be sure to continue to stir. Let cool for about 20 minutes prior to topping cheesecake.

5. Should you want to make in advance:create and bake the blondie and cheesecake layer and refrigerate when cool. Then make the sliced apple layer and caramel sauce just prior serving and ladle it on top.
                             **LAST YEAR:Grasshopper Cupcakes** 


Sunday, November 6, 2016

Chocolate Swirled Pumpkin Bars


This time I gave in to the pumpkin recipe. I did review quite a bit of recipes, but this one stuck in my head. I guess it was because of the "hidden" ingredient. Looking at this picture, we assume this is just a pumpkin bar with chocolate. However, it becomes much more interesting when we find out that the swirl is actually a blend of cream cheese and melted chocolate.

That chocolatey blend compliments the cake layer of the bar quite nicely. The spicy cake includes pumpkin and oil, so you can imagine the great texture it has. Another bonus is that the recipe comes together fairly quickly, so it is a good choice when you are short on time.

Chocolate Swirled Pumpkin Bars
adapted from Better Homes and Gardens

Ingredients/Cake Layer
1 cup vegetable oil
4 eggs
1 15 oz can pumpkin
2 cups flour
1/4 tsp ground cloves
1/2 tsp salt
1 tsp baking soda
2 tsp baking powder
2 tsp ground cinnamon
1 1/2 cups sugar

Ingredients/Chocolate Swirl Layer
1 egg
1/3 cup sugar
1 tbs milk
8 oz cream cheese (softened)
1 cup mini chocolate chips (divided into 1/2 cups)

Prepare a 10x15 inch baking pan by lining the interior with foil and extending 1 1/2 inches over the sides. Fold the extra foil down over the outside edge of the pan. Preheat the oven to 350 degrees.

For the cake layer, sift together the ground cloves, salt, cinnamon, baking soda, baking powder and flour in a medium size bowl. Whisk in the sugar. Take out a small bowl and whisk the four eggs together. Empty eggs into flour mixture. Then add the pumpkin and the oil and stir until smooth. Fill the foil lined pan with the batter and smooth the top.

The second layer starts by beating the 1/3 cup of sugar with the cream cheese in a medium bowl for about 30 seconds. Set aside.

Take out a microwave bowl and fill with 1/2 cup of the mini chocolate chips. Microwave for about 30 seconds and stir. Microwave an additional 30 seconds and stir again until smooth.

Add the melted chocolate, egg and milk to the cream cheese batter. Beat until smooth. Spoon this over the pumpkin layer. Then swirl the two layers together using a table knife or metal spatula. Be careful that you do not mix the layers, you want to marble them together.

Sprinkle the surface with the remaining 1/2 cup of mini chocolate chips. Place pan in oven and bake until tester comes out clean, about 25-30 minutes. Sit the pan on a cooling rack and leave to cool completely. Then pull out of the pan by using the foil over-hang. Cut into bars.

Tips and Notes:
1. Since I did not have the size of the pan specified, I used two 8 1/2 inch square pans. I measured each batter layer and then divided it evenly between the pans.

2. As you can see by the picture, the marble effect is only on the surface. The cut bar from a side view still has 2 distinct layers.

3. If your chocolate chips are not completely melted after following the instructions, microwave in 10 second intervals. Check with a spoon after each interval to see if completely melted.

4. Feel free to experiment with your own style of layering by melting up some caramel or peanut butter to blend with the cream cheese to put on top of  brownie or blondie batter.
                               **LAST YEAR: Bacon Buttermilk Scones**

Sunday, October 30, 2016

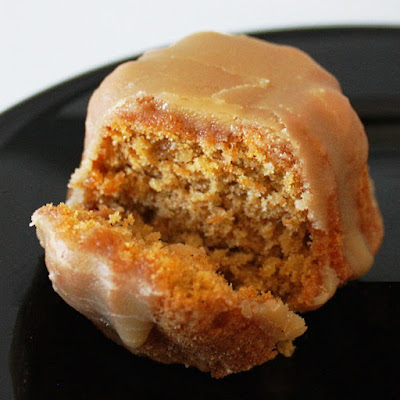
Mini Sweet Potato Cakes


For some reason, vegetables with a golden hue have been the favorites to bake with. Squash, pumpkin and even sweet potatoes have made it in cakes. However, I cannot just pick them because of the color, even purple yams have made it into recipes for baked goods.

Vegetables, unlike fruit, do not hold a lot of liquid nor do they have the acid content you will find in some fruits. With the absence of liquid and no acid, vegetables are easier to incoporate into a recipe.

Today's post uses sweet potatoes as a major ingredient. For the moist texture, olive oil is used along with butter. To compliment the sweet potatoes, the cakes are laced with cinnamon and ginger.

Paired with coffee or tea, these little cakes are a perfect if you are seeking something a little sweet in these cold, crisp days of fall. This recipe makes 1-12 cup bundt cake or mini bundt cakes (1-2 1/2 dz, depending on size of cavities.

Sweet Potato Bundt Cakes
adapted from Feast Magazine

Ingredients/ Cake
2 cups pureed sweet potato
1/2 cup or 1 stick butter
1/2 cup olive oil
splash of vanilla extract
4 eggs
1 cup granulated sugar
1 cup packed brown sugar
2 tsp cinnamon
1/2 tsp ground ginger
1 tsp baking powder
1 tsp baking soda
1/2 tsp salt
2 3/4 cup flour

Ingredients/Frosting
1/2 cup heavy cream
1/2 stick of butter
3/4 cup brown sugar
1 cup powdered sugar

In a large bowl, sift together baking powder, baking soda, flour, salt, cinnamon and ginger. Set aside.

Preheat the oven to 350 degrees, then grease and flour the cavities of a mini bundt pan or 1 12 inch bundt pan.

Fill another large bowl with both kinds of sugar and butter. Beat until the mixture is like wet sand. Whisk in the add the olive oil until evenly distributed. Add the sweet potato puree, folding the batter together to blend. Add 2 eggs and beat for about 30 seconds. Do the same with the remaining 2 eggs.  Lastly, whisk in the splash of vanilla. Once all is blended, fold in the sifted ingredients.

Spoon batter into prepared mini bundt pan or 12 cup bundt pan. Place in oven and let mini cakes bake for about 15-20 minutes and the large cake about 30 minutes. Test for doneness by using a toothpick. Cakes should have a toasted edges and spring back when touched on the surface.

Let the mini cakes cool in pan for about 3 minutes and the large bundt for about 20 minutes. After cooling time, invert and invert again so decorative side is face up.

For the frosting, put all ingredients ( with the exception of the powdered sugar) in a saucepan over medium heat. Once the butter has melted, watch for the mixture to start to simmer. It will need to simmer for approx 3 minutes. Remove from heat and set aside.

Sift powdered sugar into a medium size bowl. Then pour in the brown sugar/butter mixture and whisk together. Let cool for about 10 minutes and then ladle glaze over cakes using a spoon. Once set, then the cakes are ready to serve.

Tips and Notes:
1. the frosting is more like a glaze and to get rid of all the clumps of powdered sugar (even though sifted) you may have to use a mixer to beat.
2. Mini bundt pans vary in size, I used the smallest cavities and the recipe yielded 28 cakes.

3. I ended up using 1 1/2 times the recipe to coat all my mini cakes.
4. For the pureed sweet potato, I sliced 2 peeled sweet potatoes into 1/4 inch slices and boiled for about 20 minutes. Then I drained in a colander and beat until smooth and let cool.
                            **Last Year: Maple Pecan Pinwheel Cookies** 

Sunday, October 16, 2016

Triple Caramel Mudcake


I have a cake book that has several recipes for this type of cake. Mudcake is a very dense but moist cake. These cakes have a low amount of flour vs a high amount of liquid, which puts them between a standard cake and a flourless cake. Due to the high liquid, the cakes take an hour or more to bake.

The method for this particular type of cake is quite different from the average. Ingredients are heated together in a saucepan and cooled, then mixed with eggs and flour. For the ganache, white chocolate is actually baked in the oven.

The heavenly triple caramel flavor stems from several ingredients, but the butterscotch schnapps plays a key role in the taste of the cake, so it is a must to include.

So let's get started....

Tripe Caramel Mudcake
adapted from Australian Women's Weekly

Ingredients/Ganache
300 grams of white chocolate
1/2 cup heavy cream

Ingredients/Cake
1 can /395 grams sweetened condensed milk
1/4 cup butterscotch schnapps
250 grams or 1 cup, 1 tbs and 1 tsp butter
2 eggs
1 cup dark brown sugar
1/2 cup self rising flour
1 1/2 cups all purpose flour
1/4 tsp sea salt flakes

Since the ganache has to cool, it should be made first. Break up white chocolate bars and place in a shallow baking dish. Then preheat the oven to 320 degrees. Once preheated place baking dish in oven and cook for 10 minutes. Stir and then let cook for another 10 minutes and remove. Place a saucepan over medium heat and fill with cream. Let come to a simmer and add melted white chocolate, whisking until smooth.

Place a sieve over a medium bowl and pour chocolate mixture into sieve. Use the back of a spoon to help the chocolate strain through. After the ganache has been strained, cover and place in refrigerator to cool.

As this is cooling, prepare an 8 inch cake or springform pan by greasing the interior and lining the bottom and sides with parchment paper. Turn oven temperature up to 400 degrees.

Pull out another baking dish and fill it with the sweetened condensed milk. Cover the dish with foil, in the manner as a pie crust. The foil should sink about 1/4 inch down on the inside and the top edges should have foil that has been crimped up to make the edge stronger. Then place dish in a larger baking pan and fill the larger pan with boiling water. The boiling water should reach halfway up the outside of the smaller pan. Place in oven and let bake for 1 hour.

Uncover and then stir. Check water level and, if needed, add more boiling water to outer pan, making sure it reaches the halfway point on the outside of the interior pan. Cover again and let bake for an additional 30 minutes. Remove pan and whisk caramel until smooth. Cover and let cool to room temperature.

Once the caramel has cooled, take out a medium size saucepan. Fill with the butter, brown sugar and salt and place over low heat. As the butter melts, whisk with the brown sugar. After the butter has melted, add the cooled caramel and the butterscotch schnapps. Remove from heat and mix sauce until all ingredients have been evenly distributed.

Pour sauce into a medium size bowl and let cool for about 20 minutes. Turn oven back down to 320 degrees. As the caramel continues to cool, sift together the all purpose flour and self rising flour. Fold the sifted ingredients into the cooled caramel/butter mixture. Stir in salt. Lastly, whisk the two eggs in a small bowl and then stir them into the cake batter.

Pour batter into prepared pan and let bake for 1 hour. Cover and let bake for an additional 30 minutes. Then, test to see if done with a toothpick. If done, remove pan. If not done yet, let cook in additional 5 minute intervals until tester shows done. Let cake cool in pan 15 minutes. Invert onto rack and remove paper/parchment and invert again.

Remove ganache from refrigerator and let cake cool. Then you are ready to ice the cake. Whisk the ganache. It should be pourable, if not, heat up in the microwave to reach desired consistency. Place a sheet of wax paper under the cake and then pour the ganache onto the center top of the cake. The ganache should cover the top and drip down to cover all sides.

Let ganache set up prior to cutting cake.

                              **LAST YEAR: Caramel Apple Nut Pie**

Sunday, October 2, 2016

Banana Rum Coffee Cake


Bananas have shown up in many of the recipes posted on this blog, so I guess it can be called one of my favorite ingredients when it comes to baking. One of the reasons is that it has a strong flavor. Sometimes when you bake, the end result my be a lost flavor. No so with the banana.

This particular recipe yields a moist and fluffy cake with a pecan/praline topping. When I read this recipe, the ingredients and preparation of the batter intrigued me. It is a blend of cream cheese and butter with a cooked banana sauce folded in. The topping is a cream sauce made with rum, but I actually dusted this piece with powdered sugar. I am saving the cream sauce for serving.  Warming up the sauce and ladling it over the cake right before serving adds that special rum flavor which puts this coffeecake in a delicious class of its own.

When making this recipe, please pay close attention to the instructions for measured ingredients. There are items in the ingredient list which are divided up to make different components of the recipe.

Banana Rum Coffee Cake
adapted from Southern Living Dec 2014

Ingredients
2 eggs
2 cups heavy cream
1 1/2 cups butter (room temp)
8 oz cream cheese (room temp)
2 tsp vanilla extract
1 1/2 cups mashed, ripe bananas
1 cup granulated sugar
2 cups brown sugar
1 tsp gnd cinnamon
1/2 tsp baking powder
1/2 tsp baking soda
1/2 tsp salt
3 1/4 cup flour plus 3 tbs
1 1/2 cups chopped pecans
7 tbs light rum

Preheat the oven to 350 degrees. Prepare a 9 x13 inch cake pan by greasing and dusting the interior with flour. Set pan aside. The recipe ingredients require 4 blends or components, so be prepared with 4 bowls.

The first component starts by filling a saucepan with 1/2 cup brown sugar, mashed bananas, 3 tbs rum and 1/4 cup of butter. Place saucepan over medium heat and stir, letting sugar and butter melt. Once melted, let heat up until mixture starts to bubble or boil in pan. Remove and let cool until it reaches room temperature and then add 1 tsp of vanilla.

The second bowl will be for the dry ingredients. Sift together salt, baking soda, baking powder and just 3 cups of the flour into this bowl.

The next bowl will be the bowl from a stand mixer. Fill bowl with 1/2 cup of butter and cream cheese. Beat the two together until smooth, scraping down sides of the bowl when needed. Then incorporate 1 cup of the brown sugar, by beating for about 1 minute until batter is light and fluffy. Add one egg and blend on medium speed for 30 seconds. Repeat with the other egg.

Fold sifted ingredients into the cream cheese mixture until no dry streaks remain. Lastly, stir in the banana mixture, distributing throughout the batter. Empty batter into prepared pan and smooth, making sure mixture is even in pan.

For the pecan praline topping, start by whisking together the pecans, cinnamon, 1/4 cup flour and 1/2 cup brown sugar. Stir in 1/4 cup of melted butter. Sprinkle evenly on top of the cake batter. Bake at 350 degrees for about 40-45 minutes or until tester comes out clean. When done, remove pan from oven and place on rack to cool.

Once cooled off for 20 minutes, you can dust with powdered sugar. If you choose the cream sauce, it can be made as soon as cake comes out of oven.

For the cream sauce, start by filling a saucepan with the granulated sugar and flour. Whisk together. Then place pan over medium heat and add cream and 1/2 cup of butter. Let the mixture cook, stirring constantly. Keep stirring until it comes to a boil. As it boils, the mixture will thicken. It will take approximately 2 minutes to reach the correct consistency. Remove the saucepan from the heat and whisk in 1/4 cup of rum and 1 tsp vanilla.

To prepare in advance, the sauce can be made and chilled the day before. The cake also can be made the day before. To serve, drizzle heated sauce over each serving of cake.

Tips and Notes:
1. In order to avoid a dry cake, I pureed the bananas and I sifted the flour prior to measuring.

2. Ripe vs over-ripe: I used ripe bananas, so I am unable to rate how the recipe does with leftover dark or over-ripe bananas.
3. The cake is just as delicious cooled right out of the oven, without additional toppings.
4. If you are a fan of having rum in the topping, use more cream instead.
                                   **LAST YEAR:Gingerbread Latte Fudge*

Sunday, September 25, 2016

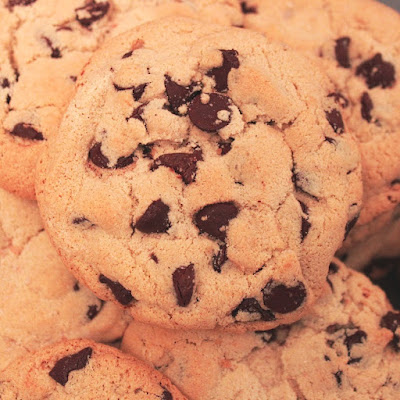
Chocolate Chip Tahini Cookies


Let's face it, every manufacturer has a vested interest in going "global" and a lot of time an money is spent on that endeavor. However, there are some global items that exploded onto the market with little effort. Most of the time it is due to an individual that visits another country and brings a unique idea or an item back home that they consider amazing. This is a small step, but the idea or item may spread like wild fire.

After the original is shared, time passes along with little tweaks. It may be developed a little more to "fit" in  according to the countries preference. This is the same when it comes to food. This post is about the "global" chocolate chip cookie. Here in the US, you will find every texture variation as well as "add in" alterations, such as walnuts or peanuts. I have enjoyed many variations through the years, but I know the variations are endless.

So, if you are taking the long (but delicious) journey of sampling all the amazing chocolate chip cookies like me, be sure not to overlook this Middle Eastern variation with tahini (sesame paste). The sesame paste adds a unique hint of nuttiness to the cookie. In addition, this recipe has one of the best contrasts of salty sweet that I can think of...dark chocolate and salt. The texture is a home run as well, since each cookie has crispy edges and a soft,chewy center. The process below makes about 12-18 big and hearty cookies. Also, be sure to plan ahead,the dough requires 12 hrs of chilling time prior to baking.

Now, let's get to the kitchen....

Chocolate Chip Tahini Cookies
adapted from Modern Israeli Cooking

Ingredients
1/2 tsp baking soda
1/2 tsp baking powder
1 cup and 2 tbs flour or matzo cake meal
1 tsp salt
1/2 cup or 4 oz butter, room temp
1/2 cup tahini 
1 egg
1 egg yolk
1 cup granulated sugar
1 tsp vanilla extract
1 3/4 cups bittersweet or semi-sweet choc

Sea salt flakes (optional for topping)

Prepare 2 baking sheets by lining with parchment paper.

Sift together flour (or matzo meal), baking soda, baking powder and salt in a medium size bowl and set aside.

In the bowl of a stand mixer, add the butter, tahini and sugar. Beat at medium speed for a total of 5 minutes, stopping from time to time to scrap down sides of bowl. Add the eggs and extract, then beat again for another 5 minutes.

Remove bowl from stand mixer and pour in sifted ingredients. Using a wooden spoon, fold the dry ingredients into the batter. Once incorporated, fold in the chocolate chips. The batter will be much softer and lighter than regular cookie dough. Cover bowl and refrigerate for a total of 12 hours.

Once the chill time is completed, preheat the oven to 325 degrees. Before you shape the dough, evaluate how large you want them. The recipe states it yields 12-18 cookies. Be aware that the size will have a direct impact on baking time. Shape the dough into balls of desired size and place on the baking sheet. Each ball should be spaced about 3 inches from the other.

Slide baking sheet in oven and bake cookies for about 13-16 minutes. The cookies will be golden on the bottom and outer edges when done. The center will still remain white, or pale. Upon removing the pan from the oven, sprinkle tops of cookies with sea salt if desired.  Let cookies cool on pan on rack for about 5 minutes, then transfer to rack to completely cool.

Tips and Notes:
1. Make sure that the tahini is mixed well prior to adding to batter.
2. The full 10 minutes of beat time is necessary to really incorporate the tahini into the dough, poor mixing results in "pockets" of tahini in your cookie batter which runs on the pan when baked.
3. My cookies took 18-20 minutes to bake.
4. These cookies will be very white in comparision to the standard chocolate chip cookie which includes brown sugar.
5. I did not use the Matzo, mainly because I only found meal instead of flour, so I cannot comment on the results of the recipe using that ingredient. 
                                     **LAST YEAR:Cranberry Black Walnut Coffeecake**
 

Sunday, September 18, 2016

Hazelnut Praline Cakes


While buttercream and fondant are covering most cakes these days, do not forget about the coated cakes, such as petit fours. However, the thought of baking cutting and dipping does seem like a major project. I imagine that is why you rarely see these type of cakes. It is not just the cutting; the dipping and decorating for that special appearance can be tedious as well.

While petit fours are pretty tasty, today's average baker is looking for something more like a snack cake. Snack cakes are small individual cakes, but they are baked in the shape you want. No cutting required. Also, another modification is to change the coating to something more tasty and less fancy.

This version of the snack cake combines hazelnut flavor, chocolate and praline. The cakes is hazelnut flavored and then it is coated in hazelnut milk chocolate with little bits of praline. In making these, 2 major factors had to be considered. The first being the structure of the cakes. Pound cake would be too dense and an airy cake would soak up the chocolate. A happy medium had to be found. Also, the cake paired with the coating had to create a good balance. Chocolate dipped brownies would be way too much sweetness.The idea of a lighter flavor cake with a strong flavored coating would make the best combination.

I have to admit, the Cacao Barry store had my business on this recipe. However, do not let that deter you from this recipe. Hazelnut ganache and toffee bits are an easy and less expensive substitute.

Now, let make some cakes! This recipe makes 1 dz cakes.

Hazelnut Praline Cakes
by flourtrader

Ingredients/Cake
1/2 cup whipping cream
1/2 tsp hazelnut extract
1 egg
2 egg yolks
3/4 cup sugar
1/2 cup butter
1/2 tsp oil
1 1/2 cups flour
1 1/2 tsp baking powder
1/4 tsp salt

Ingredients/Coating
2-3 cups hazelnut ganache (or Gianduja Plasir Lait/Milk Chocolate Hazelnut Coverture)
1/2-3/4 cup toffee bits (or Cacao Barry Praline Bits).

Prepare a muffin tin or square cake tin by buttering the interior and dusting with flour. Preheat the oven to 350 degrees. Make sure your eggs and butter have come to room temperature.

In a medium size bowl, sift together the salt, baking powder and flour. Set aside. Cut the butter into 1/4 inch chunks and place in bowl. Beat on high speed (stopping once to scrape down the sides of the bowl) for about 30 seconds until butter is smooth. Pour in sugar and beat again on high speed for about 1 minute, stopping again at intervals to scrape down the sides of the bowl. Mixture should be fluffy.

In a small bowl, whisk together the oil, egg yolks, egg and hazelnut extract. Pour into butter mixture and beat until evenly distributed throughout the batter.

Using a wooden spoon, mix 1/3 of the sifted ingredients into the batter. Then follow with 1/4 cup of whipping cream, mixing again. Follow the same steps, this time using with 1/2 of the remaining sifted ingredients. End with folding in the last of the dry ingredients.

Scoop the batter into the prepared cavities of the pans, make sure the amount of batter is about the same for all filled cavities.

Place pan in oven and bake from 18-24 minutes, or until done. Mine took about 20 minutes, but use a cake tester to determine when done. Cakes should have a golden edge.

Place pan on rack for about 10 minutes, then invert cakes onto cooling rack. Flip cakes over and let completely cool on rack.

While the cakes are cooling, if you purchased toffee bits, evaluate their size. Should you want them smaller, reduce their size by using a blender or coffee/spice grinder. With the Cacao Barry praline bits, no grinding is needed. Set aside.

Prepare the hazelnut ganache according to recipe or microwave the purchased coverture until melted (microwave in 20 second sessions, stiring after each until totally melted). Stir in toffee bits or praline pieces.

Place a sheet of waxed paper on a flat surface. Then put a rack over the paper. Dip your cooled cakes into the coating and then sit on rack to dry. If using store bought coverture, place cakes in refrigerator to have chocolate set up. Homemade ganache should set up at room temperature.

Once the coating has set up, transfer cakes to parchment or wax paper.

Tips and Notes:
1. Batter will be real thick, like cookie dough. Also and your cavities will only be about 1/2- 1/3 full.
2. You can use this recipe for mini cakes, the end result will be yield 2 dz cakes and the bake time will be around 12-15 minutes.
3. Flavor combos are limitless, so feel free to experiment. Chocolate cakes with coated with vanilla ganache with chunks of peppermint candy mixed in would be great for the holidays.
                                  **LAST YEAR:Pumpkin Chocolate Marbled Bundt Cake**
 

Sunday, September 11, 2016

Vanilla Bean Scones


It seems that the market for vanilla has really expanded. I guess when it comes to food, the new and/or improved status is guaranteed to rage on. Outside of the brown hued vanilla extract that has been on the market for years, we have: clear vanilla extract, ground vanilla bean seeds and vanilla bean paste. I am sure that at this moment someone is working on vanilla bean flour.

Anyhow, this particular recipe can be found all over the web in some variation. I figured there must be something delicious about these scones, so I decided to give them a try. I was not disappointed. They have a wonderful cake-like texture that is kept moist by the sweet vanilla coating. This recipe is definitely a keeper!

I actually ate these in the late afternoon just to taste. The next morning, I decided to have some store bought cake donuts for breakfast. After having the scones, I really thought the donuts were awful. They had some kind of a grease after-taste. Funny how these scones had such an impact on my taste buds, I had always liked the donuts before.

So be aware that these scones may make your palate pickier than it was before. Eating them is purely an act of sharpening your skills in detecting what good really tastes like! This recipe makes 24 mini or 12 regular size scones.

Vanilla Bean Scones
adapted from various website recipes

Ingredients/Scone
1 egg
1-2 vanilla bean scrapings of seeds
1/2 cup half and half
1/2 cup or 1 stick cold butter (cubed)
1/4 tsp salt
1/2 cup sugar
1 tbs baking powder
2 cups flour

Ingredients/Glaze
1 vanilla bean scraping of seeds
1/4 cup plus 2 tbs half and half
3 cups sifted powdered sugar

Prepare 2 baking sheets by lining with parchment paper and preheat the oven to 425 degrees.

Start by sifting together the salt, flour and baking powder into a medium size bowl. Then whisk in the sugar. Empty the contents into a food processor and add cubed butter and pulse until mixture resembles coarse crumbs. The other method is using a pastry blender by hand. Set aside.

In another bowl, beat the egg with a fork by hand. Then add the half and half and vanilla bean seeds, stirring together so the beans are distributed throughout the liquid. Pour into the food processor and pulse until mixture becomes like cookie dough. An alternative method is to mix together by using a wooden spoon.

Prepare a flat surface by dusting lightly with flour. Empty the dough onto the surface. With floured hands, knead the dough about 4 or 5 times. Then roll out into a rectangle 3/8-1/2 an inch thick. Once rolled out, you can cut into triangles, circles or squares. I used a square biscuit cutter.

Place the pieces on a baking sheet, spacing about 3/4 an inch apart. Bake for about 6-7 minutes if making mini size and 8-9 minutes for regular size scones. Scones should be golden brown on bottom and edges when done. Remove baking sheet from oven and let cool for a few minutes.

Take wax paper and place on flat surface and place cooling rack of the top of the paper. Then transfer scones to the cooling rack. Do not glaze until completely cool.

For the glaze, whisk together the half and half and vanilla bean seeds. Then pour into the powdered sugar and stir. Once smooth, dip each of the cooled scones into the glaze and place back on rack to set/harden.

Tips and Notes:
1. Feel free to use vanilla bean paste. Also the amount of vanilla is your preference. I have seen a recipe that incorporates vanilla bean seeds with vanilla extract.

2. Do not be afraid to experiment with other spices such as pumpkin, cinnamon or cardamon.
                               **LAST YEAR: Frosted Pineapple Cookies**

Sunday, September 4, 2016

Bali Hai Pie


While we all cannot live in tropical areas where fresh fruit is just a matter of picking it off the plant or limb, that does not mean that we have to miss out. However, the reach is a little more involved. That is mainly why I have stared at this recipe for quite some time before making it.

The recipe has mango in it, which is fairly easy to find around here. It is the passion fruit puree that took some expense and searching. Even though I made two of these pies, I still have frozen puree left over. Overall, I have no regrets. This recipe truly delivered on flavor and texture. Also, it is stunning to the eye.

If you love tropical fruits, then you will enjoy devouring an ice cold slice of this cream and fruit pie. The flaky crust is topped with coconut prior to baking. After cooling, a sweet layer of mango puree is placed in the bottom. The next layer is a silky blend of passion fruit puree, cream cheese and whipped cream. For the decoration, mango is drizzled on top following by a sprinkling of macadamia nuts. This recipe makes one 9 inch pie.

Time to make some pie....

Bali Hai Pie
adapted from State Fair Recipes

Ingredients/Crust
Pie crust dough for single layer (your recipe of choosing)
1/4 cup sweetened shredded coconut

Ingredients/Layer 1
lime zest (from 1 lime)
2 cups pureed mango chunks
1 tbs lime juice
3 tbs coconut rum
pinch of sea salt
3 tbs corn starch
1/2 cup of sugar

Ingredients/Layer 2
3 tbs butter (room temp)
8 oz cream cheese (room temp)
1/2 cup granulated sugar
3 tbs coconut rum
1 1/2 cups heavy whipping cream
1/2 cup sifted powdered sugar
1 pkg unflavored gelatin
1/2 cup passion fruit puree
1/3 cup tropical fruit concentrate
1/2 cup rough chopped macadamia nuts

Create the dough as instruction on your recipe of choice up to the point prior to baking. Then sprinkle the interior bottom of the crust with 1/4 cup of shredded coconut. After that, resume the baking instructions as provided with the chosen recipe. Let crust cool completely in pie pan before filling.

For the first layer, fill a saucepan with all the ingredients with the exception of the lime juice. Place over low heat and stir. The end result of the cooking will be a thick mixture, like the consistency of jam or pudding. This may take some time, so be patient. Once it reaches the thick stage, empty contents into a heat proof bowl and stir in the lime juice. Then set aside to cool.

The second layer starts by pouring the passion fruit puree and concentrated juice into a saucepan. Mix together and then place over low heat. Let the liquid warm up, while stirring, for about 5 minutes. Then sprinkle in the gelatin, continuing to stir. As it cooks, the gelatin will melt, disbursing into the fruit/juice blend. Remove from heat and let cool.

At this point, the first layer blend should be cooled. Take 1/4 cup of the mixture and put in a small bowl. Cover and place in refrigerator. Smooth the remaining mango filling over the top of the coconut crust, making sure the layer is even and covers the bottom interior.

Now, you are back to making the second layer of filling. First, take a metal mixing bowl and place in the refrigerator. Next, take out a stand mixer bowl and fill with the cream cheese, butter, rum and granulated sugar. Beat on medium speed until batter is smooth and all blended together. Add the gelatin mixture and beat on low until evenly disbursed into the cream cheese/sugar blend. Set aside.

Take the metal bowl out of the refrigerator and fill with the heavy whipping cream. Beat on high until stiff. Sift in the powdered sugar and beat again for about 30 seconds. Remove bowl from stand mixer and fold in the gelatin batter until mixture becomes a light ivory color. Empty mixture into pie and smooth out evenly.

Pipe the reserved mango puree in a lattice fashion over the top of the pie and then sprinkle on the macadamia nuts. Refrigerate 4 hours before serving.

Tips and Notes:
1. To have a little salty/sweet combo, use salted nuts on top.

2. To save time on the first layer, heat mixture in saucepan until sugar is dissolved in mixture. Then transfer to a heat proof bowl and microwave for about 2-3 minutes, stirring at the 1 minute interval. Keep checking for the right consistency by stirring after each one minute interval. Once it is thick, refrigerate to speed up the cooling process.

3. You are unable to taste the rum in this recipe. However, should you desire a kick of rum, the recipe suggests a stabilized whipped cream mixed with rum on top. You can pipe around the outer edge and then sprinkle a ring of nuts inside the whipped cream piping.

4. For an alcohol free pie, use coconut water in place of rum for the pie and if you desire whipped topping, use coconut extract instead of rum.

5. Not a fan of coconut? Then replace with chopped salted nuts pressed into the bottom interior of the dough prior to baking.

 5. If you do not want to serve right away, hold off on the topping of lattice piping, nuts and whipped cream until right before serving. Let the pie sit uncovered in the refrigerator until surface is solid and then cover with plastic wrap until you are ready to decorate and serve.
                              *LAST YEAR: Peach Pecan Cheesecake**

Sunday, August 28, 2016

Polish Pound Cake


Let's face it, there are a lot of different types of cakes out there to choose from. As a food blogger, I have found my food cravings are a lot more specific than they were prior to blogging. Recently, I found myself craving a buttery moist, slice of cake with tender crumb.

This particular recipe was spot on when it came to my preferences at the time. It teams both butter and shortening together to create a velvety texture. It also uses a vanilla/ butter/ nut flavoring which makes it unique, yet memorable. Lastly, sprinkled throughout this delicious cake are crunchy walnuts and sweet maraschino cherries.

Now that the craving has hit home, let's move on to the the details of this special recipe. You will need a 10 cup bundt pan in order to make this.

Polish Pound Cake
adapted from All Recipes

Ingredients
2 tbs vanilla butter nut flavoring
5 eggs
1 cup evaporated milk
1-4 oz jar maraschino cherries (drained/chopped)
1 cup chopped toasted walnuts
1 cup or 2 sticks of butter
1/2 cup shortening
2 2/3 cups flour
1/4 tsp salt
3 cups sugar

Prepare a 10 cup bundt pan by greasing and flouring the interior. Make sure all cracks and curves are well coated.

Toss the cooled walnuts in 1/3 cup of flour. In another bowl, whisk together 2 1/3 cup of the flour and salt. Set both bowls aside.

Fill the bowl of a stand mixer with the butter and shortening. Cream together until completely blended. Add the sugar and the flavoring and beat on medium speed for 1 minute, stopping occasionally to scrape down the sides. Once the mixture is fluffy with no lumps, add one egg and beat for about 20 seconds to distribute into the batter. Repeat the process with each egg, adding them one by one.

Remove the bowl from the stand mixer and stir in the evaporated milk. Fold in the flour/salt blend in three increments until no dry streaks remain. Mix the floured walnuts into the batter. Lastly, toss in the cherries and distribute throughout the batter by stirring with a wooden spoon.

Pour or scoop the batter into the pan, making sure it is smooth and even. Place pan in cold oven and turn the temperature gauge to 300 degrees. Let bake until toothpick comes out clean. The cake will bake for 1 hour and 30 minutes up to 2 hours. Start checking at the 1 hour 30 minute mark. Mine took about 1 hour and 45 minutes.

Let the cake rest in the pan on a rack for 20 minutes. It will be crusty on top, so take a small knife and run along the top edge. Then invert cake onto rack to finish cooling.

Tips and Notes:
1. Probably adding more nuts and cherries would be a good idea, be sure to dust all the walnuts prior to mixing in.
2. Do not slice until completely cool.
3. I used LorAnn vanilla butter nut flavoring and just added 1 tbs, since it is strong then regular extract.
4. Prior to serving, you can dust with powdered sugar. You can also glaze the cake, but it really is sweet enough on its own.
4. The batter in the pan was only 1 inch below the top edge. There is no leavening ingredient in the recipe so the cake does not rise very much.
5. I used Luxardo brand maraschino cherries, which you can find at some liquor stores. However, one jar is double the amount called for in the recipe.
                                           **LAST YEAR: Boo Boo Pie**

Sunday, August 21, 2016

Sierra Nuggets


Sometimes variety can be a bad thing. We get too much to choose from and then we don't want anything. That situation can also be too overwhelming. For instance, I have always wanted to go to this place that has a selection of 1000 styles of eyeglass frames. It is a nice thought, but in reality I know that I would spend all day there and probably could not make up my mind between several frames. Eventually, I would either leave with nothing or settle on one; thinking I should have got the other.

This particular cookie recipe can be the solution to having too many types of cookies to choose from. One of these gems holds a lot of flavor and texture. As you are eating these cookies, your taste buds will recall a myriad of different cookies.

They have crispy edges and an inner chewiness.You may also come across some crunchiness from the walnuts in the cookies. With oatmeal, cornflakes, spices, coconut, nuts and chocolate, they are bursting with a variety of flavor. The variety is there, but it is nicely balanced. Labeling these as simply oatmeal cookies or spice cookies would be more deceptive instead of descriptive.

In reality, taste is the major concern here, not the label. So, let's move on to the baking.....This recipe makes 6-7 dz cookies.

Sierra Nuggets
adapted from Guittard 

Ingredients
1 cup chopped, toasted nuts
2 cups or 12 oz milk chocolate or semisweet chips
1 cup cornflakes
1 cup sweetened,shredded coconut
3 cups of rolled oats
1/2 tsp mace
1/8 tsp ground cloves
1/4 tsp nutmeg
1 1/2 tsp cinnamon
1 tsp salt
1 1/4 tsp baking soda
1 1/2 cups flour
2 eggs
3 tbs milk
1 1/2 tsp vanilla extract
1 cup or 2 sticks of butter
1 1/2 cups granulated sugar
1 cup packed brown sugar

Prepare 2 baking sheets by lining with parchment paper. Preheat the oven to 350 degrees.

Sift together all four spices, flour, baking powder and salt in a medium size bowl. In another bowl, whisk together eggs, milk and vanilla extract. Set both aside.

Place butter and both kinds of sugar in the bowl of a stand mixer. Cream together the butter and sugar by beating at medium speed until fluffy. Add the egg mixture and then beat on low until combined. Remove bowl from stand mixer.

Now, it is time for the add-ins to the batter. Using a wooden spoon, mix in one add-in at a time until evenly distributed. Blend in the order as listed: corn flakes, oats, sifted ingredients, coconut, chocolate chips and nuts.

Using a scoop or spoon, drop by heaping teaspoons onto prepared baking sheets. They mounds should be placed about 1 to 1 1/2 inches apart. Bake for 5 minutes and rotate and bake for an additional 5 minutes. Check cookies to see if they are a golden hue and spring back when lightly touched, if not, bake for an additional few minutes.

Remove pan and let rest on rack for 2 minutes. Then transfer cookies to rack to completely cool.

Tips and Notes:
1. Walnuts, pine nuts and peanuts were the suggested type of nut in the recipe, but you can choose whichever you prefer.

2. For a thicker cookie, add more flour to absorb the butter and refrigerate dough prior to baking so it does not spread as much. Test your dough to see how it bakes up.

3. The recipe does suggest making a bar cookie if you are short on time. Use a 10x15 pan and bake for 20 to 25 minutes.

4. Be sure to use plain corn flakes, not frosted. The cookie is sweet enough without this added sugar.

5. A note on ounces when it comes to brands of chocolate chips. Nestle still carries the 12 oz bag, however the more gourmet chocolate brands have been reduced to 11.5 oz. Keep this in mind when buying ingredients.
                                    **LAST YEAR:Honey Glazed Berry Scones**                      

Sunday, August 14, 2016

Peach Upside Down Rum Cake


Well summer is at an end. School is right around the corner as well as cooler weather. In order to say goodbye to summer, I decided to make this peach upside down cake. The addition of rum makes it a delicious adult dessert.

Teaming juicy carmelized fruit with fluffy tender cake is nothing short of an amazing combination. These days, upside down cakes are not just limited to pineapple. I have seen cranberry and pear- the list goes on. The only thing to take into consideration would be the juiciness of the fruit. For instance, an orange upside down cake would be quite different from apple. Peaches put out quite an amount of juice, so please review tips and notes on this issue in particular if you plan to make this.

In this recipe, the caramel is made in a skillet and then the fruit goes in. After that, the batter is put on top and it then goes in to bake. You can use a cast iron skillet or a springform pan. It comes together quite quickly once all the prep work of peeling and slicing the peaches is completed.

Peach Upside Down Rum Cake
adapted from the LA Times

Ingredients
1 tsp almond extract
3 tbs lemon juice
3/4 cup dark rum
1/4 cup honey
2 eggs
6 tbs and 3 tbs butter at room temperature
2 lbs peaches peeled
1/2 cup light brown sugar
1 cup white sugar
2 tsp baking powder
1 3/4 cup flour
1/4 tsp salt

Start by preparing the peaches by slicing into 1/2 inch pieces. Place in a bowl and toss with the lemon juice and set aside.

Preheat the oven to 350 degrees. If you are not baking this in a cast iron skillet, you will use a 9 inch springform pan. This pan should be lined on the bottom and 1 inch up the sides with parchment paper.

Fill a 10-12 cast iron skillet (if you intend to bake the cake in it) or saucepan with the 3 tbs of butter. Place pan over medium heat and melt. Once melted, stir in the brown sugar. Continue to stir until brown sugar is no longer grainy, it will become smoother as it cooks. Then, mix in the honey and lower the heat.

As that is cooking, drain the peaches in a sieve. Slowly add the peach slices to the brown sugar mixture, stirring to insure that all sides are coated. Stir gently until all slices are glossy. This should take about 2 minutes. Remove from heat. If you are baking in a cast iron skillet, make sure all the peaches are spread evenly along the bottom of the pan and let the pan cool. Otherwise, empty the saucepan into the springform pan and spread peach mixture evenly along the bottom. Set aide.

Sift together the flour, baking powder and salt into a medium size bowl. Then take out a larger bowl and add the 6 tbs of the butter and white sugar. Cream together the butter and sugar until fluffy and light. Add one egg and almond extract, then beat for 30 seconds. Add the remaining egg and beat.

Once all is blended, fold in 1/3 of the sifted ingredients into the egg batter. Pour in 1/2 cup of rum and stir until blended. Add 1/2 of the remaining dry ingredients and fold in. Stir in the remaining amount of rum and lastly, fold in the rest of the sifted ingredients.

Using a large spoon, drop spoonfuls of batter on top of the peach mixture. Once all is on top of the peaches, smooth the batter to the edges. Place pan or skillet in oven to bake until tester comes out clean. This should take about 45 minutes if baking in a cast iron skillet or longer with a springform. pan. Let the cake cool in the pan for about 10 minutes before flipping over and removing parchment. The cake is best served at room temperature.

Tips and Notes:
1. I baked my cake in a 12 inch springform pan. There was still enough of a peach layer to cover the bottom completely, so there was no change there. I believe a 9 inch pan would have a much thicker coating of peaches at the bottom. Regarding the batter, it was 1 1/2 times the ratio of the above recipe.
2. My caramel mixture turned quite watery after adding the peaches. In order to compensate, I added another 1/2 cup of brown sugar and 1/4 cup more of honey.  I let it cook down a bit more to let some of the juices evaporate, so it became more like caramel again.
3. The rum flavoring of the cake was quite prevalent. As you know, the flavor gets stronger with time. Should you not want to use rum, feel free to use peach nectar or some peach liqueur.
                                                **LAST YEAR: Citrus Snap Cookies**


Sunday, August 7, 2016

Breakfast Muffins


Today I wanted to test some muffin recipes I found on line. The first is a lemon poppy seed muffin that is made with oil and in comparison is a muffin made with butter.

As far as taste, the lemon muffin was moist and had a well balanced flavor of lemon. The syrup soak on top really gave it a nice pop of citrus.This muffin, even though moist, was denser than the other.

The spice muffin rose a lot taller and fluffier than the other. It was more like the traditional muffin you find in bakeries and coffee houses. However, I wished it was a little less dry. Also, a lot of the streusel ended up on the pan instead of on the muffin. Next time I would try an extra tablespoon of oil in the batter and a different type of streusel. This muffin had a cinnamon-nutmeg flavor, but it could use some more spice.

Overall, my vote is for the lemon poppy seed. Using oil seems to bring out a moister baked good. Better in texture and stronger in flavor than the spice muffins, the decision was not a difficult one. Both recipes are below and each make about 1 dozen muffins.

Buttermilk Spice Muffins
adapted from Mimi's Cafe 

Ingredients/Batter
2 1/2 cups flour
2 tsp baking soda
1 tsp nutmeg
1/2 tsp cinnamon
3 eggs
1 cup sugar
1/2 cup butter
3/4 cup plus 1 tbs buttermilk

Ingredients/Nut Topping
1/2 tsp nutmeg
1/2 tsp cinnamon
1 cup finely chopped walnuts
1/2 cup sugar

Preheat the oven to 375 degrees and grease or line muffin tin cavities with paper cups.

Sift together the flour, baking soda, cinnamon and nutmeg. Set aside. Fill another bowl with the butter and sugar. Beat together until light and fluffy. Add one egg and beat until blended thoroughly. Continue with this process for the each of the remaining eggs until all is blended in.

At this time, the nut topping should be made. Simply add all topping ingredients to bowl and mix together until everything is evenly distributed. Set aside.

Now, back to making the batter...Add 1/2 of the sifted ingredients into the batter and fold in, using a wooden spoon. Then blend in the buttermilk. Lastly, stir in the remaining sifted ingredients just until combined.

Using a scoop, fill the muffin cavities 3/4 full of batter. Once all the batter is used up, sprinkle 1 tablespoon of topping over all the muffins. There is a time factor here, the longer you take the more apt the topping will sink, so act quickly.

Place in oven and bake until tester comes out clean. This should take about 20-25 minutes. Let muffins cool in pan for a few minutes then transfer to rack to finish cooling.

Lemon Poppy Seed Muffins
adapted from LA Times Food Section, 05/08/2002

Ingredients
2 1/2 cups cake flour
1/4 tsp salt
1 tsp baking soda
1 tbs poppy seeds
1 cup plus 2 tbs sugar, divided
1/2 cup oil
1 egg
1 cup buttermilk (well shaken)
1/4 tsp lemon extract
1/4 cup lemon juice ( for syrup)
2 tbs lemon zest

Preheat the oven to 375 degrees and prepare a muffin tin by greasing the cavities and upper edges with butter. As an alternative, just grease the upper edges of the cavities and line with paper cups.

In a medium size bowl, sift together the flour, baking soda and salt. Set aside. Using another bowl, whisk together the buttermilk, oil, egg, zest, extract, poppy seeds and one cup of the sugar. Fold in the sifted ingredients until just combined.

Using a scoop, fill the muffin cavities evenly with the batter. Place pan in oven and bake until tester comes out clean. This should take about 20 minutes. The muffins will be slightly golden in color on top when done.

While the muffins are baking, prepare the syrup. Fill a small microwavable bowl with the remaining 2 tablespoons of sugar and the 1/4 cup of lemon juice. Heat on high for 1 minute.

Once the muffins are done, let cool in pan for 5 minutes. Then dip the top of each in warm syrup and place on rack to finish cooling. After dipping if any syrup still remains, spoon on top of the muffins to soak in.
                            **Last Year:Almond Marzipan Roulade**


Sunday, July 24, 2016

Chocolate Walnut Scones


This scone is more on the cookie side than biscuit/bread side. In fact, the mouth feel and texture remind me of the same sensation you get when you bite into a cookie. Not just any cookie, but the Mexican wedding or Russian teacakes in particular. That buttery, melt in your mouth crumb is nothing short of amazing.

Part of the texture can be contributed to the ground walnuts in the batter. The combination of nuts and rich bittersweet chocolate makes for a delicious way to start the day. Pair this treat with tea, coffee or a tall ice cold glass of milk for a wonderful mid-day snack or morning brunch.

The dough comes together quickly with basic ingredients. The most time you will spend is forming and freezing the dough prior to baking. This recipe makes about 1 dz scones.

Chocolate Walnut Scones
adapted from La Brea Bakery

Ingredients/Dough
1/4 cup sour cream (or cream fraiche)
1 cup plus 2 tbs whipping cream
1/2 cup (1 stick) plus 2 tbs cubed frozen butter
1 tbs vanilla extract
1tbs and 1 tsp baking powder
2 3/4 cups pastry or cake flour
6 tbs sugar
pinch of salt
1 cup walnuts (toasted and cooled)
1 cup finely chopped bittersweet chocolate

Ingredients/Topping
1/4 cup walnuts, grated with a microplane
2 tbs sparkling sugar
2 tbs whipping cream

Prepare 2 baking sheets by lining with parchment paper. Dust a flat surface lightly with flour.

Fill a food processor with the nuts and 3 tbs of sugar. Pulse until it becomes sandy and fine. In another bowl, sift together the salt, baking soda, and flour. Stir in remaining 3 tbs of sugar.  Pour dry flour mixture into the food processor and combine in pulses until evenly distributed.  Once all is blended, drop in butter cubes and run processor until mixture can be clumped together, like damp sand. Empty into a large bowl.

Fold in chocolate pieces and make a well in the center of the mixture. Then take out a small bowl and stir together the whipping cream, sour cream (or cream fraiche) and vanilla extract.  Pour the liquid into the well and fold together until just combined. Mixture will still be a bit crumbly.

Empty contents onto prepared flat surface. Lightly dust your hands and knead the dough a few times and shape into a ball. Roll out the dough, forming a disc 1 1/2 inches thick. Dust a 1 1/2 inch cutter with flour or spray with non-stick oil. Cut dough into circles, re-rolling scraps as needed.

Once all the circles are made, take 3 circles and form a shamrock by pressing them together on the baking sheet. Continue with this process, spacing the shamrocks 1 inch apart.

Take the filled baking sheets and place them in the freezer for an hour. At the halfway point, preheat the oven to 350 degrees. Once the freezing time is complete, the scones will need to be topped. Brush each with whipping cream, sprinkle on the sparkling sugar and walnuts.

Bake for 30 to 35 minutes or until lightly toasted on the edges. Place pan on rack to cool for 10 minutes. Transfer to rack until completely cool.
                            **LAST YEAR: Almond Marzipan Roulade**