Foodbuzz
Showing posts with label breakfast scones. Show all posts

Saturday, April 27, 2019

Maui Scones


These scones take me back to thoughts of the tropics. The tropics...where things like pineapple and bananas seem to grow without any effort. Along with that, there is a vast array of big flowers you will find growing everywhere. Jamaica or Hawaii is the place for fruit and flowers. However, in a pinch, California and Florida are good seconds.

Well, there are no fruits growing here and the only flowers I see around are bluebonnets, so these tropical treats were welcome on the breakfast table. When I saw the recipe had pineapple and macadamia nuts in the ingredient list, I thought nothing much can go wrong with these two flavors and I was pleased with the results.

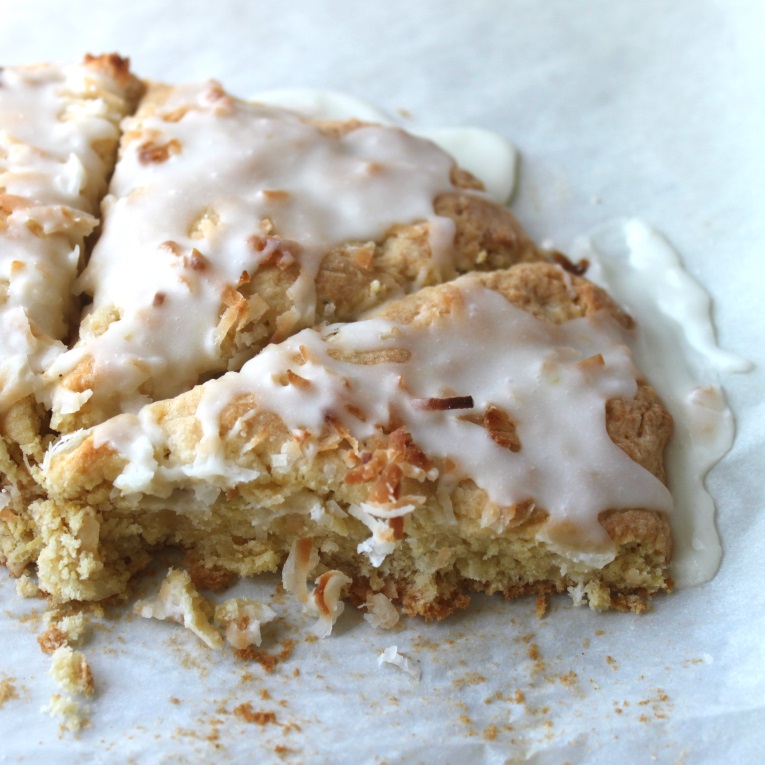
One bite reveals a cake like texture with the crunch of buttery macadamias. With a sweet pineapple drizzle on top and crushed pineapple baked inside, this is a great way to start the day or to have as an afternoon snack. Also, you will not be spending your whole day in the kitchen.

Maui Scones
adapted from Land O Lakes

Ingredients/Scones
1/2 cup chopped macadamia nuts
1/4 cup crushed pineapple (drained and juice reserved)
2 eggs
1/2 cup cold butter, cubed
1/2 cup sweet flaked coconut
1/2 cup light brown sugar
2 tsp baking powder
2 cups flour

Ingredients/Topping
2 tbs sweet flaked coconut
3/4 cup powdered sugar
reserved juice from above

Prepare 2 baking sheets by lining with parchment paper. Preheat oven to 400 degrees.

Sift together baking powder and flour in a large bowl. Whisk in brown sugar. Add 4 butter cubes and blend with a pastry cutter. Continue to add cubes and blend with pastry cutter until all is incorporated and is coarse crumbs with the largest chunk of butter being only pea sized. Stir in the coconut and chopped macadamia nuts.

Fill a medium size bowl with 1 tbs of juice, eggs and crushed pineapple. Whisk the ingredients together until well blended. Form a well in the brown sugar /flour mixture and pour the pineapple/egg blend into the well. Mix with a wooden spoon until the mixture comes together. Knead about 10 times. You may have to add more flour or more juice to get to dough consistency. Once the correct consistency is achieved, divide dough in half.

Place each ball of dough on the prepared baking sheets and form into a flat disc. Cut each disc into 6 wedges but do not separate wedges, leave disc intact. Sprinkle each disc with 1 tablespoon of coconut.

Bake 13-15 minutes or until scones are lightly browned on top. Cut through scones to fully separate but do not pull from disc.

Once the scones are completely cooled, prepare pineapple drizzle. Start with 3/4 cup of sifted powdered sugar and add 1 tsp of pineapple juice. Continue to blend pineapple juice and powdered sugar until correct drizzling consistency is met. Drizzle on to cooled scones and wait one hour until set. Then separate and serve.
                                      **LAST YEAR: Homemade Pop Tarts**

Sunday, September 11, 2016

Vanilla Bean Scones


It seems that the market for vanilla has really expanded. I guess when it comes to food, the new and/or improved status is guaranteed to rage on. Outside of the brown hued vanilla extract that has been on the market for years, we have: clear vanilla extract, ground vanilla bean seeds and vanilla bean paste. I am sure that at this moment someone is working on vanilla bean flour.

Anyhow, this particular recipe can be found all over the web in some variation. I figured there must be something delicious about these scones, so I decided to give them a try. I was not disappointed. They have a wonderful cake-like texture that is kept moist by the sweet vanilla coating. This recipe is definitely a keeper!

I actually ate these in the late afternoon just to taste. The next morning, I decided to have some store bought cake donuts for breakfast. After having the scones, I really thought the donuts were awful. They had some kind of a grease after-taste. Funny how these scones had such an impact on my taste buds, I had always liked the donuts before.

So be aware that these scones may make your palate pickier than it was before. Eating them is purely an act of sharpening your skills in detecting what good really tastes like! This recipe makes 24 mini or 12 regular size scones.

Vanilla Bean Scones
adapted from various website recipes

Ingredients/Scone
1 egg
1-2 vanilla bean scrapings of seeds
1/2 cup half and half
1/2 cup or 1 stick cold butter (cubed)
1/4 tsp salt
1/2 cup sugar
1 tbs baking powder
2 cups flour

Ingredients/Glaze
1 vanilla bean scraping of seeds
1/4 cup plus 2 tbs half and half
3 cups sifted powdered sugar

Prepare 2 baking sheets by lining with parchment paper and preheat the oven to 425 degrees.

Start by sifting together the salt, flour and baking powder into a medium size bowl. Then whisk in the sugar. Empty the contents into a food processor and add cubed butter and pulse until mixture resembles coarse crumbs. The other method is using a pastry blender by hand. Set aside.

In another bowl, beat the egg with a fork by hand. Then add the half and half and vanilla bean seeds, stirring together so the beans are distributed throughout the liquid. Pour into the food processor and pulse until mixture becomes like cookie dough. An alternative method is to mix together by using a wooden spoon.

Prepare a flat surface by dusting lightly with flour. Empty the dough onto the surface. With floured hands, knead the dough about 4 or 5 times. Then roll out into a rectangle 3/8-1/2 an inch thick. Once rolled out, you can cut into triangles, circles or squares. I used a square biscuit cutter.

Place the pieces on a baking sheet, spacing about 3/4 an inch apart. Bake for about 6-7 minutes if making mini size and 8-9 minutes for regular size scones. Scones should be golden brown on bottom and edges when done. Remove baking sheet from oven and let cool for a few minutes.

Take wax paper and place on flat surface and place cooling rack of the top of the paper. Then transfer scones to the cooling rack. Do not glaze until completely cool.

For the glaze, whisk together the half and half and vanilla bean seeds. Then pour into the powdered sugar and stir. Once smooth, dip each of the cooled scones into the glaze and place back on rack to set/harden.

Tips and Notes:
1. Feel free to use vanilla bean paste. Also the amount of vanilla is your preference. I have seen a recipe that incorporates vanilla bean seeds with vanilla extract.

2. Do not be afraid to experiment with other spices such as pumpkin, cinnamon or cardamon.
                               **LAST YEAR: Frosted Pineapple Cookies**

Sunday, August 23, 2015

Honey Glazed Berry Scones

When it comes to combining fresh blueberries or blackberries to dough, it is hard for the end result not to look like a bruised lump or have tinges of purple. That is why most bread recipes use dried fruit. There is nothing wrong with dried fruit, but you cannot deny the "gummy bear" type of texture when biting into a chunk of dried fruit. Some recipes remedy this by including a "plumping" or soaking interval for the dried fruit prior to mixing it into the dough, which is a beneficial process.

In light of this information, I decided that frozen fruit is the best choice when you are making a sweet bread type of recipe. The frozen aspect keeps the fruit from tie dying your dough into a purple lump. Also, baked in frozen fruit rates higher on the texture scale than dried fruit.

Dark colored berries, if you did not already know, are the healthiest to eat. I do try to eat fruit for breakfast. However, adding them to cereal, smoothies or yogurt all the time can get boring after awhile. It was time to have something a little different and these scones were the choice. Chock full of a double helping of berries and honey sweetened crust, there was no denying the fact that this chosen difference made my breakfast a little bit more special. Not only did the bread/berry combo turn out to be irresistible, but the honey glaze does double duty with adding sweetness and also keeping the scones from drying out. This recipe makes about 8-12 scones, depending on the cutter size.

Honey Glazed Berry Scones
adapted from A Passion For Baking

Ingredients/Scones
2 tsp of vanilla extract
1 egg
1tbs of lemon juice
1 cup whipping cream
3/4 cup or 1 1/2 sticks of butter (cut into cubes)
1/2 cup of sugar
4 tsp baking powder
1/2 tsp baking soda
1/2 tsp salt
3 1/2 cups of flour
1/2-3/4 cup frozen blackberries
1/2-3/4 cup frozen blueberries

Ingredients/Topping
1/4 cup of milk or melted butter (for brushing prior to baking)
1/3 cup honey
1/4 cup unsalted butter

Start the process by stacking 2 baking sheets together and lining the bottom of the top sheet with parchment paper. Preheat the oven to 425 degrees.

Using a liquid measuring cup, fill with the tablespoon of lemon juice and then the whipping cream. Stir and set aside.

Sift together the flour, baking soda, salt and baking powder in a medium size bowl. Stir in the sugar. Pour the blend into a food processor and drop in the chunks of butter. Pulse until no more dry streaks remain. This should result in a coarse, sand like mixture. 

Transfer dough back into medium size bowl and make a well in the center. Fill the well with the egg, lemon/cream mixture and vanilla. Blend with a wooden spoon until no dry streaks remain. The dough should be able to hold its shape but also be soft. Then fold in the berries.

Prepare a flat surface by dusting lightly with flour. Take dough out of bowl and knead. This process may require more flour to insure that the dough does not expand after cutting. Flatten and shape dough so it is only 1 inch thick. Cut into desired shape (rounds, squares or triangles) and place on parchment lined baking sheet about 1 inch apart.  Brush the top of each scone with the melted butter or milk.

Bake for about 16-19 minutes. Scones are done when they are golden brown on top. While the scones are baking, prepare the glaze.  Fill a liquid measuring cup with honey and butter. Place cup in microwave and heat on high for 45 seconds. Stir mixture and then return to microwave and heat for an additional 45 seconds.

Remove scones from oven when done and place baking sheet on a cooling rack. Then brush lightly with the glaze. Let the scones sit for about 15 minutes and then coat the surface generously again with the rest of the glaze.

Tips and Notes:
1.The purpose of stacking 2 pans together insures that the bottom of the scones do not brown too fast.

2.The frozen fruit should be in separate pieces but not thawed out.

3. Because of the size of the blackberries and the fact they are frozen, the best way to cut the dough is with a sharp blade. It insures a sharp cut into the fruit and also makes for a good height on the scones when baked. 

4. Due to the glaze, the scones will stay moist and flavorful for up to 4 days.

5. Using a food processor is recommended, but you can blend with a mixer and have the same results.
                                   **LAST YEAR:Banana Walnut Tart**