Foodbuzz

Sunday, September 27, 2015

Cranberry Black Walnut Coffee Cake

Because black walnuts have such a strong flavor, there are not a lot of recipes that use this ingredient. Using this type of nut in a recipe does require the proper balance of flavor, which involves a lot of trial and error. The other consideration is the development of flavor over time. Cookies, for instance, are usually in the cookie jar for a few days before they all disappear.

When I saw this recipe, I was deliberating about using English walnuts instead of the black, but I am glad I chose the black. The black walnuts provided a perfect amount of subtle flavor that was well matched with the cranberry and cinnamon. The moist cake, warm cranberries and crunchy streusel really hit the spot.

I would say that eating things that remind us of the fall makes us happy. The flavors conjure up thoughts of the holiday seasons with family get togethers, sitting in front of the fire and cool crisp days outside. Sometimes we all need an attitude adjustment and a slice of this coffee cake may just be the key-especially on a Monday morning.

Cranberry Black Walnut Coffee Cake
adapted from Better Homes and Gardens Fall Baking

Ingredients/Cake
3 cups flour
2 tsp baking powder
1 tsp cinnamon
1/4 tsp salt
1 cup packed brown sugar
1/2 cup granulated sugar
4 eggs
1 tsp vanilla
1 cup butter, melted
1 cup milk
2 inches stick cinnamon
1 cup apple juice or apple cider
2 cups dried cranberries
1 cup walnuts (black or English), toasted and ground

Ingredients/Streusel
1/2 cup packed brown sugar
2/3 cup flour
3/4 tsp ground cinnamon
1/2 cup chopped walnuts (black or English)
1/3 cup of cold butter, cut into small cubes

Start by making the cranberry topping.  Fill a saucepan with 1/2 cup of the brown sugar, cranberries, stick cinnamon and apple juice (or cider).  Place over medium high heat and stir constantly, letting the mixture come to a boil.  When the sugar has dissolved, lower the heat and let simmer.  As it simmers, the liquid will reduce. It will take about 15 minutes of cooking for the cranberry topping to reach the correct consistency. Remove from heat and discard cinnamon stick. Set the mixture aside and let cool completely before using, this is your first bowl.

Grease the interior of a 10 inch springform pan and preheat the oven to 325 degrees. For the second bowl, sift the cinnamon, flour, salt and baking powder in to this bowl. Add the ground nuts,granulated sugar and remaining 1/2 cup of brown sugar. Stir so all is evenly distributed. Also, set this bowl aside.

Proceed to making the streusel topping by combining the cinnamon, flour and brown sugar together in a small bowl, the third bowl. Add the cubes of butter and use a pastry blender to cut the butter into the sugar mixture. Once no dry streaks remain and mixture can easily clump together, stir in the walnuts.

Get your second bowl and make a well in the center of the dry mixture. Take out a 4th bowl. Crack eggs into this bowl and beat with a fork for about 1 minute. Mix in the melted butter, milk and vanilla. Pour this egg mixture into the well of dry ingredients in the second bowl. Stir until blended and mixture becomes a batter.

For assembly, pour the egg batter into the prepared pan and smooth the top so it is even. Spoon the cranberry mixture (from the first bowl) over the top of the batter, leaving a 1 inch border. Lastly, sprinkle with the walnut streusel topping.

Place pan in oven and let bake until edges are golden brown. Cake will start to pull away from edge of pan when done. Bake time is approximately 1 hour and 15 minutes. Let cool in pan for about 15 minutes before removing the outside ring of pan. Slice and serve warm.
                                    **LAST YEAR:Chocolate Liqueur Suicide Cheesecake**

Sunday, September 20, 2015

Marbled Pumpkin Chocolate Bundt Cake

People that bake occasionally really do not have much concept of how a recipe can actually end up being a visual work of art. A carefully placed series of strawberries on a cheesecake all the way to a contrasting marbled cake can be as visually pleasing to the eye as well as pleasing to the palate.

The "visual aspect" does play an important part when it comes to choosing food, especially at a younger age. It took me quite some time to actually try guacamole, simply because I was turned off by the look. Now, as a food blogger, I am more open to try things before making a decision regarding food and yes, I do think guacamole is pretty tasty!

This particular recipe blends spicy, pumpkin flavor with rich chocolate in a cake. The end result is a tasty, as well as stunning, dessert. This bundt cake has great texture. The use of oil instead of butter always yields a more moist cake. The chocolate part of the cake is extra rich, using dutch process cocoa while the spicy pumpkin swirl offers a tasty accent of flavor to every slice.

Marbled Pumpkin Chocolate Bundt Cake
adapted from Kiss My Bundt

Ingredients/Pumpkin Batter
7 1/2 to 8 oz pumpkin puree (1/2 15 oz can)
2 eggs
1/2 cup brown sugar, packed
1/2 granulated white sugar
1/2 cup vegetable oil
1 1/2 tsp pumpkin pie spice
1 1/2 tsp baking soda
1 1/2 tsp baking powder
1/2 tsp salt
1 1/2 cups flour

Ingredients/Chocolate Batter
1 egg
1/2 cup whole milk
1/4 cup vegetable oil
1 tsp vanilla extract
1/2 cup boiling water
1/2 tsp baking soda
1/2 tsp baking powder
1/2 cup dutch process cocoa powder
1 cup flour
1/2 tsp salt
3/4 cup plus 3 tbs sugar

Start by preheating the oven to 350 degrees. Then generously grease and coat the interior of a 12 cup bundt pan with flour.

For the pumpkin batter, crack the eggs into a bowl of a stand mixer and beat on medium speed about 3 minutes. Eggs will have a frothy consistency. Turn the mixer down to low speed and slowly stream in the white sugar. Then toss in scoops of the brown sugar. Continue to beat until batter becomes thick. Add the pumpkin puree and the oil. Combine with the mixer on medium speed until completely blended. Set aside.

Using a separate bowl, sift together the remaining dry ingredients for the pumpkin cake. Also, set this bowl aside.

For the chocolate batter, fill the bowl of a stand mixer with the egg, milk and oil. Beat for about one minute. Set aside.

Sift the baking soda, baking powder, cocoa powder, flour and salt into a medium size bowl. Stir in sugar until mixed evenly. Empty 1/3 of the batter into the egg/oil mixture and fold together. Continue
with this process until all the sifted ingredients has been blended into the batter. Lastly, mix in the
 boiling water.

Go back to the pumpkin batter and fold in the sifted pumpkin spice ingredients. Add and stir in increments, just like the instructions for the chocolate batter.

Now that you have created 2 batters, you will start the layering process. Using 1/3 of the pumpkin batter first, spoon it into the bundt pan, making sure batter makes a complete circle inside the pan.  Then pour on 1/3 of the chocolate batter. Repeat this process until you have filled the cavity of the pan with 6 layers of alternating batter. The batter layers in the pan start with pumpkin and end with chocolate.

Bake until tester comes out clean.  Cake should take about 45 minutes to bake.  Remove cake and let rest on a cooling rack about 20 minutes. Then invert onto rack to finish cooling. When cool, transfer to serving plate.

Tips and Notes:
1. The chocolate batter will be very runny, that is why the pumpkin batter goes first into the pan.
2. The chocolate is very rich, so much so that the prumpkin flavor to chocolate is not 50-50.  Should you want  a 50-50 ratio of flavors, you will need to experiment more with the recipe. However, this cake disappeared very quickly, perhaps waiting a day before serving may have allowed the pumpkin flavor to develop more.
3. Glazing or topping the cake is optional, but I would have chosen a cinnamon glaze since it pairs well with either chocolate or pumpkin, if I was going to glaze or frost the cake.
                                   **LAST YEAR:Chocolate Pecan Snails** 

Sunday, September 13, 2015

Frosted Pineapple Cookies

All the summer tourists are now back home. If you have ever lived in a tourist area, you will find that the residing population always have nicknames for the tourists. In Florida, we always called them "snowbirds". That is due to a lot of people visiting from the northern states who have very little exposure to the sun. The north has their days where they use nicknames as well. You will often hear the term of "leaf peepers."

With that being stated, just like the "snowbirds", the summer recipes will be gone until next year. This marks the last one. Even though it is still hot in Texas, I will comply with the calendar seasons. For this year, the "official" first day of fall is September 23rd. Goodbye to citrus and berries and hello ginger and spice.

To close out the summer, I chose a cookie recipe that has a buttery base with chunks of pineapple. It uses crushed pineapple instead of dried pineapple. Also, the frosting on top incorporates pineapple juice and lemon zest for an extra pop of fruity flavor. This recipe makes about 2 1/2 dozen cookies. As a reminder, the recipe has not been altered but there are important tips and notes at the end to help you succeed when creating these. Now let's get to it....

Frosted Pineapple Cookies
adapted from Copycat Recipe website

Ingredients/ Cookies
1 egg
1 8oz can of crushed pineapple
1 tsp vanilla extract
1/2 cup of butter
1/4 tsp baking soda
1 1/2 tsp baking powder
2 cups flour
1/2 tsp salt
1 cup packed brown sugar

Ingredients/Frosting
3 tbs reserved juice from canned pineapple
1 1/2 cups confectioners sugar
1/4-1/2 tsp lemon zest

Line 2 baking sheets with parchment paper. The preheat the oven to 325 degrees.

Using a stand mixer, fill the bowl with sugar and butter. Beat on medium speed for about 2 minutes, stopping periodically to scrape down the interior sides of the bowl. You now have a cookie batter.

Take out a small bowl and a sieve. Open the canned pineapple and pour into the sieve, letting the juices drain out into the bowl. Reserve 3 tbs of the juice for use in the the frosting. Empty the contents of the sieve into the cookie batter. Then add the vanilla extract and egg. Beat the mixture until all is blended smoothly.

Remove the bowl from the stand mixer and set aside. In another bowl, sift together the baking powder, baking soda, flour and salt.  Using 1/3 of the sifted ingredients, fold into the batter.  Continue with the process in two more increments, until all the dry ingredients are mixed into the batter.

Using a scoop, drop batter onto prepared cookie sheet. Since the cookies do spread, space the batter lumps about 2 inches apart. Place cookie sheet in oven and bake until golden on bottom and around edges. This should take about 17-20 minutes. Transfer baked cookies to cooling rack.

Once the cookies have completely cooled, it is time to make the frosting.  Mix together the zest and 2 tbs of juice in a medium size bowl. Sift the powdered sugar into the same bowl and then mix with a  spatula. Blend in more juice to make a spreadable frosting. Frost cookies by drizzling on top. Let frosting set up before storing or stacking cookies.

Tips and Notes:
1. The spreading of the cookie when baking is a result of the amount of juice that remains after the pineapple is drained. I wanted thicker cookies, so after draining, I pressed out a lot of the juice. Also, I saw one complaint on the original recipe stating that the cookies ran all over the pan-too much liquid.

2. Reserve all the juice from the canned pineapple. This way you can have the opportunity to make more frosting if you prefer. The original recipe shows just a drizzle on the cookies instead of being frosted like the picture above. I definitely made more frosting.
                           **LAST YEAR:Pastry Project:Croissant Dough**

Sunday, September 6, 2015

Peach Pecan Cheesecake


Using fresh fruit in a recipe that requires baking does have its challenges. First of all, you have the juice issue which may add too much liquid to the recipe. The other challenge is the acid in the fruit. In review, I would say that the citrus fruits are the most acidic and the other end of the spectrum would be bananas. The mid range would be peaches, apples and melons.

While most cheesecake recipes have a fruit sauce that you ladle on top, this one actually has diced peaches baked in. That texture, along with the crunch of chopped pecans and a cookie crust, is an excellent contrast to the creamy cheesecake. The cream cheese batter bakes up with a nice depth of flavor, incorporating a blend of dark brown sugar and peach schnapps. The chopped additions of diced peaches and toasted pecans offer an occasional zing of flavor.

My co-workers really liked this dessert and it disappeared quite quickly, so I this particular recipe is marked as a keeper. The instructions are for 1 nine inch cheesecake.

Peach Pecan Cheesecake
adapted from Cheesecake Extraordinaire

Ingredients/Crust
3 tbs chopped toasted pecans
3 tbs melted butter
11 vanilla sandwich cream cookies

Ingredients/Peach Pecan Filling
1/4 cup chopped toasted pecans
1 1/4 cup peeled and diced fresh peaches
5 tsp cornstarch
3/4 cup dark brown sugar
24 oz cream cheese
1 egg yolk
4 eggs
1 tsp vanilla extract
3 tbs heavy whipping cream
1/3 cup peach schnapps

Preheat the oven to 350 degrees. Grease the bottom of a 9 inch springform pan.

Using a food processor or blender, grind the cookies into a fine powder. Empty contents into a small bowl and stir in the pecan pieces. Pour in the melted butter and mix until all crumbs are damp and can clump together. Transfer mixture to springform pan and press into the bottom, forming a flat, even layer on the bottom of the pan. Set aside.

Fill the bowl of a stand mixer with brown sugar and cream cheese. Beat until smooth. Sift in the cornstarch and beat for 30 seconds, so it is evenly distributed into the batter. Add egg yolk and beat on low speed for 15 seconds. Repeat this process for each egg. Once all the eggs are blended, add vanilla extract, peach schnapps and whipping cream. Beat again on low speed for about 1 minute.

Remove bowl from stand mixer and fold in pecans and diced peaches. Pour the batter over the crust in the springform pan. The baking process will be in intervals. Bake the cheesecake for the first session at 350 degrees for 15 minutes. Then lower the oven temperature to 225 degrees and bake for about 1 hour and 15 minutes. The cheesecake will be done once the center no longer looks wet or shiny.

Take the cheesecake out of the oven and run a knife around the inside, between the pan ring and the cheesecake. Also, turn the oven off. Put the cheescake back in the oven for another hour.  After the hour has expired, place in refrigerator to chill overnight.

Tips and Notes:
1. Use only fresh fruit, canned and frozen will have too much liquid for this recipe.

2. None of the recipes in this book use a water bath in order to keep the cheesecakes from cracking. The book does offer other pointers in order to minimize cracks, but none are guaranteed to prevent all cracks. The eggs should not be over beaten into the batter, which is why the instructions state using low speed when blending. Also, running a knife around the interior edge right after baking helps because the cheesecake will contract upon cooling. Other tips include: making sure your oven is at the correct temperature and not overbaking the cheesecake.

3. So you did everything right and you still have a cracked cheesecake? The author suggests using a wet knife to smooth it out on top when the cheesecake is still hot. However, due to discoloration, a dry knife is recommended with chocolate cheesecakes. This will not fix "Grand Canyon" cracks. Those are the big cracks that result when the cheesecake is overbaked.

4. Do not cover your cheesecake when you place it in the refrigerator to chill. Covering will cause moisture to form on top.

5. For best flavor, cheesecakes should be made 1 day in advance of serving.

6. If you are making a cheesecake with topping, slicing prior to the topping is easier. Slicing should be done with a thin, hot and sharp knife.
                                            **LAST YEAR:Carrot Cake with Cream Cheese**   

Sunday, August 30, 2015

Boo Boo Pie


Sorry, but there is no back story here as to how this recipe got its name. We can only speculate that it was a mistake or "boo boo" that actually turned out to be a delicious error. Errors can prove to be a good thing in certain cases. After all, chocolate chip cookies stem from the act of someone trying to compensate for a missing ingredient in a recipe.

If you love Mounds candy bars, then you have come to the right place. This recipe is basically a sweet combo of a rich chocolate brownie and chewy coconut. Not only will it squelch your craving for something sweet, you will not be spending very much time in the kitchen to create this. Another plus is that the ingredient list is very basic. Now let's get into the details....

Boo Boo Pie
adapted from Recipe Goldmine

Ingredients
3 eggs
1 tbs vanilla extract
1/2 cup butter
3/4 cup sugar
3 oz unsweetened chocolate
2 2/3 cup sweetened coconut or 1 7 oz bag
1/2 cup flour
1 14.5 oz can sweetened condensed milk

Grease the interior of a 9 inch pie pan.

Empty the bag of coconut into a bowl. Using a fork or clean hands, separate the coconut so there are no clumps. Once all the clumps are loosened, pour in the sweetened condensed milk. Mix together and then let sit for at least 1 hr so the coconut can soak up some of the milk.

While the coconut is soaking, start on the brownie part of the recipe. Set up the bottom part of your double boiler by filling 2/3 full of water and placing over medium high heat. Once water comes to a simmer, place top pot on top and fill with butter and chocolate. Let ingredients melt together, stirring occasionally until smooth and blended. Remove from heat. Preheat the oven to 325 degrees.

Take out a medium size bowl and fill with eggs, sugar and vanilla extract. Stir with a wooden spoon until evenly mixed. Then mix in flour. Lastly, pour in the melted butter and chocolate blend. Mix together to form a smooth chocolate batter.

Empty the chocolate batter into the prepared pan. Smooth the top and make sure the batter is even in the pan. Go back to the bowl of coconut and sweetened condensed milk and stir.  Then spoon the coconut mixture on top, but leave a 1/2 inch border around the edge so the brownie batter can form a crust.

Place pan in oven and bake for about 25 minutes. Let cool completely before slicing.

Tips and Notes:
1. The thickness of the coconut mixture is personal preference. The center of the pie, with the recipe as is, produces a sticky but soft texture. For something more solid, cut back on the sweetened condensed milk.

2. Bear in mind that the center sets up when cooling, but it should be somewhat solid coming out of the oven, not too jiggly.

3. Due to the liquidity of the chocolate batter, smoothing out the coconut filling evenly can be difficult. To insure that the coconut layer is even, spoon it onto a sheet of wax paper and smooth it into an even 8 1/2 inch round. Then place it in the freezer until it becomes a solid mass. Remove and peel off wax paper and center on brownie batter and lightly press down. Since the coconut mixture is frozen, you will need to increase the baking time. 
                             **TWO YEARS AGO: Creme Fraiche Coffee Cake**

Sunday, August 23, 2015

Honey Glazed Berry Scones

When it comes to combining fresh blueberries or blackberries to dough, it is hard for the end result not to look like a bruised lump or have tinges of purple. That is why most bread recipes use dried fruit. There is nothing wrong with dried fruit, but you cannot deny the "gummy bear" type of texture when biting into a chunk of dried fruit. Some recipes remedy this by including a "plumping" or soaking interval for the dried fruit prior to mixing it into the dough, which is a beneficial process.

In light of this information, I decided that frozen fruit is the best choice when you are making a sweet bread type of recipe. The frozen aspect keeps the fruit from tie dying your dough into a purple lump. Also, baked in frozen fruit rates higher on the texture scale than dried fruit.

Dark colored berries, if you did not already know, are the healthiest to eat. I do try to eat fruit for breakfast. However, adding them to cereal, smoothies or yogurt all the time can get boring after awhile. It was time to have something a little different and these scones were the choice. Chock full of a double helping of berries and honey sweetened crust, there was no denying the fact that this chosen difference made my breakfast a little bit more special. Not only did the bread/berry combo turn out to be irresistible, but the honey glaze does double duty with adding sweetness and also keeping the scones from drying out. This recipe makes about 8-12 scones, depending on the cutter size.

Honey Glazed Berry Scones
adapted from A Passion For Baking

Ingredients/Scones
2 tsp of vanilla extract
1 egg
1tbs of lemon juice
1 cup whipping cream
3/4 cup or 1 1/2 sticks of butter (cut into cubes)
1/2 cup of sugar
4 tsp baking powder
1/2 tsp baking soda
1/2 tsp salt
3 1/2 cups of flour
1/2-3/4 cup frozen blackberries
1/2-3/4 cup frozen blueberries

Ingredients/Topping
1/4 cup of milk or melted butter (for brushing prior to baking)
1/3 cup honey
1/4 cup unsalted butter

Start the process by stacking 2 baking sheets together and lining the bottom of the top sheet with parchment paper. Preheat the oven to 425 degrees.

Using a liquid measuring cup, fill with the tablespoon of lemon juice and then the whipping cream. Stir and set aside.

Sift together the flour, baking soda, salt and baking powder in a medium size bowl. Stir in the sugar. Pour the blend into a food processor and drop in the chunks of butter. Pulse until no more dry streaks remain. This should result in a coarse, sand like mixture. 

Transfer dough back into medium size bowl and make a well in the center. Fill the well with the egg, lemon/cream mixture and vanilla. Blend with a wooden spoon until no dry streaks remain. The dough should be able to hold its shape but also be soft. Then fold in the berries.

Prepare a flat surface by dusting lightly with flour. Take dough out of bowl and knead. This process may require more flour to insure that the dough does not expand after cutting. Flatten and shape dough so it is only 1 inch thick. Cut into desired shape (rounds, squares or triangles) and place on parchment lined baking sheet about 1 inch apart.  Brush the top of each scone with the melted butter or milk.

Bake for about 16-19 minutes. Scones are done when they are golden brown on top. While the scones are baking, prepare the glaze.  Fill a liquid measuring cup with honey and butter. Place cup in microwave and heat on high for 45 seconds. Stir mixture and then return to microwave and heat for an additional 45 seconds.

Remove scones from oven when done and place baking sheet on a cooling rack. Then brush lightly with the glaze. Let the scones sit for about 15 minutes and then coat the surface generously again with the rest of the glaze.

Tips and Notes:
1.The purpose of stacking 2 pans together insures that the bottom of the scones do not brown too fast.

2.The frozen fruit should be in separate pieces but not thawed out.

3. Because of the size of the blackberries and the fact they are frozen, the best way to cut the dough is with a sharp blade. It insures a sharp cut into the fruit and also makes for a good height on the scones when baked. 

4. Due to the glaze, the scones will stay moist and flavorful for up to 4 days.

5. Using a food processor is recommended, but you can blend with a mixer and have the same results.
                                   **LAST YEAR:Banana Walnut Tart**   

Sunday, August 16, 2015

Raspberry Lager Cupcakes


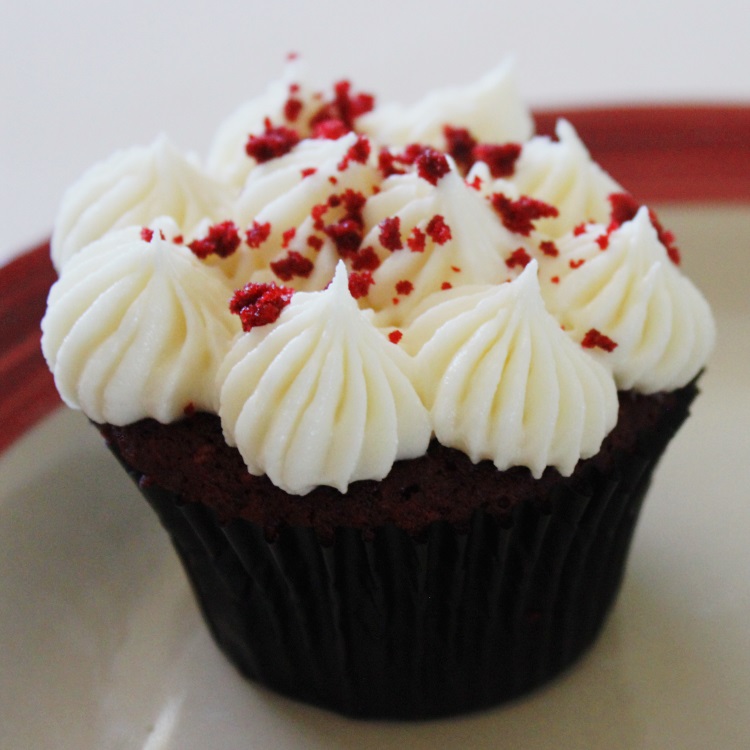
Red velvet cupcakes are always ranked as one of the favorites when it comes to baking contests.  Something about the color and that touch of cocoa really appeals to the majority of cake and cupcake lovers. With that appeal, you run across numerous recipes that have been modified from the original.  One thing I have seen is the color change; blue velvet, green velvet...etc.

However, this is one twist that does not involve a change of color. This recipe is actually a red velvet recipe with a fruity, boozy twist. It incorporates raspberry beer. Even though raspberry and chocolate is a delicious combination, my first concern was about the raspberry flavor. I did not want it to taste "artificial", so I took some time to find a naturally flavored beer. I came across a Belgium beer, Lindeman's Frambois Lambic. Other than being naturally flavored, the size of the bottle (25 oz) was a benefit since the recipe calls for more than 12 oz of beer.

This recipe scored very high in flavor and texture. As you can see by the bottom picture, the cake was nice and moist. The brush of raspberry syrup on top gave them an extra pop of delicious fruit flavor. Also the obvious, but perfect, choice of topping is the cream cheese frosting.This recipe makes about 2 dozen cupcakes, but you may try 1 1/2 times the recipe if you are bringing this to a potluck or family get together. You definitely want to make sure no one is left out when it comes to eating one of these special cupcakes.....

Raspberry Lager Cupcakes
adapted from Just a Pinch website

Ingredients/Cupcakes
1 tsp vanilla
1 oz red food coloring
2 eggs
1 tbs apple cider vinegar
1/2 cup vegetable oil
1 cup raspberry beer
1 3/4 cup sugar
1/2 cup or 1 stick butter (room temp)
3/4 cup of regular flour
2 cups cake flour
3 tbs cocoa powder
1 tsp baking soda
1 tsp salt

Ingredients/Topping
3-4 cups powdered sugar
8 oz cream cheese (room temp)
8 oz butter (room temp)
1 tsp vanilla
24-30 fresh raspberries for garnish (optional)
1 crumbled cupcake for sprinkling

Ingredients/Soaking Syrup
1 1/2 cups raspberry beer
8-10 fresh raspberries, mashed

Start by making the soaking syrup.  Fill a saucepan with the beer and mashed raspberries.  Bring the mixture to a slow boil and stir. Let it cook down to about 1/2 of the original amount. This should take about 7-10 minutes.  Place strainer over a heat proof bowl and strain liquid. Use the back side of a spoon to separate the fruit from the seeds, scraping the inside of the strainer. Once strainer holds nothing more than seeds, set bowl of strained liquid aside to cool and discard seeds.

To make the cupcakes, begin by greasing the top edge of your cupcake cavities and insert paper liners for approximately 2 dozen cupcakes. Preheat the oven to 350 degrees.

In a small bowl, mix together raspberry beer and food coloring. Set aside. Then fill the bowl of a standard mixer with the oil, butter and sugar. Beat on medium speed, occasionally scraping down the sides, for about 3 minutes or until mixture is light and fluffy. Drop in one egg and beat for 30 seconds. Add the other egg and beat again. Pour in cider vinegar and vanilla extract and blend liquids into batter until incorporated.

Using a third bowl, sift together 2 types of flour, cocoa powder, salt and baking soda. Fold 1/3 of this mixture into the batter. Pour in 1/2 of the raspberry beer/food coloring liquid. Stir until thoroughly blended. Repeat this process, using 1/2 of the remaining dry ingredients and all of the liquid. Lastly, fold in the last bit of the dry ingredients.

Using a scoop, fill each lined cupcake cavity with batter. Fill to approx. 2/3 full. Place both pans in oven and bake for 10 minutes and rotate pans. Bake for an additional 7-10 minutes or until tester comes out clean. Let cupcakes cool in pans about 5-7 minutes and then carefully transfer to cooling rack. Wait another 5 minutes and then brush lightly with soaking syrup. The brushing step will be in two sessions, about 3 minutes apart. This will give it time to soak in prior to the second session.

Cupcakes can be frosted once completely cooled.

For the frosting, add the cream cheese and butter to the bowl of a stand mixer. Then beat until no lumps remain and both ingredients are completely blended and creamy. Add the vanilla extract and beat again for about 1 minute, scraping down sides of bowl. Remove bowl from stand mixer and sift in 1 cup of powdered sugar. Place bowl back in stand mixer and beat until no dry ingredients remain. Continue with the process, adding the powdered sugar until frosting reaches the desired consistency.

Take one of the cooled cupcakes (preferably the ugliest, misshapen one) and place in mixer or food processor and process until you have fine crumbs.

Pipe frosting onto top of cupcakes and then sprinkle cupcake crumbs on top.  If desired, place 2 raspberries on center of top, just prior to serving.

Tips and Notes:
1. You will have some leftover soaking liquid.  Be sure not to "oversoak" your cupcakes, this will make them very fragile to handle and insure that they will fall apart when someone trys to eat them later.

2. How much food coloring or if you use any is personal preference.

3. The soaking liquid idea can be beneficial in instances where the flavor has baked right out of the cupcake for some reason. The recipe will need to be tweaked more, but you have a way to save these particular cupcakes from the error bin. Making a syrup with the flavoring and brushing on top will add back what was baked out.
                                       **Last Year: Citrus Syrup Tea Cakes***

Sunday, August 9, 2015

Citrus Snap Cookies

There are some treats that never really appear unless it is the holidays. Cut out cookies usually are reserved for the Christmas holidays. The shapes made are usually those of the occasion: bells, Christmas trees, gingerbread men...etc. I guess because of the time involved, it is only the holidays that motivates some people to make these type of cookies.

Well, just to be clear....these particular cut out cookies are not for the Christmas holidays. Made with a myriad of fruit zest and juices, they are most appropriate around spring or summer. That is when citrus fruit is the most plentiful and perfectly ripe.

No holiday to motivate you? Consider it a holiday when the kids go off to school! Or better yet, make the kids first day a little bit nicer by tucking a few of these away in their lunch bag.

The fun part about cut out cookies is the opportunity to make them unique. Choose whatever shape and decorate however you want. The cookies pictured above are in the shape of a butterfly, have just white glaze with sprinkles. With all the different colors of sugars, gel pens and different miniature decorations ( I even saw little "minions") the style possibilities are limitless. This recipe makes about 2 - 2 1/2 dozen.

Citrus Snap Cookies
adapted from Orlando Edible Feast 
 
Ingredients/Cookies
3 tbs fresh lemon juice
3 tbs fresh orange juice
3 tbs fresh lime juice
2 tsp lemon zest
2 tsp orange zest
2 tsp lime zest
1 cup or 2 sticks softened butter
1 cup confectioners sugar
2 cups flour
1/2 tsp salt

Ingredients/ Glaze & Topping
1 lb confectioners sugar
1 tsp lemon zest
1 1/2 tbs lemon juice
1/2 cup plus 2 tbs pasteurized egg whites

For the cookies, line 2 baking sheets with parchment paper. Pull out 2 small bowls. Mix the three kinds of zest together in one bowl. In the other bowl, combine all juices.

Fill the bowl of a stand mixer with the sugar and butter. Cream together, beating on medium high for about 3 minutes. Then add the juices, zest and salt. Beat until evenly distributed.

Remove bowl from mixer stand and fold in one cup of flour. Once blended, fold in the additional cup. Place a long sheet of plastic wrap on a flat surface. Gather dough into a ball and place in the middle of the plastic sheet. Flatten into a disc, about 1/2 an inch thick. Fold plastic over the dough, making sure all is covered. Then place in refrigerator to chill for about an hour for the dough to firm up.

While dough is chilling, preheat the oven to 325 degrees. Place a piece of parchment paper on a flat surface and dust with flour, this will be your rolling area. Also, place parchment paper underneath a cooling rack.

Once dough is firm, take out of refrigerator and divide in half. Keep one to work with and put the other, covered, back in the refrigerator. Roll dough out onto prepared surface, ending with an 1/8 inch thickness of dough. Cut into desired shapes and transfer to parchment lined baking sheets, spacing about 1/2 inch apart. Then place filled baking sheet in refrigerator. Dough will need to chill again for about 10 minutes.

After the chilling time is complete, place sheet in oven and let cookies bake for about 10-15 minutes, or until cookies are a light golden color on the edges and the bottom. Remove cookie sheet and place on cooling rack. After about 2 minutes, transfer cookies to rack. Let cool completely before frosting or decorating.

Repeat the process of forming and baking with the dough scraps and the remaining dough in the refrigerator.

For the glaze, mix all ingredients together and spoon glaze onto tops of cookies. After about 3 minutes, put topping of your choice onto glaze (sprinkles, sugar, dragees, etc.). Give the glaze time to completely harden prior to storage.

Tips and Notes:
1. The standard way to form these type of cookies, is to cut them out and then transfer to baking sheet. Instead of this method, you can roll out dough on parchment paper that fits the interior of the baking sheet. After rolling, parchment is then transferred to cookie sheet and shapes are cut out. Place pan in freezer for 10 minutes. Pull out pan and remove cold dough from around the cut shapes. Then place in oven to bake. By eliminating the transfer step from the standard process, you eliminate any possibility of losing the shape of the cookie.

2. The glaze can be as thin or thick as you want. The thicker it is, the less it will run off and drip on the parchment below the rack.
**LAST YEAR:JD's Birthday Cake**                    **2 YEARS AGO: Grand Marnier Cake**  

Sunday, August 2, 2015

Almond and Marzipan Roulade


I wonder how much of the population can be self sustaining. How many people can just go outside and get everything they need in the way of food right off their land? For some, the possibility exists, but is lacking in motivation. Most of us would probably would buy something rather than going to all that trouble.

However, other cultures seem to be doing it much more that we do in the US. This particular recipe stems from an article in Saveur called the "promised" land. It refers to the richness of the land in Northern Israel as well as several chefs residing there. One chef left a thriving bread business with a chain of bakeries, looking for a simpler, more satisfying life. Now, he is surrounded by an overabundance of fresh produce with a garden that seems to have a little of everything. Also, he is teaching culinary classes in his home.

This almond roulade recipe is definitely a keeper. One of the factors is that it is easy to make, but looks difficult as well as stunning. The marzipan brings just the right amount of sweetness to the rich, buttery bread. Another factor that impressed me was the touch of lemon zest on top and how the syrup on top completely changed the texture. Upon removing it from the oven, it looked to be crusty, almost as if it would flake into crumbs when cut. Yet, after topping it with the syrup, the surface softened. The syrup also seals the bread, keeping it from drying out with time.

If you are like the majority of the people in the US, you are not self sustaining. However, the idea can be quite appealing if you look at it with the right perspective. Imagine sitting on your back patio, enjoying a slice of this delicious breakfast pastry with coffee, while your overlook your own garden paradise.

Almond Roulade
adapted from Saveur Magazine, May 2013

Ingredients
1 cup buttermilk
4 eggs yolks (3 for dough and 1 for brushing surface)
Juice and zest of 1 lemon
1/2 cup warm water (separated into 1/4 cups)
1 1/4 cups softened butter
12 oz marzipan
1 cup sugar ( separated into half cups)
1 - 1/4 oz package active dry yeast
2 cups cake flour
2 cups all purpose flour
1 cup whole almonds (toasted and chopped)
1 tsp kosher salt
1 tbs coarse sugar

In a medium size bowl, sift together both types of flour and salt. Then stir in the yeast. Form a well in the center of the dry ingredients and set aside.

Take out another bowl and add buttermilk, 1/4 cup warm water, 1/2 cup of the sugar and 3 egg yolks. Mix together until evenly blended. Cut butter into 1/4 inch cubes. Pour buttermilk mixture into well of dry ingredients. Then drop in butter cubes. Stir with a wooden spoon until it becomes a solid dough mass.

Prepare a flat surface by dusting with flour and grease the interior of a medium size bowl. Take the  dough and knead for about six minutes on the floured surface. Form dough into a ball and place in prepared bowl and flip one time. Cover bowl with plastic wrap and refrigerate dough. It can be refrigerated overnight, but must be chilled for a minimum of 2 hours.

After chilling process is over, preheat the oven to 350 degrees. Line a baking sheet with parchment paper.  Remove dough from refrigerator and place on floured surface. Roll out dough and form a rectangle, measuring 11x16. Then sprinkle chopped almonds evenly over surface, leaving a 1 inch border on all edges. Lightly pat down almond pieces into dough to stick.

Divide marzipan into 2 pieces. Roll each piece into a rectangle measuring 5x8. Place each piece, side by side on top of the almond studded dough, leaving only a 1 inch border. Press down lightly to adhere. Start rolling the dough up, jelly roll style from the long end. Once completely rolled, the dough should be facing with the seam in the center of the bottom of the log. Pinch and tuck the ends under, downward like the bottom seam. Place log, seam side down on the baking sheet.

Brush the surface of the dough with egg yolk and then sprinkle the coarse sugar evenly on top. Place in oven and bake until golden brown. Log should be cooked completely in about 1 hour.

45 minutes into the baking time, prepare the syrup topping. Fill a saucepan with the remaining 1/4 cup of water and 1/2 cup of sugar and place over medium high heat. As the saucepan heats up, stir the ingredients together. Then let come to a boil and cook for 1-2 minutes.  Remove from heat and mix in lemon juice and zest.

Once loaf is completely baked, remove from oven and brush syrup topping over the top.  Let cool slightly before serving.

Tips and Notes:
1. The recipe refers to almond paste and marzipan as one in the same, but there is a difference.  Almond paste has more almonds and less sugar. I used almond paste, but which almond ingredient you use is personal preference.

2. For a less "chunky" filling, use sliced almonds (like I did). The sliced nuts are thinner and made for easier slicing.
                                            **LAST YEAR: Cinnamon Bun Pie**

Sunday, July 26, 2015

Brownie Bread Pudding


These days the housewares department always has those big pictures with sayings. I know you all have seen them..The first that comes to mind is "live, love, laugh."  Even though the thought is nice, these items soon become just decorations in the house.  It is hard for me to picture someone going down their hallway, before going to work, reading these pictures so they can have the proper mind set. 

Then there is are ones that do not fit the person. I am very tempted at times to ask who actually bought those things, because is sure does not reflect the person's character that is living there. Perhaps they are trying to display some strange type of irony.  So, if you are stubborn and set in your ways, it is time to take down the picture/sign that says "think outside the box".

Well, here we are with something that fits that saying...brownie bread pudding. This recipe actually is made with day-old or stale brownies. Most of us do not have that problem, but if you want to create something a little more upscale than brownies without a great deal of effort, you should keep reading. To push the idea further, experimentation with cake should prove to be a good endeavor. If you have a lot of excess trimmings from leveling cakes or the centers that you have taken out of cupcakes to fill, this recipe is a great option.

The transformation of the dry crumbs of the chocolate brownie when baked with the vanilla custard is nothing short of amazing. They turn back to their fluffy state with a creamy twist from the custard.  Topped with vanilla ice cream and caramel, this dessert carries a unique blend of textures and flavors that keep you from putting down your spoon until you are completely done. 

I implemented the recipe for ramekins and still ended up with a lot of excess crumbs, so the listing below sticks to the original size of a 7x11 inch baking dish. Make sure you plan in advance if you do not have any stale brownies on hand.

Brownie Bread Pudding
adapted from Desserts from the Famous Loveless Cafe

Ingredients/Brownies
3 eggs
1/2 cup (1 stick) and 2 tbs butter
1 tsp vanilla extract
2 1/2 oz unsweetened chocolate (chopped)
1/2 cup mini semi-sweet chocolate chips
1 tsp finely ground coffee beans
1/3 cup unsweetened cocoa powder
1 1/4 cup sugar
1 cup flour
1/2 tsp baking powder

Ingredients/Vanilla Custard
2 1/2 cups of half and half
1 1/2 tsp vanilla extract
5 eggs
2/3 cup sugar

Toppings
vanilla ice cream
caramel

Start one day ahead to make the brownies. Prepare an 8 inch square pan by greasing the interior and lining the bottom with parchment. Grease the face up side of the parchment. Preheat the oven to
350 degrees.

Set up a double boiler over medium high heat. Fill the top pot with the butter and unsweetened chocolate. Let the mixture heat up and melt, stirring occasionally. Once all is melted, remove pan from heat and remove top pot. Set aside.

In the bowl of a stand mixer, add the sugar, vanilla, eggs and ground coffee. Blend with whisk attachment on low speed. As the mixer is running, stream in the butter/chocolate mixture. Then turn off the mixer and remove the bowl.

Using another bowl, sift together flour, baking powder and cocoa. Add 1/3 of the sifted ingredients to the chocolate batter and fold in with a spatula. Repeat this process until all the dry ingredients are folded into the batter. Lastly, add 1/4 cup of chocolate chips and stir until evenly distributed throughout the batter.

Pour into the prepared pan and sprinkle the remaining chocolate chips on top. Place in oven until tester indicates done, this should take about 30 minutes. The brownies should be removed prior to the edges pulling away from the pan. Let cool completely in pan. Run a knife around the edge and invert onto a cutting board. Finely crumble the brownies in a shallow bowl or pan and let sit out uncovered overnight.

The next day, grease the interior of a 7x11 baking pan. Fill the pan with the brownie crumbs, making sure they cover the bottom evenly. Preheat the oven to 375 degrees. 

In a medium size bowl, whisk the eggs together. Then stir in the sugar, half and half and vanilla.  Pour the mixture evenly over the brownie crumbs. Cover the pan with foil and let sit for 20 minutes. The brownie crumbs will soften and soak up the custard.

Then place the pan in the oven, leaving the foil on. During the baking process, the mixture will solidify, indicating that it is done baking. This should take about 55-60 minutes. Remove and let cool for about 15 minutes, then cut and serve each piece with topping of ice cream and caramel.

Tips and Notes:
1. If you want to just make the brownies to eat as is, reduce the flour by 2 tbs.

2. Since form is not important with the brownies, you can just tear pieces out of the pan after cooling and crumble. The inverting process is not required.

3. Since the brownies bake up nice and moist, it is important that you follow the process for creating "stale crumbs" otherwise, the soaking process will not work as well.
                                  **LAST YEAR:Chocolate Cherry Scones"
 

Sunday, July 19, 2015

Banana Fudge Bundt Cake

I am always making a tunnel in my bundt cakes for a little "extra" something in there. Bundt cakes are so versatile, it is all in what you want in a cake. Mix it up with swirling another cake batter in there, or tunneling it with something extra or just plain.

This particular one is banana with a tunnel of fudge. The one thing about getting away from banana
bread to make cake, flavoring is required. You can use the artificial flavoring, which is easily found or go the extra mile for true flavor with freeze dried powder. This is personal preference, but the extract delivers the most intense flavor.

I sometimes think that bundt cakes were invented for the society against frosting. These people are easily detected. They have the "lid" of frosting left on their plate with no cake remaining. This means the cake has to stand alone in flavor. Bundt cakes do just that.

So those that love these type of cakes, the door is open on this one. Split the recipe and add 1/2 a recipe for a chocolate bundt and swirl the batter together. Another option is to make it with mini chocolate chips. Lastly, swirled banana batter with peanut butter batter topped with fudge glaze and nuts. Now that I have you hungry, let's get down to this recipe....

Banana Fudge Bundt Cake
adapted from Kiss My Bundt (fudge tunnel my added twist)

Ingredients
1 very ripe banana
3 eggs
1/2 tsp vanilla extract
1 1/4 cup milk
1 tsp banana extract
3/4 cup or 1 1/2 sticks of butter
2 1/2 tsp baking powder
2 1/2 cups flour
1 3/4 cup sugar
1/2 tsp salt
3/4 to 1/2 cup fudge spread

Prepare a 12 cup bundt pan by greasing the interior thoroughly and dusting with flour. Preheat the oven to 350 degrees.

Using a stand mixer, cream the butter and sugar together, beating at medium speed for 3 minutes. In another bowl, sift together the flour, baking powder and salt.

Add one egg to butter/ sugar mixture and beat 30 seconds. Repeat the same process with the other eggs, incorporating them into the batter one at a time. Mix in the extracts, beating for about 3 minutes.

Fold in 1/3 of the sifted ingredients. Then stir in 3/4 cup of milk. Repeat the process, starting again with the sifted ingredients.  After the last addition of the dry ingredients, take out a small bowl and mash the banana in it.  The consistency should be smooth with some liquid. Fold into the batter until evenly distributed.

Spoon 2/3 of batter into pan and smooth the top. Fill a ziplock bag with the fudge.  Seal and place in hot water.  The cut off the corner and squeeze an even line in the center of the batter, moving in a circular direction with the pan. Once bag is empty, spoon the rest of the batter on top, making sure the fudge is completely covered.  Smooth the surface and place in oven.  Let bake for about 40 minutes or until tester (when inserted off center) comes out clean.

Place pan on cooling rack and let cool for 20 minutes.  Then invert onto rack. If cake resists,let cool another 5-10 minutes and try again.  Cool cake completely before serving.

Tips and notes:
1. The method of putting the filling on the batter keeps an air pocket from forming.  This happens when baking if big spoonfuls of the fudge is placed on the batter.

2.The fudge spread I bought was very thick, more so than peanut butter or Nutella.

3. The bottom of Bundt pans are the last to cool down. If you are havin issues with cake release try sitting the pan on a towel that has been soaked in cold water to speed up the process.
                           **LAST YEAR:Coconut Almond Topped Peach Pie**


Sunday, July 12, 2015

Peach Kolaches


I have been gathering recipes that include peaches for quite some time, however, the season is so short it is hard to fit all of them in. Which means I had to make a decision among the vast amount of recipes I have.

I finally settled on this particular one. It was actually the picture that sold me. It is on the back cover of the book and inside as well. I can't help thinking that I have passed on making some really good recipes due to no picture. In reality, I should not dwell on it too long. After all, in this day and age, if the recipe truly is "all that" then the picture should be there.

Rebecca Rather really has hit a home run with this particular recipe. The bread part has the perfect sweetness with the flavor and texture that we all expect in a kolache. Also, the idea of the peaches in the middle is pure baking genius. After one of these, you will never think of kolaches the same way.

The peaches are mixed with peach jam and Rebecca suggests Fischer and Wieser brand. As I scanned the rows of different jam, I did come across that brand. However, by some delicious act of fate, there was just Amaretto Pecan Peach Jam in that brand. This was going to be one flavorful filling! I was also drawn to the big white peaches, which proved to be a good choice. They were large and when cut, sweet juice dripped out of them.

So, act quickly and take the most advantage of peach season this year. With recipes like this, you will be most likely to run out than have too many on hand. Be sure that when making these you allow time for the dough to rise. There are 3 sessions, totaling a minimum of 6 hours. However, you can do the 2nd session as overnight instead of the 4 hours.

Peach Kolaches
adapted from The Pastry Queen by Rebecca Rather

Ingredients/Dough
8 1/2 cups flour
1 (1/4 oz) package active dry yeast
1 1/4 cups sugar
2 tsp of salt
2 cups milk
1/2 cup lukewarm water (110 to 115 degrees)
1/2 cup butter
2 eggs

Ingredients/Filling
1 cup peach jam
2 cups pitted chopped peaches

Ingredients/Topping
1/2 cup sugar
1/2 cup flour
3 tbs butter (chilled and diced)

For the dough, the warm components will need to be made first. Start with a small size saucepan.  Pour in the milk and place over medium heat and let warm up until it reaches a simmer. Remove from heat and place a candy thermometer in the milk to register the temperature while cooling. The milk is ready to use once it cools down to about 110 to 115 degrees. While that is cooling, sprinkle the yeast into the bowl of lukewarm water.  Stir and then let sit until foamy, about 5 minutes. The last warm ingredient is the butter.  It can either be melted in the microwave or in a saucepan. This component will also need to cool for about 5 minutes after melted.

Crack the eggs into a bowl and whisk together. Whisk in the salt, sugar and melted butter. Once blended stir in the warm yeast. Then mix in the milk.

Add 2 cups of the flour to the wet mixture. Using a wooden spoon, mix until blended. Continue with the same process until all flour has been blended. As it starts getting thicker, you may want to switch to using your hands to for blending the flour into the batter. Once this process is complete, oil the interior of a bowl and shape the dough into a ball. Transfer dough to the bowl and cover loosely with plastic wrap. Let rise in a warm place to double in size for about 1-2 hours. To test for correct completion time, touch the dough lightly and see if it still retains the dent. If it does, this rise session is complete. 

Punch dough down once or twice. Cover again and refrigerate for a minimum of 4 hours. You can also let stay in the refrigerator overnight.

Line a 12 x 17 inch jelly roll pan with parchment paper. Then grease the interior sides and corners. To make the filling, place the chopped peaches and the jam in a medium size bowl and mix until evenly blended.  For the streusel, just blend all the ingredients together in a small food processor until it is sandy and clumps together in your hands. Set both aside.

Take the dough out of the refrigerator and divide into 16-18 even pieces and shape each piece into a ball. The ball should be about 2 1/2 inches in diameter. Make an indentation or form a round biscuit with a well in the center. Bear in mind that the dough will rise again, so make sure the well is significant. Place each formed piece on the prepared pan.  The end result should be a pan with 3 kolaches across and 6 down.  If you ended up with 2 more, place those in a small, low lipped parchment lined pan.

Fill the kolaches evenly with the peach filling. Cover rolls with a towel and let rise again in a warm place for about another hour.  At the 1/2 hour mark, preheat the oven to 375 degrees.

Uncover the kolaches and sprinkle with the streusel.  Place the kolaches in the oven and bake until golden brown on top.  Bake time should be about 25-30 minutes.  Let cool 20 minutes prior to serving.  These can be served warm or at room temperature.

Tips and Notes:
1. The rise time in the fridge created a dry top on the dough.  It did not impact the flavor, but next time I would brush lightly with oil before refrigerating.

2. My dough was formed into ashtray type holders for filling and I kept the filling from mounding above the dough. I noticed in the pictures from the author, the filling was mounded above the dough. The end result is spill over. Since the rolls are touching, the spill over will not be in the pan. It will make the peaches more noticeable and give the rolls more coverage. How you fill and create the dough wells are personal preference.

3. Really juicy peaches will release of lot of the juice when mixed with the jam, the more they set the more juices are released.  If this happens, be sure to drain the excess liquid off, you do not want to use a soupy filling in the kolaches.
                                         **LAST YEAR: Frosted Banana Bars**
    

Sunday, July 5, 2015

Key Largo Cupcakes


It has been many years ago, but it is hard to forget my leisurely summers on the beach in Florida. During those years, I was anxious to grow up and did not realize to cherish that time in my life - you know, the teenage years.

Since Florida, I still favor the tart citrusy fruits, never getting enough Key Lime pie or fresh lemonade- which brings me to this recipe.

A plain vanilla cupcake with vanilla frosting can be found just about anywhere. It does not remind me of any particular place or particular event. Nothing wrong with a vanilla cupcake, but we all can use a little pizzazz. Face it, we all actually need it. A change from jeans to the little black dress or from plain white Keds sneakers to Camouflage Nike tennis shoes.

The first "pizzazz" addition to this vanilla cupcake is the filling made with coconut and white chocolate. The filling is baked in. Outside of that, as the cupcakes are cooling, they are brushed with pure key lime juice that soaks into the cake part. With the coconut to lime ratio being about even at this point, I decided to top the cupcakes with vanilla french buttercream and sprinkles of lime zest.

Tweaks are still needing on the filling in the area of consistency only, but the taste is spot on. For more details regarding this, please go to the notes at the end of the recipe.

No vacation lined up in the near future? Don't despair. Getting to the Florida state of mind is less costly and easy. Call a friend after work, grab some lawn chairs and put on some of that real coconut-smelling tanning lotion. Set out the cooler with ice and drinks and get outside. Lay in the sun until sunset, laughing and talking with your friend. End the evening with a few of these cupcakes. Also, if anyone asks about vacation travels- tell them you have, in a way, been to Key Largo.....This recipe makes about 2 dz cupcakes.

Key Largo Cupcakes
by Flourtrader

Ingredients/Cupcakes
2 cups flour
2 tsp baking powder
1/2 tsp salt
1 3/4 cups sugar
4 eggs
1 tsp vegetable oil
3/4 cup milk
1/4 cup coconut milk
1 vanilla bean seeds (scraped out of 1 vanilla pod)
1 tsp vanilla extract
3/4 cup or 1 1/2 sticks butter

Ingredients/Filling
3/4 tsp coconut extract
2 tbs butter
1/3 cup coconut milk
1/2 cup sweetened coconut
1/4 cup corn syrup
4 oz white chocolate bars (chopped into pieces)

Ingredients/Topping
1/4 cup key lime juice
French buttercream icing (adapted from Robicellis recipe)
         1 cup water
         2 cups sugar
         2 tbs corn syrup
         1/4 tsp cream of tartar
         5 egg yolks
         1 egg
         1/8 tsp xanthan gum
         3 sticks of butter (1 1/2 cups)
3 tablespoons of lime zest

Prepare two 12 cavity muffin tins by greasing the top edge of the cavities and lining with cupcake papers. Set aside. Also, line 2 cookie sheets with parchment paper.

The filling will need to be made first. Set up a double boiler and heat until bottom pot of water simmers.  Fill top pot with all the filling ingredients except sweetened coconut. Cook until chocolate has melted. Remove from double boiler and transfer chocolate mixture into a regular saucepan. Place over medium high heat and stir in coconut. Let cook for about 20 minutes until it turns thick, like syrup. Remove from heat and let cool to room temperature. In order to speed up the process, you can transfer to a cool bowl.

Once it has cooled, scoop up tablespoons and drop onto parchment paper. Filling will run to a point, forming saucers (almost like small pralines).  After all the filling has been put on cookie sheets, place cookie sheets into the freezer.

For the cupcakes, start by placing the butter in a microwave safe bowl. Place bowl in microwave and melt using medium heat for about 1 1/2 minute. Pull out bowl and stir, making sure all is melted.  Then set aside.  Preheat the oven to 350 degrees.

Set up a stand mixer and add the eggs to the bowl.  Beat until frothy on medium speed.  This should take about 2 minutes. Turn mixer speed up to medium high and slowly stream in melted butter.  After all the butter is blended, remove bowl from stand.

Stir coconut milk, regular milk, oil, vanilla bean seeds and vanilla extract into egg/butter mixture. In a separate bowl, sift together flour, salt and baking powder. Then whisk the sugar into the sifted ingredients. Fold this dry mixture into the liquid batter, mixing just until no dry streaks remain.

Scoop out batter and fill each muffin cavity. The cavities should only be filled 2/3 of the way up.  Take out cookie sheets with filling. Filling will be very sticky. Using floured fingers, roll each piece into a ball and place in the center of the batter of each cupcake.

Bake cupcakes for about 10 minutes, then rotate pans and bake for an additional 10-15 minutes. Use a tester to check for doneness, but test it off-center since the filling is in the center. Remove pans and place on racks to cool for 5 minutes. Lightly brush lime juice on top of the cupcakes and then from pan to cooling rack.

To make the buttercream, add water and sugar to a saucepan, clip a candy thermometer on the edge  and place over high heat. Then stir in corn syrup and cream of tartar. Let the mixture cook, without stirring until the temperature reaches 235 degrees. This will need to be checked periodically while completing other steps, since cooking to the stated temperature can take some time.

In the meantime, add the egg yolks and egg to the bowl of a stand mixer and beat on high speed. Beat until they have tripled in volume. Correct consistency can be tested by pulling the beater blade out. The eggs should now stream like ribbons back into the bowl. Beat in the xanthan gum. Turn mixer off.

Check back on the sugar/water mixture and wait until it reaches correct temperature. At the correct temperature, turn mixer back on to medium speed. As the mixer runs, pour hot sugar liquid into the batter in a steady small stream. After all is mixed together, run mixer until the batter reaches room temperature. While it is cooling, start shaving your butter into slices with a cheese slicer or a vegetable peeler.

After the sugar/egg batter has cooled, start adding pieces of the shaved butter, continuing to run the mixer. Once all the pieces are blended in, change the mixer speed to medium high and beat for about 20 seconds creating a smooth buttercream frosting.  Pipe the frosting on top of the cupcakes and sprinkle on lime zest.

Tips and Notes:
1. The perfect filling would not require freezing and would not sink in the cupcake when baked in the batter, I am still working on developing a better consistency. Candy consistency that is light enough not to sink.

2. The original buttercream recipe stated butter measurement of  1 1/2 lbs. As I was making this, I was happy with the consistency and taste after only adding 3/4 of a pound. This is personal preference, so feel free to experiment with this measurement.

3. I recommend a 1/2 day for flavors to meld and best served shortly after that. Cupcakes and icing do not do well stored in the refrigerator.

4. Instead of adding the vanilla bean to the batter, you can also use vanilla infused sugar.  This is done by scraping vanilla seeds into the sugar.  Then mix together, cover and let flavors meld for about 1-2 weeks prior to use.
                                   **LAST YEAR: Chocolate Truffle Cookies**



Sunday, June 28, 2015

Butternuts


Russian Teacakes, or otherwise called Mexican Wedding Cookies have graced many a dessert table around the holiday season. Since it is a favorite, there are many recipes that spun off from the original. 

This particular cookie is just that, pulling in the flavors of butterscotch and rum. I know, a bag of butterscotch chips seem to be the remaining orphan at the grocery store. The ones that get all the attention are the chocolate chips, which are the first to go. Even though butterscotch may not be as popular as chocolate, these cookies are a reminder that this flavor can be just as delicious when the right recipe comes along.

So as you are walking down the baking aisle, please consider the butterscotch chips. All they need is a good home.

This recipe makes about 3 dz cookies.

Butternuts
adapted from Just a Pinch website

Ingredients/Cookies
1 cup finely chopped pecans
6 oz butterscotch chips
1/4 tsp salt
1 3/4 cups flour
1/2 cup powdered sugar
3/4 cup butter

Ingredients/Topping
1 tsp rum extract
1/2 cup pecan pieces
3 powdered sugar
3-4 tbs milk or water

Prepare a baking sheet by lining with parchment paper. Preheat the oven to 325 degrees.

Sift 1/2 cup of powdered sugar into a small bowl and whisk in the salt. Add the sugar blend to the bowl of a stand mixer. Then cut butter into cubes and drop cubes into sugar mixture. Beat on medium speed until smooth, about 2 minutes. Next, fold in the flour in increments until a dough is formed. Then add pecans and butterscotch chips, blending with a wooden spoon until evenly distributed throughout the dough.

Take the dough and measure out into teaspoons. Shape each into a round ball and place on prepared cookie sheet. Since the cookies do not expand very much, they can be spaced about 1/2 inch apart. Bake in oven until lightly browned on the bottom, about 15-17 minutes. Do not let cookies turn brown on top, that is a sign they are over baked. 

Remove sheet from oven and let cookies cool on baking sheet for about 2 minutes and then transfer to a cooling rack. After all the cookies are baked and cooled, place cookies on a plate. Now it is time to start on the glaze.

Place a sheet of wax paper under the cooling rack. Pull out a small bowl and add milk (or water) and extract. Whisk together. Take out a larger bowl and sift all of the powdered sugar into the bowl. Then mix the liquid mixture into the powdered sugar.

To glaze each of the cookies, dip the top into the glaze and swirl to let the excess drip back into the bowl. Place cookie back on rack and put a piece of pecan on the top. Repeat the process until all cookies are topped as stated. Let rest one hour for glaze to set up, then they are ready to enjoy.
 
                                         **LAST YEAR:Cherry Dr Pepper Cupcakes**


Sunday, June 21, 2015

Pesto Potato Rolls


Homemade bread is something that we all enjoy.  However, the thought of making bread does bring to mind an all day project, with kneading and rising time. With most people's busy lifestyles, the time is just not there. There is an alternative. No, it is not the bread machine. Nothing against the bread machine, but the soft, loaf type bread is not always what we want. The alternative would be a no knead bread with not much rise time that is soft and flavorful, which brings me to this particular recipe.

The final result to my bread baking endeavor was fluffy, pull apart rolls with the flavor of butter and pesto - so it was a tasty ending! These rolls are perfect to serve with soup, salad or any Italian meal.

Pull apart bread is very popular and versatile. There are several savory as well as sweet recipes out there. I chose pesto because it happened to pair well with the dinner I was planning. The other thing that interested me about the recipe (outside of the no knead concept) is that it uses potato in the dough.

Now, let's get to the recipe.  This makes about 2 dozen rolls.

Pesto Potato Rolls
adapted from No Need to Knead

4 3/4 cups bread flour
1 tbs sugar
2 tsp salt
1 tbs quick rising yeast
pinch of black pepper
1- 11 or 12 oz russet potato (peeled and chopped into 1 inch pieces)
6 tbs purchased pesto
3/4 cup plus 2 tbs melted unsalted butter (slightly cooled)
2 eggs

Begin by buttering the interior of two 9 inch round cake pans (about 1 1/2 inches deep) and set aside.

The next step is cooking the potatoes. Place 1 tsp salt, potatoes and 3 1/2 cups of water in a saucepan over medium high heat. Stir and then cover. The mixture should come to a slow boil. Let potatoes cook for about 20 minutes until done. When done, potato cubes should be able to be pierced with a fork with very little effort. Remove saucepan from heat and mash until all the lumps are gone. Your mixture will be very watery and pourable. Separate out 2 cups of the potato water in a heat proof bowl and discard the rest. Let the mixture cool to about 105 to 115 degrees.

Once the potato mixture has cooled, stir in yeast, pesto, pepper, sugar and other tsp of salt. In a separate bowl, whisk the two eggs together. Add the eggs and 1/2 cup melted butter into potato batter.  Blend until evenly distributed.

Prepare a bowl for rising by buttering the interior. Set aside. Using a wooden spoon, blend the flour into the batter in 1/2 cup increments. After the flour has been mixed in, you should have a smooth and sticky dough. Form the dough into a ball and place in prepared bowl. Turn once to coat each side. Cover bowl with plastic wrap and let rise in a warm place until doubled, about 45 minutes. Do not punch down dough after rise time.

Prepare a flat surface by lightly dusting with flour. Roll dough out into 1/3 inch thickness. Then cut out rounds with a 2 1/2 inch cutter.  Keep cutting and re-rolling until the dough has been formed into cut circles. At this point, set up an assembly line. The rounds will be next to the bowl of melted butter (remaining amount of 1/4 cup plus 2 tablespoons) and the pans will be next to the butter.

Dip or brush the top of each round with butter and fold in half. Place in pan with fold on the bottom, or fan side up. Continue to do this until each cake pan has 12 rolls in it. Cover each pan with plastic wrap and let rise in a warm place for about 20 minutes.

During the rising time, preheat the oven to 400 degrees. After the rising time is complete, place pans in oven and bake until golden brown on top. Bake time should be about 25 minutes. Let rolls cool in pans for about 20 minutes and invert twice, so golden tops of rolls are face up. Serve warm or at room temperature.

Tips and Notes:

1. When you form the dough in the pans it will be slippery and soft. Dough rounds might not fill pan prior to rise time. Just place folded dough rounds in pan evenly spaced.

2. If you want quick results, you can plan ahead the day before, with the changes as follows:
Form the dough by using regular rise yeast and but only melt 1/2 cup of butter for use in creating the dough. Instead of the instructions for the first dough rise, cover the dough and place in refrigerator overnight. The next day, when you are ready to form the rolls, melt the remaining butter. Follow the same instructions above, starting with the information after the first rise. The rise time for chilled dough (after the rolls have been formed) is 30 minutes.
                                   **LAST YEAR: Virginia Blackberry Roll**         


Sunday, June 14, 2015

Pecan Cream Cups


The blend of candy with cookies has always been an appealing idea. Twix is one of the better known brands that has done well by using this type of texture/flavor blend.

This recipe incorporates the same idea with very tasty results. The cup part of this treat is like a shortbread flavored with cinnamon. It is filled with a mixture of marscapone cheese and pecans and then baked. After the cups have cooled, the filling is covered with semi sweet chocolate.

One bite does have you enjoying the crunch of the cookies, then you move on to the creamy filling chock full of pecans. The filling makes me think of pecan pie or pralines, but without as much sweetness. Topping the filling with chocolate makes it more confectionary. Twix has the right idea, a cookie/candy combo is hard to resist. The little cups are great at parties and the texture/ flavor combo will have them coming back for seconds. This recipe makes about 2 1/2 dz cups.

Pecan Cream Cups
by Flourtrader

Ingredients
1 1/2 cups marscapone (softened)
2/3 cup chopped and toasted pecans
3/4 cup butter
1 cup sugar
1 egg
1 tsp cinnamon
2 cups flour
1/2 tsp baking powder
1/2 tsp salt
3/4 cup semi sweet chocolate chips

Use a non stick mini muffin pan or butter the inside and top edge of mini muffin cavities. Preheat the oven to 375 degrees.

Place the butter and sugar in a bowl. Beat until smooth and creamy, about 3 minutes. In a separate
bowl, whisk the egg with the cinnamon. Add the cinnamon/egg mixture to the creamed butter and
sugar. Blend with mixer on medium speed until incorporated into batter. Set aside.

Using another bowl, sift together flour, salt and baking soda. Fold the sifted ingredients into the wet batter. Place 1 tbs of dough in each muffin cavity. Press each tablespoon of dough into a cup form in the cavity, the same manner as you would in making tart shells. The dough cup should come up to the rim. Trim off excess and blend back in with the rest of the dough for forming additional cups.

Once all the cavities of your muffin tin have a dough cup, start making the filling. Fold the pecans into the marscapone until evenly distributed. Fill the dough cups with the filling right below the top edge, reserving some room for the top layer of chocolate. Smooth the surface of the filling.

Place in oven to bake for about 9-12 minutes, or until the cookie shell turns a golden brown. Remove and place rack to cool in pan for about 10 minutes. Then remove from pans carefully place each on cooling rack. Let cool completely.

While the cups are cooling, set up a double boiler and fill the top pot with chocolate chips. Once the chips start melting, stir a few times. When all the chocolate is melted and the cups have completely cooled, smooth the chocolate on top of the cup filling. Make sure you do not get the chocolate on the cookie edges.

Let rest about 1 hour for the chocolate to set up. Then serve. Store covered in the refrigerator.

Tips and Notes:

1. Filling will rise while cooking and sink when cooling, consider this when filling.

2. The dough cups are a good shell to use as a base for filling with the item of your choice.                              

3. Evenly shaped dough in the cookies cup will insure even baking.
                      **LAST YEAR: Chocolate Angel food cake**


Sunday, June 7, 2015

Strawberry Cream Cheese Coffee Cake


I heard on the radio station the other day that it was National Donut day. I do like donuts quite a bit, but I feel that they could incorporate some fresh fruit into the flavors.  Jelly filled is actually fruit gel, not big chunks of fresh fruit. Donut makers should split a donut and fill it with fresh fruit once in a while, I think it would catch on.  I would definitely be a patron at that donut shop.

That brings me to this particular recipe. It has a blend of fresh fruit, cream cheese and almonds layered on top of sweet cake. The original recipe called for blueberries, but I decided that with almonds and cream cheese, strawberries is a better flavor match.

This breakfast treat is one that never got out of the house. Most of my desserts are brought to the work place or given to the neighbors. It is only test tasted with one serving before moving on.  However, my husband wanted this one for our household and he managed to make it disappear in a few days.

Strawberry Cream Cheese Coffee Cake
adapted from Best Recipes from Country Inns and Bed and Breakfasts

Ingredients
1 cup fresh fruit (any type of summer fruit, with the exception of citrus, chopped if bigger than blueberries)
1 tsp almond extract
3/4 cup plain low fat yogurt
2 plus 1 eggs
1/4 cup apple juice
6 oz cream cheese
2 tsp water
1/2 cup butter
3/4 plus 1/4 cup sugar
2 1/4 cups flour
1/2 tsp baking soda
1/2 tsp baking powder
1/4 tsp salt
1/2 cup sliced almonds
1 tsp cornstarch

Grease and flour a 9 inch springform pan. Preheat oven to 350 degrees.

Fill a small saucepan with fruit and apple juice. Let come to a boil and then reduce heat and stir.  Simmer on low for about 3 minutes. Add the water and sift in the cornstarch.  Stir again and let simmer. The liquid should thicken up and reduce in a short amount of time. When ready, your saucepan contents should measure about a cup of the fruit/cornstarch mixture. Remove from heat and set aside.

Prepare a food processor for use. Fill the processor bowl with 3/4 cup of sugar and flour. Then cut the butter into cubes and drop into bowl. Process until mixture resembles sandy coarse crumbs. Empty contents into large bowl.  Remove one cup of mixture and place in another bowl for a different use.

Sift together baking powder, baking soda and salt. Fold into sugar mixture until distributed evenly.  In a separate bowl, place 2 eggs and the almond extract and whisk together. Add the yogurt and whisk again to blend. Pour into the flour/sugar batter and stir. Once blended, empty contents into prepared springform pan. The batter will be a bit sticky, but flatten on the bottom of pan and bring up the sides about a 1/4 of an inch. There should be a little bit of a well from the dough sides going down to the bottom of the dough.

Take out a medium size bowl and beat together cream cheese, 1/4 cup of sugar and remaining egg until smooth. Fill the well of the dough with the cream cheese mixture and smooth the top. Then spread fruit mixture over top of cream cheese. Find the reserved crumb mixture and stir in sliced almonds. Sprinkle over the top of the coffee cake, making sure it is covered to the edge evenly.

Place in oven and bake until golden brown. This will take about 45 minutes and filling will be set when done. Cool in pan 15 minutes then remove the outer ring of the springform pan.

Tips and Notes:

1. Because of their size, blueberries yield more volume in a cup than chopped strawberries. Next time, I will up the amount of strawberries. The 1 cup turned out to be a little sparse on top.

2. Another good flavor match since this has almonds would be cherries.

3. Be careful when adding ingredients, the eggs as well as the sugar are used in 2 different components so they need to be added separately.

4. The instructions are to spread fruit over cream cheese.  Just to insure that you are not mixing the layers, it is better to drop by spoonfuls.
                         **LAST YEAR:Chocolate Almond Marsala Cookies**


Sunday, May 31, 2015

Oatmeal Raisin Cookie Pie


Do you sometimes want homemade but find that your lifestyle may just be too busy to fit in the time? Then the cookie pie is the answer. You can have all the taste of an oatmeal or chocolate chip cookie, but in the form of a cookie pie. After just one baking session, slice and eat!

This particular recipe yields the same chewy texture that you will find in regular sized oatmeal cookies. I have been contemplating changing out the raisins for chocolate chips and skipping the icing. In the end, we must satisfy what the tastebuds are craving. Whether it is grandma's tried and true oatmeal cookies or the updated chocolate chip version, the cookie pie is the quickest method. It makes for a tasty after dinner dessert with coffee as well as a good addition to a lunchbox.

Oatmeal Raisin Cookie Pie
adapted from Serious Eats.com

Ingredients/Cookie Pie
1 egg
1 tsp vanilla
1/2 cup or 1 stick unsalted butter (room temp)
3/4 cup flour
1 1/2 cups old fashioned oats
1/2 tsp salt
3/4 tsp ground cinnamon
1/2 tsp baking soda
1/2 cup light brown sugar
1/2 cup granulated sugar
1/2 cup raisins

Ingredients/Icing
1 tsp and 1 tbs heavy cream
1/3 cup powdered sugar

Grease the interior of a 10 inch springform pan and preheat the oven to 350 degrees. Take out a medium size bowl and sift together the ground cinnamon, baking soda, salt and flour. Then stir in the oats and set aside.

Place both types of sugar in the bowl of a stand mixer and blend until evenly mixed. Cut the butter into cubes. Add butter to sugar and beat until smooth. This should take about 3 minutes.  With mixer still running, add the egg and vanilla extract.

Once all is evenly distributed, fold in the dry ingredients until no streaks remain.  Stir in the raisins. Transfer batter to prepared pan and smooth the surface so all is even.

Bake until the batter turns a golden hue and is set in the middle, approximately 20-25 minutes. Cool in pan 5 minutes and then remove the outside ring of pan. Leave on the bottom of the springform pan and let cool completely.

Once cool, fill a small bowl with the heavy cream and then sift in the powdered sugar. Stir until smooth. Take a zip lock bag and clip off a small part of of the corner. Fill bag with icing and drizzle on top of the cookie pie. Let icing set up prior to slicing and serving.

Tips and Notes:

1. You can also use a pie plate or 9 inch pan, but you will need to watch because the baking time will  vary.
2. The icing recipe can be doubled, which I did for more coverage.
                                       **LAST YEAR:Hawaiian Loaf*

Sunday, May 17, 2015

Cannoli Cake Roll

I have never actually eaten a cannoli before. One of the reasons is that they are hard to find in the U.S.  Also, the cream and candied fruit filling does not really strike up a craving. Upon further research, I have found that chocolate chips can be used and that the fruit can be excluded. That discovery does make me a candidate to seek out and taste a cannoli. However, since they are so scarce here, I decided to have the same flavor in a different format.

This particular recipe puts a spin on traditional cannoli by replacing the cannoli shell with cake and forming a cake roll with the filling inside. This type of creativity has been going on for awhile.  After all, chocolate chip cookies have a countless number of spin offs. There are now versions of this in everything from pie to bar drinks.

For flavor notes, this cake roll uses cinnamon, chocolate chips and orange liqueur in the filling. The cake part is a vanilla sponge. The garnishing with pistachios and chocolate chips is optional, but very traditional.

This was fun and easy to make. It also yielded a stunning and tasty result. If you like the taste of cannoli and are looking for something special for a gathering, this recipe is well worth trying out. Be sure to plan for the 3 hours of cooling steps when you decide to make this. Now, it's time to have some fun in the kitchen with a sweet ending! "Questa torta รจ squisita!" as they say in Italian.

Cannoli Cake Roll
adapted from All Recipes Cookbook

Ingredients/Cake
3/4 cup cake flour
1/2 cup sugar, separated
1/4 tsp cream of tartar
5 eggs, separated, at room temperature
1 tsp vanilla extract
1/4 tsp salt
confectioners sugar, for dusting

Ingredients/Filling and Frosting
4 tbs orange liqueur, separated
1 tbs water
1 tsp vanilla extract
1 1/4 cup ricotta cheese
4 oz cream cheese
3/4 cup heavy whipping cream
1/2 cup plus 3 tbs confectioners sugar
1 tbs white sugar
1/4 tsp gnd cinnamon
1/4 cup and 1 tbs mini semi sweet chocolate chips
1/4 cup chopped pistachios (optional)

Grease a 10x15 inch jelly roll pan and line the bottom with parchment paper.  Preheat the oven to 375 degrees.

For the cake, start with 2 bowls. Add egg yolks, vanilla and 1/4 cup of sugar to a large bowl.  Fill a second, medium size, bowl with egg whites, cream of tartar and salt.

Both of the mixtures need to be beaten. Start with the egg yolk mixture and beat for 5 minutes. It will thicken up and turn a light lemon, color. After beating, clean and dry your mixer beaters to use for the egg white mixture. Beat the egg white batter until it reaches a soft peak consistency. Continue to beat and sprinkle in 1/4 cup of sugar, beating until stiff peaks form.

Using a spatula, fold 1/3 of the egg white batter into the yolk mixture. Continue with 2 more intervals of adding and folding the egg white batter into the yolk batter. Lastly, fold in the flour in 1/4 cup increments until no dry streaks remain.

Pour batter into the prepared pan, making sure it is smooth and even. Place in oven and bake until cake springs back when lightly touched. Baking time is about 10 minutes.

During the bake time, place a clean towel on a flat surface and dust with confectioner's sugar. Then make a soak mixture by combining 2 tbs of orange liqueur, 1 tbs water and 2 tbs sugar in a small microwave safe bowl. Microwave about 10 seconds. Remove and stir until sugar is dissolved.

Once the cake is done, remove from oven and invert pan onto prepared towel. Peel off parchment paper. Brush cake with soak mixture. The cake, with the towel, should be positioned with the longest side running horizontally in front of you. Then, using the beginning side of the cake closest to you, carfeully rolling it up with the towel to form a jellyroll. With the seam side down, transfer to a cooling rack. Cake will be need to be completely cooled prior to filling. This will take about 1 hour.

As the cake cools, make the filling with the use of a food processor. Fill the bowl of the processor with the ricotta cheese, cream cheese, 1/2 cup confectioner's sugar, cinnamon and 1/2 tsp vanilla.  Blend on medium speed until smooth. Fold in 1/4 cup of chocolate chips. Transfer to bowl and cover. Place in refrigerator until cake is completely cooled.

Carefully unroll cooled cake and take bowl of filling out of refrigerator. Empty filling onto the center of the cake. Smooth filling out over cake, leaving 1/4 inch border. Repeat the cake rolling process as done before, except without the towel. Remember to start with the same long side as you began with the first time you rolled the cake. Once rolled, transfer to platter seam side down. The platter will be the one that you intend to use for presentation before slicing and serving.

Now the cake needs to be frosted. For the frosting, add whipping cream and 3 tbs of confectioners sugar to bowl of stand mixer.  Beat ingredients together until you reach the soft peak stage.  Add two tablespoons of orange liqueur and 1/2 teaspoon of vanilla to the cream.  Using a spatula, fold the flavor additions into the whipping cream until evenly distributed. Spread frosting over cake, covering all surfaces, including ends and the curves that meet the platter.  If you choose, use a design blade to make designs in the frosting, being careful not to expose any cake as you drag along the sides.

Refrigerate cake for about 2 hours before serving.  Decorate with 1 tbs mini chocolate chips and finely chopped pistachios when ready to serve, if desired.

Tips and Notes:
1. Due to the different batters/components using a lot of the same ingredients, so be sure to use the noted amounts in the paragraphs when creating, not the listed ingredient amount.  The measure values are combined in the listing, instead of listing the same ingredient again with a different vallue. If the measurement it is not noted in the paragraphs, then refer to the ingredient list for the measurement.

2. I know that a lumpy filling can cause issues, however, I feel that there could have been a little bit more mini chocolate chips in the filling.

3. The garnish is missing in the picture, however, I do intend to use it once the cake is served. The missing slice is a taste test.  

4. The biggest flavor in the cake is the cinnamon and orange.  If those are not a favorite, try another liqueur and spice more to your liking.
                                            **LAST YEAR: Buckeye State Ice Cream*