Foodbuzz

Sunday, June 30, 2013

Peach Amaretto Bread Pudding


This recipe stems from Austria and it has a long Austrian name, but I decided it would be easier for all if I labeled it with an American name.  The original is more of a winter type of dessert consisting of apples and raisins, but I gave it a summer touch by using peaches.

The meringue topping really did make all the difference in the dessert.  I have made bread pudding before, but never had used this type of topping. Also, the peach and amaretto flavors have always been a favorite, so I was pleased with the final tasting of this desssert.

The change in the fruit to the original recipe as well as the type of bread only impacted the height of the dessert.  If I was to make it again I would probably use the more dense brioche than the Hawaiian bread.  While Hawaiian bread does taste sweeter, it just does not hold up to the soak as well as brioche.  At the time, I could not find any brioche and did not have the time to actually make any from scratch.

The original recipe is listed below, with notes of the changes that were made to create something for the summer season. 

Fruit Bread Pudding
adapted from Austrian Desserts and Pastries

Ingredients/Bread Pudding Base
3 eggs (whites separated from yolks)
1 1/2 cup milk
3 1/2 tbs clarified butter
pinch of salt
3 1/2 tbs butter (for pan coating)
1/2 cup bread crumbs
12 oz of brioche ( or Hawaiian Bread)
zest from 1/2 of a lemon ( not used in peach flavor)
1/3 cup of granulated sugar
1 tsp vanilla sugar ( or regular granulated sugar)
1/2 cup bread crumbs (for coating pan)

Ingredients/ Fruit Filling
3 tbs granulated sugar
1/2 cinnamon stick ( not used with peaches)
1/2 cup raisins (optional- not used with peaches)
1 lb peeled cored apples (or 6 peeled peaches)
1/2 cup white wine ( or 1/2 cup amaretto for peach dessesrt)

Ingredients /Meringue
3/4 cup granulated sugar
3 egg whites
powdered sugar for dusting

Cut the fruit into thin slices and set aside.  Place a saucepan over low heat.  For the original apple dessert, pour the white wine into the saucepan and add the apples, cinnamon and sugar.  For the peach, pour the amaretto into the saucepan,  stir in the sugar and then add the peach slices.  Let poach in alcohol for about 5 minutes and then remove fruit and and drain well.  If using raisins, wash in hot water and place on paper towel to dry.

Take out the bread loaf and remove all of the crust.  Then slice very thin, about 1/5 of an inch.  Place in a bowl and set aside.  Pull out another bowl and mix together egg yolks, lemon zest, milk, salt and 1 tsp vanilla sugar until blended. Pour mixture over the the cut up bread.

Take out another bowl and fill with the egg whites and 3 tbs of sugar.  Beat until the consistency becomes very stiff. Preheat the oven to 325 degrees.  Add the remaining sugar and beat for 1 minute. Fold this mixture into the bread pudding.

Once completed, grease a 9 X13 inch pan and dust with the bread crumbs. Then spread half of the bread pudding batter into the bottom of the pan.  Place the fruit slices evenly on top of the batter and sprinkle raisins on top (optional).  Smooth the additional batter over the top of the peaches, making sure it is even. Sprinkle the batter wth the melted butter. Place in oven and let bake for 1 hour.

While this is baking, place egg whites and sugar in top of a double boiler on low.  Beat until the temperature reaches 113 degrees.  Then pour egg whites into a regular medium size bowl and beat with mixer until they have a stiff consistency. 

Remove the pan from the oven once bread pudding is done.  Let cool and raise the temperature of the oven to 500 degrees.  Spread 1/3 of the meringue over the bread pudding.  Using the rest of the meringue, pipe long strips over the top.  Lastly, dust with powdered sugar.  Bake in the oven until lightly browned.  Keep a close eye on it, it browns quickly, about 2-3 minutes to reach the desired color.

Then take pan out of the pan and let cool for 5 minutes and slice and serve.
                                     **LAST YEAR: Lemongrass Bars**

Sunday, June 23, 2013

Chocolate Irish Cream Cheesecake


With the heat and humidity, I found myself in a mood to make something that would be served cold but would not be fast melting like ice cream.  Naturally I went to the next best thing...cheesecake.

Since the cheesecake was not going to sit around the house, but be devoured at work- I had my co-workers take a vote on the flavor and this one was chosen.  This particular cheesecake is good to make and serve, but even better after the flavors meld with another day.

I have made many desserts with the combined flavors of chocolate and coffee.  They all seem to go over with great reviews and requests for more of the same. This dessert was no different.  The recipe makes one 9 inch cheesecake.

Chocolate Irish Cream Cheesecake
adapted from Cheesecake Extraordinaire

Ingredients/Crust
3 tbs butter
11 milk chocolate sandwich cookies

Ingredients/Filling
1 1/2 tsp instant coffee
2 tsp hot water
3/4 cup irish cream liqueur
1 1/4 tsp vanilla extract
2/3 cup whipping cream
5 eggs
12 oz milk chocolate chips
18 oz cream cheese
2/3 cup sugar

Optional topping:
1/2 cup sweetened whipped cream
1/4 milk chocolate chips
powdered sugar

To make the bottom crust, pulverize cookies in a blender or food processor until it turns into fine crumbs.  In a small bowl, melt the butter in the microwave.  Pour the crumb mixture into the butter and stir until smooth.

Grease the interior of a 9 inch springform pan.  Then press the crumb mixture evenly into the bottom of the pan. For the filling, start by dissolving the instant coffee in a small bowl with the water. Also, melt the chocolate in a double boiler until smooth.  Remove the melted chocolate from over the water pan. Also set aside the springform pan and instant coffee mixture. Preheat the oven to 350 degrees.

 Using a stand mixer or handheld mixer,  beat  the cream cheese and sugar together in a large bowl, running the mixer at medium speed.  Once all the lumps are gone, add one egg and beat for 30 seconds.  Repeat the process with each additional egg.  Scrape down the sides of the bowl and add the vanilla extract, whipping cream and irish cream.  Beat for another 30 seconds.  Lastly, use a wooden spoon and stir in the melted chocolate.

Pour the filling over the crust in the springform pan.  Place pan in the oven and bake for 15 minutes. For the second baking interval, reduce the oven temperature to 200 degrees and bake for about 1 hour and 10 minutes.  The cheesecake is done when the filling is no longer glossy or shiny on top.

Remove the cheesecake from the oven and run a knife along the outside edge between the cheesecake and the pan. Put the cheesecake back in the oven and turn the oven off.  Let it continue to bake for about 2 hours.  After the baking time, cover the cheesecake with plastic wrap and place in refrigerator to chill overnight.

The next day, top the cheesecake as desired.  Whipping cream rosettes can be piped around the edge and each topped with a milk chocolate chip or you can use a stencil and dust with powdered sugar.  Then you are ready to slice and serve.

Tips and Notes:
1. Dark springform pans require less baking time, the rule of thumb on cakes is about 10 minutes.
2.Iif you cannot find milk chocolate sandwich cookies, Oreos will do fine.
3. Wrap the bottom half of the springform pan in heavy duty foil, otherwise butter will melt out and run all over the oven.
4. Make sure the eggs and cream cheese are at room temperature.  If it is too cold, the melted chocolate will seize.  Then you will have a cheesecake with flakes of chocolate in the filling.
5. How thick you want the crust is a personal preference, so you can alter by adding more crumbs and butter.  Increments of about 4 cookies to 1 tbs + 1 tsp of butter.
6. Do not delay on running the knife around the outer edge of the cheesecake after it is removed from the oven.  Delay will cause the cheesecake to crack when the filling contracts in the cooling process.
                          **LAST YEAR: Key Lime Parfaits**


Sunday, June 16, 2013

Raspberry Lemon Muffins

Well since the heat of the summer has hit, I have been on a berry kick lately.  Blackberries and raspberries have been populating the fridge for the last few months.  Luckily I had not eaten too many this time, so I did have some to bake with. 

I like the fact that muffins are so versatile.  I made them without a topping but a slather of cream cheese or honey butter would be good for those who want more to their muffin.  Also, being plain makes them appealing for those that are only craving a little sweetness to have with their morning coffee.  Eaten slightly warm or at room temperature, getting a big bite of a raspberry surrounded by lemony sweet cake hits the spot.

I have included the recipe for the limoncello glaze. The addition of that would make for a stronger lemony taste as well as add more sweetness.  Without it, the lemon flavor is very subtle in the muffins.  This recipe makes  about 1 1/2 dz.

Raspberry Lemon Muffins
adapted from Moufllet

Ingredients/Muffins
1 cup fresh raspberries
1 tbs lemon zest
1 cup buttermilk
1/4 cup melted butter
2 tbs oil ( vegetable or canola
1 tsp vanilla extract
2 eggs
1/4 cup sugar
1/2 tsp salt
1 tsp baking powder
2 cups flour
1/2 tsp baking soda

Ingredients/Limoncello Glaze
1/2 tsp melted butter
3 tbs limoncello
1/2 tsp vanilla
1 drop yellow food coloring (optional)
2 cups powdered sugar

For the muffins, prepare the pans by greasing the top edges of 18 cavities and line with paper liners.  Preheat the oven to 350 degrees.

In a small bowl, whisk together the eggs until frothy. Stir in the melted butter, buttermilk, zest, oil and vanilla extract.  Set aside.  In another bowl, sift together the salt, baking powder, baking soda and flour.  Then mix in the sugar.

Make a well in the dry ingredients and pour in the egg batter.  With a wooden spoon, mix the dry with the wet but only 10 strokes.  Over mixing will ruin the texture of these.  Fold the raspberries in with only 3 strokes.

Evenly fill the cavities of the pans with the batter.  Place in oven and bake for about 15 minutes and check with a tester to see if it comes out clean of any batter. Make sure it is not inserted into a raspberry when testing. Tops should spring back when muffins are done.  Note that the 15 minutes is a starting place and that the muffins can take up to 20 minutes.  The difference is due to the type of pan ( dark non stick, silicone and shiny metal).  

Let the muffins cool in pans for 3 minutes and then transfer to a rack to completely cool.  Glaze when completely cool.

For the glaze, start with mixing the melted butter with 1 tbs of limoncello.  Then sift in 1/4 cup of powdered sugar and mix until no dry streaks remain.  Continue with the process of sifting and stirring in the powdered sugar until all is mixed in.  Add more limoncello in small increments until the glaze has a syrupy consistency. Lastly, stir in the food coloring (optional) and the vanilla extract. 

Then dip the top of the cooled muffins into the glaze, being careful to immerse so that there is still 1/2 to 1/4 inch top edge border.  Let the extra drip off and set upright on the rack.  Glaze will need about 1 hour to set before serving.  The glaze can be stored up to 1 day prior to use.
                                      **LAST YEAR:Persephone's Winter Cake**

Sunday, June 9, 2013

Graham Cracker Madeleines


After the rich indulgence I posted last week, I was determined this week to make something lighter.  These cookies were a nice alternative.  Something a little sweet to have with tea or coffee.

Someone at work said that these were a pain to make, however, I beg to differ.  You can make the batter on one day and bake the next, so each process is easier to squeeze into the day. I actually made three different kinds, but this recipe turned out to be the favorite. 

Graham cracker flavored anything is hard to come by in baked goods, except for cheesecake crust and playing the part in a s'more type of treat. I did like the stand alone flavor of these, which is why they have no glaze on them.  You can take it up a notch and dip them in chocolate if you crave something a little sweeter.  As is, the cake-like, moist texture makes them perfect for dunking. The recipe makes about 2 dozen cookies.

Graham Cracker Madeleines
adapted from We Love Madeleines

Ingredients
1/2 cup or 1 stick melted butter
2 eggs (room temp)
3/4 cup flour
1/2 cup graham cracker crumbs
2/3 cup of sugar
 
Place the eggs and sugar in a bowl and beat on medium high speed for about 5 minutes.  The mixture should convert to a pale yellow, shiny batter and the sugar be totally dissolved. Using a wooden spoon, fold in the graham crumbs and the flour until all is blended.  Then stir in the butter until it is completely incorporated into the batter.

Pour batter into a shallow bowl and cover the surface with plastic wrap.  Refrigerate batter for at least one hour or the maximum, which is overnight.  After the chill time, preheat the oven to 375 degrees. Also, prepare your pans by greasing the cavities with melted butter and then dusting with flour.

Spoon or pipe the batter into the pan cavities evenly.  They should be about 2/3 full.  Place pans in oven, putting one pan on a rack to the right and the other pan on the rack below it to the left.  They should be staggered to bake evenly.  Bake for about 10-12 minutes, rotating pans at the halfway mark.  Madeleines are done when tester inserted into the thickest part comes out clean.

After the pans are removed from the oven, invert cookies onto wire rack for cooling.  These can be served warm or at room temperature.

Tips and Notes:
1. Regardless of pan type (shiny, silicone or non stick) the pans need to be greased and floured for every batch baked.
2. If using a non-stick pan, take note that it is darker so the cookies will brown faster.  In the non-stick pans, mine took about 7-8 minutes.
3. if you only have 1 pan, refrigerate the batter between batches.
                                 **LAST YEAR: German Carmelite Sister Cookies**         

Sunday, June 2, 2013

Cherry Ripe Cake


This is a recipe I have had tucked away for awhile.  I do like chocolate covered cherries and this is about as close as you can get to finding all that flavor in the form of a cake.

Between the big flavor and the wonderful texture, this is one is not easily forgotten about.  The great texture can be attributed to the coconut milk and vegetable oil. There is no butter in the cake.  Even a small slice can satisfy, with a hefty amount of cocoa laced with with cherry brandy, chunks of glace cherries and sweet coconut.  These same flavors are part of the assembly as well. Chocolate ganache covers the top and sides of cake while the other flavors make up a buttercream filling that sandwich the two layers together.

There are a lot of people employed where I work and it is good that there was more than enough cake for our department.  There were some intent stares from not in the department when this cake was being sliced so I could not help to offer them a piece!

Cherry Ripe Cake
adapted from Ledelicieux 

Ingredients/Cake
1 3/4 cup coconut milk
1/2 cup vegetable oil
1 tsp vanilla extract
1/4 cup cherry brandy
2 eggs
2 cups sugar
3/4 cup cocoa powder
1 tsp baking powder
2 tsp baking soda
1 tsp salt
1 3/4 cup flour
1 cup shredded sweetened coconut
200 grams or about 1 cup chopped glace cherries

Ingredients/Buttercream Filling
125 grams or about 1/2 cup butter
2 tsp cherry brandy
1 cup powdered sugar
1/4 cup shredded sweetened coconut
200 grams or about 1 cup chopped glace cherries
red food coloring (optional)

Ingredients /Chocolate Ganache
1 tbs cherry brandy
300 grams or about 1 3/4 cups chopped chocolate
1 cup heavy cream

Additional topping (optional)
1 cherry ripe chocolate bar, chopped
fresh cherries

Preheat the oven to 350 degrees.  Prepare two 8" round cake pans by buttering the interior and lining the bottom with parchment paper and buttering the face up side of the parchment..

For the cake, place the eggs in a small bowl and whisk until whites are completely blended with yolks. Then stir in the cherry brandy, oil, vanilla extract and coconut milk. Set mixture aside.

In the bowl of a stand mixer, sift together flour, cocoa powder, baking powder, baking soda and salt. Then mix in the sugar.  Turn the mixer on low speed and let run while slowly adding the wet mixture in 1/4 cup increments, scraping down the sides of bowl between each addition.  Lastly, add the coconut and the glace cherries, all while continuing to let the mixer run on low speed. 

Once all is evenly distributed into the batter, pour batter evenly into prepared cake pans.   Place in oven and bake until tester comes out clean.  Baking time should range between 35 to 40 minutes. The cakes should cool in the pans for 30 minutes and then transferred to a rack to finish cooling.

Start making the filling by beating the butter until light and smooth.  Then sift the powdered sugar into the same bowl and beat until mixture is fluffy and light.  If using the food coloring, add it and beat until icing has an even color with no streaks.  Lastly, stir in the cherry brandy and fold in the glace cherries and coconut. 

Remove the parchment from the cake. Place one cake layer on a cake stand. Place parchment or wax paper all around the split between the cake and the plate.  Then smooth the filling over the the top of one of the cake layers and stack the other cake layer on top. 

Place the chocolate and cream into a small saucepan over low heat.  Once it is all melted and smooth, stir in the cherry brandy.   Let ganache cool for about 5 minutes  Pour ganache over the center of the cake, letting it fan outward and drip down sides of the cake.  Use a spatula to even out the ganache on the top and sides of the cake.  Once the ganache is set, remove the wax paper from between the cake plate and cake.

To decorate further, recipe suggests to use fresh cherries on top or chopped cherry ripe chocolate bars.
                                   **LAST YEAR: Ginny Bee Bkfst Cake**


Sunday, May 26, 2013

Mint Chocolate Cupcakes


Lately I have been traveling around on the weekends so I have been hard pressed to be able to set aside some time for this blog.  That and in addition to the trial and error it took on this particular recipe, the month is nearly over and this is only my second post.

This particular recipe is one of the winners in the Cupcake Wars on Food Network.  I do love mint and dark chocolate, but I did not want anything green nor anything artificially flavored.  The real mint did add a slight earthy flavor to these cupcakes.  Also, if you take the flavor too far,then you are getting closer to more of a flavor that is close to toothpaste.  The amount of mint to chocolate flavor is very well balanced.

These cupcakes were a hit with the coworkers.  I was also very happy with the texture of the  cupcakes.  However, please note that the recipe below is in its original state.  Since I had a few issues with the original, my notes at the bottom are very helpful. This recipe makes 1 dz cupcakes.

Mint Chocolate Cupcakes
adapted from Food Network

Ingredients/Cupcakes
2 eggs
2 cups of light cream
6 tbs of butter
1/2 cup of sugar
1 tsp salt
2 tsp baking powder
1 1/2 cups flour
2 sprigs of mint
3.5 oz of dark chocolate mint (refrigerated or frozen)

Ingredients/Mint Buttercream
4 cups confectioners sugar
1 lb butter
1/4 cup mint infused cream

Prepare a 1 dz cavity muffin pan by greasing the top edges of the cavities and lining with standard cupcake liners.  Preheat the oven to 325 degrees.

Fill a saucepan with the light cream and add the mint sprigs.  Cook on medium heat for 5 minutes and remove.  Set pan aside and leave mint leaves in mixture and let cool.

Add the butter and the sugar to the bowl of a stand mixer.  Then beat on medium high for 2 minutes. Scrape down the sides of the bowl and beat for another 2 minutes.  Again, scrape down sides of bowl and beat for one minute. Add one egg and beat on medium speed for about 30 seconds.  Scrape down the sides of bowl and add second egg.  Beat again until all is blended. Set aside.

Pour the mint infused cream into a sieve with a bowl underneath.  Discard the mint leaves in the sieve.  In another bowl, sift together salt, baking powder and flour.

Using a wooden spoon or spatula, fold 1/3 of the sifted ingredients into the batter.  Then stir in 1/2 cup of the mint infused cream.  Add 1/2 of the remaining flour mixture and mix until blended.  Pour in another 1/2 cup of mint cream and stir. Reserve the rest of the mint cream for use in the frosting.  Add the last of the flour mixture to the batter and stir until no dry streaks remain.

Take out the chocolate and finely grate using a food processor with a grate attachment.   Fold the grated chocolate into the cupcake batter.  Then evenly fill the lined cavities of the muffin pan, they should be about 2/3 full.

Bake for about 25 minutes or until tester comes out clean.  Cupcakes should cool in pans for about 5 minutes before being transferred to cooling rack.  Frost when completely cooled.

For the frosting, cream the butter in the bowl of a stand mixer with the speed on medium high.  Run mixer for a total of 5 minutes, scraping down sides of bowl at the halfway point.  Then beat in the 1/4 cup of the mint infused cream until all is blended evenly.  Discard the rest of the mint cream.

Sift the confectioners sugar into a medium size bowl.    In 1/2 cup intervals, beat confectioners sugar into butter mixture with the mixer set on medium.  Continue to beat and add confectioners sugar until all is completely smooth.

Then pipe the buttercream frosting onto the cooled cupcakes and serve.

Tips and Notes:

1. I used several types of dairy ratios for the 2 cups of light cream.  Found that 1 cup of heavy whipping cream and 1 cup of 2% milk worked best.

2. Baking time in my oven was 20 minutes, so watch the time closely.

3. Original recipe was a little too dry in texture so 2 tsp of oil was added and beat into the batter right after the addition of the eggs.

4. Note that there is only a hint of mint flavor in the icing, but it paired well with the cupcake flavor and was not overpowering.

5. Do not use any type of dark chocolate with a mint filling.  It will not freeze solid, so it does not work for grating the chocolate.  The Divine brand of chocolate has a great solid dark chocolate mint bar.  As you know, the quality of the chocolate used promises the best flavor.

6.  The recipe states garnish with mint leaves.  You can make chocolate leaves with an extra mint chocolate bar.  Even better yet, mint leaves are edible so you can do both.
                             **LAST YEAR: Elixir Wage Cake**


Tuesday, May 7, 2013

Midnight Delights

The bite sized treats sure are rampant at the grocers.  Everything is mini, little and bite sized.  Also, there is an advantage to making things in that size.  Bite sized treats are easy to transport and are easy to serve.

These particular morsels contain what I call the magic trio.  They have espresso, dark chocolate and a little bit of Kahlua or coffee liqueur.  Also, I think the addition of the walnuts is a great choice.  The chocolate cookie cup acts as a vessel to hold and support the rich, fudgey filling. This recipe makes about 4 dozen.

Midnight Delights
adapted from Bon Appetit

Ingredients/Cookie Crust
3/4 cup (1 1/2 sticks) cold butter cut into cubes
1/4 cup strong espresso coffee (chilled)
1/4 cup sugar
1/2 tsp salt
1 3/4 cups flour
1/3 cup cocoa powder

Ingredients/Filling
12 oz or 1 1/2 cups semi sweet chocolate chips (melted)
2 tbs butter (melted)
2 tsp coffee liqueur (I used Kahlua)
2 eggs
1/2 cup chopped walnuts
1/2 cup sugar
2 tbs milk
48 walnut halves( for toppers)

Prepare miniature muffin tins by greasing each cavity.  In a medium size bowl, sift the flour, salt and cocoa together.  Whisk in the sugar.  Then pour into the bowl of a food processor.  Toss in the butter cubes and pulse with steel blade till mixture starts to come together.  Then add the espresso coffee.  Pulse again until the mixture forms a ball of dough.

Sprinkle a flat surface with flour and divide dough into 4 equal pieces.  Take one piece and roll it out to a thickness of  1/8 inch. Using a 2 1/2 inch cutter, cut the dough into 12 disks.  Place each disc in a cavity of the muffin tin, so that each lines the bottom and about 2/3 up the sides of the cavity.  Repeat this process for the rest of the 4 tins.  Place all 4 tins in the refrigerator for 40 minutes to firm up.

While the tins are in the refrigerator, preheat the oven to 350 degrees and start on the filling.    In a medium size bowl, whisk together sugar, milk, butter and coffee liqueur.  Then mix in the melted chocolate until all is smooth.  Using a whisk, blend 2 eggs into the batter.  Once completely blended, fold in the walnuts.

Once the chilling time is complete, remove the tins.  Fill each cavity with 1 1/2 teaspoons of the chocolate batter.  Place each tin in oven and bake for 20 minutes. The filling should be puffed and cracked in places when done.  Remove pan and lightly press a walnut into the center of each.

Let bites cool in pan for about 15 minutes and then transfer to a rack to finish cooling.

Notes and Tips:

1. My end result was too much dough.  I must confess that the filling was not measured out exactly when filling the cavities and the thickness of the dough was not exact either.

2. If you only have one muffin tin, you can bake in batches. Because of the chilling time, the process will take longer if you prepare and bake 1 dz at a time.

                                    ***LAST YEAR: Lemon Butter Fudge**


Thursday, April 25, 2013

Ube Macapuno Cake


Like most food bloggers, I have a long "to do" list when in comes to creating new desserts in my kitchen.  This particular recipe has many variations and is not your typical American cake.  It contains purple yam-which is not commonly found here.  The other unusual ingredient is the macapuno, or preserved coconut. Both of these ingredients can be found at an Asian Market.

Overall, I found the cake to have a wonderful light flavor with great texture.  It is not as sweet as most American cakes, but it was a nice change of pace. The whipped cream and cream cheese frosting was the perfect topper.  As you can tell by the above picture, the cake color is very eye catching which is an extra plus.  However, concerning the macapuno, I did not find it to be particularly appealing according to my tastes. If you have not tried it, it would be a good idea to try it prior to baking this cake. 

This cake, due to its appearance, would be a perfect finale to an Easter meal.

Ube Macapuno Cake
adapted from Heart of Mary  

Ingredients/Cake
7 eggs, yolk and white separated
1/2 cup milk
1/2 cup olive oil
1 cup cooked &/mashed purple yam/ ube
3 tbs baking powder
2 1/4 cup cake flour
1 tsp salt
1/2 tsp cream of tartar
1 1/2 cups sugar
violet gel paste (optional)

Ingredients/Frosting
1/2 cup sugar
1-12 oz jar macapuno
1-8 oz package of cream cheese
1 tsp vanilla extract
2 cups heavy whipping cream

Prepare 2-9 inch round cake pans and 1 8X4 inch loaf pan by greasing and lining the bottom interior with parchment paper.  Preheat the oven to 350 degrees.

In one bowl, beat together mashed purple yam, egg yolks, milk and olive oil until smooth.  If you are using gel paste beat 1/4 tsp.  Continue to beat in gel paste until desired color is met.  Set aside.

In another bowl, sift together baking powder, cake flour and salt. Using a wooden spoon, fold flour mixture into egg batter until smooth and no dry streaks remain.  Set aside.

Fill the bowl of a stand mixer with the egg whites.  Beat on high until foamy.  Then, beat in the cream of tartar.  Switch the speed of the mixer to medium and continue to beat. Slowly pour in a steady stream of the sugar.  Once all sugar is in the whites, switch blender back to high and beat until the whites reach a stiff peak stage.

Fold the whites into the purple batter until evenly distributed.  Separate and pour the batter into the 3 pans.  Place pans in oven and bake until tester comes out clean.  Bake time should be about 30 minutes.  Pans should be rotated at the 15 minute interval.

Remove pans from oven and place on rack to cool for 5 minutes.  Then invert cakes onto rack and let cool completely before removing parchment paper and frosting.

Using a food processor, grind the 1 loaf cake until it all becomes crumbs.  Set aside. 

To make the frosting, place the cream cheese in a small bowl and beat until smooth.  Then, in the bowl of a stand mixer, add sugar, vanilla extract and whipping cream.  Beat on high speed until mixture has a stiff consistency and all ingredients are thoroughly blended together.  Add the cream cheese and beat on low speed until smooth. 

Fill a sieve with the macapuno and let some of the syrup drain. Using 3 small bowls, divide the frosting into thirds..  Choose which of the two cake layers to use for the bottom and top.  Top the bottom layer with 1/3 of the frosting.  Then spoon on 1/3 pf the macapuno.  Place the second cake layer on top and frost top and sides with another 1/3 of the frosting. 

Sprinkle cake crumbs on top of the cake.  Then, using handfuls of cake crumbs, press into the sides of the cake until crumbs are completely used and cake is covered.  With the remaining frosting, pipe big rosettes around the top edge and small rosettes around the bottom edge. Lastly, spoon and smooth the remaining macapuno onto the top center of the cake.

Notes and tips:
1.  I found the amount of cake crumbs to be too much.  Use your own judgement when it comes to the batter amount for the loaf pan.  Bear in mind the less batter will mean less cooking time.

2. When using the gel paste for coloring, consider that the addition of the egg white mixture will lighten the color quite a bit.  It is up to you how dark or light you want your cake to be in color.

3. The cake is very moist, so when it is inverted onto the rack, invert again so parchment paper is touching the rack.  Otherwise there will be a lot of cake sticking to the rack.  Once the cake has completely cooled then your can invert again to remove the parchment paper.

                                **LAST YEAR: Chocolate Glazed Zucchini Cake Slice**


Wednesday, April 17, 2013

Peach Oatmeal Cookies


These cookies are more in the realm of healthy instead of indulgent.  If you crave a healthy treat, these cookies are quite satisfying.  If you crave something rich and chocolatey, this is not the recipe for you.

However, someone at work did make the suggestion of ice cream with these.  Perhaps using these cookies and sandwiching vanilla ice cream between them may get closer to the mark for those that are wanting something more sweet.

After some of the decadent desserts, this is a nice change of pace.  The cookies are soft and chewy with an occasionally bite of dried peaches. These cookies, since they have molasses, bake up to a dark color, but the molasses is something I would not skip in the recipe. I am not a big fan of raisins, so the dried peaches were very suitable for my taste. This recipe makes about 2 1/2 dozen cookies.

Peach Oatmeal Cookies
adapted from Desserts from Loveless Cafe

Ingredients
3 oz dried peaches (1/4 inch chopped pieces)
1/2 tsp ground cinnamon
2 tbs of molasses
1 tsp vanilla extract
1 egg
1 1/4 cup of flour
1 tsp baking soda
1 1/3 cups old fashioned oats
1 cup of sugar
1/2 cup or 1 stick of butter (room temp)

Prepare two baking sheets by lining with parchment paper and preheat the oven to 350 degrees.

Sift together the flour, baking soda and cinnamon.  Then stir in the oats and set aside.

In another bowl, cream together the butter and the sugar. Add the vanilla extract and the molasses and beat for 1 minute, scraping down sides of the bowl at the 30 second interval.  The end result should be a fluffy light batter.  Beat the egg into the batter, scraping down the sides of the bowl again to make sure all is blended. 

Using a wooden spoon, fold the dry oat mixture into the batter.  When only a few streaks of flour remain, add the dried peaches.   Stir until there are no streaks of flour and peaches are evenly distributed throughout the batter.

Drop heaping tablespoons of batter two inches apart on prepared baking sheets. You can use a scoop or a spoon.  Place pans in preheated oven and bake for 8 minutes and rotate and bake for another 8 minutes.  Remove from oven and let cookies cool on pan for 2 minutes and then transfer to a rack to completely cool.

Tips and Notes:
1. The recipe states you can also use sorghum in place of molasses.  The end result will be the same dark cookie but sorghum has more sweetness than molasses.

2. When I baked these, they took about 12 minutes to get done so keep a close eye on your baking time.
                                   **LAST YEAR: Barista Brew Pie**


Wednesday, April 10, 2013

Chocolate Chunk Cream Cake


It has been a little while since I have posted here.  Friends and co-workers have been asking about some baked goods, so I wanted to make something different that was not too big of a project.

These are actually bars, even though the title states cake.  This recipe hails from a label on some gourmet chocolate bars.  The chocolate bars are the Julia Baker chocolate brand.  The idea of reserving chocolate bars for baking may be a difficult task, but the effort to resist eating the bars by themselves does pay off.  The chewy, tasty texture of the cream cheese in the batter paired with rich chunks of chocolate make for one tasty treat.

Chocolate Chunk Cream Cake
adapted from Julia Baker via Bakingdom.com

Ingredients
2 eggs
4 oz of cream cheese
1/4 tsp vanilla extract
4 tbs melted butter
1/4 tsp salt
1/4 tsp baking powder
1/4 tsp baking soda
1/2 cup granulated sugar
2/3 cup plus 2 tbs cake flour
1 cup confectioners sugar
3-4oz chocolate bar, coarsley chopped

Prepare an 8x8 inch pan by greasing the interior. Preheat the oven to 350 degrees.

Sift together the flour, salt, baking powder and baking soda.  Whisk in the granulated sugar. Stir in the melted butter.  Then add 1 egg and mix until all is smooth.  Spoon the batter into the prepared pan and smooth with a spatula or back of a spoon to making sure all is even.  Place 1/2 of the chocolate bar pieces on top of the batter.  The pieces should be placed so the coverage is even and no pieces touch the sides of the pan.  Set pan aside.

Beat the cream cheese in a small bowl on medium speed for 30 seconds.  Then scrape down the sides of the bowl and beat for an additional 30 seconds.  The cream cheese should be smooth and fluffy.

Sift 1/4 cup confectioners sugar into the cream cheese and stir until no dry streaks remain.  Repeat this process, scraping down the sides of the bowl at each interval,  until all the confectioners sugar is blended.   Using a wooden spoon, mix in the egg and the vanilla extract.

Pour this mixture evenly over the first batter layer in the pan.  Then finish by placing the remaining pieces of chocolate on the cream cheese layer.  Again, take care not to have any pieces touch the sides of the pan.

Bake for 30-33 minutes.  Cake will have a deep golden hue when done.  Cool completely before cutting and serving.

Notes and Tips:
1. original recipe states that you can also use a 4X11 inch tart pan.  Since the removal of the cake does require a sharp knife to be run along the edges, do not use a tart pan with scalloped edges.

2. As stated above, the cake will not easily slip out the pan for removal.  The bottom has no issues it is just the sides due to the toasted edges.  The greasing helped a little, but it still needed a knife run along the edges.

3. I used caramel filled as well as regular dark chocolate bars.  Using the caramel filled bars caused  an occasional grit or crunch to the bite.  Based on that, I would use a plain dark or milk chocolate bar.
                                       **LAST YEAR:Fried Apple Hand Pies**
 

Thursday, March 28, 2013

Pistachio Layer Cake

This particular cake may take some time, but the flavor combination of the pistachio and lemon curd is quite a treat.  In the cookbook, Momofuku Milk Bar, Christina Tosi does state that this cake became a bestseller.  After tasting this, I do agree.

As you know, food bloggers are not real big on making things twice.  However, I am ready to make this again so I can share it with more people.  Sometimes the big projects in the kitchen are well worth the time and effort, and I put this cake in that category,

This is a six inch layer cake that does require some special equipment.  You will need a six inch cake ring and 2 strips of acetate (3"X 20").  The acetate strips are sometimes referred to as cake collars.

Before starting on this cake, the layering components should already be made.  The recipes for these items can be found (here). Please read through all this recipe prior to making this cake.  This will insure that you are aware of the time and the special ingredients required.

Pistachio Layer Cake
adapted from Momofuku Milk Bar

Ingredients
1 cup of flour
1 1/2 tsp baking powder
1 1/2 tsp salt
1 1/4 cup of blanched almond flour
1 3/4 cup sifted confectioners sugar
2/3 cup pistachio paste
3 tbs glucose
1/2 cup pistachio oil
1/4 cup heavy cream
6 egg whites (separated/add each in increments)

Prepare a baking sheet by coating the interior with non stick spray and lining with parchment paper. Preheat the oven to 350 degrees.

Using a stand mixer, beat together the pistachio paste and glucose together until smooth.  This will take about 2-3 minutes on medium speed.  Scrape down the sides of the bowl when finished.

Put the mixer on low speed and add each egg white to the mixture.  Let the mixer run for about a minute before adding the next egg.  Repeat the same step with all the egg whites, stopping to scrape down the sides of the bowl after each 2 egg increment.

Keeping the mixer on low speed, blend the confectioners sugar and almond flour.  Continue to beat the mixture for about 3 minutes.  Stop and then scrape down the sides of the bowl.  Then turn the mixer back on low speed and slowly pour in the pistachio oil and the heavy cream.  Those ingredients should be fully incorporated into the batter after one minute.  Stop the mixer and scrape down the sides of the bowl again.

In a separate bowl, sift together the flour, baking powder and salt.  Using a wooden spoon or spatula, fold the sifted ingredients into the batter until no dry streaks remain.

Spoon the batter onto the prepared pan and smooth to an even layer.  Bake for 20-22 minutes.  Cake is done when the edge bounces back when touched lightly and the cake starts to pull away from the edge of the pan.  Remove from oven and let cool in the pan completely before  proceeding.

Assembly Components (recipes here)

1/2 cup pistachio oil
1 recipe lemon curd
1 recipe pistachio frosting
1 recipe milk crumbs

Invert the cake onto another piece of parchment and peel off the top piece of parchment.  Using your cake ring, cut out two layers.  You will have some cake scraps left over which will be the bottom layer of your cake.

Clean the cake ring and place it on a parchment lined baking sheet.  Line the ring with one piece of the acetate strip.  Take the cake scraps and place inside and lightly press the pieces together to form and even layer. Brush that layer with 1/4 cup of your pistachio oil.

Spoon 1/2 the batch of lemon curd onto the pistachio soaked layer.  Smooth out the curd into an even layer using a small knife or the back of a spoon.  Then sprinkle 1/3 of the milk crumbs over the lemon curd.  Press lightly so the crumbs are adhered to the curd.  The next layer added is 1/3 of the pistachio frosting.  Smooth the surface in the same manner as the lemon curd.

Take the other strip of acetate and tuck it between the cake ring and the previous piece of acetate.  The acetate should only overlap by 1/4 inch.  Choose the worst of the two layers (good layer is for the top) and place inside the acetate, on top of the pistachio frosted layer.  Smooth on the components in the same order and manner as done for the first layer.  In this process, reserve 1/2 of the remaining pistachio frosting and milk crumbs for the top layer and use up all the lemon curd and pistachio oil.

Place the top layer onto the second and smooth on the remaining frosting.  Sprinkle the rest of the milk crumbs on top.  Place the cake in the freezer for 12 hours for flavors to meld.  3 hours prior to serving, pop the cake out of the cake ring (push from cake bottom up) and peel off the acetate. Transfer to cake stand or platter.  Wrap cake in plastic and let defrost for 3 hours.  This cake will last in fridge well wrapped in plastic for up to 5 days.

Tips and Notes:

1. It is important that you have a good sturdy cake pan to insure that the cake bakes evenly.  Older pans sometimes get warped and cause problems when baking.

2. The hardest process I found was installing the 2nd acetate strip.  Since the strips are 20 inches there is a lot of overlap that must be kept even.

3. The amount of pistachio oil brushed on the layers is personal preference, I found the 1/2 cup to be too much initially. However to my surprise, it did finally meld with the cake during the chill time.

4. Do not press or mash the cake scraps too hard for your first layer.  The cake pieces still have to be somewhat spongy to soak up the oil.
                                  **LAST YEAR: Citrus Pie**

Wednesday, March 27, 2013

Pistachio Cake /Stage 1-Components

Well, I finally got around to doing the project recipe from the above book. This particular cake takes several hours for the flavors to meld and has several components that make up the layers.

This post contains the recipes for the filling, frosting and milk crumbs.  However, if you do intend to try this delicious and unusual cake, please read over this as well as the actual cake recipe. The cake recipe will be posted tomorrow.  Review is needed to make sure you have all the ingredients and are aware of the advance hours needed to create the cake.

It is best to prepare these components prior to baking the cake, so once the cake has cooled it can be assembled without delay.  The components are more suitable for storing than the cooled cake by itself.

Lemon Curd

Ingredients
1/2 tsp powdered gelatin
2 tbs cold water
1/2 cup sugar
1 stick or 1/2 cup cold butter, cubed
4 eggs
zest from 3 lemons
1/2 cup lemon juice
1/2 tsp salt

Fill a blender with the lemon juice, zest and sugar.  Blend on medium for 2-3 minutes or until the sugar has dissolved.  Add the eggs and blend on medium speed for an additional 2 minutes for the  color to change to a bright yellow.  Empty mixture into a sauce pan.  The blender will need to be cleaned for an additional use.

Pour the cold water in a small bowl and sprinkle the gelatin evenly over the surface of the water.  Let sit for 2-3 minutes to bloom.

Place the saucepan of the lemon mixture over low heat.  Let it cook, while constantly whisking and keeping a close watch.  It will become thicker and eventually come to a boil.  Once it reaches that stage, transfer contents back to the blender.

Drop cubes of butter into the warm lemon mixture.  Add the gelatin and salt.  Blend on medium high for 2 minutes.  It should have a sheen to it and be thick and smooth.  Strain contents into a heat proof bowl and place in fridge to cool for at least 1/2 an hour. After this chill time, mixture is ready to use as a filling. If refrigerating beyond the 30 minutes, cover surface with plastic wrap.  It will keep for a maximum of one week.

Milk Crumbs

Ingredients
1/4 cup dry milk powder (for mixing)
2 tbs dry milk powder (for dusting)
2 tbs flour
1 tbs cornstarch
1 tbs sugar
1/4 tsp salt
2 tbs melted butter
1 1/2 oz white chocolate

Line a baking sheet with parchment and preheat the oven to 250 degrees.  Whisk together 1/4 cup milk powder, flour, cornstarch, sugar and salt.  Set aside.

Using a fork, stir in the melted butter until there is no longer any dry mix. It should turn into clusters. Pour the mixture onto the prepared pan and use a fork to break up any large clusters.  Place pan in oven and bake for 20 minutes.  Remove and let cool completely.  Again, use the fork to break up any large clumps.

Transfer the cooled crumbs to a heatproof bowl and dust with the remaining 2 tbs of milk powder and set aside.

Melt the white chocolate in the double boiler and pour over the cooled crumbs.  Stir until all is evenly coated.  Let cool, taking time to stir the mixture every 15 minutes.  After 4 of these intervals, you can  place in fridge to all the crumbs to completely harden.  This should take an additional 30 minutes at the most.  Break up mixture and it is ready to be used in the recipe.  For storing, place in an airtight container to store in the fridge.  Storage time can be up to one month in fridge or freezer.

Pistachio Frosting

Ingredients
1/2 tsp of salt
1/2 cup or 8 tbs of butter at room temp, cubed
1/4 cup of confectioners sugar
3/4 cup of  pistachio paste

Sift the confectioners sugar together with the salt into the bowl of a stand mixer with a paddle attachment. Drop in cubes of the butter. Beat the mixture at medium high for 3 minutes, scraping down sides of bowl at one minute intervals.  The mixture should be smooth and pale yellow when completely blended.

With the mixer on low speed, slowly add the pistachio paste.  Beat on low for 30 seconds and then on medium high for about 2 minutes.  Scrape down bowl at a one minute interval and at the end.  Turn the speed up to high and beat for 1 minute.  Frosting should be an even tone of green.  Using a spatula, scrape contents into an airtight container.  Frosting can be used immediately.  For storing, place in an airtight container and it will keep for 1 week.

Tuesday, March 19, 2013

Belgian Blondies

I have been trying different bar cookie recipes recently.  Last week I had tried a recipe for Margarita Lime bars that had an error on the liquid ratio, so the edges set up fine but the center was just a pool. There was no saving it, I even tried to microwave it so the center would get done, but that did not work.

Anyhow, this particular recipe did turn out to be a success.  The bars are rich, buttery and full of delicious white chocolate.  The recipe instructions had a method in which to melt the chocolate.  However when I made these, there was a certain amount of chunks that did not melt, which makes them perfect for the person that loves white chocolate.

The rich flavor makes them perfect paired with black coffee.  Also, forget the shortbread and serve these squares with a bowl of strawberries.

Belgian Blondies
adapted from Tea with Bea

Ingredients
1 1/4 cup plus 2 tbs or 2 3/4 sticks of butter
1 tsp vanilla extract
1 lb white chocolate (chopped into pea sized pieces)
2 eggs
1 1/4 cup of sugar
1 3/4 cup of flour
a pinch of salt

Preheat the oven to 340 degrees.  Grease an 8X12 inch baking pan and line bottom with parchment, leaving an overhang on 2 sides so the bars can be lifted out of the pan prior to cutting.

Melt the butter in a saucepan and let come to a boil.  Place the chocolate pieces in a heat proof bowl and pour in the melted butter.  Stir until most or all of the chocolate is melted.  Set aside.

In another bowl,  blend eggs, sugar and vanilla extract until smooth. Pour in the chocolate mixture and stir. In another bowl, whisk together the flour and salt.  Then fold dry ingredients into the chocolate batter until no dry streaks remain.

Spoon mixture into prepared pan and smooth the surface.  Place pan in oven and bake for 28-33 minutes.  The bars are done when golden brown on top but still retain a gooey center.

Remove pan from oven and place pan on cooling rack.  After 1 hour, place pan in the refrigerator for  2 hours to set up.  After two hours, remove pan from refrigerator and run a knife down between the pan and the blondies on the sides without parchment paper.  Then lift out blondies and cut into squares for serving.

Tips and notes:
1. You can use a 9X13 size pan, but watch on the baking time. Also with a bigger pan, the blondies will not have the same height.
2. Do not use baking chips.  They are a different blend than the actual white bar chocolate and will not work in this recipe.  Use good quality white chocolate bars.
3. For a smoother bar with no chunks of white chocolate, use a grater disc in a food processer to grind the chocolate to insure that all chocolate will be melted with the hot butter.
                                  **LAST YEAR:Butter Cupcakes**

Wednesday, March 6, 2013

Raspberry Cream Cheese Braid


Outside of the wonderful taste of this breakfast treat, I really do like the ease of the recipe.  The appearance of this pastry gives the impression that this took a lot of effort.

The recipe makes two pastries, which means you can keep one and give another to the neighbors.  In my case I brought it to my co-workers.  Another good thing about the recipe is that it can be changed up, depending on your preference of fruit.


Raspberry Cream Cheese Braid
adapted from King Arthur's Bakers Companion

Ingredients/ Dough
3 cups regular or pastry flour
1/4 cup sugar
1 1/4 tsp salt
2 tsp instant yeast
6 tbs sour cream or yogurt
1/4 cup water
1 egg
6 tbs butter (room temp)
1 tsp lemon zest

Ingredients/Filling
1 tsp vanilla extract
1 egg
1/2 cup of raspberry jam mixed with 2 tbs flour
2 tbs butter
1- 8oz package of cream cheese
1/8 tsp salt
1/4 cup sugar
3 tbs flour
1/4 cup coarse sugar (optional for topping)

For the dough, mix together the yeast, warm water and 1 tsp of sugar (take from 1/4 cup measurement).  Then add 1/2 cup of the flour (take from 3 cup measurement).  Blend until the mixture forms a dough.  Shape into a ball and place back in bowl and cover bowl with plastic wrap. Set aside until the yeast becomes very active, about 10-15 minutes.

Once active, stir in all the remaining dough ingredients.  After all is blended into a dough, knead dough until it becomes soft and is no longer sticky.  You can do this by hand or with a dough hook in a stand mixer.  Grease the interior of a medium size bowl.  Shape the dough into a ball.  Put dough ball into the bowl and cover with plastic wrap.  Place bowl in a warm, draft free place and let dough rise for about 45 minutes or until doubled.

While the dough is rising, you can prepare the filling.  In the bowl of a stand mixer, cream together the butter and sugar until fluffy.  Beat in the salt and vanilla extract. Take the cream cheese and cut into 8 portions. While the mixer is still running, add pieces of cream cheese at 15 second intervals. Scrape down sides of bowl and then beat in egg and flour.  Scrape down sides of bowl again and beat until all is incorporated.  Set aside.

Divide dough into 2 equal pieces.  Line two baking sheets with parchment paper.  Take 1 piece of the dough and roll out on a lightly floured surface into a rectangle measuring 15 X10 inches.  Place sheet of dough on the center of the parchment lined baking sheet.  Repeat with second piece of dough.

Spread half of the jam in a 2 1/2 inch wide strip down the center of each piece of dough.  There should be a 1 inch border left at the top and bottom of the dough.  Then spoon and smooth 1/2 of the cream cheese mixture on top of the jam for each piece of dough.

On each 15 inch side of the dough, make strips by cutting 2 1/2 inches in length which are 3/4 inches wide. The strips should be at a 15 degree angle downward.  The end result is that the strips make like an upside down "V" with the filling in the center.

Fold in the 1 inch border dough on the top and bottom.  Then crisscross dough strips over top of filling, placing one left strip over the filling and then alternating with the right. Repeat the cutting and folding process for second piece of dough. Cover both braids with plastic wrap and let rise in a warm place until they puff up, about 30-45 minutes.

Preheat the oven to 350 degrees.  Once the braids have risen, you can top according to preference.  An egg wash (one egg blended with 1 tbs water) will add shine and a deeper color to the braid.  Spritzing the dough with water was the method I used.  After that process, sprinkle the dough with the coarse sugar.

Bake the braids until they reach a golden hue, which should take about 32-36 minutes.  Once baked, let cool for about 15 minutes and then slice and serve.

Tips and notes:
1. Pastry flour will make the braids more tender.  If using regular flour, add 2 extra tbs of water.
2. You can use a product called Clear Gel in place of the flour in the filling.  Use 2 tbs to mix in with the raspberry jam instead of the flour and use 2 tbs to add with the egg instead of 3 tbs of flour.
3. This dough can be used for many sweet breads such as monkey bread and hot cross buns.
                                **LAST YEAR:Black Pond Cupcakes**


Wednesday, February 27, 2013

Chocolate Caramel Sandwich Cookies


I really do not make sandwich cookies all that often.  I believe it is the time factor.  My attitude is that if you are going bake something that requires a lot of time, make sure that the results are well worth it. 

These proved to be a worthwhile endeavor.  You will not find this type of cookie sitting on the grocery shelf, which makes it unusual. The flavors and textures really compliment each other.  Between the crumbly rich chocolate of the cookie and the buttery chewy caramel, these bite size morsels really do hit the spot.

This recipe states that it makes 30 cookies, but for some reason I ended up with nearly double that amount.


Chocolate Caramel Sandwich Cookies
adapted from Bon Appetit/Nov 2010 issue

Ingredients/Caramel
1/4 cup butter (cut into cubes)
2 1/4 cup of sugar
1 tbs light corn syrup
1/3 cup of honey
2 tbs vanilla extract or a lengthwise split vanilla bean
1 3/4 cup heavy whipping cream

Ingredients/Cookie
1 cup plus 1 tbs sugar
2/3 cup natural cocoa powder
1 1/2 cups of flour
1 egg
3/4 cup or 1 1/2 sticks of butter
1/4 tsp salt

Prepare an 8X8 square cake pan by brushing oil on the interior of the pan.  Then line the bottom with parchment paper and brush the surface of the paper with oil as well.

To make the caramel, fill a medium size saucepan with the sugar, cream, honey and corn syrup.  If using vanilla bean, scrape the seeds into the mixture.  Place pan over medium heat and stir until the sugar dissolves.  Increase the heat and stop stirring.  Using a candy thermometer as a gauge, let the mixture come to a boil and cook until it registers about 250 degrees.  This should take about 8 minutes.

Remove pan from heat and add butter.  If using vanilla extract, add it at this time.  Stir until butter is completely melted and mixture is smooth.  Pour into prepared cake pan.  Let caramel cool completely.

While that is cooling, the cookies can be made.  Sift together flour, salt and cocoa powder in one bowl.  In another bowl, cream together the butter and sugar until fluffy.  Add the egg and beat for 15 seconds and then scrape down sides of bowl.  Beat for an additional 15 seconds.  Using a wooden spoon or spatula, fold in the sifted ingredients.

Form the dough into a flat disc and cover with plastic wrap.  Place in refrigerator for 30 minutes. Line 3 baking sheets with parchment paper and preheat the oven to 350 degrees.

Once the dough has chilled, roll out to a 1/4 inch thickness and cut out rounds using a 1 1/2 inch  cookie cutter.  Place each round 1 inch apart on cookie sheet.  Bake cookies for about 12 minutes.  They should have a firm center when done.  Remove baked cookies from pan and place on rack to cool. Repeat the process until all the dough has been converted to cooled cookies.

Invert caramel filled pan onto smooth clean surface.  Peel off parchment paper.  Take a 1 inch round cutter and cut out caramel disks.  Place each disk on the bottom side of a cookie and top with an additional cookie, with bottom side facing caramel.  Press lightly and repeat process until all cookies are sandwiched together.
                           **Last Year: Maui Pine Cream Pie**


Tuesday, February 19, 2013

Oatmeal Butterscotch Cookie Pie


The name "cookie pie" makes me think of those big chocolate chip cookies at the mall that you can have decorated.  However, this particular recipe does not fall into that category.

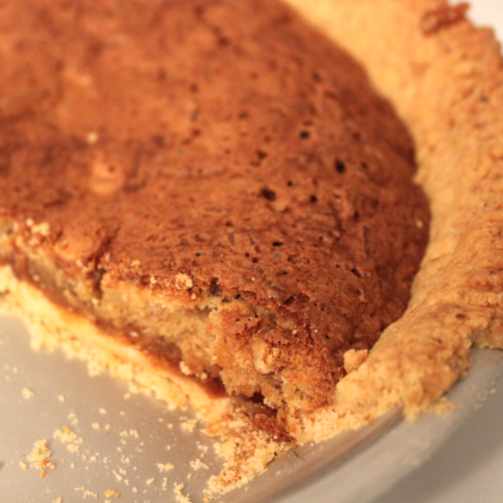
As you can tell by the picture, it looks to have a closer resemblance to pie rather than cookie.  There is a pie crust layer with melted butterscotch chips, pecans and a brown sugar filling.  As far as the oatmeal, it has enough to give it some chewy texture but is not overwhelming.

I have always considered butterscotch one of the forgotten flavors,  It was a nice change of pace and well liked by the crowd of eaters.

Oatmeal Butterscotch Cookie Pie
adapted from Pie by Ken Haedrich

Ingredients
1 basic single crust pie pastry, refrigerated
1/4 cup whole milk or light cream
3 eggs, room temp
1 tsp vanilla extract
1 cup butterscotch chips
1/2 cup chopped pecans
1/2 cup or one stick of butter
1/3 cup cake or regular flour
1/4 tsp salt
1 1/2 cups packed brown sugar
1/3 cup rolled oats

Roll the pastry on a floured surface into a 13 inch circle.   Place the pastry evenly into a 9 1/2 inch deep dish pie pan.  Press the pastry into the pan, taking care not to stretch it.  Shape the top edge of the dough as desired.  Place in the freezer for 15 minutes.  In the meantime, preheat the oven to 350 degrees.

To make the filling, use a mixer and cream the butter until smooth.  Then add the brown sugar in 1/2 cup increments, beating 30 seconds after each addition.  Then scrape down the sides and add one egg and beat for 30 seconds.  A the rest of the eggs, one at a time, and beat each for 30 seconds or until completely blended.

Beat in the vanilla extract.  Then fold in the flour, oats and salt until no dry streaks remain.  Mix in the milk until blended.  Lastly, add the pecans and butterscotch chips.

Place pie in the oven and bake for 30 minutes.  Then rotate back to front and bake for 30 minutes more.  Once the time is up, the pie should not jiggle when moved and should have a brown filling. Transfer to rack and let cool.  You can either serve warm or refrigerate for 2 hours and then serve cold.

Tips and Notes:
1. Feel free to mix up the type of chips in the batter.  The recipe also suggests 1/2 butterscotch and 1/2 chocolate chips.
2. For people with nut allergies, add an extra 1/2 cup of butterscotch chips and eliminate the pecans.

                                          **LAST YEAR: Jade and Suede Cheesecake**                    


Wednesday, February 13, 2013

Lemon Limoncello Cupcakes


It has been so overcast and gloomy here, so I was looking for a nice treat to remind me of summer.  When I think of summer, the flavor of lemon is the first to come to mind.

These cupcakes were the perfect fix.  They are bursting with tart lemony flavor.  The curd filling is really what put these over the top when it comes to flavor.  Also, nothing goes better with lemon than a cream cheese topping. This recipe makes 1 dz cupcakes.

Lemon Limoncello Cupcakes
adapted from Brown Eyed Baker

Ingredients/Lemon Curd filling
1 egg
1 egg yolk
zest of 2 lemons
1/2 cup of lemon juice
1/4 cup sugar

Ingredients/Cupcakes
2 tbs limoncello
3 eggs
1/4 cup fresh lemon juice
1/2 cup buttermilk
1/4 cup or 1/2 stick of butter (room temp)
2 oz cream cheese (room temp)
1 cup sugar
1 tsp baking powder
1/2 tsp salt
1 1/2 cups flour
zest of 1 lemon

Ingredients/Frosting
4 oz cream cheese (room temp)
1 tbs limoncello
1/4 cup or 1/2 stick of butter (room temp)
2 cups powdered sugar
sprinkles (optional)

Start with making the filling.  Place sugar, lemon zest and juice in a saucepan.  Put pan over medium heat, let come to a simmer and remove from heat.  In another bowl, whisk together egg and egg yolk until a little frothy.  Add half of the lemon mixture to the eggs and whisk until completely blended.  Then whisk in the remaining lemon mixture.  Pour back into the saucepan and put over medium heat again.  Let the mixture cook, while stirring constantly for a total of 5 minutes.  Remove and let cool completely.  Then pour into bowl, cover surface of curd with plastic wrap and refrigerate until ready to use.

To make the cupcakes, start by preheating the oven to 350 degrees.  Grease the top edge of the cavities of a 12 capacity cupcake pan and fill with paper liners.

Sift together the flour, baking powder and salt in a small bowl and set aside.  Fill the bowl of a stand mixer with butter, cream cheese and and sugar.  Using the paddle attachment, beat the ingredients together for about 3 minutes, stopping occasionally to scrape down the sides of the bowl.  Then beat in each egg, one at a time, for 30 seconds.  Pour in the limoncello and beat for about a minute until distributed evenly throughout the batter.

Remove bowl from mixer and, using a spatula or wooden spoon, fold in 1/3 of the sifted ingredients. Then mix in 1/4 cup of buttermilk. Repeat the process, ending with the last 1/3 of the flour mixture. Add the zest and the lemon juice and stir until blended.

With an ice cream scoop or a spoon, evenly fill each cavity of the muffin tin with the batter.  Place pan in oven and bake until tester comes out clean.  This should take about 18-20 minutes.  Remove pan, let cool for one minute and transfer cupcakes to a cooling rack.  Cool completely before proceeding to the filling and icing stages.

Using whatever tool you choose (knife, melon baller, opposite end of pastry tip, etc) core out a hole in the middle of each cupcake.  Remove the lemon curd from the refrigerator.  Spoon the curd into a pastry bag fitted with a large plain tip.  Fill each cupcake with the lemon curd. Using a knife, smooth over the surface of the curd, making sure that the top of the curd is flush with the top of the cupcake.

For the frosting, beat together the butter and cream cheese until smooth.  This should take about 3 minutes.  Then beat in the limoncello, running the mixer at medium speed for 1 minute.  Sift the powdered sugar into the bowl in 4 increments, beating until blended for each increment.  Scrape down the sides of the bowl to make sure that no powder remains.  After all is blended, fill a pastry bag fitted with a star tip with the frosting and decorate.  Top with sprinkles if desired.

                            **LAST YEAR:Banana Nut & Dulce De Leche Coffeecake**   

Tuesday, January 29, 2013

Tunnel of Fudge Bundt Cake


I have always had a thing for bundt cakes, especially the ones with another flavor wrapped inside.  I can remember the chocolate bundt cake with coconut running through the center.  However, out of all the flavors the tunnel of fudge is my favorite.  It is a great one to go to if you are really looking for a chocolate fix.

This one is different from the traditional since it has nuts.  Also, I could not resist using the dutch cocoa brand Cacao Barry.  I have read a lot about it and like it much more than the typical grocery store brands.  It has an dark amber color and is richer in flavor than other brands I have tried.

Tunnel of Fudge Bundt Cake
adapted from Serious Eats

Ingredients
5 eggs, room temp
1/4 teaspoon vanilla extract
1/2 cup boiling water
1 1/4 cup or 2 1/2 sticks of butter, softened
3/4 cup light brown sugar
1 cup granulated sugar
1 tsp salt
2 cups flour
2 cups powdered sugar
3/4 cup cocoa powder, dutch processed
2 oz or 1/4 cup chopped bittersweet chocolate or chocolate chips
2 cups finely chopped pecans or walnuts

Preheat the oven to 350 degrees. Melt 1 tbs of butter and brush the interior of a 12 cup bundt pan, making sure are areas are covered.  Then dust with 1 tbs cocoa powder.  

Sift flour, cocoa and salt into a medium size bowl.  Whisk in powdered sugar and nuts. Set bowl aside.  Place chopped chocolate in a bowl and pour boiling water over it.  Let sit for 2 minutes and then stir until all chocolate is melted and consistency is smooth.

Then fill the bowl of a stand mixer with the butter, vanilla extract, light brown sugar and granulated sugar.  Cream together until light and fluffy.  Add each egg, one at a time, and beat for 30 seconds. Pour in the melted chocolate mix and blend until no dark streaks remain.

Remove bowl from stand mixer and fold in the dry cocoa/flour mixture.  Once all the dry ingredients are incorporated into the batter, fill the prepared bundt pan with the batter.  Smooth the top and place in oven to bake.

Cake is done when top springs back lightly when touched and cake starts pulling away from the sides of the pan.  This should take about 45 minutes.  Once finished baking, place on rack to cool for 20 minutes.  Once the 20 minutes has expired, invert the cake onto cooling rack.

Cake will take about 2 hours to completely cool.
                            **LAST YEAR: Lower East Side Nut Cake**
 

Tuesday, January 22, 2013

Aristocrats


Well with Valentines coming up, I could not resist the bright pink sanding sugar.  After buying it, I was on the hunt for a recipe that uses it.  I have decorated sugar cookies and russian teacakes with sanding sugar, so I narrowed it down to a cookie recipe.

I found a recipe that is basically a butter cookie with mini chips mixed in.  The dough is made into a log, chilled and wrapped with an thin layer of dough and then covered in the sugar.  These do have some crunch to them and they are perfect for dunking in hot tea or cold milk. This recipe makes about 6 dz small cookies.

Aristocrats
adapted from Gourmets Best Desserts

Ingredients
3 oz of mini chocolate chips
2 1/2 cups flour
2/3 cup granulated sugar
3/4 cup and 2 tbs of butter (or 1 & 3/4 sticks)
2 eggs
1/2 cup colored sugar crystals

Beat the butter and sugar together until light and fluffy.  Add one egg and beat for 30 seconds. 

Using a wooden spoon, mix in the flour in 1/4 cup increments.  The mixture should form a dough when all flour is completely mixed in.  Split the dough in half and seal one of the pieces in plastic wrap or foil and chill for 30 minutes.

While that is chilling, take the other piece of dough and mix in the mini chips.  Once evenly distributed, split dough mound into 2 equal pieces.  On a lightly floured surface, roll and form each piece into a log.  Each log should be even in diameter and be 10 inches long. Set aside.

Then take out the chilled dough.  Dust a flat surface with flour and roll dough into a rectangle, measuring 11 x 9.  Cut the dough in half , lengthwise, so you have 2 pieces.  Each piece should be 4 1/2 X 11.  Beat remaining egg in a small bowl. Using a  pastry brush, cover the face up side of  one piece of dough with the egg wash.

Place one log in the very center of the piece of the dough brushed with the egg wash.  Roll the rectangle around the log, sealing ends and seam.  Brush again with the egg wash.  Then sprinkle the colored sugar on a piece of wax paper and roll log in sugar until covered.  Wrap in foil and put in fridge.  Repeat the same process with the remaining log and dough rectangle, so you have 2 logs chilling in the fridge.  They will need to be in the fridge for at least 4 hours to firm up to the consistency you want.

During the last 1/2 hour of the chilling time, preheat the oven to 400 degrees.  Also, line two baking sheets with parchment paper.  Once the logs have completed the chilling stage, remove from fridge and slice each log into 36 slices of even thickness.

Place each cookie on a baking sheet, spacing about 1/2 apart.  Bake for 10-12 minutes or when bottom starts to brown.  Remove pan from oven and place cookies on a rack to cool.

Notes and Tips:

1. Since the cookie dough is sealed at the end, your end pieces will not be as nice as the other slices.
2. The recipe also states to use chopped walnuts in the dough instead of chocolate chips, use 2/3 of a cup.  For variety, you can do 1/2 of each.

                    **LAST YEAR: Celebrity Factor Cookies**


Tuesday, January 15, 2013

Spice Donuts

I have been craving some donuts lately.  I was disappointed the last time I bought some, so I decided on homemade donuts.  I wanted to make a variety and  really was not interested in frying a bunch of dough.  Baked cake donuts would be easier and last longer than fried.  I split the recipes in half and made 2 dozen, with 6 in each flavor.  Out of all of them, my favorite were the spice ones.  They all were pretty good, but in my mind, the spice ones paired best with hot coffee and cold weather.

The recipe below is for 1 dozen cake donuts.  These are fairly simple to make and yield pretty tasty results.  You can glaze these or top however you want, but I feel that the cinnamon sugar coating brings out the best in texture and flavor.

Spice Donuts
adapted from 150 Best Donut Recipes

Ingredients/ Donuts
1/2 tsp ground nutmeg
1/8 tsp ground ginger
1 tsp ground cinnamon
1/4 tsp allspice
2 tsp baking powder
3/4 cup sugar
2 cups flour
1 tsp salt
2 eggs
3/4 cup whole milk
1 tbs melted butter
1 tsp vanilla extract

Ingredients/Topping
1/2 cup melted butter
1 cup sugar
1 1/2 tsp ground cinnamon

Preheat the oven to 325 degrees and spray 2-6 cavity donut pans with non stick spray.

In one bowl, sift together the baking powder, salt, flour, cinnamon, nutmeg, ginger and allspice.  Then mix in the sugar and set aside.

The next bowl should be filled with eggs, melted butter, milk and vanilla extract.  Whisk all the ingredients together and pour in the bowl with the dry ingredients.  Mix with a wooden spoon until  blended.  I added some more milk to mine because it was a little thick.  The consistency should be like a thick frosting, not doughy.

Cut  a small piece of the corner off of a quart size freezer bag and fill with the batter.  Use the bag as you would a pastry tip and fill all 12 of the donut cavities evenly.  They should be about 2/3 full.  Bake in oven until springy to the touch, about 10-14 minutes.  Mine were done in 10 minutes.

Remove pans and let cool for 5 minutes.  As they are cooling, mix the cinnamon and sugar together for the topping. Invert the donuts from the pans, let cool completely.  Dip each donut into the melted butter and roll in sugar.  You can just do the tops or the whole donut as I did.
                        **LAST YEAR:High Octane Mini Pies*     


Tuesday, January 8, 2013

Tiger Tea Cakes


I found myself looking around for a recipe that required almond flour.  It had been sometime since I have used any of the flour and that bag seemed to always be staring back at me, even though I packed it in the freezer.

I landed on a unique recipe for tea cakes that used the almond flour in the batter.  The other good thing that caught my eye was that these little cakes had mini chocolate chips in them.  They were made in dome molds, but I decided to make them in my pan which had mini 1/2 circle cavities. You can make these in muffin tins as well.

The batter does have a strange consistency, but the cakes turned out wonderful.  They were like little pound cakes, with a tight crumb and very buttery.  The crowd did like them and they made for such a great presentation.  A nice dessert with afternoon tea or coffee. This recipe makes 16 muffin sized cakes or 12 cakes using the 1/2 circle pan.

Tiger Tea Cakes
adapted from Paris Sweets

Ingredients/ Cakes
1/3 cup flour
2 1/4 cup ground almonds or almond flour
3/4 cup sugar
5 oz mini chocolate chips
1 stick plus 7 tbs butter
1 1/2 tbs light corn syrup
6 egg whites, room temperature

Ingredients/Topping
5 oz bittersweet chocolate
1 stick of butter
3/4 cup heavy cream (for swirl on top)

Whisk the egg whites lightly.  Then add the corn syrup, ground almonds, sugar and the flour.  Mix until batter becomes smooth.  Cover top of bowl with plastic wrap and place in fridge for a minimun of 2 hours and maximum of overnight.

15 minutes before chilling time is complete, preheat the oven to 350 degrees.  Also butter the interior of the cavities of your pans, making sure there is capacity of 16.

In a small saucepan, melt the butter.  Remove from heat.  Take batter out of the fridge and pour the warm butter into the batter.  Stir until all of the butter is incorporated.  Once the batter is back to room temperature, mix in the chocolate chips.

Fill each muffin cavity with about 3 tbs of batter.  Once all batter is in the pans, place in oven and bake until golden on the edges.  This should take about 15-20 minutes.  Remove from oven and let cool for about 3 minutes.  Then transfer cakes from pans to rack to finish cooling.

While the cakes are cooling, you can prepare the topping.  Melt butter and bring to a boil.  Remove from heat and spoon off the foamy layer on top. Pour the yellow butter into a bowl leaving the milky residue on the bottom of the pot.  Your bowl holds the clarified butter.

In a double boiler, melt the 5 oz of bittersweet chocolate.  Once melted, mix in the clarified butter.  Place the cooling rack with the cakes over a shallow rimmed baking sheet lined with wax paper. Pour the chocolate glaze over the cakes, making sure all areas are covered.

Place in fridge for 1 hour to allow the glaze to set.  Then beat the whipped cream and pipe a small swirl in the center of each cake.  Now they are ready to serve.
                         LAST YEAR: Cinnamon Topped Immortality Bars

Tuesday, January 1, 2013

Swedish Raspberry Almond Bars


With all the heavy food of the holidays gone, I am more in the mood for something lighter as well as a hot beverage.  Kind of ready for some tea time with a light snack.  I mainly wanted a bar recipe but something more of a shortbread fruit type of thing rather than a thick brownie.
I came across this easy recipe that was just perfect for my craving.  Shortbread is topped with raspberry jam.  Then a fluffy meringue batter that holds almonds and coconut goes on top with a final sprinkling of almond slices.

Swedish Raspberry Almond Bars
adapted from Taste of Home Best Loved Recipes
Ingredients
1 cup sliced almonds (divided into 1/2 cups)
1/2 cup sweetened coconut
3/4 cup seedless jam
3 egg whites
6 tbs of sugar
3/4 cup confectioners sugar
3/4 cup butter/room temperature
1 1/2 cups flour

Preheat the oven to 350 degrees and grease the interior of a 9X13 size baking pan.

Beat together the butter and the confectioners sugar for about one minute on medium speed, scraping down the bowl at the halfway point.  The mixture should become very light and fluffy. Fold in the flour until the mixture is crumbly and all the flour is blended.

Pour it into the prepared pan and press evenly into a layer on the bottom of the pan.  Bake crust for about 18-20 minutes.  The crust should be a golden brown when done. Remove and place on rack.

Using a small offset spatula, smooth the jam evenly over the warm crust.  Set aside.

While the crust is cooling, place the egg whites into the bowl of a stand mixer and beat until soft peaks form.  Continue to beat and increase the speed of the mixer to high.  Gradually add one tablespoon of regular sugar and beat for 1 minute.  Follow this for each tablespoon addition until all 6 tablespoons are incorporated.  The beating process should end when the whites can hold stiff peaks.

Sprinkle the coconut into the batter, making sure there are no big lumps, and stir.  Then blend in 1/2 cup of the sliced almonds.  Empty bowl of mixture onto the jam layer of the bars.  Spread evenly, covering all sides and corners of jam. Then sprinkle the last 1/2 cup of almonds on top.

Place in oven and bake until the meringue layer becomes a golden brown, which is about 18-22 minutes.  Let cool on a rack completely before cutting and serving.

Tips and Notes:
1. I used canned raspberry pastry filling which I had to de-seed and warm up to spread.  I am sure the seedless jam would have been easier.
2. Parchment is not required, for I found that these bars came out of the pan easily with just greasing.
3. Make sure that you are not too heavy handed when smoothing the meringue layer, you want distinct layers, not a mixture of the meringue and raspberry.
4. None of the components are strong in this recipe.  I got good reviews even from one person that did not like coconut and another that had a dislike for meringue.
                           **LAST YEAR: Nut Drenched Chocolate Cake***