Foodbuzz

Sunday, August 10, 2014

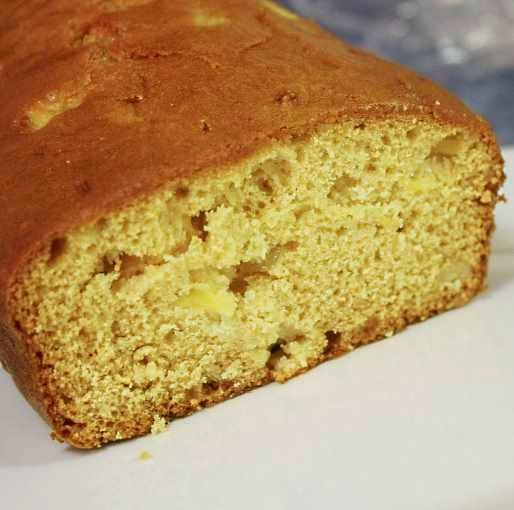
JD's Birthday Cake


Well if you are wondering who JD is, it is Jack Daniels- the founding father of the famous Jack Daniels Whiskey.  It would seem natural that whiskey be one of the key ingredients for his birthday cake.

This cake does not have oil, milk or water.  The liquid that does make this cake moist is the melted butter and the sweetness, other than the topping, comes from brown sugar.  Please note that this cake does not rise high and fluffy, it will be dense and about 1 3/4 inch thick.  However, the texture is definitely one of cake and not like bars.

Since I did my spring cleaning late this year, this particular recipe was perfect.  This item is proof that delicious cake does not always require lots of time or exotic ingredients. So if your friends just let you know they will be arriving shortly, pull out this recipe.  Other than the bake time, it comes together in a snap. 

JD's Birthday Cake
adapted from Jack Daniels Cookbook

Ingredients/Cake
1 cup melted butter, cooled
2 cups packed light brown sugar
4 eggs
1/2 cup whiskey
2 tsp baking powder
2 1/4 cups flour
1/2 tsp salt
1-6 oz package of semi sweet chips/regular or mini
1 cup chopped pecans

Ingredients/Glaze
1 tsp vanilla extract
2 cups powdered sugar
1/4 cup melted butter
3 tbs whiskey

Prepare a 9/13 inch pan by buttering the inside.  Then line the bottom and 2 long sides with parchment paper, leaving an overhang on the long sides.  Butter the face up side of the parchment. Preheat the oven to 325 degrees.

In a large bowl, whisk the eggs, whiskey and brown sugar together and set aside.  In another bowl, sift together the flour, baking powder and salt.  Mix the dry ingredients in with the wet until smooth.  Pour batter into prepared pan.  Sprinkle the surface of the batter with chocolate chips and pecans.

Place in oven and bake until center is firm and edges start to pull from pan.  This should take about 45-50 minutes.  Remove and let cool in pan on rack for 30 minutes.  Then pull up on parchment and transfer cake to rack to finish cooling.

To make glaze, stir together butter,whiskey and vanilla.  Then sift in the powdered sugar and stir until smooth.  Using a squirt bottle or a fork, drizzle glaze on top of cake.
                                 **LAST YEAR: Orange Grand Marnier Cake**

Sunday, August 3, 2014

Cinnamon Bun Pie


I think that seeking to improve old favorites is not a bad thing, but it generally is a tall order.  While the grocery store is lined with products that state new and improved, some fall into the " I wished they left it the way it was..."  The smart thing to do is introduce more variety, not discard the original product that founded your success.   With that being said, I will now get into some explanation concerning the above item.

This particular recipe is a spin off from the original baked cinnamon rolls with the cream cheese topping.  The filling is what really makes this special.  With cinnamon rolls you get the cinnamon entwined in the dough and the top is coated with a cream cheese mixture.  This pie, however, does have a stand out quality with the increased amount of the cinnamon and cream cheese mixture.  Even better, the two flavors are baked together.  Just the idea of a warm blend of cinnamon, brown sugar and liquid cheesecake filling is nothing short of a delicious stroke of genius.

That genius idea comes from none other than Christina Tosi of Momofuku Milk Bar.  I have made a few of her recipes and have been pleased with the results. Regarding this pie, it is obvious I am not the only one!  Hopefully since I have put it out of sight, it will not continue to shrink in size.   As I sit here doing this blog, I am wondering if someone is cutting themselves another slice. Hmmm...the best food security is the freezer... I better get on with this post so I can store it there!

Before we get started, this is one of those recipes that have components.  Be aware that some of the components require baking and cooling prior to assembly of the pie, so be sure to allow yourself plenty of time. 

Cinnamon Bun Pie Components
adapted from Momofuku Milk Bar

Ingredients/ Liquid Cheesecake
3/4 cup sugar
8 oz cream cheese
2 tbs milk
1 tbs cornstarch
1/2 tsp salt
1 egg

Line a six inch square or round pan or ramekin with wax paper. Do not worry about the folds or wrinkles, it is for baking the filling and has no impact on the final appearance of the pie.  Preheat the oven to 300 degrees.

Place cream cheese in the bowl of a stand mixer and beat until it becomes like smooth frosting.  This should take about two minutes on low speed.  Be sure to stop the mixer in intervals and scrape down the sides of the bowl.  Then beat in the sugar until evenly distributed.

In a small bowl, sift together cornstarch and salt.  Stream in the milk, whisking into the dry mixture.  Lastly, beat in the egg until incorporated. 

Turn the stand mixer on medium low and pour the egg batter slowly into the cream cheese batter.  Continue to beat, scraping down the sides of the bowl occasionally.  After 3-4 minutes the batter will become a smooth and have the consistency of pudding.

Pour batter into the prepared pan. Then add the rest by scraping down the sides of bowl with a spatula and dropping batter into pan. Place pan in oven and let cook for 15 minutes.  Then open the oven and check for consistency of cheesecake, it should be firmer around the edge and jiggly in the center.  If still watery, keep adding 5 minutes baking time and check after each interval.  The most it should take is 25 minutes.  Do not let the mixture rise more than 1/4" when baking or brown on the edges.  Consider that it will become more solid upon cooling but must be able to be spread like butter. Cool the cheesecake completely before using.

Ingredients/Browned Butter
1/4 cup butter

Place butter in a deep saucepan placed over medium high heat.  Let butter melt and then cook until it reaches an amber color.  It will sputter and pop, so be careful.  Remove from heat and pour into heatproof bowl to cool. Use when completely cooled.

Ingredients/Mother Dough
1 1/2 tsp salt
1 3/4 cup flour
1/2 tsp and pinch of yeast
1/2 cup plus 3 tbs water
oil, for coating inside of bowl

Coat the inside of a medium size bowl with oil and set aside.

In a small bowl, mix together dry ingredients and then stir in water.  Use your hands to mix until no dry streaks remain.  Now it should resembles a shaggy mass of dough.  Place dough in bowl of stand mixer fitted with a dough hook.  Mix on low speed for about 7 minutes.  The end result should be a damp ball of dough that bounces back when poked with your finger.

Place dough in oiled bowl and cover with plastic wrap and let proof for 45 minutes at room temperature.  Then the dough will be ready to use.

Ingredients/ Cinnamon Streusel
2 tbs light brown sugar
1 tsp gnd cinnamon
1/4 cup oats
1/4 cup flour
1/4 tsp salt
1/8 tsp vanilla extract
2 tbs melted butter

Stir together dry ingredients until evenly distributed.  Then stir in the butter and vanilla extract until the dry is completely moistened and clumps form.  Set aside.

Cinnamon Bun Pie/Assembly and Baking
adapted from Momofuku Milk Bar

Ingredients/Pie
components, noted above
3 tbs flour for dusting flat surface
1 tsp cinnamon
1/4 tsp salt
1/4 cup tightly packed light brown sugar

Preheat the oven to 300 degrees.  Lightly dust a flat surface with flour.  Punch down dough in bowl and then place on the floured surface.  Roll dough out to a circle about 11 inches in diameter and 1/4 to 1/2 inch thick.  Place dough in a 10 inch pie tin and press dough evenly in place.

Smooth half of the brown butter over the surface of the dough.  Using 1/2 of the liquid cheesecake mixture, drop spoonfuls onto buttered dough.  Take the back of the spoon and smooth the cheesecake into an even layer over the interior of the dough, leaving a  1/2 inch border or edge.  Add another layer of butter, smoothing as best you can. 

Sprinkle on the brown sugar and press lightly to adhere.  Then sprinkle the cinnamon and salt evenly on top.  Layer it with the remaining cheesecake as stated prior, but this time take and dip the spoon in water at intervals to help you with the smoothing process.

Lastly, sprinkle evenly with the streusel and press down lightly.  Place the pie tin over a cookie sheet and put in the oven.  Bake for about 40 minutes and then check for doneness.  The outer edges of the filling should be firm with a slightly jiggly center.  The crust should be golden brown and the streusel have a dark brown hue. It not, cook for an additional 5 minutes and check again.

When done, remove pie and place on rack to cool. Pie is best served slightly warm.

Tips and Notes
1. Do not overwork your dough when pressing in pie tin.  Dough is to have a pit in the center but do not try to have dough go completely up the sides of pie tin.  It is to be more like a pizza crust than pie crust.

2. The first brown butter layer is the only one to cover the whole surface of the dough.  The other layers will leave a 1/2 inch border. 

3.  Suggestion was made to make the brown butter in a microwave in a bowl with a saucer over the top.  I found that the force of the butter popping knocked the saucer off and hence butter splattered all over the inside of the microwave.  Cooking or even melting butter in the microwave is not a good idea.

4. The instructions were to use plastic wrap to line the pan for the liquid cheesecake.  On the box of the plastic wrap I use it states that heating with high fat or sugar items may cause the plastic to melt, so wax paper was used.
                                       **LAST YEAR:White Velvet Cut Outs** 

 

Sunday, July 27, 2014

Chocolate Cherry Scones

I can remember that a previous employer had a person in management that would take time out for afternoon tea .  I find this unusual , especially since most offices always have a counter full of coffee pots.  However, a tea time break may be just the thing to brighten up the afternoon.

As always, tea time should include some tasty food.  As far as I am concerned, scones have been overlooked.  Scones, for some reason, are not an item you see very often in bakeries but there is no doubt that they are just as worthy as cookies or cupcakes. Also, there is enough of a variety to appeal to everyone.  Some are savory, others sweet and the base can have a bready quality or skate very close to being cookies.

In this particular recipe, the harmony created with the sweet dried cherries and the semi sweet chocolate does create a craving for seconds. Also, there is a hint of something extra, which is cinnamon.

Take some time for yourself and friends with an afternoon tea and don't forget the scones! This recipe makes about 1 dozen scones.

Cherry Chocolate Scones
adapted from Gifts From the Kitchen

Ingredients/ Scones
3/4  cup or 3 oz coarsely chopped cherries
1/2 cup miniature semi sweet chocolate chips
1tbs baking powder
1/4 tsp salt
1/4 cup sugar
1/2 tsp gnd cinnamon
2 cups flour
1 1/3 cups heavy cream

Ingredients/ Topping
melted butter
Cinnamon sugar or sparkling white sugar


Line a baking sheet with parchment paper and preheat the oven to 425 degrees.   In a large bowl, sift together cinnamon, salt, flour and baking powder.  Then stir in sugar.  Mix in the dried cherries and chocolate chips.

Add 1/3 cup of cream to the batter.  Using a pastry cutter or large fork, blend the cream into the dry ingredients.  Repeat this process, adding and mixing in the cream until the mixture can be formed into a ball of dough.

Lightly dust a flat surface with flour and place the ball of dough in the center.  Knead the dough about 15 times, turning after each time. Roll out the dough into a 3/4 inch thick mass. Take a 2 1/2 inch biscuit cutter and cut out rounds. Dust bottom edges of cutter occasionally between cuttings. Continue with the process, re-rolling scraps when needed.

Once all the dough has been cut into circles,  place on baking sheet about 1 inch apart . If one of the sides of the scone has flour on it, place that side up.  Bush the top of the scones with butter and sprinkle on the cinnamon.  Place the sheet in the oven for the scones to bake until light brown.  They should take about 20 minutes to be done. Scones will be firm to the touch.

Let cool in pan about 5 minutes then serve warm or let cool completely to serve at room temperature.
                              **LAST YEAR: French Strawberry Cake**


Sunday, July 20, 2014

Coconut Almond Topped Peach Pie


The window of time for the best peaches seems to be pretty small in Texas.  Intending to get fresh fruit for the pie, I was disappointed only to find a sad selection of small hard peaches at the grocers.  Not the tender juicy ones I had in mind.  However, I came across had a note in a pie recipe book stating that sometimes the frozen ones are better because they are flash frozen at the peak of freshness.  So I went ahead and got frozen peaches.

When it comes to fruit pies, the fruit should be the most prominent thing you taste.  Some pies have just too much filling so you are tasting the syrupy type base more than the fruit.  As you can see in the picture, the syrup base keeps the peaches clinging together as opposed to floating in the base.

The crunchy topping is a great alternative to using pie crust.  It not only imparts a nice texture, it adds a little bit more flavor to the dessert.  Let's not forget that it is much easier to make than a pastry crust top for the pie!

Coconut Almond Topped Peach Pie
adapted from Pie by Ken Haedrich

Ingredients/Pie Crust
1/4 cup cold butter (cut into 1/4 inch pieces)
1/4 cup cold vegetable shortening (cut into pieces)
1/4 cup water
1/2 tsp salt
1 1/2 cups flour
1 1/2 tsp sugar

Ingredients/ Filling
1 1/2 tbs fresh lemon juice
zest from 1 lemon
1/2 tsp vanilla extract
1/3 cup plus 3 tbs sugar
2 tbs cornstarch
1/4 tsp ground nutmeg
2- 1lb bags of frozen peaches, thawed in a large bowl

Ingredients/Pie Topping
1/4 tsp salt
1/2 cup sliced almonds
1/2 cup sweetened coconut
6 tbs or 3/4 cup cold butter (cut into 1/4 inch pieces)
1 tbs milk
2/3 cup sugar
1 cup flour

For the pie crust, sift together the flour and salt.  Stir in the sugar.  Pour mixture into a food processor.  Add the butter cubes and pulse several times to cut into the dry ingredients.  Scrape the bowl and fluff with a fork.  Do the same with the pieces of shortening.  Drizzle 2 tbs of water over mixture and pulse until blended.  Fluff and then sprinkle additional 2 tbs of water over dough and pulse again. Empty dough into bowl and test texture. Mixture should clump together in your hand.  If still too dry, knead in a teaspoon of water.

Then sprinkle flour on a flat surface and empty bowl of dough on top of flour.  Knead the dough a few times and form into a 3/4" thick disk.  Wrap disk in plastic wrap and place in refrigerator for at least and hour or overnight.

Once chilling time is complete, roll disk out on a floured surface to form a 13" circle.  Then invert into a 9 1/2 inch deep dish pie pan.  Make sure dough is covering all of the interior of the pie pan, so there are no bubbles of air.  Using your fingers or the tines of a fork, sculpt the extra dough hanging over the edge of the pie pan to make the upper edge of the crust.

Place pie tin in the freezer for 15 minutes.

The filling starts with tossing the lemon zest, lemon juice, 1/3 cup sugar and peaches together in a medium size bowl.  Set aside for 10 minutes for peaches to release more juice.  Preheat the oven to 400 degrees.

In a small bowl, stir together the cornstarch and the remaining 3 tbs of sugar.  Add to the peach mixture, stirring to make sure everything is evenly distributed.  Then mix the nutmeg and vanilla extract into the fruit filling.  Pour filling into the chilled pie crust and smooth the top.  Place in oven to bake for about 35 minutes.

While pie is baking, make the topping.  Fill food processor with coconut, almonds, flour , sugar and salt.  Press the pulse button about 6 times, running each pulse session about 5 seconds.  Then drop in butter cubes and run food processor until the mixture turns into crumbs.  Lastly, pour in milk and process until consistency is uniform.  Pour the crumb mixture in a bowl and test to see if the crumbs will clump together in your hand.  Put in refrigerator until pie has been removed from the oven.

Once pie is removed from oven, reduce temperature to 375 degrees.  Take crumb topping and dump into center of pie and smooth.  Then lightly pat down so crumbs form a solid coating over the peaches.

Cover a baking sheet with foil and place on the bottom rack of the oven.  Then place pie on the rack above.  Bake for about 30 minutes, or until filling is thick and bubbly.

Remove and let cool for at least an hour prior to cutting and serving.

Tips and Notes:
1. The recipe states, partially frozen peaches instead of thawed.  To insure even baking of the crust as well as the filling, I thawed out the peaches completely before mixing to make filling.

2.  When it comes to making the dough, you can use other processing methods such as by hand and by using a mixer.

3. To make sure the bottom crust fully bakes, the freezer time should not exceed 15 minutes.

4.  While the recipe states dump the crumbs into the center of the pie and spread, I sprinkled them on top, this helps make the topping even. Also, not that the crumb mixture does seem like a lot, but the volume insures a crumbly top coat instead of the crumbs melting into the peach filling.
                                        **LAST YEAR: Pecan Tassies**


Sunday, July 13, 2014

Frosted Banana Bars

When it comes to recipes that include bananas, most of us find ourselves turning to these type of recipes when we have over ripe bananas.  That was not the case here.  I bought the bananas the day before baking.

Based on the results, I am left wondering about the specifics of the ingredient list in regards to the bananas. Over ripe, medium ripe, ripe or just the listing of banana.  These variations have a definite impact on the flavor and texture of the bars.  Since my bananas were just purchased, the end result was that the bars had just a hint of banana flavor.

The frosting would have been a better match if the bars had a stronger flavor.  The flavor of the cream cheese was too strong of a match for the subtle banana base. If I was to make this again I would use over ripe bananas and perhaps some banana extract. However, note that the ingredients listed below are those as stated originally.

The recipe did have some positive points.  The bars were moist and the frosting remained creamy even after a few days. The amount of confectioners sugar used in the frosting is a variable according to what consistency is desired, but bear in mind that the more sugar the dryer it will be after it sets. So if you are looking for something banana, this may be a good one to test out with those over ripe bananas.

Frosted Banana Bars
adapted from Taste of Home, Best Loved Recipes

Ingredients/Bars
2 cups flour
1 tsp baking soda
1/4 tsp salt
2 eggs
1/2 cup softened butter
1 1/2 cups sugar
2 medium ripe bananas, mashed (about 1 cup)
1 cup sour cream
1 tsp vanilla extract

Ingredients/Frosting
3 3/4 to 4 cups confectioners sugar
1/2 cup softened butter
2 tsp vanilla extract
1-8 oz package cream cheese, softened

Preheat oven to 350 degrees.  Prepare a 10 x 15 x 1 inch baking pan by greasing the interior. Sift together the flour, salt and baking soda.  Set aside.

Add the butter and sugar to a bowl of a stand mixer.  Beat on medium high for 2 minutes, stopping occasionally to scrape down the sides of the bowl.  The batter should be very light and fluffy after this process.  Add one egg and beat for 30 seconds and repeat with the remaining egg.  Then add the sour cream and vanilla.  Beat on medium speed until evenly distributed into the batter.

Fold the sifted ingredients into the batter in increments of 1/3.  When no dry streaks remain, fold in the mashed bananas.  Spoon batter into prepared pan and smooth the surface with a spatula.  Place in oven and bake until it has a golden hue and tester comes out clean.  This should take about 20-25 minutes.  Remove and let bars cool in pan completely without cutting.

To prepare the frosting, add the cream cheese, vanilla and butter to a mixing bowl.  Beat for 1 minute on medium high speed to reach the same consistency as stated in the first mixing step of the bar batter.  Sift in 1 cup of the confectioners sugar and beat until smooth.  Continue to add the sugar in increments and beat after each addition until desired consistency is achieved.

Smooth the frosting on the cooled bars and refrigerate until read to cut and serve.
                                            **YEAR 2012: Apricot Brie Croissant Pockets**


Sunday, July 6, 2014

Chocolate Truffle Cookies


When I bring food to my co-workers I am faced with a timeline.  Each person indulges in the dessert at a different time.  Saving for later, eating right then and saving until tomorrow poses an issue.  Anything that is cold is hard to serve, as well as anything that drys out at room temperature after cut.  All I can do is use the company refrigerator and advise when it is best to be eaten.

I am sure that we would all agree that there is nothing quite as tasty as a freshly cut, fudgy brownie.  With this cookie recipe, you can forget about the timeline. The thin, crackly exterior protects all the fudgey goodness that lies on the inside, so sitting for several hours has no impact on the texture.

Like brownies, these are delicious served on their own.  However, another serving suggestion (from none other than my over-the-top adviser) is to pair these with homemade vanilla ice cream.  Be sure to plan in advance, for the dough requires about 3 hours chilling time before baking. This recipe makes about 4 dozen cookies.

Chocolate Truffle Cookies
adapted from Taste of Home Best Loved Recipes

Ingredients
3 eggs
1/3 cup butter
1 1/2 tsp vanilla extract
2 cups semi-sweet choc chips or a 12 oz bag
4 oz unsweetened chocolate
1 cup sugar
1/4 tsp baking powder
2 tbs unsweetened natural cocoa
1/4 tsp salt
1/2 cup flour
confectioners sugar (optional for dusting)

Place butter, unsweetened chocolate and 1 cup of  semi-sweet chocolate chips in a double boiler and place over medium heat.  Once all ingredients are melted, stir until batter is smooth and remove from heat.  Set timer for 10 minutes.

In a large bowl, sift together salt, baking powder, cocoa and flour.  Set aside.

Add sugar and eggs to another bowl.  Beat with mixer on medium high until thick and light in color. It should take about 2 minutes to reach the correct consistency.  Add the vanilla extract and beat again until evenly distributed. 

At this point, your timer that was set for the melted chocolate to cool should have already gone off.  If not, wait for it to complete.  Then pour the chocolate batter into the sifted ingredients.  Using a spatula, scrape all of the chocolate batter into the dry ingredients and stir until no dry streaks or lumps remain.  Lastly, fold in the other cup of the chocolate chips.  Cover batter and place in refrigerator to chill for no less than 3 hours. 15 minutes prior to the 3 hour completion, preheat the oven to 350 degrees.

Once the chilling time has expired, remove a cup of dough from the batch and place the rest of the dough back in the refrigerator.  Measure out pieces of the dough for 1 inch balls by using a spoon or scoop. Lightly flour your hands and shape the pieces into circles/ balls. Place each ball about 1 inch apart on an ungreased baking sheet.

Bake cookies for about 10-12 minutes.  Cookies will not spread that much.  When done, cookies will be set, puffy and cracked on the surface.  Let rest on cookie sheet for 4 minutes and transfer to a rack to finish cooling.

Repeat this process with the remainder of the dough.  Then, if you choose, dust with confectioners sugar.

Tips and Notes:
1.  These cookies are not very large, so I used mini chocolate chips instead of the regular size.
2.  They really do not require the confectioners sugar, this option is basically for appearance.
3.  The chocolate chip measurement is by weight as well as volume, but with the mini chips I found that the 12 oz bag came up a little short of the 2 cups.
                                            
                                        **LAST YEAR: Fudge Swirl Cheesecake Ice Cream**


Sunday, June 29, 2014

Cherry Dr Pepper Cupcakes


A co-worker in my office is turning 19, so for her birthday I wanted to do something a little different and something fun.  The idea of baking using carbonated drinks, such as Coke or root beer has been around awhile, but I have not really used soda too much in recipes on my blog.

This particular recipe originally used Coke, but I decided to try it with Dr. Pepper.  Actually, I think it was the little cans I spied in the grocers that had me latch on to this particular soda.  I had mentioned this recipe to a few people and their first thought was that there were too many flavors in this to even taste good.  Kind of takes me back to a review I saw on a recipe once..."every one in the family went to bed with upset stomachs!"  That review just happened to be tied to another cherry chocolate combination.

This recipe actually does have a great balance of flavor which is key when you have a lot of different flavor ingredients coming together.  Having soda, cocoa, cherries and cream in one recipe can have its challenges.  However, there is not one flavor here that is overpowering and each flavor compliments the others.  Also, the separate flavors can be recognized in each bite. This recipe makes about 2 1/2 dz cupcakes.


Cherry Dr Pepper Cupcakes
adapted from Homemade by Holman and discovered on Pass the Sushi 

Ingredients/Cake
2 eggs
3 tsp vanilla extract
1 cup buttermilk
1 1/2 cups Dr Pepper ( not diet)
1 can cherry pie filling
1/4 cup plus 2 tbs cocoa
3 cups flour
1 1/2 cups sugar
1 tsp baking soda
1/2 tsp salt
1 cup or 2 sticks butter, room temp

Ingredients Glaze
3-4 tbs Dr Pepper
1 1/2 cups powdered sugar

Ingredients/Icing
1 tsp whipped cream stabilizer (optional)
1/4 cup plus 2 tbs powdered sugar
1 1/2 cups heavy cream
maraschino cherries (optional for decoration)

Prepare the muffin tins by greasing the top edge of each cavity and lining with cupcake liners.  Preheat the oven to 350 degrees.

Start by making the cake batter.  Cream together the butter and sugar until light and fluffy, stopping the mixer occasionally to scrape down the sides of the bowl.  This will take about 1 minute at medium high speed with the mixer.  Add one egg and beat for 30 seconds, then do the same with the second egg.  Set aside.

In one medium size bowl, sift together the cocoa, flour, salt and baking soda.  In another bowl, pour in the Dr. Pepper. Let it sit so that all the foam is gone.  Then stir in the buttermilk and vanilla extract.  Again, let it sit for 3 minutes for the carbonation to settle.

Using a wooden spoon, mix in 1/4 of the sifted ingredients to the butter batter until thoroughly combined.  Pour in 1/3 of the Dr Pepper mixture and stir.  Repeat process in the same intervals, ending with the last 1/4 of the sifted ingredients.  Then beat at medium speed until all lumps are gone.

Fill each cupcake liner 2/3 full with batter.  Place pan in oven and bake until top springs back when lightly touched or tester comes out clean.  This should take about 18-20 minutes.  Remove muffin tins and let cupcakes rest for 5 minutes in pan.  Then transfer to a wire rack to complete cooling.

While this is cooling, strain the pie filling into a small bowl and reserve the liquid.  Take the cherries and toss into a blender.  Pulse cherries a few times and then stir back into the liquid filling.

Once the cupcakes have cooled, cut a cone shaped core out of the middle of each cupcake using a paring knife.  Then cut the corner off of a zip lock back and insert a large piping tip or use as is.  Fill with the cherry filling and pipe into the cored out center of the cupcake, smoothing the top.

The next step would be glazing the cupcakes. Sift powdered sugar into a bowl and pour in Dr. Pepper.  Stir mixture and check consistency.  If it is too runny, add more sugar and if too thick add more Dr. Pepper.  Once the desired consistency is achieved, spoon onto cupcakes, leaving a small border on the edge so it will not drip down the sides.

After the glaze is set, chill a bowl in the freezer for 10 minutes.  Remove and fill with cream and beat on low speed for 1 minute.  Then add the stabilizer and powdered sugar.  Beat on medium high until it holds stiff peaks.  Decoratively pipe the cream on top of each cupcakes and place 1 maraschino cherry on top.

Tips and Notes:
1. For appearance purposes I cut the top off of mini cans of  Dr.  Pepper.  Due to the sharp edge of the can, it is not recommended to serve the cupcake placed inside the can.
2. The pie filling can size is questionable, but I did have a lot left over.  Since the filling is from a can and not prepared, start with 1/2 cup and then make another if you run out. The chopped cherries will add more volume to the original amount of the filling.
3. Do not be concerned if cake crumbs or filling gets swirled into the glaze as you are smoothing it on top of the cupcake.  The whipped cream topping with conceal most of this.
                                         **LAST YEAR: Peach Amaretto Bread Pudding**


Sunday, June 22, 2014

Bavarian Key Lime Pie


I can remember the first time in Florida when I tasted a key lime pie.  It was in a restaurant located in Destin.  I had one of those: "probably won't like it but at least should try it attitudes."  Not sure why the thought, since I am a big fan of lemon, especially lemonade.  After one ice cold bite of the tart smooth filling with the slight crunch of the graham crust...well lets just say I had a real attitude adjustment in regards to eating key lime pie.

Since then I have made several key lime pies at home.  The one thing that bothered me was that the pie never seemed to have much depth to it.  The filling never really baked up close to the lip of the pie pan.  In scanning the net, I found a pie shop that had double-decker pies.  That is where I got the idea to make this particular pie.

The top layer is white chocolate Bavarian cream and the other layer, of course, is the tangy key lime filling. Also, it has the traditional graham cracker crust.

This pie is really a great cold dessert to serve up in the heat of the summer.  I had a few visitors here that spent most of the day outside that simply devoured the pie after dinner.

Bavarian Key Lime Pie
crust and key lime filling adapted from Bubbie's Homemade Pies
Bavarian layer adapted from Penzey's spices

Ingredients/Crust
1/3 cup or 5 1/3 tbs melted butter
1 1/2 cups Graham Cracker crumbs
3 tbs sugar
pinch of salt

Ingredients/Key lime layer
1/3 cup key lime juice
1 cup sweetened condensed milk
3 eggs
1/2 tsp cream of tartar

Ingredients/White Chocolate Bavarian Cream layer
1 1/2 tsp  unflavored gelatin powder
4 oz chopped white choc bar
2 tbs cold water
1/4 and 2 tbs sugar
1 cup milk
1/2 tsp vanilla
1 cup heavy cream
4 eggs yolks, room temp

For the crust, preheat the oven to 350 degrees.  Then mix together butter, sugar, salt and crumbs.  Pour in melted butter and stir until all the crumbs are moistened.  Transfer mixture to an 8-10 inch pie tin and press evenly into pan.  If you have another of the same pie tin or plate, place it on top of the crumb mixture in the other pie pan and lightly press down.  This will help compact the crust.   Remove the top tin and place crusted tin in fridge for 30 minutes.

Once chilling time is complete, place tin in oven and let crust bake for about 8 minutes.  Remove and let cool to room temperature before filling.

Start on the Key lime filling by preheating the oven to 300 degrees.  Whisk the eggs until frothy.  Then beat in the sweetened condensed milk along with the cream of tartar.  Run the mixer on medium high for 1 minute.  Change the speed to low and pour in a steady stream of key lime.  Once all the key lime has been mixed in, increase the speed to medium high and beat for 5 minutes.  Then fill the crust with the mixture.

Place filled pie tin on the middle rack and then put an empty jelly roll pan on the rack underneath.  Let the pie bake for about 15 -20 minutes.  The pie sets up after it is removed from the oven, so coming out of the oven it will still jiggle in the center a little.  Do not let the filling brown on the edges, that means it is overcooked.

Remove pie and let cool at room temperature for 20 minutes, then transfer to a refrigerator to chill and make note of the time.

For the chocolate layer, start by setting up a double boiler to simmer.  Then break up chocolate and place in top bowl to melt. Keep warm so chocolate stays melted.  Next is the gelatin; fill small bowl with the water and sprinkle gelatin over top.  Then stir, making sure no dry powder remains on top. Set aside so gelatin can dissolve.

In a stand mixer bowl, add egg yolks, sugar and vanilla extract. Beat until frothy.  Set aside.  Place a small saucepan over medium high heat and cook milk until simmering but not boiling. Remove from heat.  Turn on stand mixer to medium low and start mixing the egg yolks/sugar batter again.  As you continue to mix, pour in a steady stream of the hot milk.

Once combined, pour batter back into saucepan and heat over medium low until mixture is thick enough to coat the back of the spoon.  This should take at least 15 minutes.  Then check the white chocolate, making sure it is still melted. If not, heat up again and then add to batter in saucepan and mix until combined. Lastly, stir in the gelatin/water mixture until all is smooth.  Strain into a bowl and let cool.

After batter has cooled, whip 1 cup of heavy cream to medium peak stage.  Stir 1/3 of the whipped cream into the batter.  Remove pie from refrigerator and pour the white chocolate batter over the top.  Then pipe the remaining whipped cream around the edge of the pie.

Place the pie back in the refrigerator to chill.  Chilling time should be a total of 4 hours from the first time it was placed in the refrigerator.  After the 4 hours, it is ready to be served.

Tips and tricks:
1. Should you not be patient and find that the white chocolate mixture when cooled is not the right consistency, you can recover by cooking up in the microwave by using the defrost button. Run for about a minute and stir.  Repeat the process until right consistency is achieved.

2.  The Bavarian cream recipe can be doubled, should you want more white chocolate flavor paired with the lime.

3.  Adding key lime zest will give it an extra punch of lime flavor.  However, keep in mind that this addition will eliminate the smooth texture of the pie.

4.  Also for a more decorative touch you can insert slices of lime, curve side up, in the whipped cream.
                                    **LAST YEAR:Chocolate Irish Cream Cheesecake*


Sunday, June 15, 2014

Virginia Blackberry Roll


I like all kinds of fruits, however, it is the dark fruits I like most.  Maybe it is the dark color, but I feel that those fruits seems to have more flavor.  Also, while farmers are growing bigger and bigger strawberries, strawberries seem to have less and less flavor.  Lets just hope farmers do not opt to make larger and larger blackberries.  I really like them just the way they are, so I can continue to pass on the grapes as a snack and go for the blackberries.

This recipe is basically a blackberry cobbler, but formed in a different way.  The blackberries are encased in a buttermilk biscuit dough and then sliced to serve.  I think that the way this is formed allows for more of the juices to penetrate the biscuit.  Biting into that bottom purple piece of biscuit is my favorite part.  However, I am not sure how definite that answer is when a scoop of vanilla ice cream is added!

I hope everyone is enjoying time with family and friends to celebrate Father's Day today!

Virginia Blackberry Roll
adapted from Classic Home Desserts

Ingredients/Berry Filling
4 cups rinsed blackberries
juice of 1/2 lemon
pinch of salt
3 tbs quick cooking tapioca

Ingredients/ Biscuit Dough
3/4 cup buttermilk
1/2 cup or 1 stick butter (cubed and cold)
1 tbs baking powder
3 cups flour
3 tbs sugar
1 1/2 tsp baking soda
pinch salt
1 egg
2 tsp milk

For the berry filling, add all filling ingredients in a large bowl and mix until berries have an even coating and set aside.

Start making the dough by sifting together the flour, baking powder, baking soda and salt.  Mix in the sugar and pour into a food processor.  Drop in cubes of butter and pulse until mixture resembles coarse crumbs.  Then turn the machine on and pour a steady stream of buttermilk into the dough.  Let run until the dough comes together.  If it still appears to be a little dry, mix in an additional tablespoon or two of buttermilk.

Roll out some wax paper on a flat surface and lightly dust with flour.  Also, butter the interior of a 9 1/2 x 2 1/2 inch loaf pan. Line the bottom and long sides (leaving some extra overhang) of the pan with parchment paper and butter the surface.  Preheat the oven to 400 degrees.

Take dough out and roll out to a rectangle about 11x14 inches.  Trim sides to make straight and reserve trimmings.  Using the wax paper, flip the dough into the loaf pan, lightly pressing the sides to adhere to the interior of the pan.  Your dough should overhang the long sides and just come up to the top of the pan on the short sides.  Trim the dough where needed on the short sides and cut about an inch off each long side overlap of dough.  Set dough trimmings with the others.

In a small bowl, crack the egg and add the milk.  Blend with a wire whisk until a little frothy.  This is the egg wash for the dough. 

Fill the dough lined loaf pan with the blackberry filling, making sure it is all even.  Then fold over one long side of dough over berry mixture.  Brush with egg wash and then fold the other long side of the dough over and press to seal edge.  Make any folds as needed to seal the short ends as well.

Form the reserved dough trimmings into a ball and roll out. Using a cookie cutter, cut out desired shapes.  Place decoratively on top of roll and brush with egg wash.

Place a cookie sheet lined with foil on the bottom rack of the oven.  Then place the loaf pan above, in the next rack up.  Let bake for 30-50 minutes.  Once golden, sprinkle the top with sugar and let bake and additional 10 minutes.  Mine took a total of 40 minutes because I baked in a dark pan.  For a glass pan, it recommends 50-60 minutes.

Remove and let cool in pan for 30 minutes then transfer to pan with a lip to catch juices as you slice.  Serve slightly warm by itself or add a scoop of vanilla ice cream.

Tips and Notes:
1. Recipe stated to serve in pan that you baked it in.  I did the parchment lining and transferred it for a nicer presentation.
2.  My crust browned pretty quickly, so occasionally peek in on it and if it gets too brown, cover lightly with foil.
3.  For more thickness on top and less decoration, trim off less dough.
                                          **LAST YEAR: Raspberry Lemon Muffins**


Sunday, June 8, 2014

Double Chocolate Angel Food Cake


We all have had the basic Angel Food Cake.  An airy, vanilla slice does seem to call out for a little more flavor.  It is usually paired up with fruits during the summer, but you rarely see it served alone.

However, most people seemed to have overlooked the fact that the cake does not have to be restricted to vanilla.  I have found recipes for angel food cakes that range from citrus, lavender rose, mocha and, of course this one, double chocolate.

When I made this, the picture I had in mind of the interior was spot on.  The light milk chocolate color with patches of dark chocolate.  With the extra chocolate flavor, a slice is enjoyable all by itself.  However, no harm done if you want to dress it up by serving with chocolate syrup, whipped cream or fruit!

This cake would be a great item to present at your next cookout or picnic.

Double Chocolate Angel Food Cake
adapted from Cakes 1000 Classic Recipes from Around the World

Ingredients
1/4 cup chocolate syrup ( in squeeze bottle)
1 tsp vanilla extract
12 egg whites
1/4 cup natural unsweetened cocoa powder
1 cup sugar
1 tsp cream of tartar
1/4 tsp salt
3/4 cup cake flour

Pull out a 10 inch tube cake pan.  The cake pan is to be used as is, no greasing or flouring the interior.  Preheat the oven to 325 degrees.

Bring the egg whites to room temperature in the bowl of a stand mixer.  Sift the cream of tartar and salt into the egg whites.  Beat until frothy on medium speed.  Move the speed up to high, and add 1/2 cup of sugar in a steady stream while the mixer is running.  Then pour in the vanilla extract.  Beat at high until stiff peak stage.  Set aside.

Sift together cocoa powder with the cake flour into a small bowl.  Then stir in the sugar.  Using a spatula, fold the sifted ingredients into the egg white batter in 1/3 increments.

Once dry ingredients are folded in, spread 1/3 of the batter into the bottom of cake pan.  Drizzle 2 tbs of chocolate syrup on top and use a knife to swirl into the batter.  Repeat process again.  Spoon out last layer of batter on top and smooth surface.

Bake for 40-60 minutes or until top springs back when lightly touched.  My cake took about 45 minutes.  Remove cake from oven and invert, balancing the center core of the pan over a small bowl or mold.  It should be high enough so air can get to the inside of the pan.  After cooling for 1 1/2 hours, take a knife and run between pan and cake on all areas; ie sides, bottom and center.  Invert onto cake plate and invert again.  Slice and serve.

Tips and Notes:

1. Be careful swirling on your first layer, so that the chocolate syrup does not get to the bottom of the pan.   Also, avoid edges of pan when swirling and drizzling.
                                **Last Year:Graham Cracker Madelines**


Sunday, June 1, 2014

Chocolate Almond Marsala Cookies


These little Italian cookies are quite unique.  Just by appearance, the first thought is- did you want a little cookie batter with your add ins?  That batter does not just hold everything together, it actually provides the spice to these cookies.  The cinnamon spice is a good flavor base to enhance all those add ins.  The batter is studded with almonds, dried fruit and mini chocolate chips.  Also, since the recipe includes 1/3 cup of Marsala wine, these cookies can be classified as Italian. Especially since this recipe makes only 2 dz cookies.

Concerning the "high gloss" look that the cookies have, it can be attributed to the use of an egg wash prior to baking.  

The original recipe is stated below.   My tweaks on the original are: that I used dried apples instead of candied orange peel and mini choc chips instead of the standard. Candied orange peel, if you are not already aware, is a specialty ingredient that cannot be found at a regular grocery store.  The recipe  cautions not to buy candied fruit as a substitute, but to use the real candied orange peel.  As far as my twist, the dried apple was already in the pantry and it did not hurt that I love the flavors of apple, cinnamon and chocolate melded together.  The mini chocolate chips were chosen based on the fact that these are a slice cookie.

Chocolate Almond Marsala Cookies
adapted from Martha Stewarts Cookies

Ingredients
1/2 cup or 4 oz chopped chocolate
1/2 cup finely chopped candied orange peel
1/2 cup chopped toasted almonds
1/3 cup Marsala wine
2 large eggs
3 tbs honey
1 1/4 cups flour
2 tsp baking powder
1 tsp salt
1 1/4 tsp gnd cinnamon

Prepare 2 baking sheets by lining with parchment paper and dust a flat surface lightly with flour.  In a small bowl, whisk 1 egg and wine together until frothy.  Set aside.  Pull out a larger bowl and sift together cinnamon, baking powder, salt and flour.  Pour wine mixture into sifted ingredients and fold together until a dough is formed.  Mix in honey. Then knead in all the almonds, chocolate chips and orange peel into the dough, using 1/4 cup increments of each of the add ins.

Once all is distributed, knead dough lightly on floured surface until it holds its shape.  Divide dough into 2 equal pieces.  Form each piece into a log, measuring 10 1/2 x 1 1/2 x 1.  Place each log on a wax paper lined plate.Cover and chill in refrigerator for about 45 minutes. At the 30 minute mark, preheat the oven to 250 degrees. 

Remove and slice each log crosswise, ending up with 12 slices per log.  Slices should be approx 3/4 of an inch thick.  Flatten bottom half of slices, so the slice actually looks like a 1/2 moon.  Place cookies on cookie sheet about 1 inch apart with the bottom half facing down and the top curved part facing up, so the cookies are actually standing up from the pan.  Each is cookie is kind of like the sun coming over the horizon, with the pan being the horizon. 

Once all the cookies are on the pan, take the remaining egg and whisk in a small bowl.  Then brush on tops and sides of each cookie. Place pan in oven and bake for 20 minutes.  Increase the oven temperature to 350 degrees and rotate the baking pan.  Continue to bake cookies for an additional 10 minutes. The should turn a golden color when done.

Cool cookies completely by placing pan over rack. 
                                      **LAST YEAR: Cherry Ripe Cake***


Monday, May 26, 2014

Hawaiian Loaf


I can recall the show "The Golden Girls" which had a daily ritual of the ladies gathering around a table and eating cheesecake in the afternoon.  Even though I enjoy a good slice of cheesecake every now and then, I would not choose it for a daily ritual.  In my opinion, biscotti or sweet loaf bread is more appropriate for an afternoon get together.  Cheesecake is a little bit on the heavy, rich side of the dessert family.

While there are lots of sweet loaf bread recipes out there, my pantry had some macadamias that beckoned to be used.  Also, I still had some pineapple left from the recent trifle I made.  This narrowed down the choices to something in the Hawaiian category.

After working with this particular recipe, I found a few flaws. If I made it again, I would probably add more cream cheese than recommended.  It is actually the cream cheese and the sour cream components that aid in keeping this bread from being dry. However, I still thought it could be more moist. This recipe calls for 1 pkg or 3 oz of cream cheese, which is quite a bit smaller than the standard 8 oz that we are used to. Also, I had a dark pan, which may have impacted the bake time.  Instead of the recommended 70 minutes to bake in a nine inch loaf pan, mine was finished in 55 minutes - this may have been another factor that affected the texture.  It may have already been done a little prior to me removing it from the oven.

All in all, this is one that you will need to tweak a little to get it to your liking in texture.  The recipe is below, as originally stated.

Hawaiian Loaf
adapted from My Great Recipes/ Card222 

Ingredients
1/2 cup chopped macadamias
2- 8 oz cans crushed pineapple, drained
1 pkg (3 oz) softened cream cheese
1/2 cup sour cream
1 egg
2 cups flour
1 tsp baking soda
1 tsp salt
1 cup sugar
1 1/2 tsp vanilla

Prepare 2- 7 inch loaf or one 9 inch loaf pan by greasing the interior and lining the bottom and two long sides with parchment paper.  Grease face up side of paper.  Preheat oven to 350 degrees.

Sift together flour, baking soda and salt.  Set aside.  In another bowl, beat cream cheese until smooth.  Continue to beat and slowly pour in sugar.  Once all is blended add vanilla extract and the egg.  Beat for 30 seconds on medium high.

Fold in 1/3 of the dry ingredients to the cream cheese mixture.  Then mix in half of the sour cream.  Repeat the process and end with folding in the last 1/3 of the sifted ingredients.  Add the nuts and pineapple and stir until evenly distributed.  Spoon into pan(s) and smooth the top.

Place in oven and bake.  Recipe recommends 45 minutes for the small pans and 70 minutes for the 9 inch pan.  Test for doneness after 30 minutes on the small loafs and 50 on the larger.  Bread is done when tester comes out clean.

Remove and place pan on rack for 10 minutes to cool.  Remove loaf (loaves) and let completely cool before slicing.
                                       **LAST YEAR: Mint Chocolate Cupcakes***


Monday, May 19, 2014

Buckeye State Ice Cream


Buckeyes are actually nuts that grow on trees that are related to the chestnut.  Many of these trees grow in Ohio and that is how Ohio got to be tagged as the buckeye state.

Even though the nuts are considered poisonous, Ohio is also home to the candy confections called buckeyes.  These are basically a fudge-like ball made up of peanut butter and honey, then dipped in dark chocolate.  If you are a fan of Reese's, you will love this candy as well as this ice cream.

An ice cold mouthful of smooth peanut buttery ice cream with the occasional crunch of chocolate does hit the spot on a hot humid day.  In order to insure the best flavor, stick with the natural peanut butter and quality dark chocolate in this recipe.  You will be glad you did.

Why not break out some homemade ice cream this Memorial Day? This peanut butter and chocolate combination is sure to get everyone's approval.

Buckeye State Ice Cream
adapted from Jeni's Splendid Ice Cream at Home

Ingredients
2 tbs light corn syrup
2 tbs honey
1 1/4 cups cream
2 cups whole milk
1 1/2 oz or 3 tbs cream cheese
2/3 cup of sugar
1/2 cup natural peanut butter
4 oz chopped chocolate ( preferably dark chocolate 55-70% cocoa)
1 tbs plus 1 tsp cornstarch

In a medium size bowl, mix together the cream cheese and peanut butter. Set aside.  In another bowl, combine the cornstarch with 2 tbs of milk (taken out of the original 2 cup measurement), stirring until smooth.

Fill a saucepan with the cream, milk, sugar, honey and corn syrup.  Place over medium high heat and stir.  Continue to stir as the mixture comes to a boil. Set the timer for 4 minutes and let the cream cook, mixing constantly.  Remove from the heat.  Stir the cornstarch mixture one last time and then pour into the cream in a small stream while mixing.  Transfer saucepan back to the heat and let cook for about a minute until thickened, then remove.

Place ice in kitchen sink and fill with water.

Put the cream cheese/peanut butter mixture in the cream and stir until smooth.  Then pour ice cream into a zip lock bag and seal.  Place the sealed bag in ice bath.  Let mixture cool for about 30 - 45 minutes.  While this is cooling, melt dark chocolate in top of a double boiler.  After melting, remove top pot from boiler pot and set aside. Let chocolate cool until just warm, but not solid.

Once cooling time is complete for the ice cream, pour into an ice cream maker and follow manufacturer's instructions.  Right before you reach the stage of transferring the ice cream to another container, pour in the chocolate and spin or mix the ice cream.  After all chocolate is mixed in, then put ice cream in another container and press a piece of parchment on the surface.  Then seal with a tight lid and place in freezer.  Ice cream should be firm in about 4 hours.

Tips and notes:

1. The peanut butter/cream cheese mixture is thick.  In order to mix it in after it was added to the cream, I placed the saucepan once again over medium heat.  Using the back of the smooth, smash the large clumps against the side of the saucepan and swish from side to side.  Then scrape down with the spoon.  Continue until there are no lumps that float to the top.  Once the process is complete, pour into zip lock bag.

2. Drizzling is the best method to insure even distribution of the chocolate in the ice cream.  On my second round of making this ice cream, I used a squirt bottle and drizzled thin lines on top. Once the chocolate got hard, I used a butter knife to break it up and mix it into the cream.

3. The recipe stated use unsalted, natural peanut butter but also listed 1/2 tsp of sea salt as an ingredient to add to the cream cheese.  I skipped the salt ingredient by using regular, natural peanut butter, not the unsalted kind.
                                            **LAST YEAR: Midnight Delights**


Monday, May 12, 2014

Pineapple Rum Trifle Cake


This particular dessert is for those who like fruit and cream.  The recipe, having less than one cup of sugar, lets the sweetness of the pineapple shine through.  The nutty pistachio cake and the rum custard are the other two elements which come together to create this tasty dessert.

The issue I had in preparing the recipe was that the batter is baked in a jelly roll pan and then the cake is cut in half and then split horizontally after baked.  I did not have a 10 1/2 by 15 1/2 inch pan (my pan was larger), so in order to compensate, I actually baked 2 cakes and skipped the step in splitting horizontally.  Be sure to read the tips and notes, for the recipe below reflects the original instructions.

The tropical flavors as well as the lightness of this dessert make this cake a perfect ending to a summer meal.

Pineapple Rum Trifle Cake
adapted from the Best of Gourmet 1999

Ingredients/Cake
5 eggs
2/3 cup of sugar
1/4 cup shelled pistachios
1/2 tsp salt
3/4 cup plus 1 tbs flour 

Ingredients/Filling
1/4 cup rum
1/4 cup sugar
4 egg yolks
1 cup heavy cream
2-20 oz cans of crushed unsweetened pineapple

Ingredients/Topping
1 cup heavy cream
2 tsp sugar

Prepare 10 1/2 by 15 1/2 inch jelly roll pan by oiling the interior and lining bottom and sides with parchment paper.  Preheat the oven to 350 degrees.

Fill a food processor with the pistachios, flour and salt.  Grind ingredients to a fine powder.  Set aside.  In the bowl of a stand mixer, beat eggs for 30 seconds on medium.  Then increase speed to medium high and slowly pour in sugar while the batter continues to be beaten with the blade.  Continue to beat for an additional 10 minutes.  The end result should be a pale yellow batter that is light and thick.  Remove bowl from mixer and fold in dry ingredients from the food processor in 1/4 cup increments.  Make sure it is all mixed in but do so gently so as not to deflate the thickness of the egg batter.

Spread batter into prepared pan and smooth the top.  Bake for 10 to 15 minutes.  Cake is done when edges are slightly toasted and top springs back when lightly touched.  Cool cake completely by letting sit in pan on top of a rack.

While cake is cooling, prepare the pineapple filling layer.  Empty both cans of pineapple into a food processor (juice and all).  Pulse mixture for 3 seconds.  The pineapple will have more of a pureed look when done.  Pour pineapple into sieve set over a small bowl.  Set pineapple aside, juice can be reserved for another use.

To make rum custard filling, set up a double boiler on the stove. Also fill a sink 1/4 full of ice and cold water.  Heat up water in double boiler to a steady simmer.  In a small bowl, add first 3 filling ingredients on the list above plus only 1/4 cup of the heavy cream. Mix together and then pour into the top saucepan of the double boiler.  Stir constantly with a wire whisk while mixture cooks.  Once it reaches a pudding-like consistency and the whisk leaves marks in the custard, transfer the saucepan of custard to the prepared ice bath in the sink.  Let cool to room temperature.

Take the remaining 3/4 cup of heavy cream and beat until you reach the stiff peak stage.  Fold the cooled custard into the cream.  Set aside.

Invert cake layer onto flat surface and remove parchment paper. Trim edges to create a size of 7X14, reserving trimmings.  Cut cake in half and then split horizontally.

For assembly, place 1 cake layer onto cake plate.  Spread with 1/2 cup of pineapple and then 1/2 cup of rum custard. Place the next cake layer on top and repeat the process until layers are stacked and filled.  After the last layer, use the cake trimmings to piece together the final, 5th layer.  Chill cake covered in refrigerator for at least 1 hour.

Make the topping by beating the cream and sugar together.  Once soft peaks are formed, spread evenly over cake top and sides.

Tips and Notes:
1. When adding dry ingredients to cake batter, do not dump in.  Instead, pour a steady stream as the folding is done.  Dumping in will cause clumps, which in turn will require more mixing which will deflate the texture of the batter.  That lesson is reflected in the cake layer thickness differences in the picture above.

2.  On the egg batter for the cake, it is important that you run the mixer for the full 10 minutes to insure the proper height of the cake layers.

3. My cake was a little bigger and did not have the pieced cake trimmings on top.  The whipped cream topping is forgiving when it comes to covering jagged uneven edges and, so that will not be noticed.  When cut, it is the cake layer thickness which is the most noticed.

4. I used 1 1/2 times the recipe for the topping on this cake.  Also, if doing again, I would probably do the same with the custard filling. Bear in mind that my cake was a little bigger due to my pan used.

5. Without the whipped topping, cake can be prepared and refrigerated up to 2 days.  If you prepare ahead with the whipped topping, make it no more than 1 day in advance.  Either way, let cake come to room temperature before slicing and serving.

                                             **2 YEARS AGO:Monticello Pride Tart**


Sunday, May 4, 2014

Vienna Chocolate Bars


I do realize that I have quite a number of posts out there with raspberry and most of them are bars.  However, when a dessert recipe calls for jam, it is first to come to my mind.  Probably goes back to the cake with apricot filling...it is a long story, so all I will have to say is do not let decorative colors of a party make you sacrifice anyone's favorite flavors. If the guest of honor at a baby shower loves chocolate, do not make a strawberry lemonade cake to match pink.  A chocolate cake would make your guest happier.

Chalk up another raspberry dessert for me, but this recipe can be made with any of your favorite fruit jam.  You can even choose apricot, but do not look to me to make a trade.

These particular bars have a shortbread crust baked and layered with jam, chocolate chips and a nutty walnut fluff on top.  I know you are wondering where the chocolate is and I admit that the name of this recipe does not really match this bar.  The chocolate is not a primary flavor.  The fruit flavor is dominant, while the chocolate is a subtle undertone. 

For as little as the time it takes to make these, the end result is quite worth it.  We have all been in the situation where we have a commitment to bake but the clock indicates we are short on time.  This is a good one to pull out to resolve the situation.

Vienna Chocolate Bars
adapted from Oh Fudge by Lee Benning

Ingredients
4 egg whites
2 egg yolks
1 cup or 2 sticks butter
2 cups finely chopped walnuts
10 oz jelly (raspberry or your choice)
1 cup choc chips
2 1/2 cups flour
1 1/2 cups sugar
1/4 tsp salt

Line a cookie sheet with parchment paper and preheat the oven to 350 degrees.

In a stand mixer, beat the butter with 1/2 cup of sugar for 3 minutes on medium high speed, scraping down the sides of the inside of the bowl at one minute intervals.  The mixture should be smooth and creamy when done.  Then beat in one egg yolk for 30 seconds and repeat with 2nd egg yolk.

In a separate bowl, sift together flour and salt.  Pour 1/3 of this into the butter mixture and fold the dry ingredients into the dough until no dry streaks remain.  Repeat same process with the 2 other batches of the sifted ingredients.

Once dough is thoroughly mixed, dump onto the prepared cookie sheet.  Pat dough out in the form of a rectangle, measuring 8 inches by 10 inches.  Place in oven and bake for 15-20 minutes.  This layer is done baking when the edges turn a golden brown.

Remove pan from oven and then spread with the raspberry. There is no cooling time, start as soon as it comes out of the oven. Take care to spread evenly and not to let go over the edge.  Then top the raspberry layer with chocolate chips.

The last layer of this dessert, is the nutty topping. Beat the egg whites until stiff.  Gently stir in the nuts and sugar.  Spoon it on top of the chocolate chips and use a spatula to smooth the top.

Place in oven and bake for about 25 minutes. When done, the top is like a hard shell but it still is very light in color.  Remove and let cool completely before cutting into squares.

Tips and Notes:
1. The egg whites can be beat while streaming in the sugar and then the nuts get stirred in.  The recipe states that this method will make the topping a little but like divinity.
2.  Try a low sided 8X10 pan if you want the shape more precise.
3.  I placed my chocolate chips on the jelly one by one spacing and making several lines. It is more exact than sprinkling the chips.  Placing the chips evenly guarantees chips in every bite.
                                 **LAST YEAR: Midnight Delights**

Sunday, April 27, 2014

Cherry Almond Cobbler Cookies


Here it is.  A good recipe for making individual cobblers without using ramekins.  Besides the assembly, just make the two cookies and the filling.  One pan to wash when it comes to the filling and only dessert plates and forks to wash when nothing is left to eat!

Sandwiched in between the cookies are whole cherries (bought frozen) flavored with cinnamon and lemon.  For the cookies, almond streusel is baked on to the top cookie and the bottom is plain.

I did have to tweak the recipe in regards to volume on both the streusel and the filling.  Even with the tweak , I was surprised at the amount of cherries needed for just a little over 2 dz sandwich cookies. More cherries than the syrupy liquid....hmmm...not really a bad thing!

These would be perfect for the 4th of July celebration.  That is if you can wait that long.

Cherry Almond Cobbler Cookies
adapted from the Cooking Channel

Ingredients/Cherry Crumble
1/4 cup chopped blanched almonds
1 1/3 cup flour
1/4 cup of sugar
1/3 cup packed brown sugar
1/2 tsp almond extract
1/2 cup or 1 stick of butter
1/8 tsp nutmeg
1 tsp gnd cinnamon

Ingredients/Cookie Dough
2 eggs
1 cup or 2 sticks of butter
1/4 cup corn syrup
1 tsp almond extract
1/2 tsp vanilla extract
4 cups of flour
2 tsp salt
2 tsp baking soda
1/2 cup chopped dried cherries
1/2 cup packed brown sugar 
1 cup granulated sugar
1/2 cup confectioners sugar

Ingredients/Cherry Filling
3 lbs frozen cherries, thawed and drained
2 tbs lemon juice
1 cup granulated sugar
1/4 cup cornstarch
1 tsp cinnamon
pinch of salt

Preheat the oven to 300 degrees.  Line 2 baking sheets with parchment paper.

Start with making the crumble.  Melt the butter in a small saucepan, remove from heat. Stir in the almond extract. Next, fill a medium size bowl with both sugars, cinnamon and nutmeg.  Mix until evenly distributed.   Pour the liquid into the sugar mixture, stir and then mix in the flour.  Then fold in the chopped almonds with a wooden spoon and set aside.

To make the dough, you will need 3 bowls: two medium size and one from a stand mixer. In the first bowl, stir together all the sugars.  In another bowl, sift together baking soda, flour and salt.  In the third and stand mixer bowl, add the butter.  Beat the butter on medium speed, stopping occasionally to scrape down the sides of the bowl.  Continue to beat until the butter has a smooth consistency.  Mix one egg into the butter, beating for about 30 seconds.  Repeat with the additional egg.  Then add the corn syrup and both extracts.  Beat for another 30 seconds.  Remove bowl from mixer and fold in the sifted ingredients.  When no dry streaks remain, stir in the dried cherries.

Separate dough into halves.  The first half will make up the bottom of the cookies. Scoop out a heaping tablespoon of dough and flatten it on the prepared cookie sheet. It should be about 2 1/2 to 2 3/4 inches in diameter.  Repeat with process, making sure the flattened cookies are about 1 inch apart on the baking sheet.  Bake for about 9-12 minutes or until cookies have a toasty or golden hue on the edges.  Let rest on baking sheet for 2 minutes, then transfer to rack to completely cool.  For the top cookie, follow the same instructions with one difference: before your dough is completely flattened to size, evenly sprinkle a heaping tablespoon of streusel on top.  Then press down lightly to flatten to desired size. Once all are baked, turn off the oven.

After all the cookies have cooled, match the tops with the bottoms.  Since they are free form, they will not match perfectly, but this task will keep you from having a big difference in size from top to bottom.

To start on the filling, you will need a cake pan (I used a 9X13 size) and foil to cover the top.  Preheat the oven to 325 degrees.  In a large mixing bowl blend the cinnamon, salt, cornstarch, lemon juice and the granulated sugar.  Then fold in the cherries.  Pour mixture into cake pan and spread evenly.  Cover tightly with foil and place in oven to bake for 30-45 minutes.  At 15 minute intervals, remove from oven, uncover and stir.  Then cover and place back in oven.  After baking, uncover and let cool for 15 minutes.  It should be like pie filling, not watery but not rubbery either. If it still has a watery consistency, cover and put back in oven to bake some more and check at 15 minute intervals.  Bear in mind mixture will thicken upon cooling. Let cherry mixture completely cool prior to using as filling.  My cook time was the full 45 minutes.

To assemble, spoon desired amount of filling on bottom cookie and top with streusel cookie.

Tips and Notes:
1.  Make sure your cherries are completely frozen and well drained.  Otherwise, filling cook time will be longer to eliminate the excess liquid.

2. I have thought that maybe rolling the dough between waxed paper and cutting it into circles is a way to go for a more exact match of top and bottom cookies, but the issue would be pressing the streusel on top. Also, I was very liberal with the streusel, making sure the cookie was completely covered, even the edges.

3. Other tweaks to the cookie part of this recipe include chopping dried cherries and almonds.  Also there was no reference to type of cherries (fresh, frozen, dried) used in the cookie dough so I opted for the dried.

4. The cookies are chewy and soft in texture which makes them a bit delicate.  Care is needed when handling. When assembling do not press down on the top cookie, just set on top.  The cookies can be eaten by hand, but due to the filling they are better served with a fork.

5. Since the filling is not completely enclosed in the cookie, assemble and serve the same day.
                                  **LAST YEAR: Ube Macapuno Cake**
 

Sunday, April 20, 2014

Minnie's Chocolate Chip Supreme Cookies

There are a variety of chocolate chip cookie recipes out there as there are different preferences.  So much that it is a task just to zero in on the most favorite type.  In scanning recipes, I came across a Disney recipe that encompassed some uniqueness to it that had wonderful results.

Kids do know a thing or two about cookies.  Also, who else but Disney to know kids and what kids like?   Let's talk size first.  These are not like grandma's dainty tea cookies.  They are big cookies, about the size of a DVD disc.  Also, much to a child's delight,they are packed with a myriad of different type of morsels in them.  Most of the add ins are some type of chocolate.  Also, that texture of crispy on the outside and chewy on the inside is another factor that brings out a smile.

Kids love these cookies.  No longer a kid?  Don't despair..these cookies will bring out the inner child, no matter what the age.  Oh and don't forget the milk. Chocolate chip cookies should always be served with milk or as Carl says "ice cream please!" This recipe makes 1 dozen large cookies.

Hope everyone is having a super Easter filled with family, friends and great food!

Minnie's Chocolate Chip Supreme Cookies
Adapted from Disney Diner

Ingredients
2 tbs water
1 egg
1/2 tsp vanilla extract
1 cup butter,  room temperature
3/4 cup semi sweet choc chips
6 oz bittersweet choc, chopped
3/4 cup milk choc wafers/candy melts
3/4 cup toffee bits
1 cup chopped pecans
3/4 cup powdered (not granulated) sugar
1 cup light brown sugar, packed
2 2/3 cup flour
1/2 tsp salt
1/2 tsp baking soda

Prepare two baking sheets by lining with parchment paper.  Fill bowl of a stand mixer with butter and both types of sugar.  Beat at medium high speed for 1 minute. The mixture should have a fluffy consistency.  Then beat in egg, water and vanilla. Set aside.

In another bowl, sift together flour salt and baking soda.  Using a wooden spoon or spatula, fold sifted ingredients into butter/sugar blend.  Once no dry streaks remain, then the add ins can be mixed in.  The recipe suggests adding each of the chocolate ingredients in separate batches, mixing in after each addition.  Then fold in the toffee bits and the last addition is stirring in the nuts.

Preheat the oven to 400 degrees.  While the oven is heating up, scoop out mounds of dough with an ice cream scoop and place on cookie sheets.  Remember that this recipe makes around 1 dz large cookies.  With correct spacing of the mounds, there should be about 5 to a pan.  After all the mounds are made, place baking sheets in the freezer to firm up for about 15-20 minutes.

Once chilling process is complete, place in oven to bake for two minutes. The flash bake is a technique for creating a crispy outside to the cookies.  After the two minutes, reduce temperature to 350 degrees and bake for about 15 minutes.  The cookies should be golden brown on the edges when done. Let cookies cool on pan for 5 minutes and then transfer to a rack to finish cooling.

Tips and Notes:
1.This is a good base cookie dough recipe, feel free to experiment with you own choice of add ins.
2. The cookie has a chewy interior which gives the impression of it not being done in the middle when they come out of the oven.  Be careful not to over bake.
                               **LAST YEAR: Peach Oatmeal Cookies**

Sunday, April 13, 2014

Black Walnut Madeira Cake

As most of us know, when dealing with a strongly flavored ingredient, there has to be another ingredient which mellows that flavor.  We all have choked at one time or another, when someone prepares something in which the flavor is overpowering.  My situation involved cilantro and I had a friend that stated hers was banana.  However, when reviewing strong flavors, black walnuts fall into that category.  The perfect offset for that slightly bitter taste of black walnuts would be something sweet.  In this particular recipe, Madeira wine is included in the batter and the cake is topped with an extra sweet icing and a sprinkling of more nuts.  They both play an important part in creating a good balance of flavors.

Black Walnut Madeira Cake
adapted from My Great Recipes

Ingredients/ Loaf Cake
1/2 cup chopped black walnuts
1/2 cup light brown sugar
1/4 cup granulated sugar
1/4 cup milk
1/4 cup Madeira wine
3 egg whites
1/2 cup butter
1 1/2 tsp baking soda
1 tsp cream of tartar 
1 1/2 cups flour

Ingredients/ Frosting
2 tbs butter
1 tsp vanilla extract
1/2 cup packed brown sugar
1 1/2 cups powdered sugar
2 tbs milk
chopped walnuts for sprinkling top

Prepare the 9X5 inch loaf pan by greasing the interior.   Also, line bottom and 2 sides (with excess overhang) with parchment paper.  Grease the surface of the parchment paper touching the sides and bottom.  Preheat the oven to 350 degrees.

Fill a bowl with butter and both sugars and beat on high speed for one minute.  Set aside.  Sift together the flour, cream of tartar and baking soda.  Fold 1/3 of the sifted ingredients into the butter/sugar mixture.  Pour in the milk and stir until smooth. Stir in the next 1/3 of the sifted ingredients and then mix in the Madeira wine.  Lastly, fold in the rest of the dry ingredients and set aside.

In another bowl, beat egg whites on high speed until it reaches the stiff peak stage.  Gently fold the egg whites into the prepared batter until evenly distributed.  Then mix in the walnut pieces.   Bake cake in oven for about 45-50 minutes or until tester indicates done. Cool 10 minutes in pan then run a knife between the cake and the pan on the sides without parchment.  Lift cake out of pan with excess overhang of parchment and place on rack to completely cool.

For the frosting, beat together the butter and brown sugar on medium high speed with an electric mixer.  Then add the powdered sugar, vanilla extract and milk, stirring to combine.  Once the frosting has the desired consistency, spread on the top surface of the cake.  Then sprinkle with walnut pieces, if desired.

Tips and Notes:
1.  Both the wine and the nuts are the stand out flavors in this recipe.  You can use Marsala and regular walnuts, but the flavor will not be the same.
2. Since the frosting is made with brown sugar, it does need some time to set.  As it sets, the texture will not be as gritty like the newly made frosting.  Be aware that it is very sweet, but the sprinkling of the nuts tones that down.
                                       **LAST YEAR: Chocolate Chunk Cream Cake**     


Sunday, April 6, 2014

Pecan Coffeecake

The thing that most people enjoyed about this coffeecake was the flavor of the cake part, not the filling or the topping.  The two pecan elements were good, but the extra flavor of the cake was a delicious surprise. Usually most coffeecakes are plain, letting the filling and topping be the highlight of flavor.  We all have experienced that plain bite of coffeecake, you know, the one that has no filling or much topping with it.  So, since filling and topping in every bite is hard to guarantee, the next best thing is to make the cake taste delicious on its own.

This recipe uses lemon zest in the batter, which paired nicely with the pecan filling.  Yet if that was not enough, the icing has espresso in it. So, if your standard breakfast has reached that blah stage, change it up with this coffeecake. It will definitely make for a better morning.

Pecan Coffeecake
adapted from My Great Recipe Cards

Ingredients/ Cake
1 egg
1/2 cup warm milk (105-115 degrees)
1/4 cup butter (room temp)
5 tbs cold butter, cut into cubes
2 tbs shortening
2/3 cup bread flour
1 1/4 cups bread flour
1 pkg active dry yeast
1/2 cup sugar
grated zest from one lemon
1/4 tsp salt

Ingredients/ Filling
1/3 cup butter
3 tbs shortening
1/3 cup flour
2/3 cup dark brown sugar (packed)
2/3 cup finely chopped pecans

Ingredients/ Topping
1 egg mixed with 1 tbs water (egg glaze)
2 tsp hot water
1/3 cup powdered sugar
1/2 tsp instant espresso powder
whole pecans for placing on top

For the cake, sprinkle yeast in warm milk.  Stir with a fork until yeast has dissolved.  Fold in 2/3 cups of the flour.  Cover and set aside.

Using a handheld or stand mixer, beat together butter, sugar and shortening until fluffy.  Add the egg, salt and lemon zest and beat for 30 seconds on medium speed.  Then stir in yeast/flour mixture, set aside. Fill another bowl with the remaining 1 1/4 cups of bread flour.  Using a pastry blender, cut the butter cubes into the flour until it is crumbly and the clumps are about pea sized.  Then add the yeast/flour mixture, stirring until all is blended and it forms a dough.  Cover and let dough chill for 2 hours.

While dough is chilling, the filling can be made.  Beat the butter and shortening together until light and creamy.  Using a handheld mixer on medium speed, mix in the dark brown sugar.  Then fold in the chopped pecans.  Lastly, stir in the flour until evenly distributed.  Also, prepare 2 baking sheets by lining with parchment paper.

Prepare a flat surface by dusting with flour.  Remove the dough from the refrigerator and knead dough on surface about 18 turns.  Divide dough in half.  Roll one piece of dough into a rectangle, measuring about 10X14 inches.  Take out 1/2 of the filling and spread down the center of the length of the dough, leaving about a 2 1/2 inch border on either side. Fold borders of dough over the top of the dough that is spread with filling.  Overlap each side by 1/4 of an inch, pinching the center of the dough together to seal.  Also, to further seal the dough, take a rolling pin and lightly roll over the top in a few strokes. Flip sealed dough over and center on a prepared baking sheet.  Repeat process with the remaining dough and filling.

Make 1/2 inch slashes on each side of the length of each coffeecake.  Use a knife and prick the top of the dough.  Brush with the egg glaze and place pecans decoratively on top.  Let cakes rise on baking sheets for 30 minutes.  During the rising time, preheat the oven to 350 degrees.

Once rise time is completed, bake cakes for 30-35 minutes until golden brown.  Remove and let cool for 15 minutes before icing.  Let cakes stay on baking sheet until completely cool.

The icing can be started by dissolving the espresso powder in the hot water.  Then stir in powdered sugar until smooth.  Drizzle over the top of each cake.

Tips and Notes:
1. This coffeecake can be made thinner by rolling out to a wider shape after the dough has been folded over the filling. This will create a thinner type of pastry that will be more crispy as compared to the one in the above picture.
2. Watch the hue of the dough while baking.  The first one I baked came out too dark.  The one in the picture was covered in foil halfway through baking so it would not get too brown. 
                                    **TWO YEARS AGO: Berry Meringue Slices**