Foodbuzz

Sunday, August 2, 2015

Almond and Marzipan Roulade


I wonder how much of the population can be self sustaining. How many people can just go outside and get everything they need in the way of food right off their land? For some, the possibility exists, but is lacking in motivation. Most of us would probably would buy something rather than going to all that trouble.

However, other cultures seem to be doing it much more that we do in the US. This particular recipe stems from an article in Saveur called the "promised" land. It refers to the richness of the land in Northern Israel as well as several chefs residing there. One chef left a thriving bread business with a chain of bakeries, looking for a simpler, more satisfying life. Now, he is surrounded by an overabundance of fresh produce with a garden that seems to have a little of everything. Also, he is teaching culinary classes in his home.

This almond roulade recipe is definitely a keeper. One of the factors is that it is easy to make, but looks difficult as well as stunning. The marzipan brings just the right amount of sweetness to the rich, buttery bread. Another factor that impressed me was the touch of lemon zest on top and how the syrup on top completely changed the texture. Upon removing it from the oven, it looked to be crusty, almost as if it would flake into crumbs when cut. Yet, after topping it with the syrup, the surface softened. The syrup also seals the bread, keeping it from drying out with time.

If you are like the majority of the people in the US, you are not self sustaining. However, the idea can be quite appealing if you look at it with the right perspective. Imagine sitting on your back patio, enjoying a slice of this delicious breakfast pastry with coffee, while your overlook your own garden paradise.

Almond Roulade
adapted from Saveur Magazine, May 2013

Ingredients
1 cup buttermilk
4 eggs yolks (3 for dough and 1 for brushing surface)
Juice and zest of 1 lemon
1/2 cup warm water (separated into 1/4 cups)
1 1/4 cups softened butter
12 oz marzipan
1 cup sugar ( separated into half cups)
1 - 1/4 oz package active dry yeast
2 cups cake flour
2 cups all purpose flour
1 cup whole almonds (toasted and chopped)
1 tsp kosher salt
1 tbs coarse sugar

In a medium size bowl, sift together both types of flour and salt. Then stir in the yeast. Form a well in the center of the dry ingredients and set aside.

Take out another bowl and add buttermilk, 1/4 cup warm water, 1/2 cup of the sugar and 3 egg yolks. Mix together until evenly blended. Cut butter into 1/4 inch cubes. Pour buttermilk mixture into well of dry ingredients. Then drop in butter cubes. Stir with a wooden spoon until it becomes a solid dough mass.

Prepare a flat surface by dusting with flour and grease the interior of a medium size bowl. Take the  dough and knead for about six minutes on the floured surface. Form dough into a ball and place in prepared bowl and flip one time. Cover bowl with plastic wrap and refrigerate dough. It can be refrigerated overnight, but must be chilled for a minimum of 2 hours.

After chilling process is over, preheat the oven to 350 degrees. Line a baking sheet with parchment paper.  Remove dough from refrigerator and place on floured surface. Roll out dough and form a rectangle, measuring 11x16. Then sprinkle chopped almonds evenly over surface, leaving a 1 inch border on all edges. Lightly pat down almond pieces into dough to stick.

Divide marzipan into 2 pieces. Roll each piece into a rectangle measuring 5x8. Place each piece, side by side on top of the almond studded dough, leaving only a 1 inch border. Press down lightly to adhere. Start rolling the dough up, jelly roll style from the long end. Once completely rolled, the dough should be facing with the seam in the center of the bottom of the log. Pinch and tuck the ends under, downward like the bottom seam. Place log, seam side down on the baking sheet.

Brush the surface of the dough with egg yolk and then sprinkle the coarse sugar evenly on top. Place in oven and bake until golden brown. Log should be cooked completely in about 1 hour.

45 minutes into the baking time, prepare the syrup topping. Fill a saucepan with the remaining 1/4 cup of water and 1/2 cup of sugar and place over medium high heat. As the saucepan heats up, stir the ingredients together. Then let come to a boil and cook for 1-2 minutes.  Remove from heat and mix in lemon juice and zest.

Once loaf is completely baked, remove from oven and brush syrup topping over the top.  Let cool slightly before serving.

Tips and Notes:
1. The recipe refers to almond paste and marzipan as one in the same, but there is a difference.  Almond paste has more almonds and less sugar. I used almond paste, but which almond ingredient you use is personal preference.

2. For a less "chunky" filling, use sliced almonds (like I did). The sliced nuts are thinner and made for easier slicing.
                                            **LAST YEAR: Cinnamon Bun Pie**

Sunday, July 26, 2015

Brownie Bread Pudding


These days the housewares department always has those big pictures with sayings. I know you all have seen them..The first that comes to mind is "live, love, laugh."  Even though the thought is nice, these items soon become just decorations in the house.  It is hard for me to picture someone going down their hallway, before going to work, reading these pictures so they can have the proper mind set. 

Then there is are ones that do not fit the person. I am very tempted at times to ask who actually bought those things, because is sure does not reflect the person's character that is living there. Perhaps they are trying to display some strange type of irony.  So, if you are stubborn and set in your ways, it is time to take down the picture/sign that says "think outside the box".

Well, here we are with something that fits that saying...brownie bread pudding. This recipe actually is made with day-old or stale brownies. Most of us do not have that problem, but if you want to create something a little more upscale than brownies without a great deal of effort, you should keep reading. To push the idea further, experimentation with cake should prove to be a good endeavor. If you have a lot of excess trimmings from leveling cakes or the centers that you have taken out of cupcakes to fill, this recipe is a great option.

The transformation of the dry crumbs of the chocolate brownie when baked with the vanilla custard is nothing short of amazing. They turn back to their fluffy state with a creamy twist from the custard.  Topped with vanilla ice cream and caramel, this dessert carries a unique blend of textures and flavors that keep you from putting down your spoon until you are completely done. 

I implemented the recipe for ramekins and still ended up with a lot of excess crumbs, so the listing below sticks to the original size of a 7x11 inch baking dish. Make sure you plan in advance if you do not have any stale brownies on hand.

Brownie Bread Pudding
adapted from Desserts from the Famous Loveless Cafe

Ingredients/Brownies
3 eggs
1/2 cup (1 stick) and 2 tbs butter
1 tsp vanilla extract
2 1/2 oz unsweetened chocolate (chopped)
1/2 cup mini semi-sweet chocolate chips
1 tsp finely ground coffee beans
1/3 cup unsweetened cocoa powder
1 1/4 cup sugar
1 cup flour
1/2 tsp baking powder

Ingredients/Vanilla Custard
2 1/2 cups of half and half
1 1/2 tsp vanilla extract
5 eggs
2/3 cup sugar

Toppings
vanilla ice cream
caramel

Start one day ahead to make the brownies. Prepare an 8 inch square pan by greasing the interior and lining the bottom with parchment. Grease the face up side of the parchment. Preheat the oven to
350 degrees.

Set up a double boiler over medium high heat. Fill the top pot with the butter and unsweetened chocolate. Let the mixture heat up and melt, stirring occasionally. Once all is melted, remove pan from heat and remove top pot. Set aside.

In the bowl of a stand mixer, add the sugar, vanilla, eggs and ground coffee. Blend with whisk attachment on low speed. As the mixer is running, stream in the butter/chocolate mixture. Then turn off the mixer and remove the bowl.

Using another bowl, sift together flour, baking powder and cocoa. Add 1/3 of the sifted ingredients to the chocolate batter and fold in with a spatula. Repeat this process until all the dry ingredients are folded into the batter. Lastly, add 1/4 cup of chocolate chips and stir until evenly distributed throughout the batter.

Pour into the prepared pan and sprinkle the remaining chocolate chips on top. Place in oven until tester indicates done, this should take about 30 minutes. The brownies should be removed prior to the edges pulling away from the pan. Let cool completely in pan. Run a knife around the edge and invert onto a cutting board. Finely crumble the brownies in a shallow bowl or pan and let sit out uncovered overnight.

The next day, grease the interior of a 7x11 baking pan. Fill the pan with the brownie crumbs, making sure they cover the bottom evenly. Preheat the oven to 375 degrees. 

In a medium size bowl, whisk the eggs together. Then stir in the sugar, half and half and vanilla.  Pour the mixture evenly over the brownie crumbs. Cover the pan with foil and let sit for 20 minutes. The brownie crumbs will soften and soak up the custard.

Then place the pan in the oven, leaving the foil on. During the baking process, the mixture will solidify, indicating that it is done baking. This should take about 55-60 minutes. Remove and let cool for about 15 minutes, then cut and serve each piece with topping of ice cream and caramel.

Tips and Notes:
1. If you want to just make the brownies to eat as is, reduce the flour by 2 tbs.

2. Since form is not important with the brownies, you can just tear pieces out of the pan after cooling and crumble. The inverting process is not required.

3. Since the brownies bake up nice and moist, it is important that you follow the process for creating "stale crumbs" otherwise, the soaking process will not work as well.
                                  **LAST YEAR:Chocolate Cherry Scones"
 

Sunday, July 19, 2015

Banana Fudge Bundt Cake

I am always making a tunnel in my bundt cakes for a little "extra" something in there. Bundt cakes are so versatile, it is all in what you want in a cake. Mix it up with swirling another cake batter in there, or tunneling it with something extra or just plain.

This particular one is banana with a tunnel of fudge. The one thing about getting away from banana
bread to make cake, flavoring is required. You can use the artificial flavoring, which is easily found or go the extra mile for true flavor with freeze dried powder. This is personal preference, but the extract delivers the most intense flavor.

I sometimes think that bundt cakes were invented for the society against frosting. These people are easily detected. They have the "lid" of frosting left on their plate with no cake remaining. This means the cake has to stand alone in flavor. Bundt cakes do just that.

So those that love these type of cakes, the door is open on this one. Split the recipe and add 1/2 a recipe for a chocolate bundt and swirl the batter together. Another option is to make it with mini chocolate chips. Lastly, swirled banana batter with peanut butter batter topped with fudge glaze and nuts. Now that I have you hungry, let's get down to this recipe....

Banana Fudge Bundt Cake
adapted from Kiss My Bundt (fudge tunnel my added twist)

Ingredients
1 very ripe banana
3 eggs
1/2 tsp vanilla extract
1 1/4 cup milk
1 tsp banana extract
3/4 cup or 1 1/2 sticks of butter
2 1/2 tsp baking powder
2 1/2 cups flour
1 3/4 cup sugar
1/2 tsp salt
3/4 to 1/2 cup fudge spread

Prepare a 12 cup bundt pan by greasing the interior thoroughly and dusting with flour. Preheat the oven to 350 degrees.

Using a stand mixer, cream the butter and sugar together, beating at medium speed for 3 minutes. In another bowl, sift together the flour, baking powder and salt.

Add one egg to butter/ sugar mixture and beat 30 seconds. Repeat the same process with the other eggs, incorporating them into the batter one at a time. Mix in the extracts, beating for about 3 minutes.

Fold in 1/3 of the sifted ingredients. Then stir in 3/4 cup of milk. Repeat the process, starting again with the sifted ingredients.  After the last addition of the dry ingredients, take out a small bowl and mash the banana in it.  The consistency should be smooth with some liquid. Fold into the batter until evenly distributed.

Spoon 2/3 of batter into pan and smooth the top. Fill a ziplock bag with the fudge.  Seal and place in hot water.  The cut off the corner and squeeze an even line in the center of the batter, moving in a circular direction with the pan. Once bag is empty, spoon the rest of the batter on top, making sure the fudge is completely covered.  Smooth the surface and place in oven.  Let bake for about 40 minutes or until tester (when inserted off center) comes out clean.

Place pan on cooling rack and let cool for 20 minutes.  Then invert onto rack. If cake resists,let cool another 5-10 minutes and try again.  Cool cake completely before serving.

Tips and notes:
1. The method of putting the filling on the batter keeps an air pocket from forming.  This happens when baking if big spoonfuls of the fudge is placed on the batter.

2.The fudge spread I bought was very thick, more so than peanut butter or Nutella.

3. The bottom of Bundt pans are the last to cool down. If you are havin issues with cake release try sitting the pan on a towel that has been soaked in cold water to speed up the process.
                           **LAST YEAR:Coconut Almond Topped Peach Pie**


Sunday, July 12, 2015

Peach Kolaches


I have been gathering recipes that include peaches for quite some time, however, the season is so short it is hard to fit all of them in. Which means I had to make a decision among the vast amount of recipes I have.

I finally settled on this particular one. It was actually the picture that sold me. It is on the back cover of the book and inside as well. I can't help thinking that I have passed on making some really good recipes due to no picture. In reality, I should not dwell on it too long. After all, in this day and age, if the recipe truly is "all that" then the picture should be there.

Rebecca Rather really has hit a home run with this particular recipe. The bread part has the perfect sweetness with the flavor and texture that we all expect in a kolache. Also, the idea of the peaches in the middle is pure baking genius. After one of these, you will never think of kolaches the same way.

The peaches are mixed with peach jam and Rebecca suggests Fischer and Wieser brand. As I scanned the rows of different jam, I did come across that brand. However, by some delicious act of fate, there was just Amaretto Pecan Peach Jam in that brand. This was going to be one flavorful filling! I was also drawn to the big white peaches, which proved to be a good choice. They were large and when cut, sweet juice dripped out of them.

So, act quickly and take the most advantage of peach season this year. With recipes like this, you will be most likely to run out than have too many on hand. Be sure that when making these you allow time for the dough to rise. There are 3 sessions, totaling a minimum of 6 hours. However, you can do the 2nd session as overnight instead of the 4 hours.

Peach Kolaches
adapted from The Pastry Queen by Rebecca Rather

Ingredients/Dough
8 1/2 cups flour
1 (1/4 oz) package active dry yeast
1 1/4 cups sugar
2 tsp of salt
2 cups milk
1/2 cup lukewarm water (110 to 115 degrees)
1/2 cup butter
2 eggs

Ingredients/Filling
1 cup peach jam
2 cups pitted chopped peaches

Ingredients/Topping
1/2 cup sugar
1/2 cup flour
3 tbs butter (chilled and diced)

For the dough, the warm components will need to be made first. Start with a small size saucepan.  Pour in the milk and place over medium heat and let warm up until it reaches a simmer. Remove from heat and place a candy thermometer in the milk to register the temperature while cooling. The milk is ready to use once it cools down to about 110 to 115 degrees. While that is cooling, sprinkle the yeast into the bowl of lukewarm water.  Stir and then let sit until foamy, about 5 minutes. The last warm ingredient is the butter.  It can either be melted in the microwave or in a saucepan. This component will also need to cool for about 5 minutes after melted.

Crack the eggs into a bowl and whisk together. Whisk in the salt, sugar and melted butter. Once blended stir in the warm yeast. Then mix in the milk.

Add 2 cups of the flour to the wet mixture. Using a wooden spoon, mix until blended. Continue with the same process until all flour has been blended. As it starts getting thicker, you may want to switch to using your hands to for blending the flour into the batter. Once this process is complete, oil the interior of a bowl and shape the dough into a ball. Transfer dough to the bowl and cover loosely with plastic wrap. Let rise in a warm place to double in size for about 1-2 hours. To test for correct completion time, touch the dough lightly and see if it still retains the dent. If it does, this rise session is complete. 

Punch dough down once or twice. Cover again and refrigerate for a minimum of 4 hours. You can also let stay in the refrigerator overnight.

Line a 12 x 17 inch jelly roll pan with parchment paper. Then grease the interior sides and corners. To make the filling, place the chopped peaches and the jam in a medium size bowl and mix until evenly blended.  For the streusel, just blend all the ingredients together in a small food processor until it is sandy and clumps together in your hands. Set both aside.

Take the dough out of the refrigerator and divide into 16-18 even pieces and shape each piece into a ball. The ball should be about 2 1/2 inches in diameter. Make an indentation or form a round biscuit with a well in the center. Bear in mind that the dough will rise again, so make sure the well is significant. Place each formed piece on the prepared pan.  The end result should be a pan with 3 kolaches across and 6 down.  If you ended up with 2 more, place those in a small, low lipped parchment lined pan.

Fill the kolaches evenly with the peach filling. Cover rolls with a towel and let rise again in a warm place for about another hour.  At the 1/2 hour mark, preheat the oven to 375 degrees.

Uncover the kolaches and sprinkle with the streusel.  Place the kolaches in the oven and bake until golden brown on top.  Bake time should be about 25-30 minutes.  Let cool 20 minutes prior to serving.  These can be served warm or at room temperature.

Tips and Notes:
1. The rise time in the fridge created a dry top on the dough.  It did not impact the flavor, but next time I would brush lightly with oil before refrigerating.

2. My dough was formed into ashtray type holders for filling and I kept the filling from mounding above the dough. I noticed in the pictures from the author, the filling was mounded above the dough. The end result is spill over. Since the rolls are touching, the spill over will not be in the pan. It will make the peaches more noticeable and give the rolls more coverage. How you fill and create the dough wells are personal preference.

3. Really juicy peaches will release of lot of the juice when mixed with the jam, the more they set the more juices are released.  If this happens, be sure to drain the excess liquid off, you do not want to use a soupy filling in the kolaches.
                                         **LAST YEAR: Frosted Banana Bars**
    

Sunday, July 5, 2015

Key Largo Cupcakes


It has been many years ago, but it is hard to forget my leisurely summers on the beach in Florida. During those years, I was anxious to grow up and did not realize to cherish that time in my life - you know, the teenage years.

Since Florida, I still favor the tart citrusy fruits, never getting enough Key Lime pie or fresh lemonade- which brings me to this recipe.

A plain vanilla cupcake with vanilla frosting can be found just about anywhere. It does not remind me of any particular place or particular event. Nothing wrong with a vanilla cupcake, but we all can use a little pizzazz. Face it, we all actually need it. A change from jeans to the little black dress or from plain white Keds sneakers to Camouflage Nike tennis shoes.

The first "pizzazz" addition to this vanilla cupcake is the filling made with coconut and white chocolate. The filling is baked in. Outside of that, as the cupcakes are cooling, they are brushed with pure key lime juice that soaks into the cake part. With the coconut to lime ratio being about even at this point, I decided to top the cupcakes with vanilla french buttercream and sprinkles of lime zest.

Tweaks are still needing on the filling in the area of consistency only, but the taste is spot on. For more details regarding this, please go to the notes at the end of the recipe.

No vacation lined up in the near future? Don't despair. Getting to the Florida state of mind is less costly and easy. Call a friend after work, grab some lawn chairs and put on some of that real coconut-smelling tanning lotion. Set out the cooler with ice and drinks and get outside. Lay in the sun until sunset, laughing and talking with your friend. End the evening with a few of these cupcakes. Also, if anyone asks about vacation travels- tell them you have, in a way, been to Key Largo.....This recipe makes about 2 dz cupcakes.

Key Largo Cupcakes
by Flourtrader

Ingredients/Cupcakes
2 cups flour
2 tsp baking powder
1/2 tsp salt
1 3/4 cups sugar
4 eggs
1 tsp vegetable oil
3/4 cup milk
1/4 cup coconut milk
1 vanilla bean seeds (scraped out of 1 vanilla pod)
1 tsp vanilla extract
3/4 cup or 1 1/2 sticks butter

Ingredients/Filling
3/4 tsp coconut extract
2 tbs butter
1/3 cup coconut milk
1/2 cup sweetened coconut
1/4 cup corn syrup
4 oz white chocolate bars (chopped into pieces)

Ingredients/Topping
1/4 cup key lime juice
French buttercream icing (adapted from Robicellis recipe)
         1 cup water
         2 cups sugar
         2 tbs corn syrup
         1/4 tsp cream of tartar
         5 egg yolks
         1 egg
         1/8 tsp xanthan gum
         3 sticks of butter (1 1/2 cups)
3 tablespoons of lime zest

Prepare two 12 cavity muffin tins by greasing the top edge of the cavities and lining with cupcake papers. Set aside. Also, line 2 cookie sheets with parchment paper.

The filling will need to be made first. Set up a double boiler and heat until bottom pot of water simmers.  Fill top pot with all the filling ingredients except sweetened coconut. Cook until chocolate has melted. Remove from double boiler and transfer chocolate mixture into a regular saucepan. Place over medium high heat and stir in coconut. Let cook for about 20 minutes until it turns thick, like syrup. Remove from heat and let cool to room temperature. In order to speed up the process, you can transfer to a cool bowl.

Once it has cooled, scoop up tablespoons and drop onto parchment paper. Filling will run to a point, forming saucers (almost like small pralines).  After all the filling has been put on cookie sheets, place cookie sheets into the freezer.

For the cupcakes, start by placing the butter in a microwave safe bowl. Place bowl in microwave and melt using medium heat for about 1 1/2 minute. Pull out bowl and stir, making sure all is melted.  Then set aside.  Preheat the oven to 350 degrees.

Set up a stand mixer and add the eggs to the bowl.  Beat until frothy on medium speed.  This should take about 2 minutes. Turn mixer speed up to medium high and slowly stream in melted butter.  After all the butter is blended, remove bowl from stand.

Stir coconut milk, regular milk, oil, vanilla bean seeds and vanilla extract into egg/butter mixture. In a separate bowl, sift together flour, salt and baking powder. Then whisk the sugar into the sifted ingredients. Fold this dry mixture into the liquid batter, mixing just until no dry streaks remain.

Scoop out batter and fill each muffin cavity. The cavities should only be filled 2/3 of the way up.  Take out cookie sheets with filling. Filling will be very sticky. Using floured fingers, roll each piece into a ball and place in the center of the batter of each cupcake.

Bake cupcakes for about 10 minutes, then rotate pans and bake for an additional 10-15 minutes. Use a tester to check for doneness, but test it off-center since the filling is in the center. Remove pans and place on racks to cool for 5 minutes. Lightly brush lime juice on top of the cupcakes and then from pan to cooling rack.

To make the buttercream, add water and sugar to a saucepan, clip a candy thermometer on the edge  and place over high heat. Then stir in corn syrup and cream of tartar. Let the mixture cook, without stirring until the temperature reaches 235 degrees. This will need to be checked periodically while completing other steps, since cooking to the stated temperature can take some time.

In the meantime, add the egg yolks and egg to the bowl of a stand mixer and beat on high speed. Beat until they have tripled in volume. Correct consistency can be tested by pulling the beater blade out. The eggs should now stream like ribbons back into the bowl. Beat in the xanthan gum. Turn mixer off.

Check back on the sugar/water mixture and wait until it reaches correct temperature. At the correct temperature, turn mixer back on to medium speed. As the mixer runs, pour hot sugar liquid into the batter in a steady small stream. After all is mixed together, run mixer until the batter reaches room temperature. While it is cooling, start shaving your butter into slices with a cheese slicer or a vegetable peeler.

After the sugar/egg batter has cooled, start adding pieces of the shaved butter, continuing to run the mixer. Once all the pieces are blended in, change the mixer speed to medium high and beat for about 20 seconds creating a smooth buttercream frosting.  Pipe the frosting on top of the cupcakes and sprinkle on lime zest.

Tips and Notes:
1. The perfect filling would not require freezing and would not sink in the cupcake when baked in the batter, I am still working on developing a better consistency. Candy consistency that is light enough not to sink.

2. The original buttercream recipe stated butter measurement of  1 1/2 lbs. As I was making this, I was happy with the consistency and taste after only adding 3/4 of a pound. This is personal preference, so feel free to experiment with this measurement.

3. I recommend a 1/2 day for flavors to meld and best served shortly after that. Cupcakes and icing do not do well stored in the refrigerator.

4. Instead of adding the vanilla bean to the batter, you can also use vanilla infused sugar.  This is done by scraping vanilla seeds into the sugar.  Then mix together, cover and let flavors meld for about 1-2 weeks prior to use.
                                   **LAST YEAR: Chocolate Truffle Cookies**


Sunday, June 28, 2015

Butternuts


Russian Teacakes, or otherwise called Mexican Wedding Cookies have graced many a dessert table around the holiday season. Since it is a favorite, there are many recipes that spun off from the original. 

This particular cookie is just that, pulling in the flavors of butterscotch and rum. I know, a bag of butterscotch chips seem to be the remaining orphan at the grocery store. The ones that get all the attention are the chocolate chips, which are the first to go. Even though butterscotch may not be as popular as chocolate, these cookies are a reminder that this flavor can be just as delicious when the right recipe comes along.

So as you are walking down the baking aisle, please consider the butterscotch chips. All they need is a good home.

This recipe makes about 3 dz cookies.

Butternuts
adapted from Just a Pinch website

Ingredients/Cookies
1 cup finely chopped pecans
6 oz butterscotch chips
1/4 tsp salt
1 3/4 cups flour
1/2 cup powdered sugar
3/4 cup butter

Ingredients/Topping
1 tsp rum extract
1/2 cup pecan pieces
3 powdered sugar
3-4 tbs milk or water

Prepare a baking sheet by lining with parchment paper. Preheat the oven to 325 degrees.

Sift 1/2 cup of powdered sugar into a small bowl and whisk in the salt. Add the sugar blend to the bowl of a stand mixer. Then cut butter into cubes and drop cubes into sugar mixture. Beat on medium speed until smooth, about 2 minutes. Next, fold in the flour in increments until a dough is formed. Then add pecans and butterscotch chips, blending with a wooden spoon until evenly distributed throughout the dough.

Take the dough and measure out into teaspoons. Shape each into a round ball and place on prepared cookie sheet. Since the cookies do not expand very much, they can be spaced about 1/2 inch apart. Bake in oven until lightly browned on the bottom, about 15-17 minutes. Do not let cookies turn brown on top, that is a sign they are over baked. 

Remove sheet from oven and let cookies cool on baking sheet for about 2 minutes and then transfer to a cooling rack. After all the cookies are baked and cooled, place cookies on a plate. Now it is time to start on the glaze.

Place a sheet of wax paper under the cooling rack. Pull out a small bowl and add milk (or water) and extract. Whisk together. Take out a larger bowl and sift all of the powdered sugar into the bowl. Then mix the liquid mixture into the powdered sugar.

To glaze each of the cookies, dip the top into the glaze and swirl to let the excess drip back into the bowl. Place cookie back on rack and put a piece of pecan on the top. Repeat the process until all cookies are topped as stated. Let rest one hour for glaze to set up, then they are ready to enjoy.
 
                                         **LAST YEAR:Cherry Dr Pepper Cupcakes**


Sunday, June 21, 2015

Pesto Potato Rolls


Homemade bread is something that we all enjoy.  However, the thought of making bread does bring to mind an all day project, with kneading and rising time. With most people's busy lifestyles, the time is just not there. There is an alternative. No, it is not the bread machine. Nothing against the bread machine, but the soft, loaf type bread is not always what we want. The alternative would be a no knead bread with not much rise time that is soft and flavorful, which brings me to this particular recipe.

The final result to my bread baking endeavor was fluffy, pull apart rolls with the flavor of butter and pesto - so it was a tasty ending! These rolls are perfect to serve with soup, salad or any Italian meal.

Pull apart bread is very popular and versatile. There are several savory as well as sweet recipes out there. I chose pesto because it happened to pair well with the dinner I was planning. The other thing that interested me about the recipe (outside of the no knead concept) is that it uses potato in the dough.

Now, let's get to the recipe.  This makes about 2 dozen rolls.

Pesto Potato Rolls
adapted from No Need to Knead

4 3/4 cups bread flour
1 tbs sugar
2 tsp salt
1 tbs quick rising yeast
pinch of black pepper
1- 11 or 12 oz russet potato (peeled and chopped into 1 inch pieces)
6 tbs purchased pesto
3/4 cup plus 2 tbs melted unsalted butter (slightly cooled)
2 eggs

Begin by buttering the interior of two 9 inch round cake pans (about 1 1/2 inches deep) and set aside.

The next step is cooking the potatoes. Place 1 tsp salt, potatoes and 3 1/2 cups of water in a saucepan over medium high heat. Stir and then cover. The mixture should come to a slow boil. Let potatoes cook for about 20 minutes until done. When done, potato cubes should be able to be pierced with a fork with very little effort. Remove saucepan from heat and mash until all the lumps are gone. Your mixture will be very watery and pourable. Separate out 2 cups of the potato water in a heat proof bowl and discard the rest. Let the mixture cool to about 105 to 115 degrees.

Once the potato mixture has cooled, stir in yeast, pesto, pepper, sugar and other tsp of salt. In a separate bowl, whisk the two eggs together. Add the eggs and 1/2 cup melted butter into potato batter.  Blend until evenly distributed.

Prepare a bowl for rising by buttering the interior. Set aside. Using a wooden spoon, blend the flour into the batter in 1/2 cup increments. After the flour has been mixed in, you should have a smooth and sticky dough. Form the dough into a ball and place in prepared bowl. Turn once to coat each side. Cover bowl with plastic wrap and let rise in a warm place until doubled, about 45 minutes. Do not punch down dough after rise time.

Prepare a flat surface by lightly dusting with flour. Roll dough out into 1/3 inch thickness. Then cut out rounds with a 2 1/2 inch cutter.  Keep cutting and re-rolling until the dough has been formed into cut circles. At this point, set up an assembly line. The rounds will be next to the bowl of melted butter (remaining amount of 1/4 cup plus 2 tablespoons) and the pans will be next to the butter.

Dip or brush the top of each round with butter and fold in half. Place in pan with fold on the bottom, or fan side up. Continue to do this until each cake pan has 12 rolls in it. Cover each pan with plastic wrap and let rise in a warm place for about 20 minutes.

During the rising time, preheat the oven to 400 degrees. After the rising time is complete, place pans in oven and bake until golden brown on top. Bake time should be about 25 minutes. Let rolls cool in pans for about 20 minutes and invert twice, so golden tops of rolls are face up. Serve warm or at room temperature.

Tips and Notes:

1. When you form the dough in the pans it will be slippery and soft. Dough rounds might not fill pan prior to rise time. Just place folded dough rounds in pan evenly spaced.

2. If you want quick results, you can plan ahead the day before, with the changes as follows:
Form the dough by using regular rise yeast and but only melt 1/2 cup of butter for use in creating the dough. Instead of the instructions for the first dough rise, cover the dough and place in refrigerator overnight. The next day, when you are ready to form the rolls, melt the remaining butter. Follow the same instructions above, starting with the information after the first rise. The rise time for chilled dough (after the rolls have been formed) is 30 minutes.
                                   **LAST YEAR: Virginia Blackberry Roll**         


Sunday, June 14, 2015

Pecan Cream Cups


The blend of candy with cookies has always been an appealing idea. Twix is one of the better known brands that has done well by using this type of texture/flavor blend.

This recipe incorporates the same idea with very tasty results. The cup part of this treat is like a shortbread flavored with cinnamon. It is filled with a mixture of marscapone cheese and pecans and then baked. After the cups have cooled, the filling is covered with semi sweet chocolate.

One bite does have you enjoying the crunch of the cookies, then you move on to the creamy filling chock full of pecans. The filling makes me think of pecan pie or pralines, but without as much sweetness. Topping the filling with chocolate makes it more confectionary. Twix has the right idea, a cookie/candy combo is hard to resist. The little cups are great at parties and the texture/ flavor combo will have them coming back for seconds. This recipe makes about 2 1/2 dz cups.

Pecan Cream Cups
by Flourtrader

Ingredients
1 1/2 cups marscapone (softened)
2/3 cup chopped and toasted pecans
3/4 cup butter
1 cup sugar
1 egg
1 tsp cinnamon
2 cups flour
1/2 tsp baking powder
1/2 tsp salt
3/4 cup semi sweet chocolate chips

Use a non stick mini muffin pan or butter the inside and top edge of mini muffin cavities. Preheat the oven to 375 degrees.

Place the butter and sugar in a bowl. Beat until smooth and creamy, about 3 minutes. In a separate
bowl, whisk the egg with the cinnamon. Add the cinnamon/egg mixture to the creamed butter and
sugar. Blend with mixer on medium speed until incorporated into batter. Set aside.

Using another bowl, sift together flour, salt and baking soda. Fold the sifted ingredients into the wet batter. Place 1 tbs of dough in each muffin cavity. Press each tablespoon of dough into a cup form in the cavity, the same manner as you would in making tart shells. The dough cup should come up to the rim. Trim off excess and blend back in with the rest of the dough for forming additional cups.

Once all the cavities of your muffin tin have a dough cup, start making the filling. Fold the pecans into the marscapone until evenly distributed. Fill the dough cups with the filling right below the top edge, reserving some room for the top layer of chocolate. Smooth the surface of the filling.

Place in oven to bake for about 9-12 minutes, or until the cookie shell turns a golden brown. Remove and place rack to cool in pan for about 10 minutes. Then remove from pans carefully place each on cooling rack. Let cool completely.

While the cups are cooling, set up a double boiler and fill the top pot with chocolate chips. Once the chips start melting, stir a few times. When all the chocolate is melted and the cups have completely cooled, smooth the chocolate on top of the cup filling. Make sure you do not get the chocolate on the cookie edges.

Let rest about 1 hour for the chocolate to set up. Then serve. Store covered in the refrigerator.

Tips and Notes:

1. Filling will rise while cooking and sink when cooling, consider this when filling.

2. The dough cups are a good shell to use as a base for filling with the item of your choice.                              

3. Evenly shaped dough in the cookies cup will insure even baking.
                      **LAST YEAR: Chocolate Angel food cake**


Sunday, June 7, 2015

Strawberry Cream Cheese Coffee Cake


I heard on the radio station the other day that it was National Donut day. I do like donuts quite a bit, but I feel that they could incorporate some fresh fruit into the flavors.  Jelly filled is actually fruit gel, not big chunks of fresh fruit. Donut makers should split a donut and fill it with fresh fruit once in a while, I think it would catch on.  I would definitely be a patron at that donut shop.

That brings me to this particular recipe. It has a blend of fresh fruit, cream cheese and almonds layered on top of sweet cake. The original recipe called for blueberries, but I decided that with almonds and cream cheese, strawberries is a better flavor match.

This breakfast treat is one that never got out of the house. Most of my desserts are brought to the work place or given to the neighbors. It is only test tasted with one serving before moving on.  However, my husband wanted this one for our household and he managed to make it disappear in a few days.

Strawberry Cream Cheese Coffee Cake
adapted from Best Recipes from Country Inns and Bed and Breakfasts

Ingredients
1 cup fresh fruit (any type of summer fruit, with the exception of citrus, chopped if bigger than blueberries)
1 tsp almond extract
3/4 cup plain low fat yogurt
2 plus 1 eggs
1/4 cup apple juice
6 oz cream cheese
2 tsp water
1/2 cup butter
3/4 plus 1/4 cup sugar
2 1/4 cups flour
1/2 tsp baking soda
1/2 tsp baking powder
1/4 tsp salt
1/2 cup sliced almonds
1 tsp cornstarch

Grease and flour a 9 inch springform pan. Preheat oven to 350 degrees.

Fill a small saucepan with fruit and apple juice. Let come to a boil and then reduce heat and stir.  Simmer on low for about 3 minutes. Add the water and sift in the cornstarch.  Stir again and let simmer. The liquid should thicken up and reduce in a short amount of time. When ready, your saucepan contents should measure about a cup of the fruit/cornstarch mixture. Remove from heat and set aside.

Prepare a food processor for use. Fill the processor bowl with 3/4 cup of sugar and flour. Then cut the butter into cubes and drop into bowl. Process until mixture resembles sandy coarse crumbs. Empty contents into large bowl.  Remove one cup of mixture and place in another bowl for a different use.

Sift together baking powder, baking soda and salt. Fold into sugar mixture until distributed evenly.  In a separate bowl, place 2 eggs and the almond extract and whisk together. Add the yogurt and whisk again to blend. Pour into the flour/sugar batter and stir. Once blended, empty contents into prepared springform pan. The batter will be a bit sticky, but flatten on the bottom of pan and bring up the sides about a 1/4 of an inch. There should be a little bit of a well from the dough sides going down to the bottom of the dough.

Take out a medium size bowl and beat together cream cheese, 1/4 cup of sugar and remaining egg until smooth. Fill the well of the dough with the cream cheese mixture and smooth the top. Then spread fruit mixture over top of cream cheese. Find the reserved crumb mixture and stir in sliced almonds. Sprinkle over the top of the coffee cake, making sure it is covered to the edge evenly.

Place in oven and bake until golden brown. This will take about 45 minutes and filling will be set when done. Cool in pan 15 minutes then remove the outer ring of the springform pan.

Tips and Notes:

1. Because of their size, blueberries yield more volume in a cup than chopped strawberries. Next time, I will up the amount of strawberries. The 1 cup turned out to be a little sparse on top.

2. Another good flavor match since this has almonds would be cherries.

3. Be careful when adding ingredients, the eggs as well as the sugar are used in 2 different components so they need to be added separately.

4. The instructions are to spread fruit over cream cheese.  Just to insure that you are not mixing the layers, it is better to drop by spoonfuls.
                         **LAST YEAR:Chocolate Almond Marsala Cookies**


Sunday, May 31, 2015

Oatmeal Raisin Cookie Pie


Do you sometimes want homemade but find that your lifestyle may just be too busy to fit in the time? Then the cookie pie is the answer. You can have all the taste of an oatmeal or chocolate chip cookie, but in the form of a cookie pie. After just one baking session, slice and eat!

This particular recipe yields the same chewy texture that you will find in regular sized oatmeal cookies. I have been contemplating changing out the raisins for chocolate chips and skipping the icing. In the end, we must satisfy what the tastebuds are craving. Whether it is grandma's tried and true oatmeal cookies or the updated chocolate chip version, the cookie pie is the quickest method. It makes for a tasty after dinner dessert with coffee as well as a good addition to a lunchbox.

Oatmeal Raisin Cookie Pie
adapted from Serious Eats.com

Ingredients/Cookie Pie
1 egg
1 tsp vanilla
1/2 cup or 1 stick unsalted butter (room temp)
3/4 cup flour
1 1/2 cups old fashioned oats
1/2 tsp salt
3/4 tsp ground cinnamon
1/2 tsp baking soda
1/2 cup light brown sugar
1/2 cup granulated sugar
1/2 cup raisins

Ingredients/Icing
1 tsp and 1 tbs heavy cream
1/3 cup powdered sugar

Grease the interior of a 10 inch springform pan and preheat the oven to 350 degrees. Take out a medium size bowl and sift together the ground cinnamon, baking soda, salt and flour. Then stir in the oats and set aside.

Place both types of sugar in the bowl of a stand mixer and blend until evenly mixed. Cut the butter into cubes. Add butter to sugar and beat until smooth. This should take about 3 minutes.  With mixer still running, add the egg and vanilla extract.

Once all is evenly distributed, fold in the dry ingredients until no streaks remain.  Stir in the raisins. Transfer batter to prepared pan and smooth the surface so all is even.

Bake until the batter turns a golden hue and is set in the middle, approximately 20-25 minutes. Cool in pan 5 minutes and then remove the outside ring of pan. Leave on the bottom of the springform pan and let cool completely.

Once cool, fill a small bowl with the heavy cream and then sift in the powdered sugar. Stir until smooth. Take a zip lock bag and clip off a small part of of the corner. Fill bag with icing and drizzle on top of the cookie pie. Let icing set up prior to slicing and serving.

Tips and Notes:

1. You can also use a pie plate or 9 inch pan, but you will need to watch because the baking time will  vary.
2. The icing recipe can be doubled, which I did for more coverage.
                                       **LAST YEAR:Hawaiian Loaf*

Sunday, May 17, 2015

Cannoli Cake Roll

I have never actually eaten a cannoli before. One of the reasons is that they are hard to find in the U.S.  Also, the cream and candied fruit filling does not really strike up a craving. Upon further research, I have found that chocolate chips can be used and that the fruit can be excluded. That discovery does make me a candidate to seek out and taste a cannoli. However, since they are so scarce here, I decided to have the same flavor in a different format.

This particular recipe puts a spin on traditional cannoli by replacing the cannoli shell with cake and forming a cake roll with the filling inside. This type of creativity has been going on for awhile.  After all, chocolate chip cookies have a countless number of spin offs. There are now versions of this in everything from pie to bar drinks.

For flavor notes, this cake roll uses cinnamon, chocolate chips and orange liqueur in the filling. The cake part is a vanilla sponge. The garnishing with pistachios and chocolate chips is optional, but very traditional.

This was fun and easy to make. It also yielded a stunning and tasty result. If you like the taste of cannoli and are looking for something special for a gathering, this recipe is well worth trying out. Be sure to plan for the 3 hours of cooling steps when you decide to make this. Now, it's time to have some fun in the kitchen with a sweet ending! "Questa torta è squisita!" as they say in Italian.

Cannoli Cake Roll
adapted from All Recipes Cookbook

Ingredients/Cake
3/4 cup cake flour
1/2 cup sugar, separated
1/4 tsp cream of tartar
5 eggs, separated, at room temperature
1 tsp vanilla extract
1/4 tsp salt
confectioners sugar, for dusting

Ingredients/Filling and Frosting
4 tbs orange liqueur, separated
1 tbs water
1 tsp vanilla extract
1 1/4 cup ricotta cheese
4 oz cream cheese
3/4 cup heavy whipping cream
1/2 cup plus 3 tbs confectioners sugar
1 tbs white sugar
1/4 tsp gnd cinnamon
1/4 cup and 1 tbs mini semi sweet chocolate chips
1/4 cup chopped pistachios (optional)

Grease a 10x15 inch jelly roll pan and line the bottom with parchment paper.  Preheat the oven to 375 degrees.

For the cake, start with 2 bowls. Add egg yolks, vanilla and 1/4 cup of sugar to a large bowl.  Fill a second, medium size, bowl with egg whites, cream of tartar and salt.

Both of the mixtures need to be beaten. Start with the egg yolk mixture and beat for 5 minutes. It will thicken up and turn a light lemon, color. After beating, clean and dry your mixer beaters to use for the egg white mixture. Beat the egg white batter until it reaches a soft peak consistency. Continue to beat and sprinkle in 1/4 cup of sugar, beating until stiff peaks form.

Using a spatula, fold 1/3 of the egg white batter into the yolk mixture. Continue with 2 more intervals of adding and folding the egg white batter into the yolk batter. Lastly, fold in the flour in 1/4 cup increments until no dry streaks remain.

Pour batter into the prepared pan, making sure it is smooth and even. Place in oven and bake until cake springs back when lightly touched. Baking time is about 10 minutes.

During the bake time, place a clean towel on a flat surface and dust with confectioner's sugar. Then make a soak mixture by combining 2 tbs of orange liqueur, 1 tbs water and 2 tbs sugar in a small microwave safe bowl. Microwave about 10 seconds. Remove and stir until sugar is dissolved.

Once the cake is done, remove from oven and invert pan onto prepared towel. Peel off parchment paper. Brush cake with soak mixture. The cake, with the towel, should be positioned with the longest side running horizontally in front of you. Then, using the beginning side of the cake closest to you, carfeully rolling it up with the towel to form a jellyroll. With the seam side down, transfer to a cooling rack. Cake will be need to be completely cooled prior to filling. This will take about 1 hour.

As the cake cools, make the filling with the use of a food processor. Fill the bowl of the processor with the ricotta cheese, cream cheese, 1/2 cup confectioner's sugar, cinnamon and 1/2 tsp vanilla.  Blend on medium speed until smooth. Fold in 1/4 cup of chocolate chips. Transfer to bowl and cover. Place in refrigerator until cake is completely cooled.

Carefully unroll cooled cake and take bowl of filling out of refrigerator. Empty filling onto the center of the cake. Smooth filling out over cake, leaving 1/4 inch border. Repeat the cake rolling process as done before, except without the towel. Remember to start with the same long side as you began with the first time you rolled the cake. Once rolled, transfer to platter seam side down. The platter will be the one that you intend to use for presentation before slicing and serving.

Now the cake needs to be frosted. For the frosting, add whipping cream and 3 tbs of confectioners sugar to bowl of stand mixer.  Beat ingredients together until you reach the soft peak stage.  Add two tablespoons of orange liqueur and 1/2 teaspoon of vanilla to the cream.  Using a spatula, fold the flavor additions into the whipping cream until evenly distributed. Spread frosting over cake, covering all surfaces, including ends and the curves that meet the platter.  If you choose, use a design blade to make designs in the frosting, being careful not to expose any cake as you drag along the sides.

Refrigerate cake for about 2 hours before serving.  Decorate with 1 tbs mini chocolate chips and finely chopped pistachios when ready to serve, if desired.

Tips and Notes:
1. Due to the different batters/components using a lot of the same ingredients, so be sure to use the noted amounts in the paragraphs when creating, not the listed ingredient amount.  The measure values are combined in the listing, instead of listing the same ingredient again with a different vallue. If the measurement it is not noted in the paragraphs, then refer to the ingredient list for the measurement.

2. I know that a lumpy filling can cause issues, however, I feel that there could have been a little bit more mini chocolate chips in the filling.

3. The garnish is missing in the picture, however, I do intend to use it once the cake is served. The missing slice is a taste test.  

4. The biggest flavor in the cake is the cinnamon and orange.  If those are not a favorite, try another liqueur and spice more to your liking.
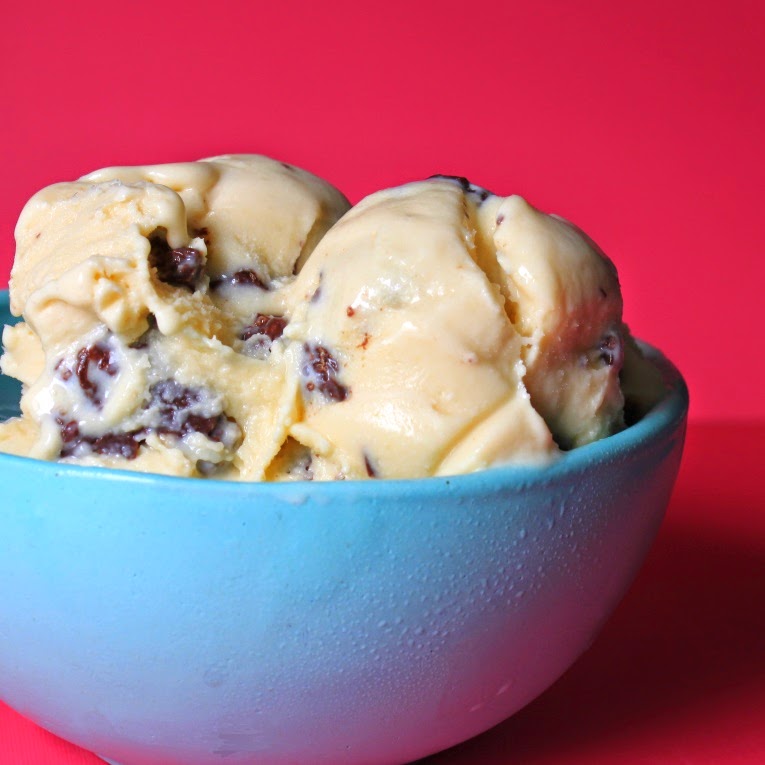
                                            **LAST YEAR: Buckeye State Ice Cream*


Saturday, May 9, 2015

Peanut Butter Fudge Brownies


Brownies have become quite versatile these days. There are so many things that pair well with chocolate, it is hard not to add an additional flavor component to them.  Cream cheese, raspberry, wine, coffee-- and the list goes on.  However, we do not need to turn to the Food Bible to discover this particular flavor combination. Chocolate and peanut butter are a classic pairing that nearly all of us are familiar with.

These treats taste are as if someone took a large chocolate peanut butter cup and stacked it on top of  rich chocolate brownies. Not just plain brownies, but fudgy brownies choc-full of roasted, salted peanuts. Now that I have your attention, lets get right to the recipe.

Peanut Butter Fudge Brownies
adapted from Bon Appetit/Jan 2007

Ingredients/Brownies
4 eggs
3/4 cup or 1 1/2 sticks butter
1 1/2 tsp vanilla extract
7 oz bittersweet or semisweet chocolate, chopped
3 oz unsweetened chocolate, chopped
1 cup coarsely chopped peanuts ( preferably roasted and salted)
1/4 tsp salt
1 cup flour
1 1/2 cups sugar

Ingredients/Topping
1 tbs milk
1 tsp vanilla extract
1/2 or 1 stick butter (divided in half)
7 oz bittersweet or semisweet chocolate, chopped
1 cup chunky style peanut butter (not natural or old fashioned)
1/8 tsp salt
1/8 tsp gnd nutmeg
3/4 cup powdered sugar


Preheat the oven to 375 degrees. Line the interior of a 9x13 inch pan with foil, leaving an overhang on the long sides. Butter the face up side of the foil, covering all that is lining the interior of the pan.

The first step is to create and bake the brownie base. Set up a double boiler over medium heat. Let the water in the bottom part come to a simmer. Place other pot on top and fill with chocolate and butter. Stir occasionally as the ingredients melt.  Once completely melted, transfer to a mixing bowl.

Add sugar, vanilla extract and salt to the melted batter. Mix together until blended. Add one egg and whisk into the batter. Continue the same process with each egg, one by one. Stir in flour until no streaks remain.  Lastly, mix in peanuts.

Transfer batter to prepared pan, smoothing the surface. Place in oven and bake for about 30 minutes or until tester comes out with moist crumbs attached. Cool brownies completely in pan, placing pan on rack.

The first layer on top of the brownies is the peanut butter mixture.  Add peanut butter and 1/4 cup butter to mixing bowl and beat on medium speed until combined.  Sprinkle in the salt and nutmeg and beat again for about 30 seconds.  Sift in the powdered sugar and blend with mixer.  Beat in the milk and vanilla for another 30 seconds.  Spread mixture evenly over brownies and smoothing the top.

For the final layer, set up a double boiler again.  Fill top pot with chocolate and 1/4 cup of butter.  Stir occasionally as the mixture melts.  Once melted and smooth, drop by spoonfuls over the surface of the peanut butter layer.  Using a spatula, smooth out chocolate.  Make sure that the surface is covered evenly.  Place pan in refrigerator for about 1 1/2 hours.  This will give the top two layers time to set up.

To serve, pull sides of foil and lift brownies out of pan. Cut into squares while still cold. Let come to room temperature prior to serving.
                           **LAST YEAR: Pineapple Rum Trifle Cake**


Sunday, May 3, 2015

Raspberry Picnic Pie

Pie is one of those things that makes me think of picnics, family reunions and outdoor get togethers. Usually in the summer, berry pies find their way to the weekend table. I created this pie with my first thought being strawberry lemonade. However, the idea of "cooked" strawberries was unappealing. That is when the flavor idea shifted to raspberries.  Raspberry pie may not be the most favorite berry for pie, but I am more fond of raspberries than any other berry,  in spite of all the seeds.

This pie makes use of fresh and frozen berries. Also, it does not have the tapioca ingredient that you find in some pies. The fresh raspberries are layered on top of the crust first. Then it is filled with a cooked mixture of frozen berries, sugar, cornstarch, lemon juice and zest. Since raspberries are pretty tart, the crumbly, sweet topping is the offset to the tartness.  In addition, I used a dairy/egg mixture prior to the layer of crumbs in order to seal the surface of the pie.

Creating the pie is fairly easy. There is no fancy lattice top nor is there prep work on cutting and peeling fruit. Definitely good reasons to try a berry pie if you are short on time. However, bear in mind if you bring it to the family reunion this year, consider that you are starting a tradition. Something this tasty will have your family will be expecting it every year! This recipe makes one 10 inch pie.  


Raspberry Picnic Pie
by Flourtrader

Ingredients/Bottom Crust
1/2 cup refrigerated shortening
1/4 cup cubed cold butter
1 1/2 cups flour
1/4 tsp baking powder
1/2 tsp salt
1 tsp sugar
Ice water

Ingredients/Filling
5 cups frozen raspberries (thawed until still icy but pliable)
1 tbs lemon juice
1 tsp lemon zest
1 1/2 cups fresh raspberries
1/4 cup cornstarch
1 1/2 cups sugar

Ingredients/Top Crust
2 1/4 cups sugar, divided
1/4 tsp salt
1 1/2 cups flour
1 cup half and half
1 egg
1 tsp vanilla extract
3/4 cup or 1 1/2 sticks butter, room temp

Prepare a baking sheet by lining the interior with foil, making sure all sides and corners are covered.  To create the crust, sift together flour, baking powder and salt into stand mixer bowl. Then add the sugar, butter and shortening. Beat on medium speed until mixture resembles coarse, small clumps. Slowly sprinkle a 1/2 tsp of ice water into the batter and beat. The dough is the right consistency when it comes together on the beaters instead of clinging to the edge.

Lay a piece of plastic wrap on a flat surface and empty dough onto plastic. Flatten into a disc and cover with the wrap. Place in the refrigerator to chill for at least 30 minutes. Once the chilling step is completed, lightly dust a flat surface with flour. Remove the disc from the refrigerator and place on the floured surface and roll out to 12 inches in diameter.

Roll dough over rolling pin and then unroll dough over pie pan and release. Lightly press dough, making sure all the interior of the pie pan is covered. There should be no air pockets. Fold the excess dough under the part of the dough that touches the top outer edge of the pie pan. Then crimp the top edge of the dough. Place in freezer until ready to use.

Preheat the oven to 400 degrees. Fill a medium size saucepan with the slightly frozen berries, cornstarch and sugar. Place over medium heat and stir, blending ingredients.  Mixture will come to a boil, but continue to stir and cook for about 2 minutes after it has reached a boiling point. Remove from heat and stir in lemon zest and lemon juice.

Remove frozen pie crust and place fresh raspberries evenly on the bottom of the crust.  Pour the cooked raspberry mixture on top. Set aside.

In a small bowl, whisk together the egg, half and half, 1/4 cup of sugar and vanilla extract. Then slowly pour the mixture over the top of the filling. Start pouring on the outer edge, moving toward the center until bowl is empty.

For the crumb mixture, sift together the flour and the salt. Add the butter and remaining 2 cups of sugar.  Combine by using a pastry blender until it becomes a crumbly sandy mixture. Sprinkle crumbs on top of pie, again starting with the outer edges and moving toward the center.

Place pie on prepared pan and transfer pan to oven. Bake for about 45-60 minutes. Pie is done when you see the filling bubbling over and the crumb surface has turned a deep golden brown.

Let cool to room temperature and then cut and serve.
                           **LAST YEAR:Vienna Chocolate Bars*

Sunday, April 26, 2015

Apple Cinnamon Bundt Cake


I guess we all have a desire for lots of flavor without all the fat and calories. After years of blogging desserts without regard to calories or fat, I decided I would try a lighter recipe. I know that several other countries believe that American desserts contain too much sugar for the palate. It is about personal taste and what you are used to.  I know people that prefer a salty snack over sugary.  Dieting, in my book, is about portion size control when it comes to eating desserts. After all, it is easier to eat less than to change your whole realm of eating habits. Moderation is another key.

This particular recipe is a bundt cake filled with cinnamon, apples and ground walnuts. The cake part has vanilla beans in it. However, the results prove that the filling is the real flavor in this cake.

For my taste, the cake part seemed to eggy and did not offer much flavor. The ratio of eggs to flour  seems unbalanced. As you can see by the picture, the cake part looks very spongy. This is not typical of most bundt cakes. In addition, I was disappointed that you cannot taste the flavor of the vanilla beans in the cake. Since I am not someone that creates low fat/calorie recipes, I am at a loss with how to get to a more flavorful cake, while still retaining its low cal/fat attributes.

If you are a low fat/low calorie guru and enjoy tweaking recipes, then you are welcome to grab this one up and start experimenting. Myself, on the other hand, will go back to sweet indulgences.

Apple Cinnamon Bundt Cake
adapted from Cooking Light/Nov 2011

Ingredients/Filling
1 cinnamon stick ( 3 inches long)
1/2 cup apple cider
1 tbs dark brown sugar
1 1/2 cups diced, peeled apple (tart style, like Granny Smith)

Ingredients/Streusel
1/2 tsp ground cinnamon
1 tbs flour
2 tbs dark brown sugar
1/2 cup walnuts

Ingredients/Cake
2 eggs
1 egg yolk
1/2 cup fat free milk
3/4 cup 2% reduced fat Greek Yogurt
1/2 cup butter, softened
1/4 tsp salt
2 tsp baking powder
1 tsp baking soda
9 oz or about 2 cups flour
1 vanilla bean, split lengthwise
powdered sugar (optional, for dusting top of cake)

Start by preparing the bundt pan by coating the interior with a baking spray with flour or greasing and then dusting with flour.  Make sure all the crevasses are completely covered.  Set aside and then preheat the oven to 350 degrees.

For the filling, place all the filling ingredients in a small saucepan. Cook over medium high heat.  Once the mixture reaches a boil, turn temperature down to medium and let simmer. As it simmers, stir occasionally. The liquid will evaporate as it cooks. After 20 minutes, there should be very little liquid and the apple quite tender. Remove from heat and let cool to room temperature. Divide mixture in half and set aside.

The next step is the streusel. Fill the bowl of a food processor or blender with all the streusel ingredients. Pulse the mixture until it reaches a coarse, sandy texture. Just like the apple mixture, divide in half and set aside.

The cake process starts by sifting the flour, baking soda, baking powder and salt together. Then take out another bowl and fill with the butter and sugar. Using a stand mixer or hand held mixer on medium speed, cream the two together by beating for about 3 minutes. Add one egg and beat for another 30 seconds.  Add the other egg and beat again for 30 seconds.  Repeat with the egg yolk.

Take the split vanilla bean and scrape the seeds into the sugar/egg batter and blend until evenly distributed. In a separate bowl create a dairy mixture by whisking together yogurt and milk.  Fold 1/3 of the sifted ingredients and into the sugar/egg batter.  Stir in half of the dairy mixture.  Repeat the process of adding the dry and wet ingredients, ending with the dry ingredients. Divide the batter into thirds.

Take 1/3 of the batter and spoon into the bottom of the prepared bundt pan.  Top the batter with 1/2 of the apple ingredients, making a row in the center of the batter.  Then top with 1/2 of the streusel mix, still making a center row.  Add another layer of batter (using the next 1/3 measurement), spooning in and smoothing out. Layer the center row with the remaining apples and top with the last of the streusel.  Spoon the rest of the batter on top and smooth with a spatula.

Place the filled pan in the oven and bake for 20-30 minutes. A toothpick test resulting in moist crumbs indicates that the cake is done.  Let cool in pan 20 minutes and then invert onto cooling rack.  Once completely cool, dust with powdered sugar if you prefer.

Tips and Notes:
1. The recipe did not specify making a center row of filling and apples, I added this instruction to insure that it would not reach the edges to cause sticking to the pan.

2. Act quickly when assembling, batter rises quickly once the dry ingredients are incorporated.
                          **LAST YEAR:Cherry Almond Cobbler Cookies**  

Sunday, April 19, 2015

Charlevoix Cookies


One of the flavors in this recipe is maraschino cherry. In researching cherries, I found that the trees were first were planted by the French along the Saint Lawrence Seaway. That seaway reaches into the Great Lakes area from Canada.  Based on this tie, there are 2 areas called Charlevoix. The first is a town in the far northern area of Michigan and the other is in Quebec. While both are along water and offer fishing and plenty of hiking areas, the Canadian location has mountains along the seaway.

Now that the background of the name has been covered, lets get into the details of this petite sandwich cookie. The cookie part has the flavor of almond and it has a soft texture with a slight crunch of desiccated coconut and almond flour. For an even bigger pop of flavor, the bottoms of the cookies are dipped in chocolate and then sandwiched together with a maraschino cream.

They are small and are perfect for popping in your mouth whole. That way you get the full experience of all the textures and flavors. In addition, bigger cookies would be quite messy after one bite. If you like chocolate covered cherries, then you are reading the right post.

This recipe yields about a dozen sandwich cookies.

Charlevoix Cookies
by Flourtrader

Ingredients/Cookies
1 stick or 1/2 cup butter
1 egg white
1 tsp almond extract
1/4 cup and 1 tbs powdered/confectioners sugar
1/4 cup and 1 tbs desiccated coconut
3/4 cup flour
2 tbs almond flour
1/4 tsp baking powder
1/2 cup chopped semi-sweet chocolate or chocolate chips

Ingredients/Filling
1/4 cup butter
1 1/4 cup powdered sugar
1/2 tsp vanilla extract
1 tbs maraschino juice

Prepare two baking sheets by lining with parchment paper. Also, preheat the oven to 350 degrees. Cream together butter and powdered sugar until smooth. Beat the egg white into the batter, running the mixer on medium high for about 30 seconds. With the mixer on low speed, stir in the coconut and almond extract for another 30 seconds. Set aside.

Using a separate bowl, sift together the regular flour and baking powder. Then whisk in the almond flour.  Fold the dry mixture into the wet batter, using a spatula. Scoop out the batter into rounded teaspoons and place each on the prepared baking sheet, about one inch apart. Place in oven and bake for about 15 minutes, rotating pans halfway thru the baking process. Cookies are done when lightly browned on edges and bottom. Let cool completely on pan.

While the cookies are cooling, line 2 more baking sheets with parchment paper. Place in the freezer.  Set up a double boiler and fill top pot with chocolate. Place over medium high heat and stir occasionally until all the chocolate is melted. Take one of the baking sheets out of the freezer.

The chocolate coating process is the next step. Using a wooden spoon, scoop up some of the melted chocolate and then place a cookie on top of the chocolate, flat side down. Transfer to cold baking sheet by placing on the parchment paper, chocolate side down. Continue with the process until both baking sheets are full, placing each in the freezer when complete.

Next, prepare the filling by starting with creaming the butter and powdered sugar together. Once mixture is smooth beat in vanilla extract and maraschino juice. If the consistency is too thick, add more juice as needed.

Take out one baking sheet of cookies and match pairs together by size and shape.  Then sandwich each pair together with a few teaspoons of filling.

Tips and Notes:
1. Clear vanilla extract instead of dark will help retain the pink from the maraschino cherry juice, but you can add food coloring if you are unable to find clear vanilla extract.

2. The usage of the chocolate and filling is not an exact science, so some may be left over. The chocolate can be stored for later use. If you are concerned about excess filling, try halving the filling ingredients then see how far it goes when assembling the cookies.

3. The addition of the egg white results in a curdled looking batter, but that is normal.

Also, I did listen to an old song during my research into cherries. That oldie is called "Life is just a Bowl of Cherries". A nice reminder not to take things too seriously, laugh a little and enjoy it!
                                    **LAST YEAR:Minnies Chocolate Chip Supreme Cookies**

Sunday, April 12, 2015

Chocolate Banana Muffins

Well contrary to what the song says, it is not "all about the base." That is, when it comes to muffins. These muffins reinforce what we all know to be true -- muffin tops are the best part of the muffin!

When I read the recipe instructions for these treats, I envisioned a big baked glop as the end result and also some cooked batter on the baking sheet. After all, I have never filled muffin tin cavities to the top with the batter and this recipe stated fill to just over the rim. That's right-- just over the rim! However, since the author made special notes regarding a lawsuit tied to a bakery stealing one of her muffin recipes, I decided to follow the instructions as stated.

I am sure glad I did. To my pleasant surprise, the muffins turned out with a huge top and did not stick or tear when removing from the muffin tin. The inside was very moist and packed with lots of flavor. The baked treats are composed of 2 types of chocolate, bananas and nuts. Prior to baking, they are topped with chewy coconut and ground nuts held together by a little butter. These are a tasty way to start the day, but too good to be segregated to breakfast. They make for a tasty afternoon snack as well. The recipe yields about 16 to 18 muffins with lovely, large tops.

Chocolate Banana Muffins
adapted from The Best of Better Baking

Ingredients/Topping
2 tbs packed brown sugar
4 tbs or 1/2 stick of unsalted butter, cubed and softened
1 1/2 cups sweetened shredded coconut
1/2 cup of finely ground nuts- pecans or macadamia

Ingredients/Muffins
1/2 cup sour cream
1 tbs strong brewed coffee
1/2 cup vegetable oil
1 tsp vanilla extract
1 cup banana purée (about 2 ripe bananas)
4 eggs
1/2 cup or 1 stick of butter
1 cup packed light brown sugar
3/4 cup granulated sugar
1/2 cup chopped pecans or macadamia nuts
4 oz chopped white chocolate
1/2 semisweet chocolate chips
3 3/4 cup flour
3/4 tsp baking soda
1/2 tsp salt
4 tsp baking powder

Start by preheating the oven to 425 degrees. Grease the top edge of 18 cavities of muffin tin(s). Line the cavities with paper liners. Line baking sheet (s) with parchment paper. The recipe recommends that most of the mixing in this recipe be done by a food processor. At this time, set up your equipment accordingly.

Using a medium size bowl, sift together flour, baking soda, baking powder and salt . Set aside. For the topping, fill the bowl of a food processor with all the filling ingredients. Cover and pulse for about 15 seconds. Transfer topping into a bowl and set aside for later use. Clean the food processor bowl.

Using the same processor bowl, fill with both types of sugar, butter and oil. Pulse until mixture is smooth. Add the vanilla extract and coffee, pulsing again until blended.  Add the eggs, one at a time, processing each completely into the batter. Lastly, pulse in the sour cream and the banana puree.

Transfer batter from the food processor to the bowl of sifted ingredients. Fold together until no dry streaks remain. Then mix in both types of chocolate and nuts, making sure all is evenly distributed into the dough.

Fill the muffin cavities with the batter by using a large ice cream scoop. The cavities should be filled to just over the rim. Scoop out about 1 1/2 tbs of the topping and flatten into a disc with your hands and place on top of each cavity of batter and press lightly. Put each pan on the prepared baking sheet.

Place the pans in the oven, using the top and middle shelves. Then reduce the temperature to 400 degrees. Bake the muffins until tester comes out clean and top springs back when lightly touched.  Be sure to rotate the pans at the halfway point of baking. The recipe recommends 20-22 minutes, but mine took about 30 minutes. Let muffins cool in pans for about 15 minutes before transferring to a rack to finish cooling.

Tips and Notes:
1. Timing is everything and baking time will vary depending if you are using a dark pan or not. The recipe states be careful not to over bake, but my issue was the opposite- making sure they were completely baked.

2. The author instructed cooling time in muffin pan as 5 minutes, but I stated 15 minutes in the above recipe. This change was made to insure that they would retain the same shape when pulled out of the oven. Even with the increased wait time, the muffins did not stick to the pan when transferring each muffin to the cooling rack. 
                           **LAST YEAR:Black Walnut Madeira Cake**


Sunday, April 5, 2015

Honey Bunny Crunch Frozen Custard

Recently, I found 4 baby rabbits laying the grass. They did not even have their eyes open yet, so I guess their mother fell victim to a predator. I scooped them up and put them in a box.  Luckily, there was someone close by that had a daughter that was involved in rabbit rescue, so I gave them to him.  Last I heard was that they were coming along quite well and were starting to get fur and did open their eyes.

Since it is Easter Sunday and the rabbits were still on my mind, I decided to name this frozen custard accordingly. In the early stages of creation, I was thinking of a custard base made with some kind of cereal soak.  The soak idea stems from Christina Tosi's cereal milk, as sold at the Milk Bar. Since there are quite a bit of cereals that are heavy in sugar, I wanted something that was not so sweet.  Then it came to me - crunchy honey oat granola bars. After soaking, I added honey.  This gave it more flavor and reduced the amount of processed sugar. 

The end result is a base with a honey oatmeal flavor. Quite tasty by itself, but I could not resist to put some crunch into the smooth cream. Chopped up granola bars coated in dark chocolate were the perfect add in. The reason it is referred to as custard is that it does not freeze hard like your standard ice cream.  After 2 days in the freezer it still remained soft.  Not like soft serve ice cream, but not like regular ice cream either.

It is that time of year. The time to get outside more- so go to the lake, fire up the grill, have a picnic and enjoy some homemade frozen custard! You will need to plan ahead due to the steep time of 3 hours and the time it takes to freeze. This recipe makes about 1 quart of ice cream.

Honey Bunny Crunch Frozen Custard
by Flourtrader

Ingredients
1 cup and 2 tbs milk
2 1/4 cup cream
2 cups chopped crunchy honey oat granola bars, divided (about 10 bars)
1 cup semi sweet chocolate chips
2 tbs invert sugar (recipe:dessert components)
3 eggs (room temp)
1/4 cup 2 tbs sugar
1/2 cup 2 tbs honey
1/4 tsp vanilla extract

Pour milk and cream into a saucepan. Add one cup of chopped granola. Place over medium high heat and let come to a boil. Remove from heat and cover.  Let sit for 3 hours for flavors to meld.

During that time, set up a double boiler over medium high heat and line a baking sheet with parchment paper. Place semi sweet chocolate chips in the top pot and let melt, stirring occasionally. Once all is melted and smooth, stir in the chopped granola. After coating all the pieces, empty onto the parchment paper.  Separate all the pieces with a fork, making sure no big clumps remain.  Place sheet in the refrigerator for chocolate to set up.

In a bowl of a stand mixer, whisk the eggs and sugar together. Go back to the saucepan of the cereal cream and strain the liquid into a bowl. Discard the cereal and pour the liquid back into a saucepan.  Add honey and invert sugar (if using) and place over medium heat. Stir and cook mixture until all is melted and completely mixed in with the cream. Remove from heat.

Run the mixer on low, slowly whisking the egg/sugar batter.  As you continue to whisk, pour a small, steady stream of the cream mixture into the eggs.  Continue with this process until all the cream has been mixed into the egg batter.  Lastly, whisk in the vanilla extract.

Transfer mixture back to saucepan and place over medium heat. Let the custard simmer for about 4-5 minutes or until thick enough to coat the back of a spoon. The temperature should reach 170 to 175 degrees. Then pour mixture into heatproof bowl, cover and place in the refrigerator. Let cool for at least 3 hours or overnight.

Check the chilled chocolate covered granola.  If you still see that the chunks are too large, chop into smaller pieces.  Place back in refrigerator until needed. Once the chilling time is complete for the custard, add to an ice cream maker and follow the manufacturers' instructions. Toss in the chilled chocolate covered granola chunks at the halfway point of the churning process.  After churning process is complete, transfer to cold custard to a bowl, cover and place in freezer.  Let freeze overnight or until desired consistency is met.

Tips and Notes :

1. If trying another cereal milk flavor, take into consideration the sugar content of the cereal and the elimination of the sweetness of the honey.  For peanut butter/chocolate fans, try Captain Crunch milk soak and add in chunks of Reese cups.

2. The invert sugar is not required if your custard will not be stored in the freezer a long time.  It is mainly used to prevent ice crystals from forming. Just increase the honey content by 2 tbs, which would give you a total of 3/4 of a cup of honey.

3. Do not use chewy granola bars, I used Nature Valley brand crunchy type.

Enjoy your Easter!

Sunday, March 29, 2015

Havana Cupcakes

There are a lot of good recipes out there that are being overlooked by most home bakers for several reasons. A few of the reasons are exotic ingredients and special equipment requirements. However, this particular recipe was most likely overlooked due to the quantity. The original recipe makes 6 cakes, 8 inches in diameter.

Fiddling around with the calculator on conversions can get overwhelming, but I was so intrigued by the flavors I set out to convert this one. I finally worked to scale it down for about 1 1/2 dozen cupcakes.

The cupcake is made up of a chocolate sponge cake that envelops a nutty layer of hazelnuts and almond paste. The meld of texture and flavor is amazing. Fluffy on the outside and chewy on the inside. Chocolate, hazelnuts and almonds are tasty enough in the cake, but the fudge frosting is something to rave about as well. It reminds me of the type of topping you would put on brownies. Just swirl it on with the back of a spoon and it will settle smoothly on top of the cupcake.

Take note that the recipe does not include baking soda or baking powder, so the cupcakes do not rise like the standard. The liners can be filled close to the top without fear of spilling over.

Havana Cupcakes
adapted from Mastering the Art and Craft: Baking and Pastry

Ingredients/Nut Batter
1/2 cup or 1 stick of butter plus 2 tbs
3 eggs
1/2 cup plus 3 tbs finely gnd toasted hazelnuts
5 oz of almond paste
1/2 cup 2 tbs sugar
1 tsp vanilla extract
1/4 cup plus 2 tbs bread flour
Pinch of salt

Ingredients /Chocolate Batter
1/4 cup cocoa powder
1/2 tsp cinnamon
1 cup finely gnd toasted hazelnuts
Pinch of salt
8 egg whites
3/4 cup sugar
1 tsp vanilla extract

Ingredients/ Devils Fudge Icing & Topping
1/4 cup cocoa powder
1/2 stick or 1/4 cup butter
1/4 cup plus 2 tbs corn syrup
1/2 tsp vanilla extract
1/4 cup hot water
1 1/4 cup confectioners sugar
3/4 cup heavy cream
1/2 tsp whipped cream stabilizer
2 tbs sugar
18 whole hazelnuts or almonds

Prepare pans by greasing the upper edge of the cavities and lining with cupcake papers. The first batter to make is the nut batter. Begin by pouring the ground hazelnuts into a bowl. Then sift in the flour and whisk together. Set aside.

Fill a the bowl of a stand mixer with the sugar, butter, almond paste, salt and vanilla. Using the paddle attachment, beat the ingredients together on medium speed for about 5 minutes. Be sure to stop occasionally to scrape down the sides of the bowl. The end result will be a fluffy mixture that is light in color.

In a separate bowl, whisk the eggs together. Beat the eggs into the almond paste batter in 3 separate additions, running the mixer on medium speed for about 30 seconds each interval. Lastly, using a spatula, fold in the flour/hazelnut mixture. Set aside.

For the chocolate batter, whisk the salt and the ground hazelnuts together in a small bowl. Sift in the cocoa powder and cinnamon and whisk again. Set aside.

Pour the egg whites into the bowl of a stand mixer. Using the whipping attachment, whip until soft peaks form.  At this point, continue to whip while slowly adding the sugar, until stiff peaks form. Stop the mixer and fold in the dry ingredients.  Lastly, stir in the vanilla extract. Preheat the oven to 350 degrees.

Prepare a piping bag with a large tip and fill with nut mixture.  Quickly scoop out a heaping tablespoon of the chocolate batter and place into cupcake cavity. Repeat process for 18 cupcake cavities. Then pipe a complete circle of nut batter on top of the chocolate batter of the 18.  Lastly, scoop out another heaping tablespoon of batter, placing it on top of the nut batter.  Smooth the top, insuring that the nut batter is completely covered.

Place pans in oven and bake until top is smooth and springs back when lightly pressed, about 25-30 minutes. Be sure to rotate pans halfway through the baking process. Once baked, place pans on a cooling rack for 5 minutes then transfer cupcakes to a rack to finish cooling.

Start making the icing by adding butter, cocoa powder, corn syrup vanilla and salt to the bowl of a stand mixer.  Beat at medium speed for about 5 minutes. Mixture should be very fluffy at this point. Stir in the hot water. Remove mixer bowl from stand and sift in 1/4 cup of confectioners sugar and stir with a wooden spoon. Repeat the process until all the sugar is blended. Adjust consistency to your liking by mixing in more confectioner sugar or hot water. Spoon icing on top of cooled cupcakes and smooth out with a spoon.

For the optional topping, whip heavy cream until thickened. Add stabilizer and sugar, then whip again until piping consistency is reached. Pipe a round shell on top of the center of the cupcake and then lightly press a nut on top of the whipped cream.

Tips and notes:
1. Dutch processed or regular cocoa is your choice. The recipe does not specify but I used Dutch.

2. Whipped egg whites do have a tendency to deflate as they sit, so act quickly.  The other option is to make half a batch and do 9 cupcakes at a time.  The nut batter can sit in the fridge while the first batch bakes.

3. There will be some nut batter left over, but the baked result is chewy enough to make for a good filling in a brownie or cookie as well, so feel free to experiment with what is left.
                               **LAST YEAR: Biscotti Aloha**