Foodbuzz

Sunday, February 17, 2019

Brown Sugar Ginger Caramel Swirl Ice Cream


I have a slight fear of the use of ginger in recipes. It stems from the past in which I made some cookies that were good the first day. The next day the flavor developed more and the ginger took over. The cookies had too strong of a flavor, the ginger even over powered the chocolate in the cookie.There should have been a disclaimer stating serve or eat the same day.

Flavor balancing is a difficult subject because a lot is based on personal preference. Some people want a strong flavor while others want an even balance. For the strong flavor, I recommend making something that has a singular flavor. A singular flavor does not have to balance with another and you will get the pure taste.

This post is a particularly great example of balance of flavor. The caramel, ginger and brown sugar all comes through, which makes this ice cream a real keeper. This recipe requires one special ingredient, ginger spread. The recipe does not require much and I ordered it from Amazon under the "ginger people" brand.

Should you decide not to add the ginger spread, the end result will be a pretty tasty caramel swirl ice cream. 

After I tasted the ice cream, I wished the recipe made more. Delicious and unique, I am sure I will be making this again soon!

Brown Sugar Ginger Caramel Swirl Ice Cream
adapted from Sweet Cream and Sugar Cones

Ingredients/Ice Cream
1 3/4 cup heavy cream
3/4 cup of 2% milk
5 large egg yolks
1/4 tsp salt
1/2 cup dark brown sugar
2 tsp vodka

Ingredients/Swirl
1/8 tsp salt
1 cup sugar
3/4 cup heavy cream
1 tsp of ginger spread

Complete any preparation work required on your ice cream maker prior to creating this ice cream. Fill the bowl of a stand mixer with the egg yolks and whisk together. Once blended, add in 1/4 cup of brown sugar and mix on medium speed until sugar is thoroughly blended into egg yolks. Set aside.

Add 1/4 cup brown sugar, cream, milk and salt to saucepan and place over medium high heat. Once it reaches a simmer, remove. Turn stand mixer back on to medium and stream in 1/2 cup of the hot cream mixture. After this is blended, repeat with an additional 1/2 cup of the cream. Take the saucepan and place over medium heat and pour cream/egg mix back into remainder of hot cream.

Stir constantly as the mixture heats up. It should cook to a thickened state and coat the back of a wooden spoon. If you swipe your finger through it, the path will remain. This indicates that it is done cooking.

Place a sieve over a large heat proof bowl and pour the mixture into the sieve. This will insure that the custard is smooth. Fill a sink with ice and water. Place the bowl into the ice water. There should be enough ice and water to come level with the top edge of the custard inside the bowl. Whisk in vodka.

Stir the mixture at intervals while it chills. Once 15 minutes has passed, mix in the vodka and cover bowl. Place in refrigerator for a minimum of 2 hours or overnight.

As the ice cream is chilling, the swirl can be made. Place a saucepan over medium high heat and add 2 tablespoons of sugar. As it cooks, the edge of the sugar pile will melt and then start to change colors. Once completely melted, repeat the process with another 2 tablespoons of sugar. The rest of the remaining sugar should be added and melted in the same manner. Remove from heat when all the sugar is melted and it has a mahogany hue.

Slowly pour in the cream, mixing it into the sugar. The cream will cause the caramel to seize up. In that instance, drop the temperature to low and continue to stir the mixture until all the caramel is melted and blended with the cream. This could take 15-30 minutes, depending on how much turned into a lump. Add ginger paste and salt to mixture and blend.

After the chilling time is complete, remove ice cream from refrigerator and fill ice cream machine. Follow manufacturer's instructions. Then place caramel in a squirt bottle. When transferring ice cream from machine to storage bowl, squirt caramel into bowl after transferring a few scoops. Repeat process until 6 tablespoons of caramel is in the ice cream. Take a knife and make a few swirls in ice cream to disperse caramel in streaks throughout ice cream base.  

Cover and freeze until ice cream reaches the preferred firmness for serving.

Tips and Notes:
1. The vodka is for the purpose of keeping the ice cream from turning rock hard in the freezer. It does not impart any flavor to the ice cream.

2. There will be extra caramel sauce for another use. the recipe states that smaller measurements of the ingredients somehow do not work. There is more than enough for double the ice cream base.

3. For a short cut without the ginger, use store bought Dulce de Leche.
                                **THREE YEARS AGO:Raspberry White Chocolate Cookies**

Sunday, February 10, 2019

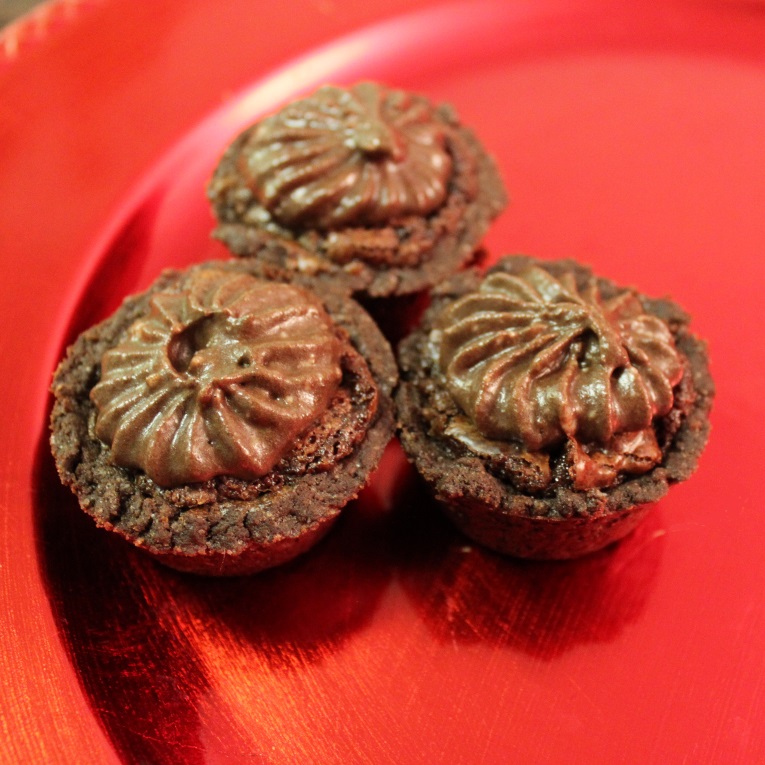
Chocolate Raspberry Tassies


With Valentine's day right around the corner, it is time for a little dessert that is rich in chocolate. These little gems are perfect for the occasion. They have a bold dark chocolate flavor with a fudgey filling on the inside and a cookie crunch on the outside. In addition they have a dollup of cocoa buttercream for more texture and more chocolate flavor.

Now, concerning the raspberry. They are made with raspberry liqueur, but there is no remaining flavor after baked. As is, the recipe only tastes of chocolate. In order to add more raspberry flavoring, I would suggest an extract, about 1 - 1 1/2 teaspoons.

The recipe suggests plain cocoa, however ,for an even deeper dark chocolate flavor, I used dutch chocolate. Even with plain cocoa, I still believe the raspberry flavor of the liqueur would not come through after baked.

These are so rich in chocolate, I doubt if they would be refused due to their lack of raspberry flavor. Nothing like the taste of dark chocolate to bring a smile to someone's face. So if you are looking for a special treat this Valentine's-- add this to your day, you along with someone else will be happy to enjoy these little gems. The recipe makes 24 tassies.

Chocolate Raspberry Tassies
adapted from Better Homes and Gardens

Ingredients/Chocolate Pastry
1/2 cup or 1 stick of butter (room temp)
1/3 cup sugar
1/4 cup cocoa powder
1/4 tsp salt
1 1/4 cup flour
1 egg yolk (room temp)
2 tbs cold water

Ingredients/Filling
1/3 cup sugar
1 tbs raspberry liqueur
2 tbs butter
1 lightly beaten egg (room temp)
2 tsp vanilla
6 oz semi sweet chocolate chips

Ingredients/Buttercream
1/4 cup butter
2 cups confectioner's sugar
2 tbs milk
3 tbs cocoa powder

The first step is to make the chocolate pastry. Sift together flour, salt and cocoa in the bowl of a stand mixer. Then whisk in sugar. Cut the butter into cubes and drop into the sifted ingredients. Beat until mixture is crumbly. Preheat the oven to 375 degrees.

Take out a small bowl and whisk together the egg yolk and the water. Pour into the chocolate mixture and beat until a soft dough is formed. Test the dough for stickiness and the ability to hold its shape. It can be refrigerated and you can use floured fingers for shaping. Once you are ready to shape, divide the dough into 24 equal balls. Place the balls into the cavities of 2-12 count mini muffin pans. Then shape each ball into a cup, covering the bottom and interior sides. After this process is completed, set aside.

Next is to create the filling. Melt butter in a saucepan over medium heat. Then add chocolate chips and stir until mixture becomes smooth and all is melted. Remove from heat. Add the raspberry liqueur, sugar and vanilla extract. Mix until blended. Then whisk in the egg. Using a tablespoon scoop out some of the filling and fill a cavity of dough. Repeat this process until all cavities are filled with the chocolate blend.

Place in oven and bake until center is set, about 12-15 minutes. Remove from oven and let cool in pans for about 10 minutes. Then carefully scrape the outside of the cookie shell and pry the tassies loose from the pan and place on cooling rack to completely cool.

Once cooled, buttercream icing can be prepared. Beat the butter in a stand mixer until smooth, then scrape down sides. Sift in 1/2 cup of confectioner's sugar and mix until no dry streaks remain. Repeat the process until all the sugar is incorporated into the butter. Then add the cocoa and milk and beat. The end result is a thick glossy icing. Fill a piping bag with a large star tip and pipe a dollup of icing on top. Let the icing set for 1 hour before serving.

Tips and Notes:
1. The egg may cause the filling to glop up in sections but it is okay, it does not hurt the final outcome.

2. After baked, some of the filling may sink. However, the icing will cover this so the sinking is acceptable.

3. Be sure that the cups made by the dough are even. Any that are too thin will cause them to collapse when removing from the pan.

4. A tablespoon of filling is too much to use in each. It will result in a shortage. In order for all the cups to be filled, use 2/3 of a tablespoon or make some extra.
                                           **LAST YEAR:Nusstaler Cookies**

Sunday, February 3, 2019

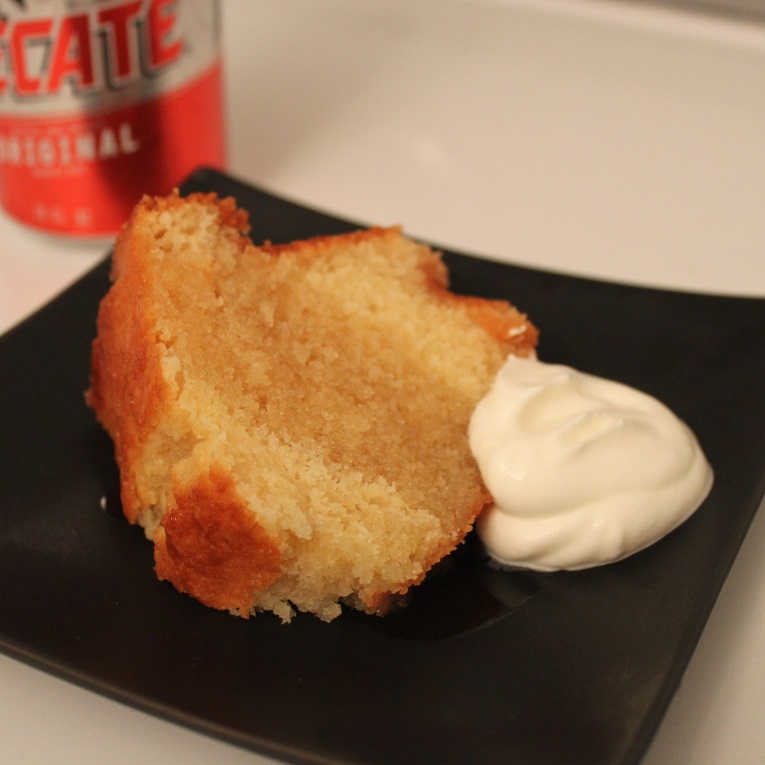
Tecate Bundt Cake


There is a thought by some people that beer is the perfect pairing to every type of food imaginable. I believe this becomes more evident during football season. Today's post does support that theory, for this bundt cake is made with Tecate beer. It is not just in the cake, but there is a Tecate syrup that is drizzled on top.

It resembles a pound cake in texture and taste. After tasting the sweet vanilla flavor there is a subtle flavor chaser of malt that stems from the beer. Delicious with a drizzle of Tecate syrup and whipped cream, after one serving your taste-buds will crave a second piece. The recipe is for a 10 cup bundt pan and I have included a buttercream icing for those that like icing. Also, this recipe lists the brand as Tecate, but I am sure it would work for other beers, but I would not recommend a light beer.

Bring this cake out at Superbowl time, I am sure everyone will be impressed with how you have made use of the beer!

Tecate Bundt Cake
adapted from LA Times

Ingredients/Syrup
3 cups Tecate brand beer
3/4 cup sugar

Ingredients/Cake
1 1/4 tsp vanilla
1/2 cup Tecate brand beer
3/4 cup milk
3 eggs (room temp)
2 1/2 cups flour
2 1/2 tsp baking powder
1/2 tsp salt
3/4 cup or 1 1/2 sticks of butter (room temp)
1 3/4 cup sugar

Ingredients/Tecate Buttercream
1-2 tbs milk
3 tbs Tecate syrup
4 cups powdered sugar
1 cup or 2 sticks of butter (room temp)

The syrup, since it has to be room temperature when used will be made first. Fill a saucepan with the beer and the sugar. Place over medium high heat. Stir constantly and when mixture comes to a boil, set the timer to 15 minutes. Continue to stir as the mixture boils. Once the time goes off, check the amount in the pan, it should be about 3/4 cup. If still too much, continue to boil until reduced to 3/4 cup. Remove from heat and set aside.

For the cake, preheat the oven to 350 degrees. Generously grease the interior of a 10 cup Bundt pan. Dust with flour and tap out excess.

Fill the bowl of a stand mixer with the butter. Beat until smooth and silky, stopping at intervals to scrape down the sides of the bowl. Then add the sugar in 1/4 cup increments, beating to blend after each addition. Once the sugar is incorporated, add one egg and mix for 30 seconds, until combined into batter. Repeat the process with each egg until all 3 have been mixed in.

Pour milk, beer and vanilla into a bowl and stir. Take out another bowl and sift together the flour, salt and baking powder. Add 1/3 of the sifted ingredients to the batter and fold until incorporated. Then pour half the milk mixture into the batter and mix. Repeat the process, ending with the dry ingredients, until everything is blended together.

Lastly, whisk in 5 tbs of the beer syrup. Pour batter into prepared Bundt pan and smooth the top. The pan will be 3/4 full. Place cake in oven and bake for 25 minutes and then rotate. Bake until a tester comes out clean, 20-25 minutes. Let cool in pan 20 minutes, then invert onto baking rack.

If covering in syrup and frosting, drizzle all but 3 tbs of syrup onto cake while still warm. It will drip down sides. If you are not frosting the cake, you can use all of the syrup.

For the frosting, fill a stand mixer with butter and beat until smooth and light. Sift in one cup of powdered sugar and beat on low and then increase the speed to medium. Mix until blended, stopping at intervals to scrape down the sides of the bowl. Repeat until all the powdered sugar is mixed into the butter. Add 3 tbs of syrup and mix into frosting. Then beat in 1 tbs of milk and check for consistency. If too thick, beat in an additional tablespoon. Frost completely cooled cake as desired.

Tips and Notes:
1. If you have had trouble in the past with the release of bundt cakes from the pan, try using breadcrumbs to dust the interior of the pan instead of flour.

2. Do not use butter to grease the pan, it promotes sticking. Use shortening.

3. You can leave the cake as is and save the syrup for serving.

4. The milk may curdle when mixed with the beer, but that is normal.

5. When making the syrup, the beer will foam up as you stir, so be careful it does not foam over the pan.
                                   **LAST YEAR: Blue Corn Zucchini Bread**


Sunday, January 27, 2019

Penuche Coffee Cake


Outside of chocolate fudge, I believe the next favorite flavor of fudge is Penuche. Penuche is basically a brown sugar fudge. There are sometimes add ins like coconut and pecans, which makes this fudge even more irresistible.

This particular recipe for coffee cake incorporates the flavor of penuche as a filling. It also has the particular add in as mentioned above. The filling in the cake is not as thick as fudge, it more resembles the texture of the typical icing you find on a German chocolate cake. The base of the cake is a fluffy yeast bread that just takes a few hours to rise. Outside of this delicious combination, the crowning touches are lots of streusel and a white icing drizzle.

The amount of filling in this cake is more than the norm, which I consider a plus. This insures that you get some crunchy pecans and moist coconut in every bite. That factor is what makes this recipe extra special. The original information is below and there are tips and notes at the end to help your bake be successful.

Penuche Coffee Cake
adapted from this old hen website

Pastry Ingredients:
3/4 cup warm milk
1/4 cup warm water
1 egg (room temp)
2 1/2 tsp yeast
1/3 cup instant mashed potatoes (mixed with 1/3 cup warm water)
1/2 cup sugar
1/4 cup shortening, cut in small cubes
1 tsp salt
3 1/2 cups flour

Penuche Filling Ingredients:
3/4 cup pecans, chopped and toasted
7 oz sweetened coconut
1/2 cup butter
1/4 cup sugar
1 egg (room temp)
1/2 cup heavy whipping cream
1/2 cup light brown sugar
1 tsp vanilla
1 tsp salt

Streusel Ingredients:
2/3 cup powdered sugar, sifted
1 1/2 cups flour
1/2 cup butter
1 egg
pinch of salt

Icing Drizzle Ingredients
2 tbs water
2 cups powdered sugar (sifted)

The bread base is the first component. Start by sprinkling the yeast over the surface of the warm water. Then stir a few times. The mixture will develop a foam on the surface after 10 minutes. At this stage, add mashed potato mixture, egg, shortening, milk, salt and sugar. Whisk together with a fork and use it to mash the shortening on the inside of the bowl so it is the size of peas.

Prepare a 9x13 inch rectangle pan or a 12 inch round pan by buttering the interior. If you have a 12 inch springform pan, that will work also. Set pan aside.

Using a wooden spoon, fold in 1 cup of the flour. When that is thoroughly blended, fold in the second cup and blend, then do the same with the last cup. Dust a flat surface with flour. Remove the ball of dough and knead for 5 minutes, kneading in the remaining 1/2 cup of the flour. Shape into a ball and cover dough lightly and let rise in a warm place until doubled in size. This should take about one hour.

During the rise time, prepare the filling. Place a saucepan over low heat and fill with the butter. Continue to cook until butter is completely melted. In a small bowl, whisk together the cream and the egg. Pour in with the butter. Then add both types of sugar, vanilla and salt. Stir together and switch heat to medium high. Mixture will thicken as it cooks. For the right consistency, cook for about 12-15 minutes, watching and stirring ocassionally. Lastly, stir in pecans and coconut, making sure coconut clumps are broken up. Transfer mixture to a heat proof bowl and place in refrigerator until needed.

After the dough has doubled, dust the flat surface again with flour. Remove dough from bowl and punch down. Roll out to about 1 inch more than the interior of your prepared pan. Then lightly press it into the pan covering the bottom and the sides up to the top edge.

Cover lightly with a towel and let the dough rise in the pan for one hour or until doubled in size.

As it rises, prepare the streusel. Fill a food processor with all the ingredients and pulse until all is combined and mixture is crumbly. Set aside.

Preheat the oven to 350 degrees.After the pan rise time is completed, press down dough in bottom and sides of pan. Empty bowl of filling into the pan. Using a spatula, smooth the filling out evenly,
covering the entire interior bottom and reaching to all corners of the dough. Then evenly sprinkle on the streusel clumps. Place cake pan on a baking sheet and put in preheated oven. Bake until edges of dough are golden, about 35-45 minutes.

Remove pans and place cake pan on a rack to cool completely. Once cool, prepare the icing by whisking together the water and sifted powdered sugar. If the cake was baked in round form, invert onto serving platter by inverting twice. The streusel should be face up. If baked in the 9X13 inch pan, cake can be served from pan. Drizzle or use a squirt bottle to ice the cake. Wait 30 minutes for icing to set.  

Tips and Notes:
1. I used parchment on the 9x13 inch pan so I could pull the cake out of the pan. It got too wet and tore, so it is best to leave it in the pan to serve.

2. The streusel was more dough than crumble, so I added 2/3 cup more flour to get it the right consistency.

3.The cake did not bubble over when baking, so the pan on the bottom was just a precaution.

4.The original recipe listed a egg for the filling ingredients yet instructed to add egg yolks but nowhere did it say to add egg. I used just an egg and it turned out fine.
                            **LAST YEAR: Chocolate Tequila Sundae** 

Sunday, January 20, 2019

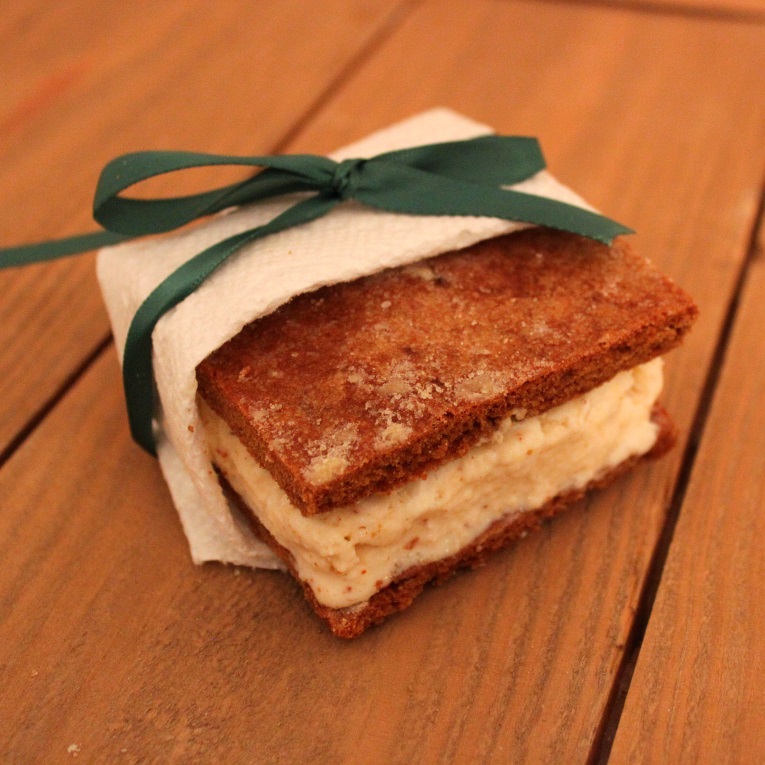
Gingerbread Bars

I like the winter spices, even in the summertime. Gingerbread may conjure up memories with grandma, however, the flavor is classic but very much part of today. It has been too long since I have indulged in some gingerbread.

Today's post is actually a combination of two elements. The first element of the ginger bars are a spicy blend in which has a moist texture that is teetering between a cookie and a cake. They are thin enough to use for sandwich cookies. Instead of a cookie cream filling, I opted to make ice cream sandwiches.

To go along with the spice theme, I chose to fill them with the apple spice ice cream that was made in a previous post.Winter spices in a cookie bar as well as in the ice cream...this combo makes for a wonderful dessert.

Gingerbread Bars
adapted from Bon Appetit Magazine 2009

Ingredients
2 eggs, room temp.
1/4 cup molasses
1/2 cup plus 2 tablespoons of butter (1 1/4 sticks), room temp.
1/4 cup plus 1 tbs and 1 1/2 tsp granulated sugar, divided
3/4 cup dark brown sugar
2 tsp ground ginger
1 tsp ground cinnamon
1/2 tsp baking soda
1/2 tsp salt
1/4 tsp ground cloves
1/4 tsp ground nutmeg
2 cups flour

Prepare a baking sheet (10x15x1 inches) by buttering the interior. Lightly dust with flour and tap out excess. Preheat the oven to 350 degrees.

Measure out the flour into a bowl and take out 2 tablespoons. Reserve the 2 tablespoons of flour for later use. Take the bowl of flour and the six ingredients listed before flour and sift together. Set aside.

Fill the bowl of a stand mixer with the butter, dark brown sugar and only 6 tablespoons of granulated sugar. Cream the ingredients together, running the mixer on medium high speed and stopping at intervals to scrape down the sides of the bowl. Once the mixture is nice and fluffy, add one egg and blend for 30 seconds. Repeat with the second egg. Then stir in the molasses until evenly distributed.

Using a wooden spoon, fold the 1/3 of the sifted ingredients into the egg/butter blend. Repeat with the next 2 additions of the sifted ingredients. Combine until no dry streaks remain.

Empty bowl of batter into prepared baking sheet. Using a spatula, spread and smooth the batter evenly, covering the interior of the pan.

Take the reserved 2 tablespoons of flour and dust over the surface of the batter using a sifter. Then sprinkle a second layer, this time with the remaining sugar (1 tablespoon and 1 1/2 tsp) over the top. Place pan in oven and bake for about 20 minutes or until tester comes out clean.

Remove and cool completely. Cut into desired size. If making ice cream sandwiches, let your ice cream soften a little (like soft serve) before putting between the 2 bars. Press together and smooth the edges with a spatula and freeze.

If you cut them 3 1/2 x 1 3/4,  you will have 24 bars or 12 ice cream sandwiches.

Tips and Notes:
1. The flour on the surface is still noticeable after baking, you can eliminate that step if you do not like the look.

2. Evenly smoothing the batter is key. Too thin and it will bake up as crust, too thick and it will be more cake like.

3. The bars can be made 2 days prior to sandwiching them together

                                          **LAST YEAR:Bear Claws**

Sunday, January 13, 2019

French Lemon Pound Cake


The things I like about pound cakes and bundt cakes are their velvety texture and the stand alone flavor. Most cakes in this category require no icing, even though some are glazed and iced. In regards to this particular recipe, glazing or icing would be a mistake.

For those that crave super lemon flavor, the french have you covered on this one. It takes 9 lemons to make this pound cake. There are lemon segments in the batter. In addition, you give the loaf a few squeezes to soak up a lemon syrup after baking. All that lemon creates a pop of tart flavor with every bite-especially when it includes a lemon segment.

Since this cake has such super flavor, I have discarded all other recipes for lemon pound cake.  This will be my "go to" recipe.

French Lemon Pound Cake
adapted from the New York Times

Ingredients/Cake
3/4 cup of heavy cream
6 eggs
9 lemons
1/2 cup or 1 stick of butter plus 2 tablespoons; melted
1 1/2 cup of sugar
2 3/4 cup of flour
1 1/2 tsp baking powder

Ingredients/Syrup
remaining zest from creating cake
Juice from remaining 6 lemons from creating cake
1 1/2 cups water
1/2 cup confectioners sugar
1 1/2 cups sugar

For the cake, grease a 9x5 inch loaf pan and line interior bottom and 2 long sides with parchment paper. Grease the surface of the parchment paper. Preheat the oven to 350 degrees.

Take 4 of the lemons and grate the outer skin for lemon zest. Set zest aside.

Using 3 of the zested lemons, slice off the tops and bottoms. Then cut away the skin and white pith by standing on end and slicing downward. After that, the membrane and seeds will need to be removed. Use a paring knife and work over a bowl to capture the fruit and juices. Once finished, check the size of the lemon segments and cut any in half that exceed one inch. Set this aside, along with the 4th zested lemon.

Take out a medium size bowl and sift together baking powder and flour. Add the sugar and whisk until evenly distributed into the sifted ingredients. Empty into a bowl of a stand mixer and run mixer on low speed while slowly streaming in heavy cream. Once combined, turn mixer to medium speed and add one egg. Beat for 30 seconds to combine. Repeat the process with each egg. Then mix in the melted butter. Remove bowl from stand mixer.

Add 3/4 of the zest to the batter, along with lemon segments and juices. Mix with spatula or wooden spoon to combine. Set remaining zest aside. Empty batter into prepared loaf pan and smooth the surface. Place in oven and bake for 15 minutes.

Remove and make a slice about 1/2 inch deep lengthwise in the center of the loaf. Return loaf to oven and bake for 30 minutes. Once that baking session is over, reduce the oven temperature to 325. Bake loaf until tester comes out clean, about 40-45 minutes.

While the loaf is baking, create the syrup. Take and juice the remaining 6 lemons (this includes the one that was zested). Whisk in the rest of the zest.

Fill a saucepan with the water and both types of the sugar. Place over medium heat and stir until sugar is dissolved. Remove and whisk in zest/juice blend. Let cool.

After loaf is baked, let cool for 10 minutes and then invert onto a rack. Remove parchment and invert again so loaf is face up. Let cool for 20 more minutes. Prepare a baking sheet by lining with parchment paper and preheat oven to 350 degrees.

Pour cooled syrup into a large dish with ample room for the loaf. Invert loaf into syrup and lightly squeeze. Invert again and repeat the process. Place the loaf face up on the prepared baking sheet and put in oven to bake for 10 minutes. Remove and let cool on rack completely before slicing and serving.

Tips and Notes:
1. Due to the syrup, loaf will somewhat damp on the outer edges. The extra 10 minutes baking after soaking does not dry it out. It may be damp but the syrup does bring a lot of flavor to the loaf.

2. Serving suggestion is to slice, toast and top with fruit compote.

3. After baking the loaf for 15 minutes, it still has a batter consistency. The lengthwise scoring or cut will show after completely baked.

4. Feel free to use Meyer lemons for less acidiity, they are still in season. When you get ready to cut, remember that their skin is thinner than regular lemons.
                                   **LAST YEAR:Salty Sweet Nut Bars** 

Saturday, January 5, 2019

Brandied Eggnog Cookies


I hope everyone had a wonderful holiday. This post is a little late, but I am still reminiscing. I wanted to thank all the Google communities of wonderful bakers and cooks that inspire me. I now am in the job realm of baking, but I still continue with my passion on my own time with this blog.

To start this year, I bring you a recipe for a delectable sandwich cookie. The crunch of a sugar cookie sandwiched together by a brandy nutmeg filling. All the flavor of eggnog in a sweet gem of a treat. Next year try putting these cookies out for Santa-it will definitely insure that you are on his nice list!

Brandied Eggnog Cookies
adapted from the Good Cookie

Ingredients/Cookies
2 cups flour
1/4 tsp grated nutmeg
1/8 tsp salt
1 egg yolk
1 cup or 2 sticks of butter (softened)
1 tsp vanilla extract
1/2 cup sugar

Ingredients/Cream Filling
1 cup plus 2 tbs confectioners' sugar
1 tsp vanilla extract
1 tbs brandy
3 tbs butter (softened)

Ingredients/Topping
Coarse sugar
Grated nutmeg

For the cookies, fill the bowl of a stand mixer with butter and sugar. Cream together until light and fluffy, about 1 minute. In a separate, smaller bowl, whisk together the vanilla,  nutmeg, egg yolk and salt. Pour into the butter/sugar mixture and beat until thoroughly blended.

Remove bowl from stand mixer and fold in the flour, incorporating it into the batter in 1/2 cup intervals. Once combined, place a large piece of plastic wrap on a flat surface. Transfer the dough to the plastic and flatten into a rectangle. Completely cover dough and place in refrigerator for a minimum of 1 hour and maximum of 3 days.

When you are ready to form and bake cookies, lightly sprinkle a flat work surface with flour. Preheat the oven to 350 degrees. Prepare 2 baking sheets by lining with parchment paper.

Remove dough from the refrigerator and divide in half. Place one half back in refrigerator and the other half on the work surface. Dust with flour and roll dough out in a mass about 1/8 of an inch thick. Using a cutter (I used linzer cookie cutter) about 1 1/2 inch square, cut dough into shapes. For the center hole, use a 1/2 inch round piping tip to form the window or hole. This step is to be completed on only half of the cookies, the top cookie will have the window and the bottom cookie will be solid.

Then transfer cut outs to a baking sheet, placing the solid cut outs together on one sheet and the cut outs with the window on another. The baking time for the cut outs with the window takes about one minute less than the others. Sprinkle each cookie with coarse sugar. Place cookies in the oven and bake each sheet separately, for about 9-11 minutes. Cookies should be be a light golden brown on the bottom, the tops should not change color. Once baked, transfer cookies to a wire rack to cool completely.

Repeat the process of rolling the dough and cutting out shapes by re-using the scraps and the second piece of dough in the refrigerator. If the dough gets too sticky in the process, return it to the refrigerator to firm up. Once firm, you can start the rolling and cutting process again.

For the filling, fill a small bowl with the butter and beat until smooth and silky. Add 1/2 a cup of the confectioners's sugar and beat until no dry powder remains. Using another bowl, whisk together the brandy and vanilla extract. Add it to the butter/sugar mixture and blend until evenly distributed. Lastly, mix in the remaining confectioners' sugar until creamy. It should have a frosting consistency.

Spread about 3/4 of a teaspoon of filling onto each solid cookie. Then lightly press the cookie with the window on top. Grate or sprinkle the top with nutmeg.

Tips and Notes:
1. Another method for forming the cookies is to roll the dough on parchment paper, making sure the dough can fit into the baking sheet. Then cut out dough on parchment lined baking sheet and remove the outer scraps, leaving the cut outs on the baking sheet. This keeps you from having to transfer the cut out from the flat surface to the cookie sheet, so it insures the perfect shape. Also, if the dough gets too sticky or soft, it can be chilled quickly in the refrigerator on the baking sheet.

2. Feel free to use the liquor of your choice. I used gingerbread spiced whiskey.

3. The recipe states it makes 30 cookies, I ended up with about 24. My 1/8 of an inch thickness was not consistent, so I had less cookies.

4. The filling of 3/4 of a tsp may not seem much. Due to the strength of the brandy, not much filling is required to get a nice flavor pairing with the cookies.
                                       **LAST YEAR:Cocoa Almond Pound Cake**


Sunday, December 23, 2018

Peanut Butter Cut Out Cookies


Cut out cookies show up for special occasions because they can be decorated to fit the theme. Gingerbread and sugar cookies are tasty and are a good canvas for decorating. They are classics, but in the cut out category there is an array of flavors that are overlooked.

This particular recipe is for a peanut butter cut out cookies. They make for a good stand alone for dunking in milk. Also, they are versatile enough to be "spruced up" for the holidays by sandwiching  together or decorated on top. These cookies are deceiving because they appear to be just a sugar cookie. It is quite a delicious surprise when you bite into them. The tasty flavor of peanut butter in an unusual format of a cut out cookie. This recipe makes about 3 1/2 dozen cookies.

Peanut Butter Cut Outs
adapted from ACH Food Companies

Ingredients
2/3 cup of light corn syrup
1 cup creamy peanut butter
1 cup or 2 sticks of butter
2 eggs
1 cup brown sugar
4 cups of flour (divided use)
1 tsp cinnamon
1 tbs baking powder
1/4 tsp salt

Fill a stand mixer bowl with the butter and peanut butter. Beat mixture until blended and smooth, stopping occasionally to scrape down the sides of the bowl. Then cream the brown sugar into the mix. Add the eggs and the corn syrup and blend together until mixture is smooth. Set aside.

Place a sieve over a medium size bowl and sift together only 2 cups of flour, cinnamon, baking powder and salt. Fold dry mixture into peanut butter/sugar blend. Once fully combined (with no dry streaks) add the remaining 2 cups of flour and mix until a cohesive dough is formed.

Separate dough into 2 equal mounds. Place each on a large piece of plastic wrap and flatten into a disk. Cover completely with wrap and refrigerate both disks of dough for a minimum of 4 hours and a  maximum of overnight.

Once the cookies are ready to be formed, preheat the oven to 325 degrees. Prepare a flat surface by placing a piece of parchment down (the size of your baking sheet) and dusting with flour.

Take out one of the dough disks and place on floured surface. Roll the disk out into a 1/8 inch thickness into a rectangle that will fit on the baking sheet. Once rolled out, place the parchment with the dough on the baking sheet. Cut dough into desired shapes and remove the dough from around the cut outs.

I use this method on some cut out cookies because it eliminates the risk damaging them if you cut out on a flat surface and transfer to a baking sheet. Also, you can quickly chill the dough in the fridge on the baking sheet if it gets too warm when you are forming the cookies.

Place cookies in oven and bake until light brown, this should take about 10 minutes. Remove from oven and transfer cookies to a baking rack to cool completely. Repeat forming the cookies (taking time to re-chill the dough when needed) and baking as stated.

Once cool you can decorate as desired. I piped melted chocolate over the top. Other suggestions are to ice with chocolate and sprinkle with peanuts or sandwich together with chocolate buttercream. 
                                   **TWO YEARS AGO: Chocolate Custard Tart**           


Sunday, December 16, 2018

Pistachio Snowballs


The theme this month is cookies. However, I ran across this wonderful holiday recipe for candy that I could not wait to share. If you are one that has to "stash" away cookies or candies so the kids do not devour them all, you will be glad to know that these are for adults only.

The add ins of these snowy gems are pistachios and white chocolate. I have never experienced these two flavors together except in ice cream. While the combination may be obscure, the taste will have you wondering why. The tie together element is the white chocolate liqueur. I consider that ingredient as a way of gilding the lily, but I would not recommend making these candies without it.

In addition, this recipe is quick and easy, leaving you with more time to prepare for the holidays. It makes about 4 dozen.

Pistachio Snowballs
adapted from Sophisticated Cookies

Ingredients 
1 1/2 cups unsalted pistachios
1/2 cup granulated sugar
1 1/2 cups powdered sugar
1 tsp light corn syrup
1/2 cup white chocolate liqueur
2 cups vanilla wafer cookies
1 cup white chocolate chips

Pour the white chocolate chips and the vanilla wafer cookies into a food processor. Process the mixture until it becomes crumbs. Add the liquids (liqueur and corn syrup) and pulse. Once all the ingredients are blended into a dough, measure out one cup of the powdered sugar. Pour into the dough and run the food processor until the powder is absorbed into the dough.

Add all the pistachios and use the food processor to grind the nuts into smaller bits and blend them into the dough. Using a medium size bowl, whisk together the remaining 1/2 cup of powdered sugar with the granulated sugar.

Form the dough into 1 inch balls. Then roll in the sugar blend. Store for a few days so the flavor can meld.

Tips and Notes:
1. The recipe states you can sub the pistachios with unsalted skinned almonds and 2 tbs grated orange zest for a flavor alteration.

2. If you are unable to find unsalted pistachios, just boil the salted ones for about 10 minutes and then rinse. You can dry the nuts out in the oven-just as you would toast nuts.

3. While these may look like cookies, they have a very sweet candy consistency.

4. These are also great for gift giving in the mail because they hold their shape.
                               **LAST YEAR:Savory Kalacs**

Sunday, December 9, 2018

Chocolate Chip Almond Cookies


While vanilla extract is a primary flavoring, I feel that almond is a very close second. As I review recipes, almond keeps coming up in baked goods. Not just the nut or the flavoring, but almond liqueur is prominent as well. Almond based items are hard to avoid at the grocers-nuts, flavoring,oil, almond liqueur, milk and flour. Time to stock up on this staple ingredient.

These almond cookies are actually a copy cat recipe of Mother's brand cookies and are really easy to make. The brand is still around but this flavor of cookie has been discontinued. Almond shortbread studded with mini chocolate chips- the flavor combination is one of my favorites. Easy and perfect for the cookie jar or holiday table, this cookie recipe is a keeper.

Chocolate Chip Almond Cookies
adapted from Recipelink Website 

Ingredients 
1 egg
2 tsp almond extract
1 tsp vanilla
3/4 cup shortening
1 cup sugar
1 tsp cream of tartar
1/4 tsp salt
1 tsp baking powder
1 tsp baking soda
2 1/4 cup flour
1 cup mini chocolate chips

Preheat oven to 350 degrees. Line 2 baking pans with parchment paper.

Fill a stand mixer with the shortening and sugar. Beat for 3 minutes on medium speed, occasionally scraping down the sides of the bowl with a spatula. Using a small bowl, whisk the egg, vanilla and almond extracts together. Stir both mixtures together to blend. Set aside.

Sift the flour, baking powder, baking soda, cream of tartar and salt together into a large bowl. Then fold the sifted ingredients into the sugar/egg blend until no dry streaks remain. Lastly, fold in the mini chocolate chips until even dispersed throughout the batter.

Measure batter out in heaping teaspoons and drop onto the prepared baking sheet, spacing 1 inch apart. Bake until golden on the edges, about 8-10 minutes. Let cookies cool on baking sheet for about 2 minutes. Then transfer to rack to completely cool.
                                      ***LAST YEAR:Chestnut Pie***

Sunday, December 2, 2018

Pecan Praline Cookies


December is the month of cookie swaps and holiday cookie contests, so my holiday cookie posts this month will fall into place. We all have our favorites, but this month I will steer away from the traditional cookies. I hope the recipes will inspire you to start a new tradition by adding one or more types of these special cookies to the holiday dessert table.

The first are a creation with a favorite candy from the French Quarter in New Orleans-pecan pralines. The praline mixture is created first and then added to the dough just prior to baking. However, unlike regular pralines, there is very little sugar base. There is only enough sugar to hold the pecan pieces together. The end result is an extra nutty cookie, which is a plus. This recipe makes about thirty 2 3/4 inch cookies.

Pecan Praline Cookies
adapted from International Cookie Cookbook

Ingredients/Praline
1 cup pecans (chopped)
1/3 cup granulated sugar

Ingredients/Dough
2 tsp vanilla extract
1/2 cup butter (room temp)
1 egg
1 cup light brown sugar (packed)
2 tbs granulated sugar
1 1/4 tsp baking powder
1/4 tsp salt
1/4 tsp baking soda
1 1/2 cups flour

The praline is the first step to these cookies. Start by preheating the oven to 325 degrees and greasing a heatproof platter (I used a pizza pan). Place the chopped pecans in a pan, spreading evenly. Toast in oven for about 8 minutes, stirring every 2 minutes. Remove pan and set aside.

Fill a saucepan with 2 tbs of water and the sugar. Stir and set over medium high heat. Let come to a boil and stir until sugar is dissolved. Place a cover over the saucepan and let it continue to boil for another few minutes. Uncover and continue to cook for 2 more minutes. The mixture will start to develop a golden color. Watch closely for the ideal amber color (you do not want burnt sugar) and remember that it still continues to cook a little even after removed from the stove. Once syrup is ready, pour in pecans and quickly toss to coat. Transfer to buttered pan and flatten with a heavy saucepan.

After 10 minutes, praline should be cooled. Crack praline and place in a plastic bag. Using a mallet or heavy saucepan, break up the mixture into tiny pieces. Separate out 1/3 of a cup. Set both aside.

Change the oven temperature to 375 degrees. Prepare 2 sheet pans by lining with parchment paper. Fill the bowl of a stand mixer with the butter. Beat until silky, stopping to scrape down the sides of the bowl. Then add both sugars and blend until a fluffy texture is reached. Scrape down the sides of the bowl again and beat in egg and vanilla extract.

Then place a sieve over a large bowl. Fill with flour, baking powder, salt and baking soda. Sift through the sieve.

Add half of the sifted ingredients to the sugar/butter blend. Fold the ingredients together until no dry streaks remain. Then add the rest of the dry ingredients and mix together until completely blended. Pour the larger portion of the pecan praline into the batter. Stir until all praline is evenly distributed throughout the batter.

Form cookies by rolling dough pieces into a 1 inch ball. Take each ball and dip the top into the remaining 1/3 cup of pecan praline. Place each ball about 2 inches apart on prepared baking sheets.

Bake for about 5 minutes. Rotate pans and bake for another 5-6 minutes or until barely golden on the edges. Be careful not to over bake. Over baking will change the texture from slightly chewy to hard and crunchy. Once the cookies are done, place pan on cooling rack. Let cookies cool on pan for about 2 minutes and then transfer to rack to finish cooling.
                                        **LAST YEAR:Samoa Bundt Cake**

Sunday, November 25, 2018

Maple Date Loaf


This is the last post of the holiday quick breads..so the first of a new baking theme will go out for the month of December. This post I feel is sort of vintage. The reason for that is because this recipe has dates in it. For some reason dates, figs and prunes make me think of something a grandmother would eat.

Vintage as it may be, after tasting this I would say grandmother was on to something when it came to using dates in baking. Just the smell of this sweet loaf wafting from the kitchen had me waiting to taste a slice. Maple syrup and dates make for a perfect pair in this loaf cake. In addition, the crunchy oat streusel on top adds just enough sweetness. One slice is right at home alongside a cup of hot tea or coffee. The recipe is for one  9 x 2 3/4" loaf pan or mini foil pans (5 3/4 X 3 1/4).

Maple Date Loaf
adapted from Better Homes and Gardens

Ingredients/Oatmeal Streusel
2 tbs flour
2 tbs butter
2 tbs light brown sugar
2 tbs maple syrup
1/4 cup regular oats

Ingredients/Loaf
1/2 cup water
1/2 cup orange juice
3/4 cup maple syrup
1 egg
1 tbs butter
1 cup chopped/pitted/dried dates
1/2 to 1 tsp orange zest
2 cups flour
1 tsp baking powder
3/4 tsp baking soda
1 tsp salt

For the streusel, start by whisking the oats, brown sugar and flour together.  Add butter and use a pastry cutter to blend. Lastly, stir in the maple syrup. Set aside.

Preheat oven to 350 degrees. Grease the interior of the pan(s).


Fill a medium size bowl with the orange juice, zest and water. Place over medium high heat. Let cook until it comes to a boil. Remove from heat and add butter and dates. Stir until butter is melted and set aside for 5 minutes to plump the dried dates.

In a small bowl, whisk the egg with the maple syrup. Blend mixture into the orange/date liquid.

Sift together flour, baking soda, baking powder and salt. Make a well in the center.  Pour the date blend into the well. Fold dry mixture into the water blend. Once no dry streaks remain, add batter to pans (dividing evenly if using multiple pans).

Sprinkle the top of the loaf with the streusel. Place in oven and bake until teamster comes out clean. Bake time should be about 25 to 30 minutes. Leave in pan(s) for gifting or invert twice after cooling for 20 minutes.
                     
                         **2 YEARS AGO: White Russian Krispy Bars

Sunday, November 18, 2018

Nutmeg Cake


We all have our favorite spices that are used often in baking, however, there are some that rarely come to mind. One of these is nutmeg. While nutmeg is used in holiday baked goods, it usually is only one element of a combination of spices called for in a recipe. This particular recipe focuses on nutmeg being the primary flavor.

Do not let the plain appearance fool you. Moist, light and packed with the special taste of nutmeg, one slice will make you a true fan. A delicious choice if you have not yet experienced nutmeg as singular spice. Also, if you make this, do not omit the rum syrup - it is an important flavor component to the cake.

Nutmeg Cake
Adapted from Warm Bread and Honey Cake

Ingredients/Syrup Topping
1/2 cup sugar
1/4 cup plus 2 tbs water
1/2 tsp lemon juice
2 tbs rum

Ingredients/Cake
1/4 cup milk
2 eggs
1 tsp vanilla
9 tbs butter
1/2 c plus 1 tbs light brown sugar/packed
1/8 tsp salt
1 tsp nutmeg
1/2 tsp baking powder
1 1/4 cup flour

Start by making the sugar syrup. Place sugar, water and lemon juice in a saucepan. Whisk together then heat at medium temperature on stove. As it cooks, let it come to a boil then reduce heat. The sugar will dissolve and the the mixture will come to a simmer. Let simmer for about 5 minutes. Remove from heat and set aside until it reaches room temperature.

As the syrup is cooling, prepare a standard size loaf pan by buttering the interior. Then line the bottom and two sides with parchment and butter the surface. Dust the inside with flour and tap out excess. Preheat oven to 325 degrees.

In a medium size bowl, sift together baking powder, salt, flour and nutmeg. Set aside. Fill a bowl of a stand mixer with butter and beat at medium speed until smooth and silky. Then add sugar and cream ingredients together, beating at medium speed. Stop the mixer and scrape down the sides of the bowl at intervals during the process.

Using a small bowl and a whisk, blend the eggs with the vanilla extract. Add half of this mixture to the sugar/butter blend. Beat at 30 seconds and then add the remainder. Blend together, beating another 30 seconds.

Fold 1/3 of the sifted ingredients into the batter. Then mix in 2 tbs of the milk. Blend in half of the remaining flour mixture. Add the last of the milk, mix and then the remaining flour blend. Once all is thoroughly mixed and batter is smooth, fill the prepared pan.

Bake until tester comes out clean, about 40-45 minutes. Place pan on cooling rack.

The sugar syrup should now be at room temperature. Add the rum and stir until completely distributed in the syrup. Take a skewer and poke holes in the top of the cake, all the way to the bottom of the pan. Then pour the rum syrup over the top. Let the syrup soak in and the cake cool for about 5 minutes in the pan and transfer to wire rack to cool completely.

For the best flavor-wait 24 hours before serving.

                              **LAST YEAR: Favorite Cookie Round Up**

Sunday, November 11, 2018

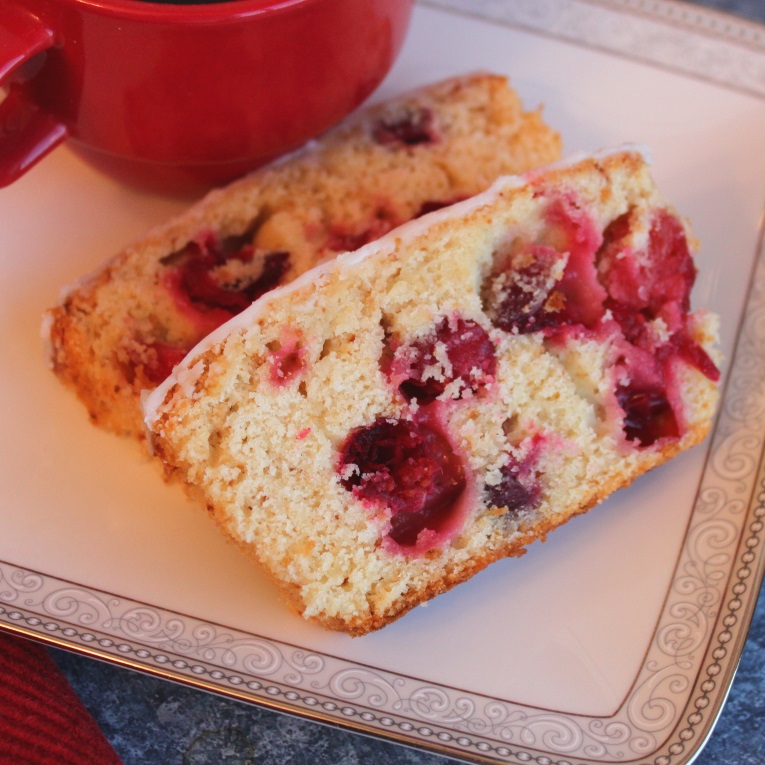
Cranberry Pound Cake


With the season, a lot of bloggers are doing themes for the last few months of the year. For the rest of November, I have decided to focus on holiday quick breads such as muffins, scones and sweet loaf breads. The recipes are fairly easy and great for gifting this season.

As a first one, I decided on this cranberry orange pound cake. It is bursting with cranberries and has the tender crumb of a pound cake. My favorite thing is the pop of tartness that comes with the cranberries combined with the sweetness of the icing. This loaf cake is one of the traditional cranberry items that always seems to show up around the holidays, but entirely too good to be reserved for just that occasion.

Cranberry Pound Cake
adapted from Chef in Training

Ingredients/cake
3 eggs
3/4 cup buttermilk
1/2 tsp vanilla
1 cup butter
2 1/2 cup flour
2 tsp baking powder
1 tsp salt
1 3/4 cup sugar
2 tbs orange zest
2 1/2 cup whole cranberries

Ingredients/Icing
1 tbs milk
1/4 tsp vanilla
1 tbs orange juice
1 tbs orange zest
1 1/2 cup powdered sugar

Preheat oven to 350 degrees. Grease the interior of 2 standard size loaf pans. Dust interior of pans with flour and tap out excess.

Using a large bowl and a sieve, sift together flour, baking powder and salt. Set aside. Then fill a bowl of a standard mixer with orange zest, sugar and butter. Beat on medium speed with mixer fitted with a paddle attachment.

Place one egg and vanilla extract in a small bowl and whisk until blended. Pour into butter/sugar blend and beat until distributed into batter. Add each additional egg, one by one- mixing into batter after each one. Set aside.

Add 1/3 of sifted ingredients to batter and fold until just blended. Add 1/2 the buttermilk measurement and mix until combined. Repeat the process, ending with the last addition of the sifted ingredients. Fold in the cranberries.

Divide the batter in half and add each half to one one of the prepared pans. Smooth the surface of the batter and bake until tester comes out clean. This should be about 55-60 minutes. Place pans on rack and cool about 20 minutes then invert twice onto rack so loaf is facing up.

As the cake cools, prepare the glaze. Sift the powdered sugar into a bowl. Using another small bowl, whisk together orange juice, milk, vanilla and orange zest. Add orange blend to powdered sugar and whisk together. Pour over cooled cake.

Tips and Notes:
1. I used paper loaf pans so the icing was thick on top. Original recipe refers to it being a glaze.

2. Using whole cranberries were not a problem.

                                   **LAST YEAR: Eggnog spice cookies**

Saturday, November 3, 2018

Apple Spice Ice Cream


The hardest thing about being a blogger is trying to keep those kitchen gadgets to a minimum. These gadgets sometimes are not required in order to make certain things. They are convenient and seem to work better than the way things were done in the past. However, if you have the time and do not want to have all the gadgets, sometimes the old way of doing things can have the same delicious results.

This brings me to this post for "no churn" ice cream. It just has to be mixed and sit in the freezer for 6-8 hours. The only effort is getting the apples ready, since they have to be peeled, cored and sliced.In the end you will have an exceptional treat in an ice cold format. Never had apple ice cream? This is a great way to celebrate the winter holiday season. Take advantage of the variety of apples that the grocers has to offer and do not forget about the wonderful seasonal spices (ginger, cinnamon, cardamon, anise and clove).

I have yet to find any other ice cream that equates to the winter holidays as much as this flavorful concoction. This recipe makes 1 quart of ice cream

Apple Spice Ice Cream
adapted from No Churn Ice Cream

Ingredients
1 crushed cinnamon stick
1-2 crushed Cardamon pods
1 whole clove
1 piece star anise
1 tsp grated/peeled fresh ginger
4 cups peeled/cored sliced apples
1 inch wide slice of lemon rind
1/4 cup apple cider vinegar
2 cups heavy cream
1-13 to 14 oz can of sweetened condensed milk
1 cup milk
Pinch of salt

Start by preparing the crushed, peeled, cored and grated items in separate bowls. The thinner the apple slices, the better. They will cook faster. Measure out the rest of the items in other bowls. Now that everything is in place, put the lemon rind, vinegar, spices (including pinch of salt) and apple slices in large saucepan and toss together. Then place over high heat. Stir the mixture as it cooks. After 5 minutes, taste test an apple slice for tenderness. If still raw, repeat process until apples are cooked through.

Place mixture in a blender or food processor and purée. Then push through a fine mesh strainer into a large bowl. Let cool for 15 minutes and stir in both types of milk and salt. Set aside.

Using another bowl, fill with heavy cream. Beat with a mixer fitted with a whisk attachment. Once the soft peak stage has been reached, fold into to the apple mixture. Once evenly distributed, pour batter into a shallow container (one that has a snap on lid is best).

Place a sheet of plastic wrap over the surface of the ice cream. Freeze for 6-8 hours prior to serving.

Tips and notes:

1. In order to swirl caramel, freeze a one inch layer of ice cream then pour caramel over. Repeat the layers. Caramel will mix into ice cream if not frozen.

2. If keeping for weeks, add inverted prior to adding the heavy cream. This will decrease the chance of ice from forming and keep the consistency smooth.

3. This recipe included a suggestion for caramel apple ice cream. In this recipe the spices and lemon rind are omitted. The apples are to be cooked over high heat with 2 tbs of butter with 1/4 cup brown sugar. Reduce the heat and add cider vinegar with 1/4 cup water. Once apples are soft and the liquid has evaporated, follow the recipe as stated from the second paragraph forward. Just reduce the milk to 1/4 and add 1/4 sour cream.
                                      **LAST YEAR: Baklava Cake**

Sunday, October 14, 2018

Macadamia Cherry Cookies


As a blogger, sometimes we come across recipes that do not turn out as expected. However, the disappointment is an excellent motivator to create something better. The recipe here reflects just that type of inspiration.

The original cookies that had my own tweaks of flavor. Despite the changes in flavor, it did not help on the texture of the cookie. The first bake resulted in very greasy and flat cookies. To remedy this problem, I added more flour and chilled the dough. These alterations changed the cookie into something more appealing in flavor and visual enticement.

They are a spin off of the standard macadamia white chocolate cookies. The dough was enhanced by extra flavor layers of chopped dried cherries and butternut extract. These differences made the cookies a little bit more tempting than the usual macadamia cookies. In addition, the red and white combination of ingredients makes them a perfect addition to the Christmas cookie list. This recipe makes 4-5 dozen, depending on the scoop size.

Macadamia Cherry Cookies
by flourtrader 

3 eggs
3/4 cup light brown sugar
3/4 cup sugar 
1 cup or 2 sticks of butter (room temp)
3 1/4 cup flour
1/2 tsp salt
1 tsp baking soda
1 tsp butternut extract
3/4 cup chopped salted macadamia nuts
1 1/4 cup chopped sweetened dried cherries
12 oz chopped white chocolate bar

Preheat oven to 350 degrees. Grease the interior of 2 cookie sheets, or line with parchment paper.

Fill the bowl of a stand mixer with the butter. Beat at medium speed until smooth and silky, stopping at intervals to scrape down the sides of the bowl. Then add both types of sugars and beat again until mixture is light and fluffy. Add one egg and beat for 30 seconds. Scrape down sides of bowl. Repeat those 2 steps with each egg until incorporated. Pour in the extract and beat again until evenly distributed.

Take out a large bowl and cover with a sieve and sift the flour, baking soda and salt into the bowl. Remove the bowl of batter from the stand mixer and fold in the sifted ingredients, using a spatula or wooden spoon. Continue to fold until no more dry streaks remain in the dough.

Add the chopped cherries, white chocolate chunks and chopped macadamias to the mixture. Blend all the ingredients together, distributing the add-ins evenly. Cover the dough and refrigerate for 40 minutes.

After chilling, use a scoop or a generous tablespoon to transfer mounds of dough to the prepared cookie sheet. Space the mounds about 1 inch apart. Bake in the oven until the cookies are a pale matte color with a golden edge, about 10-12 minutes. Let cookies rest on pan a few minutes then transfer to a rack to completely cool.

Tips and Notes:
1. I always use parchment paper to keep my pans in good condition. The parchment had a tendency to slide around when I was trying to get the cookies off, so a greased pan is easier to manage when it comes to removing the cookies. The cookies are a little soft on top when removed from the baking pans, so be careful with that step.
                                    **LAST YEAR: Oatmeal Pumpkin Cookies** 


Sunday, October 7, 2018

Autumn Butternut Brioche Rolls


I cannot stress enough the importance of equipment when creating in the kitchen. We all are aware of the numerous conversion charts on the internet. However, I caution use of these because they are not all identical. Part of this is due to the variables associated with what you are measuring. For instance, if you are converting egg yolks from grams to units, there is a problem because eggs come in different sizes (medium, large, XL and jumbo). All in all, a digital conversion scale is worth investing in and they are not that expensive. With that said, this particular recipe is in grams.

If you are like me, brioche rolls (fluffy, buttery and sweet) are hard to resist. Now- pair those qualities with the extra flavor ingredients of butternut squash, cinnamon, nutmeg and ginger. The end result is nothing short of delicious. The idea of flavored brioche is simply genius and the possibilities are endless.

Before you stroll into the kitchen to make these, be aware that the dough rises overnight in the refrigerator. Most of the time devoted to making this recipe takes place the day prior to baking. The day of bake just requires some time to form the rolls and about 1 hr and 45 min rise time. This recipe makes 2 loaves of rolls using a 9 inch cake pan, creating approximately 17-18 rolls per pan.

Autumn Butternut Brioche Rolls
adapted from Wild Yeast Blog 

Ingredients/Bread dough
226 g butter (softened and cubed)
water (if needed)
100 g whole eggs
60 g egg yolks
480 g butternut squash pulp (cooked, mashed and cooled)
34 g milk
126 g brown sugar
840 g flour
10 g yeast (rapid rise)
10-14 g salt (preference amount)
1/2 tsp cinnamon
1/4 tsp nutmeg
1/2 tsp ginger

Ingredients/Toppings
1 cup chopped roasted pecans (optional)
1 egg

The day prior to baking, fill the bowl of a stand mixer the eggs and egg yolks. Beat on medium speed with a beater blade until blended. Change out the blade for a dough hook and add flour, squash puree, spices, milk, yeast and salt. Set the mixer on low and run for 5 minutes, stopping at intervals to scrape down the sides of the bowl. The ingredients will come together, forming a very heavy dough. If it is still too dry after mixing for 4 minutes, add 1 tsp of water and blend until no more dry streaks remain.

Next, change the mixer speed to medium and add 2 tablespoons of brown sugar. Beat for a few minutes and then repeat until all of the brown sugar has been incorporated into the dough. Run the mixer another 4 minutes and then pull out a tablespoon of dough. Stretch it to see if it forms a thin translucent "windowpane". If not, try beating another few minutes and test again. The "windowpane" is an indicator that the gluten in your dough has fully developed.

Once it reaches the correct consistency, add the butter cubes to the dough, running the mixer at low speed. Continue to beat until all the butter has been blended into the dough, stopping at intervals to scrape down the sides of the bowl interior. The dough should be smooth and elastic at this point.

Form the dough into a large ball. Butter the interior of a bowl that is 1 1/2 times larger than the dough mass. Place the dough in the bowl and cover with plastic wrap. Let the dough rise in a warm place (approx 76 degrees) for one hour. Then place bowl (still covered) in the refrigerator for an overnight rise (8-12 hours).

The next day, prepare two-9 inch round cake pans by greasing the interior and lining the bottom with parchment paper. Remove dough from refrigerator and punch down. Then, using floured hands, separate dough into 36 equal pieces. Take each piece and roll tightly into a circle. Place about 18 dough balls in each prepared pan, making sure they are placed evenly, touching each other but not losing their circular shape. If you cannot fit them all into the pans, place the extras on a baking sheet. The ones on the baking sheet can be spaced however you desire (round circle, spaced apart, one line, etc).

After placing in/on baking pans, whisk the egg in a small bowl, combining the yolk and white. Brush the surface of the rolls with the whisked egg. Cover each set of rolls lightly with a cloth or paper towel and let rise for one hour and 45 minutes. Also, cover the bowl of egg wash and place in refrigerator for later use.

During the last 15 minutes of rise time, preheat the oven to 380 degrees. Remove the egg wash so it comes to room temperature again.

One the rise time is completed, the surface of the rolls are to get another coating of the egg wash. After that, if you prefer, you can sprinkle the pecans evenly on top of the dough rolls.. Place filled pans in the preheated oven and bake for about 25 minutes. At the 25 minute mark, check the rolls for surface color. If the color of the rolls have darkened enough, cover them lightly with foil and place back in oven. Bake for an additional 10-15 minutes, or until light and fluffy. If you have some rolls spaced out on baking sheet or put in individual brioche pans, cut the baking time in half.

Remove pans from the oven and place on rack for 5 minutes and then invert rolls out of pan onto rack and invert again. Let cool completely if storing for later. If serving immediately, let rolls cool until slightly warm to the touch.
                                           **LAST YEAR: Maple Pumpkin Cheesecake**

Sunday, September 23, 2018

Carrot Cupcakes


After creating these cupcakes, I realized the importance of finishing touches on a baked good. These special touches can be just to enhance appearance of items, like using sprinkles. However, in addition to the visual enhancement, a finishing touch should also add more flavor to the dessert.

These cupcakes have walnuts on top of the icing. You may think it is no big deal, but let me clue you in further. The walnuts are chopped and roasted in the oven. Then, while still warm, they are coated in melted butter with a light sprinkling of salt. This creates a wonderful contrast to the fluffy, sweet cream cheese icing. I would not even think of omitting the nuts on top.

Now that I have your taste buds awake concerning the icing and nut topping, let's get into the cake component. The cake contains oil instead of butter, which guarantees they will be moist in texture. Also, the myriad of spices in the batter with the grated carrots equates to the delicious standard that we all crave when it comes to carrot cake. This recipe makes about 2 dozen cupcakes and about 4 cups or more of icing (feel free to cut back on this).

Carrot Cupcakes
adapted from Robicelli's

Ingredients/Cake
1 1/4 cups canola or grapeseed oil
1 tsp vanilla extract
4 eggs, lightly beaten
1/2 tsp ginger
1/2 tsp nutmeg
3/4 tsp cinnamon
1 tsp salt
1 tsp baking powder
1 tsp baking soda
2 1/4 cups flour
1 cup granulated sugar
1 cup packed light brown sugar
2 cups packed shredded/grated carrots
1/2 cup chopped, roasted walnuts
1/2 cup raisins (optional)

Ingredients/Cream Cheese Buttercream
1 batch French buttercream (recipe below) or 1 batch American buttercream but without marscapone cheese ingredient (see this link)
1 tsp vanilla extract
8 oz package cream cheese (cut into cubes)
1/4 tsp guar gum (optional)

Ingredients/French Buttercream
5 egg yolks
1 whole egg
1 lb to 1 1/2 lbs of butter
1 cup water
2 tbs corn syrup
1/8 tsp xanthan gum

Ingredients/Roasted Walnuts
1 1/2 tsp salt
1 cup coarsely chopped walnuts
1 tbs butter

Start by setting up a stand mixer with a paddle attachment. Grease the top edge of each cavity of a cupcake pan. There should be 2 pans prepared with 12 cavities each. Line the cavities with paper liners. Preheat the oven to 350 degrees.

Place a sieve over a large bowl. Fill with flour, nutmeg, salt, cinnamon, ginger, baking soda and baking powder. Sift the ingredients together and set aside.

Fill the bowl of the stand mixer with both sugars and the grated/shredded carrots. Mix on medium low for about 30 seconds and scrape down the sides of the bowl. Then mix for an additional 30 seconds. Continue to run the mixer on the same speed and pour in the vanilla extract and oil. Once combined, remove the bowl from the stand and use a spatula and scrape down the sides and mix, making sure all is blended.

Add the sifted ingredients to the sugar/carrot batter and mix, using a wooden spoon until everything is fully incorporated. Add the eggs and mix again until blended. Lastly, fold in the walnuts and raisins (if using).

Using a scoop, fill each of the paper lined cavities with the batter. They should only be 3/4 of the way full. Place each pan in the oven (on the same or different racks-making sure they are spaced so each pan is to the left or right so they get enough heat). Bake for 10 minutes and then rotate the pans from front to back and left to right. Let bake an additional 10 minutes and check with a tester. When done, the tester will be clean and cupcakes should spring back when lightly touched.

Remove from oven and let rest in pans about 2-3 minutes. Keep the oven on. Then transfer to a rack to completely cool.

To roast the walnuts, line a pan with foil and add the 1 cup of chopped nuts. Spread out evenly onto the pan and place in oven. Roast for about 7-10 minutes. Walnuts will release an aroma once done. Once roasted, make a foil pouch with the foil that you lined the pan with, enclosing all of the nuts. Open up a small hole on top and add the salt. Close up and shake. Open the top again and pour in the melted butter. Close and shake again then set aside.

If you are making the French buttercream, place a saucepan on the stove. Fill with the water, corn syrup, sugar and cream of tartar- you do not need to mix together. Turn the heat up to high and let cook. Once it becomes a liquid, place a candy thermometer in the pan. The mixture will cook up to a boil, but do not stir. It will be ready to use once it reaches a temperature of 235 degrees.

As the liquid cooks, fill the bowl of a stand mixer (fitted with a whisk attachment) with the egg and egg yolks. Turn the mixer to high. This process will change the eggs to a light yellow batter that falls of the whisk in silky ribbons.

While the sugar is cooking and the eggs are being beaten, slice the butter into thin slivers. Take a few moments to still monitor the sugar mixture for correct temperature. Once the sugar reaches the desired temperature, remove the saucepan from the stove. Turn the mixer to medium speed and sprinkle the xanthan gum into the silky egg mixture. Continue to run the mixer and lift the hot saucepan and place the lip or top edge against the edge of the bowl of the stand mixer. Slowly stream in the hot sugar mixture. Keep a steady stream going until the saucepan is completely empty.

Switch the speed of the mixer to high and beat until the outside of mixing bowl is cool to the touch. Once correct temperature is achieved, turn the mixer off and take off whisk and fit with beater blade. Switch on the mixer again and set at high speed. Steadily add butter slices to the batter as the mixer is running. After all the butter is blended, reduce speed to medium high and beat for an additional 20 seconds.

Now you will use this batch (or the American Buttercream) to create the cream cheese frosting. Add the vanilla extract and the cubes of cream cheese to the buttercream. Beat until cream cheese is fully incorporated into batter. Pipe frosting onto batter and sprinkle with walnut pieces.

Tips and notes:
1. Buttercream requires refrigeration and cupcakes are best not refrigerated, so I frosted the cupcakes right before serving.

2. If you have chosen the French buttercream, be aware that it is the most unstable of the 2 types of frosting. This is why the recipe contains stabilizers such as guar gum and xanthan gum.

3. The amount of butter in the French buttercream frosting is a personal preference. I only used 1 lb and it still came out delicious with the correct consistency.

4. When making the French buttercream, there is a risk of the buttercream breaking when mixing with the cream cheese. In order to prevent this, make sure your cream cheese is ice cold and solid-not liquidy. Guar gum is the remedy if it breaks, but it is used in such a small quantity, some of us do not keep it on hand.

5. The xanthan gum is also a binding agent, it is more important than the guar gum. It helps bind eggs with water- which is essential to a good buttercream.

6. If the butter is all sliced before the egg mixture has cooled, refrigerate until ready to use.

7. If you want to buy shredded carrots instead of doing the shredding, be aware that the shredded carrots at the grocer have lost a lot of moisture. You can remedy this by soaking them overnight in a bowl of water. Drain before using.
                                   **LAST YEAR:Almond Frangipane Cookies** 

Sunday, September 16, 2018

Cocoa Snails


The best independent coffeehouses can be found in Europe. Some of the more elite date back to the 1800's and the atmosphere is nothing short of amazing. Going out for a simple cup of coffee turns into an experience that reflects history and elegance. As you walk inside, you will behold red velvet, gold leaf and milk white marble. You can stay on that floor or go one floor up.

Your stay will not just include coffee. To heighten the whole experience, there are delicious pastries that reflect the unique skills of the famous pastry chefs of Paris or Hungary.

I have yet to get to Europe, but visiting some of these coffeehouses are on my bucket list. As you can tell, I have read up on the subject. With that in mind, I bring you this recipe that is a recognized favorite in Budapest, kakaos csiga (cocoa snails).

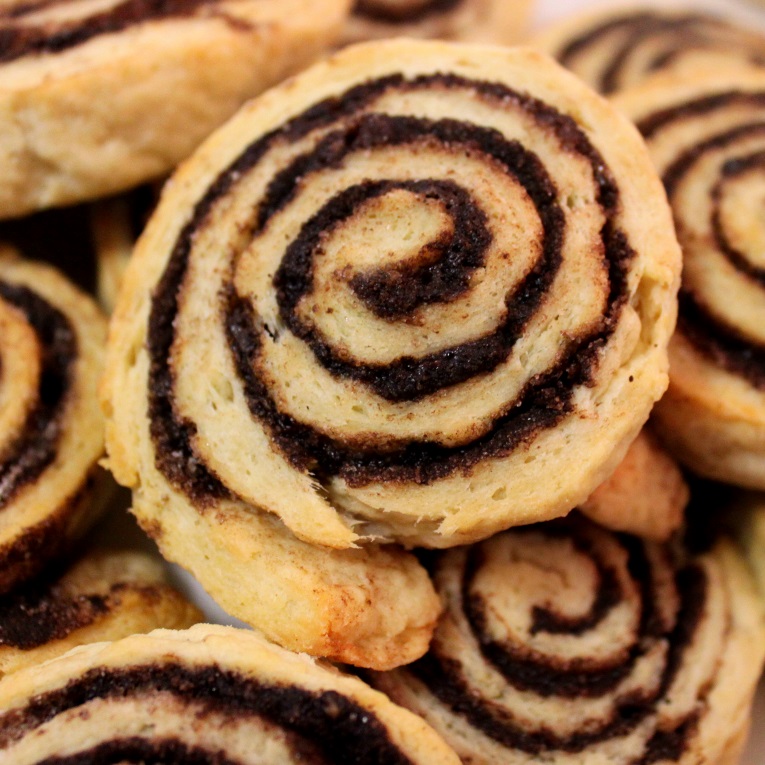
Do not let the picture fool you, these are nothing like cinnamon rolls. The pastries are a cross between yeast dough and puff pastry. The rolls have a crisp outer edge and a soft interior, unlike yeast rolls. These snails have a deep chocolate flavor and do not contain a lot of sugar-typical of most European recipes. Each round is small, ranging from 2 1/2 to 3 inches in diameter, making them look more like a cookie than a pastry. The dough is formed by using the laminated dough process of folding and rolling to create layers, making approximately 2 1/2 dozen snails.

Cocoa Snails
adapted from zserbo.com

Ingredients/Dough
2 tbs sugar
1 egg
1 cup milk
1 cup or 2 sticks butter (or more depending on roll out)
4 cups plus 2 tbs flour
1/4 tsp salt
2 1/2 tsp dry yeast

Ingredients/Filling
4 heaping tbs dutch processed cocoa
7 heaping tbs of sugar
1/4 cup butter

To make the dough, you should start with the butter. The butter, if in the form of sticks, should be sliced vertically and placed in a bowl. Add the 2 tbs of flour and use a pastry cutter to blend the butter with the flour until no more dry streaks remain. Place the lump of butter in between 2 pieces of parchment paper and roll out to a rectangle, approximately 16 x 10 inches. This rectangle is to cover 2/3 of the rolled dough surface. While you prepare the dough, place the butter pad in the refrigerator.

While the butter is chilling, prepare the dough. Heat the milk in the microwave on 15 second intervals, mixing and checking the temperature after each session. Once it registers between 105 to 115 degrees, sprinkle in a pinch of sugar and the yeast. Stir to blend and then set aside for the yeast to react. Once the surface of the mixture becomes foamy, it is ready to incorporate into the flour.

Fill a large bowl with the 4 cups of flour, egg, 2 tbs of sugar, salt and activated yeast. Combine by using a wooden spoon. Once a mass has formed, place on a flat surface dusted with flour. Knead until smooth and elastic. If the dough seems too dry, knead in more milk (one teaspoon at a time) until the proper dough consistency is achieved.

Form the dough into a rectangle, rolling out to approximately 21-24 inches in length by 16-18 inches in width. The longest part of the dough should face towards you, parallel with the length of the counter top. Remove the butter pad from the refrigerator and peel off one layer of the parchment paper. This butter pad is to cover 2/3 of the surface of the dough. Flip the butter rectangle on top of the right side of the dough, with the remaining parchment paper facing up and butter down. Slowly peel the parchment paper off of the butter pad. This should result in 1/3 of the left side of the dough without a buttery surface and the remaining should be covered in butter.

If you have thin places and some does not peel off, take another stick of butter and cut thin vertical slices. Use these slices to spread on dough so the 2/3 section on the right is completely covered. Then fold the left section of dough (the section with no butter) towards the center, covering 1/3 of the buttered section. Then fold the last 1/3 of the buttered section (on the right) over the top of the other, forming a 3 layer stack of dough. It should measure 7-8 inches wide (this side parallel with the counter top) and 16-18 inches in height.

Turn the dough mass 90 degrees. Roll out again to the original size (21-24 by 16-18 inches), placing it lengthwise, parallel with the counter top. Now each side is to be folded in to meet each other. This is called the book method. Then the dough is folded over again at the seam where the two sides meet. Cover in plastic wrap and place on baking sheet and refrigerate for 30 minutes.

After the 30 minutes of chill time, follow the instructions on the rolling and folding for the 1/3 sections and then refrigerate again for 30 minutes. Then take out and roll and fold, using the second, or book, method. Wrap and chill again. Repeat this rolling and folding process a second time for each method. Once the last fold is made, do not refrigerate. Instead let the dough rest for 30 minutes at room temperature.

During the rest period, preheat the oven to 390 degrees. Line 2 baking sheets with parchment paper and set aside.

For the filling, melt the butter in the microwave and take out a pastry brush. Fill a small bowl with the cocoa and sugar and whisk together. Set aside.

After the dough has rested, roll out to a rectangle (same size as originally stated). Dough should be about 1/4 of an inch thick and the length should be parallel to the counter edge. Brush the surface with the melted butter and then evenly sprinkle the cocoa/sugar blend on top. Roll up the dough tightly, forming a round log with swirls of filling, starting with the longest length. Slice the log into 1/2 inch rounds.

Place the rounds on the prepared baking sheets, about an inch apart. Bake in the oven until slightly golden, about 13-15 minutes. Remove and let rest on baking sheet for 3 minutes then transfer to rack to completely cool.

Tips and Notes:
1. Whenever you are making laminated dough, the temperature is crucial. The dough and the butter should have the same pliability. Too much heat in the kitchen will cause the butter to start to melt and if too cold, the butter will crack. During the process you may need to refrigerate or leave at room temperature if you experience any of these issues.

2. If you have butter seeping out through the dough when rolled, use a little flour to patch the area.

3. After the last fold of the dough, dust off the excess flour before rolling into a log.

4. Should you want an even fold of dough, cut the edges to form a straight, sharp edge.

5. Insuring that the butter pad is an even rectangle is the most difficult part. If it is not, some of your rolls will be drier than others and not puff as much. They will still taste good, but will not be a perfect example.
                                  **LAST YEAR:Apricot Sweet Rolls** 

Sunday, September 9, 2018

Pumpkin Chocolate Chip Cookies


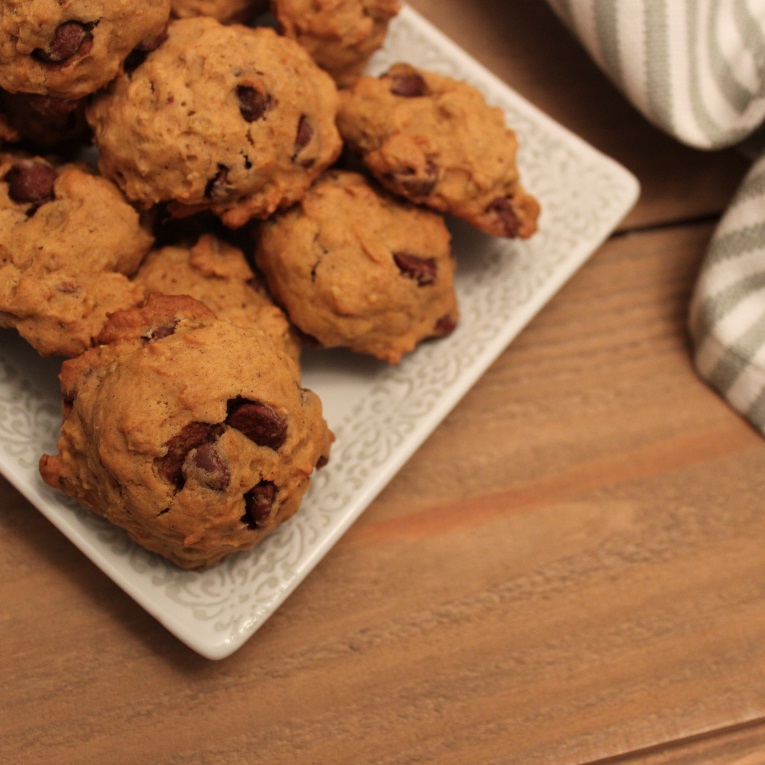
To start the fall season, I have kicked it off with these pumpkin chocolate chip cookies. My first dilemma was that I knew the use of pumpkin would produce a cake-like cookie and that was not exactly the texture I was looking for. The cookies needed to have a little bit more substance than that.

This particular recipe amps up the structure of the cookies by using oats and chocolate chips. Even though the main texture is cake like, the oats support a little bit of chewiness. Also, since the chocolate chips remained unchanged in structure, they support a slight crunch.

Regarding the flavor, it reflects the typical essence of pumpkin and pumpkin spice with a touch of chocolate. These gems are a delicious reminder of all the wonderful flavors that fall represents. I am looking forward to this season.

Pumpkin Chocolate Chip Cookies
adapted from castlehomes.com 

Ingredients
2 eggs (room temp)
1 tsp vanilla extract
2 oz honey whiskey
15 oz pumpkin puree
1 cup butter (room temp)
1 cup sugar
1 cup brown sugar
2 tsp pumpkin pie spice
2 tsp baking soda
4 cups flour
2 cups oats
1 tsp salt (optional)
2 cups milk chocolate chips

Prepare 2 baking sheets by lining the interior with parchment paper. Preheat the oven to 350 degrees.

Place flour, pie spice, baking soda and salt (if using) in a sieve placed over a large bowl. Sift the dry ingredients together into the bowl. Then add the oats and stir until evenly distributed. Set aside.

Fill the bowl of a stand mixer with the butter. Beat on medium high speed, stopping at intervals until butter becomes slick like frosting. Then switch the speed to medium and add the brown sugar. Beat until fully blended into the butter. Add the regular sugar and beat again, the end result will be a light fluffy mixture.

Incorporate each egg, one at a time, into the batter by mixing on medium speed. Remove the bowl from the stand mixer. Using a wooden spoon, stir in the vanilla extract, honey whiskey and pumpkin puree. Once fully mixed, fold in 1/3 of the dry oat/flour blend. Then add half of the remaining blend, mix again and add the last of it, mixing until no dry streaks remain. Fold in the chocolate chips, making sure they are evenly distributed throughout the batter.

Using a small scoop or tablespoon, drop mounds of cookie dough onto the prepared baking sheets, spacing about 1 inch apart. Bake until golden brown on edges. This should take about 15-20 minutes.
Cookies should rest on baking sheet for 2 minutes and then transferred to a cooling rack.

Tips and Notes:
1. Feel free to experiment with the 2 oz liquour addition. Liquour that has fall flavors such as cinnamon, gingerbread and nutmeg would be good paired with the pumpkin.

2. The cookies do not spread much on the pan, so you can bake a lot on each pan.

3. This recipe makes about 8 dozen small cookies, so divide the ingredient quantities if you want to make less.

4. Consider adding 1 cup of chopped toasted pecans and reduce the milk chocolate chips to 1 cup.
                                  **LAST YEAR:Hibiscus Butter Cake**