Foodbuzz
Showing posts with label citrus cake. Show all posts

Sunday, September 2, 2018

Limoncello Bundt Cake


There are many cake recipes out there, but there is one type of cake that stands in a class all of its own - the bundt cake. These type of cakes are more dense and much more flavorful than any layer or sheet cake. Based on that, the bundt cake is prepared and served (quite often) without any icing or glaze.

Recently, our house was gifted with a bottle of a special lemon liqueur that hailed from Italy, Limoncello cream. As we know, all things lemon basically equate to summertime. Since the temperature is starting to wane down, I decided that this Limoncello bundt cake would be the perfect way to say goodbye to the season of long hot days. Summer was fun, but now it is time to bid it farewell until after another spring season.

This bundt cake has 1/4 cup of lemon zest, which gives it a nice clean taste. Also, the flavor of the Limoncello exists as a subtle undertone in every bite. The structure and texture reflects that of the classic standard-moist and with a tight, tender crumb. Now on to the recipe...you will need a 10 cup capacity bundt pan in order to make this cake.

Limoncello Bundt Cake
adapted from Nordicware 

Ingredients/Cake
1/4 cup limoncello
1 1/2 tsp vanilla extract
3/4 cup of buttermilk
4 eggs
2 egg yolks
4 oz melted white chocolate
1/4 cup lemon zest
1 cup butter
2 1/4 cups sugar
1/2 tsp salt
1/2 tsp baking powder
1/2 tsp baking soda
3 cups flour
1/4 cup bread crumbs (or more for dusting pan)
2 tbs vegetable shortening

Ingredients/Glaze
1/4 cup water
1/4 cup sugar
2 tbs Limoncello

Start by preparing the bundt pan for baking. Melt the 2 tablespoons of shortening in the microwave. Then, using a silicon brush, brush the interior of the pan. Make sure all the surfaces are well coated. Empty the bread crumbs into the pan and rotate to coat the interior with the crumbs. Once fully coated, set the pan aside.

Preheat the oven to 325 degrees. Also, prepare a cooling rack by placing over a parchment lined baking sheet.

Fill the bowl of a stand mixer with the 2 1/4 cups of sugar and the butter. Cream together on medium speed, stopping at intervals to scrape down the sides of the bowl. Continue to beat the mixture until the consistency reaches a fluffy stage-which should take about 5 minutes. Add the vanilla extract and combine. After that, each egg and egg yolk is to be blended into the mixture, one at a time. Once all the eggs are incorporated, blend in the lemon zest and white chocolate. Set aside.

Using a small bowl, whisk together the Limoncello and the buttermilk. Take out another bowl (medium size) and place a sieve over the top. Fill the sieve with the flour, baking soda, baking powder and salt. Sift the ingredients together, filling the medium size bowl.

Fold 1/3 of the sifted ingredients into the butter/sugar batter. Then, mix in 1/2 of the buttermilk/Limoncello blend. Repeat the process-beginning and ending with the sifted ingredients. Empty the batter into the prepared pan and smooth the top.

Place filled pan in the oven and bake until tester comes out clean, about 1 hour to 1 hour and 15 minutes. Remove from the oven and set on the prepared cooling rack. Let the cake cool in the pan for about 20 minutes. Then invert the cake pan onto the rack, releasing the cake. The cake should cool for about 15 minutes before drizzling the glaze on top.

For the icing glaze, fill a saucepan with the water and sugar. Place over medium high heat. Stir the mixture until the sugar has dissolved into the water. Remove from heat and whisk in the Limoncello. Drizzle the syrup over the warm cake.

Tips and notes:
1. Make sure your refrigerated ingredients have warmed up to room temperature (yes, this does include the buttermilk)

2. The bread crumb coating creates a nice toasty surface to the cake and insures that it falls out of the pan with no sticking issues. Also, if you are making any type of bundt cake with chocolate, dusting with cocoa is another option. Should you not want a toasty surface for the cake, generously spray the pan with a non stick spray that includes flour.

3. This cake is good sliced and served with cream and fresh fruit.

4. I used a white chocolate bar for the chocolate, but you are welcome to use chips. If using the chips, the melted chocolate can cool some prior to adding to the batter. The bar chocolate, due to its tendency to seize up quickly, should be mixed into the batter as soon as it is melted. 
                                          **2 YEARS AGO: Bali Hai Pie** 

Sunday, March 27, 2016

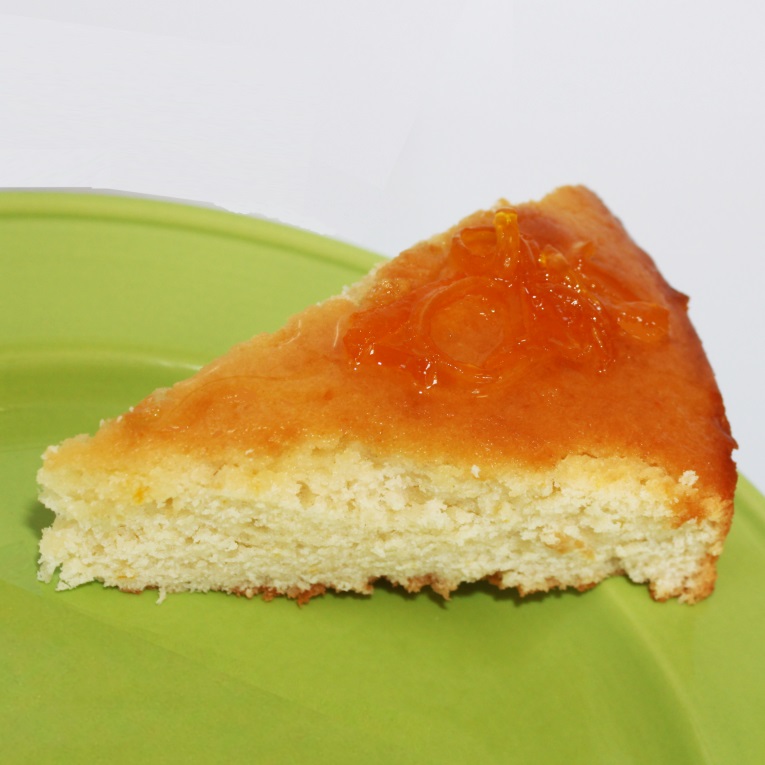
Meyer Lemonade Cake


Citrus fruits really do remind me of spring and summer. I definitely have spring fever! Luckily I have a window at work, since it is getting more difficult to stay inside.

Lime and lemon are my favorite citrus flavors.  However, with the introduction of the Meyer lemons, I am more apt to use these in baking instead of regular lemons.  Since they are the result of a cross between lemons and oranges, the lemon flavor is less acidic but still prevailing. This recipes uses around 6-8 lemons. That worked out well, since Meyer lemons are sold by the bag around here.

This cake is a perfect way to brighten up your day. I changed the recipe a little to make the lemon flavor stronger in the cake. With zest in the batter and a soaker on top with candied lemon peel, it really packs a lot of luscious lemon flavor in every bite.  The cake part is reminiscent of the texture that you find in a pineapple upside down cake.

This recipe makes 2 single layer, 8 inch cakes. One for you and yours and one for the neighbors or co-workers.

Meyer Lemonade Cake
adapted from Serious Eats website

Ingredients/Cake and Soaker
1 cup or 2 sticks of butter
8 oz  plain yogurt
4 eggs
3/4 cup lemon juice
1 tbs lemon zest (takes about 2-3 lemons)
1 tsp vanilla extract
1/4 cup candied lemon peel (takes about 4 or 5 lemons, recipe below)
2 1/2 cups sugar
3 cups flour
1/2 tsp baking powder
1/2 tsp baking soda
1 tsp salt

Ingredients/ Candied Peel
4-5 lemons
1 cup water
2 tbs corn syrup
1 cup sugar

The first step will be making the candied peel. Set up 2 pots full of water and a bowl or sink full of ice water. Also, have a strainer close at hand.

Place both pots of water over high heat. As you wait for the water to boil, take the lemons and peel off strips, using a potato peeler running it down the length of the lemon. Take care to get as little of the pith as possible. After all lemons are peeled, slice the peelings into thin strips.

The next process is to blanch the lemon strips. The blanching will be done three times. Put the strips in the first boiling pot of water and let boil for 20 seconds. Remove pot from heat and pour into a strainer. Then take strainer of strips and submerge in ice bath, just deep enough to cover and cool the strips. Take empty pot and refill with water. Place over high heat and let come to a boil. As it heats up, follow the same blanching process using the boiling water in the second pot and the recently heated water in the first pot. Leave strips in strainer.

For the candy syrup, put sugar, corn syrup and water in a pot over medium high heat. Stir occasionally, letting mixture come to a boil until sugar is dissolved. Add blanched lemon strips.

Correct the temperature of the liquid to a simmer mode, liquid should have occasional bubbles. Cook at this temperature for about 20 minutes. Liquid will be thicker and lemon peels will start to curl. Remove from heat. Let cool completely before using.

For the cake, prepare two 8 inch round cake pans by greasing the interior and lining with parchment paper. Preheat the oven to 350 degrees.

Using a stand mixer, cream together butter and only 2 cups of the sugar until mixture takes on a much lighter texture. This should take about 5 minutes. Add the eggs, one at a time, beating into butter/ sugar blend for about 30 seconds. Repeat the same process with each egg, until all are blended in. Sprinkle in zest and beat for another 30 second. Mix in the vanilla extract. Set aside.

In another bowl, sift together flour, baking powder, baking soda and salt. Mix the sifted ingredients into the batter in 3 stages, alternating with the yogurt. The start of the process as well as the end will be with blending in the dry ingredients.

Lastly, stir in only 1/2 cup of the lemon juice until completely blended into the batter. Divide batter equally and empty into each prepared pan. Place in oven and let bake for about 20 minutes and rotate pans then bake for an additional 20 minutes. Cake is done when it springs back when lightly touched in the center and turns a golden hue or use a toothpick to check if done. Remove pans and place on rack. Let cakes cool in pans 20 minutes.

As cakes cool, make the soaker by filling a pot with the remaining 1/2 cup of sugar and 1/4 cup of juice. Place over medium heat and cook, stirring occasionally. Once the sugar has dissolved , remove from heat. Brush mixture over cooled cakes. Let the cakes remain in the pan for another 10 minutes.
Invert the cakes onto a rack covered in wax paper and quickly invert again so drizzled side is face up. and cakes have cooled for 20 minutes. Then garnish with candied peel.


Tips and Notes:
1. The cakes are very sticky so springform pans would insure the appearance of the surface,removing the cakes prior to soaking is a good idea.

2. The soaker has too much syrup compared to the actual peels, so cutting the liquid ingredients  in half would be better.
HAPPY EASTER!!
                            **LAST YEAR: Havana Cupcakes**


Sunday, January 3, 2016

Orange Liqueur Bundt Cake

I hope everyone had a wonderful holiday! I remember my last New Year's post, stating that I would make it my best year ever. It was full of changes, however all of those changes have enriched my life and I am so thankful. 2016 has me looking forward to less changes, but just as much enjoyment as 2015.

It is cloudy and overcast, but I am lighthearted so I have my own sunshine. The perfect match to my mood is this citrus cake. Infused with orange liqueur and orange zest, it brings something lighter to the holiday table.

The recipe includes a topping with marscapone cream and blackberry compote, but I choose something simpler to drizzle on top. The extra options are not included in the instructions below, but I am sure you can come up with a suitable topping for your taste. I chose to enhance that sweet orange flavor with fresh squeezed juice and chunks of oranges.

I really loved how the juice soaked into the cake a little, giving it a different texture. Also, the juicy orange chunks were a refreshing addition.

Orange Liqueur Bundt Cake
adapted from the Cooking Channel

Ingredients
4 eggs
1 cup of milk
1/2 cup of orange liqueur
1 tbs vanilla extract
1 cup or 2 sticks of butter, softened and cubed
3 cups of flour
2 tsp baking powder
1/2 tsp salt
zest of 1 orange
1 cup sugar
orange juice, peeled orange segments (optional)

Grease the interior of a 12 cup bundt pan and preheat the oven to 350 degrees.

Sift together the flour, baking powder and salt into a medium size bowl. Fill another bowl, smaller in size, with the orange liqueur and milk and stir. Set both bowls aside.

Place the butter chunks into the bowl of a stand mixer and beat until smooth. Then add the sugar and beat for 3 minutes, creating a thick, fluffy mixture. Add the vanilla extract and one egg. Beat until all is evenly combined. Add, one by one, each egg and beat for 30 seconds at a time, scraping down the sides after each egg is beaten into batter.

Continue to beat the mixture, this time on low, and add the flour in 1/2 cup increments. After all the flour is added, change the speed to medium and stream in the milk/liqueur mixture. Once it is all blended and batter is smooth, transfer to prepared bundt pan. Smooth the top and make sure batter is level inside the cake pan.

Place pan in oven on center rack and bake for about 50 minutes and check with tester. The recipe states 1 hour and 10 minutes, but it will vary depending on the color of your pan. After baking, let cool in pan for about 20 minutes and invert onto rack to finish cooling.

Once cool, slice and serve with topping of your choice.

Tips and Notes:
1. Proper baking time is important for the texture of the cake, so keep a watchful eye out.
2. Even though beating the batter works better than folding the dry mixture in, be careful not to over beat.
3. I contemplated mini choc chips in this cake, but I feel it would have over powered the light orange flavor.
                                    **LAST YEAR:Candy Bar Tart**

Friday, June 1, 2012

Ginny Bee Breakfast Cake

Well I am sure one thing that comes to mind is who is Ginny Bee?  Ginny Bee is actually the creation of  John Edwards.  Ginny is a citrus picker, mostly used for oranges.  Before Johns invention, there were other pickers on the market but they were plagued with the problem of  causing tree damage when harvesting. However, in 1976, John came up with a well functioning machine that did not damage any part of the tree or limbs.  With the tree damage not being an issue, his machine was found to be quite handy to have in the groves.  It could pick a 90 lb box of oranges in one minute, which was a real time saver.

This particular recipe is basically an orange breakfast cake.  The cake part has a citrus tang and is moist, having both sour cream and yogurt as ingredients.  Also, there is no skimping on the streusel-it is thick crunchy and has a drizzle of orange glaze.  Since we all seem to enjoy orange juice in the morning, I thought that orange in a breakfast cake would be a good way to start the day.

Ginny Bee Breakfast Cake
by flourtrader

Ingredients/Streusel
1 cup or 2 sticks melted butter
1 tbs plus 1 1/2 tsp cinnamon
1 cup packed dark brown sugar
1/2 cup sugar
1/2 tsp salt
2 1/2 cups flour

Ingredients/Cake
2/3 cup orange yogurt
2/3 cup sour cream
4 tbs orange zest
1 tsp orange extract
2 eggs
3/4 cup or 1 1/2 sticks of butter, room temp
1 1/2 cups sugar
2 1/2 cups flour
1/2 tsp salt
3/4 tsp baking powder
1 tsp baking soda

Ingredients/Drizzle
1 cup powdered sugar
1 tbs orange juice

To make streusel, stir together the cinnamon, both sugars and salt.  Then pour in the melted butter and mix until all is blended.  Then blend in the flour until no dry streaks remain and the mixture clumps together.  Set aside.

For the cake, preheat the oven to 350 degress.  Butter the inside of a 9X13 baking dish.  Then line the bottom and along 2 sides with overhang.  Butter the face up side of the parchment.

Beat the butter in a large bowl until creamy.  Add the sugar, beating again until mixture is completely blended.  Add one egg and blend, running mixer for about 30 seconds.  Repeat the process with the other egg.

Put the sour cream, yogurt, orange zest and orange extract into the batter and blend until all is smooth.  Set aside.

In a different bowl, sift together the flour, salt, baking powder and baking soda. Then, in increments of 1/3, fold the ingredients into the wet batter.  Mix until no dry streaks remain.

Spoon batter into prepared pan and smooth with spatula so bottom of pan is evenly covered.  Take some streusel into your hand and clump together, then sprinkle on batter.  Continue with the clumping and sprinkling until all the batter is covered.

Place in oven and bake for about 1 hour or when tester comes out clean.  Streusel should be a deep brown and be crisp.  Let cool in pan on rack for 30 minutes.

While cooling, you can prepared the drizzle.  Beat the ingredients together until the texture becomes a smooth glaze.  You can add more of either ingredient until you reach the desired consistency.

After the cake has cooled for 30 minutes, drizzle glaze on top.  Cake is tasty served warm as well as cold.  Use parchment handles to lift out of pan and cut into squares.

Tips and Notes:
1. I like streusel and the recipe here probably yields over 4 cups, so if you are not that big on this topping, you can cut down the recipe.
2. You can add nuts to the streusel if you want.
3. The topping is very crumbly, so it will be hard to get a clean cut..
4. Bake time is for a glass pan, other pans may have some variance in the baking time.
                     **LAST YEAR: Jamaican Coin Cookies**