Foodbuzz

Sunday, May 1, 2016

Southern Cotillion Peach Cake


After making this cake, I decided to deem it worthy of "high society" by naming it a Cotillion cake. For those that are unaware of the reference, a Cotillion is a formal party or dance that introduces a young girl into society and an opportunity for the father to introduce their daughter to proper suitors. Prior to the party, the girls have attended finishing school for learning social graces. This is something that came about in the South.

Regarding the cake, I believe that any special ocassion cake would need to be white. White makes for a good base to showcase any additional flavors. While you can add other flavors to chocolate, chocolate is not really subtle, so balancing with other flavors is more difficult.

I know you are wondering what makes this cake so special. Tasting it would truly tell you, but since this is in writing I will need to describe. The cake itself has the flavor of peach. The primary flavor  ingredients are peach cream liqueur, freeze dried fruit powder and a touch of almond. The cake is moist, since it is made with oil instead of butter. Between the cake layers is a filling made with peaches and then a layer of buttercream type icing with almond paste. The buttercream icing on the outside is flavored with the liqueur and fruit powder. The outer sides of the cake has slivered almonds pressed into the icing.

At the end of the post, you will find useful tips when making this cake as well as all other layer cakes. As with any recipe, careful evaluation is needed, because opinions vary on flavor and texture. The one thing I wanted to bring up is the almond paste-type filling. Almond paste does not break down smooth when mixing. This means that the filling imparts a nutty type texture which goes good with the fruit. However, should you want something smoother, you are welcome to use just regular buttercream and flavor it with almond extract.

Southern Cotillion Peach Cake
by flourtrader

Ingredients/Cake
4 eggs
1 cup of vegetable oil
1/4 cup sparkling white wine
3/4 cup peach liqueur
1 tsp almond extract
1/2 tsp salt
2 tbs peach fruit powder
2 1/4 tsp baking powder
2 1/2 cups flour 
2 cups sugar

Ingredients/2 kinds of filling
1/3 cup brown sugar
1 tsp lemon juice
3 cups peeled diced peaches (fresh or thawed & drained frozen)
2 tsp cornstarch
2 tsp water
1/4 cup confectioners sugar
1/2 cup butter
6-7 oz almond paste
1/2 tsp salt
1/4 cup peach liqueur
2 tsp fruit powder

Ingredients/Icing
3 or more cups of buttercream icing
2 tbs peach liqueur
1 tbs fruit powder
1 1/2-2 cups slivered almonds (if desired)

Prepare two 9 inch cake pans by greasing the interior with butter and then lining the bottom with parchment paper. Grease the face up side of the parchment paper and then dust the interior of the pans with flour. Preheat the oven to 350 degrees.

The peach filling will need to be made first, since it has to chill before use. Fill a small saucepan with brown sugar, 1 1/2 cups of diced peaches and lemon juice. Place saucepan over medium high heat and stir together. Let mixture come to a boil, then reduce heat. Simmer for about 10 minutes, stirring every so often. Remove from heat and let cool for 10 minutes.

Pour the filling into a blender and puree. Fill the same saucepan with the puree and add the remining fruit. Place over heat and let simmer again for about 5 minutes. In a small bowl, combine cornstarch and water. Then pour into the peach mixture. Let cook on low, stirring until thickened.  Pour into a heat proof bowl and place in fridge to chill. 

Now it is time to make the cake layers. Fill the bowl of a stand mixer with the eggs and sugar. Beat until well blended. Remove bowl from mixer and add the oil, champagne, peach liqueur and almond extract and stir together. In another bowl, sift together the flour, fruit powder, salt and baking powder. Fold the sifted ingredients into the liquid. Then place the bowl back into the stand mixer and beat at low speed until no lumps remain, about 1 minute.

Pour batter evenly into the two pans. Bake until the top is golden or a tester comes out clean. This should take about 35-40 minutes. Let cakes cool in pans on a rack for about 10 minutes. Invert and let cool another 10 minutes and remove parchment paper.

For the nutty filling, grate the almond paste into a bowl using a cheese grater and set aside. Then fill the bowl of a stand mixer with confectioners sugar and butter. Beat until smooth, about 2-3 minutes. Add the grated almond paste and salt. Beat on low for 30 seconds then on medium high for about 2 minutes. Scrape down the sides and beat for 1 minute more. Chill until ready to use. Take out a small bowl and then mix the fruit powder with the peach liqueur and set aside.

For the icing, mix together fruit powder and liquer in a small bowl. Then make your standard butter cream icing. Then pour peach flavor mixture into icing and beat until evenly distributed. Add additional confectioners sugar to reach desired thickness. Chill until ready to use.

Once the cake layers are completely cool, they are ready to be assembled into a delicious cake. Choose which of the layers you will be using for the bottom. Brush the top surface of the bottom layer with 1/2 of the fruit powder/liqueur blend. Then do the same on the other layer, this time on the bottom side of the top layer. Let mixture soak in for about 10 minutes. Place one layer in the center of a cake board or cake plate.

Take out the chilled peach filling and smooth it over the top surface of the cake, being careful to leave a small border around the edge. Then carefully smooth the nutty filling over the peach filling. Stack the top layer on top. Cover with plastic wrap and chill for about 1 hour.

Once chilling time is over, remove cake and frost as desired. If desired, press slivered almonds into sides of cake by the handful.

Tips and Notes:

1. Soaking a top cake layer on the bottom side instead of top insures that the icing on the top will be easy to spread. If your cake is wet on top, it makes for a slippery layer and is very difficult to ice.

2. Always measure your batter to insure even layers. "Eyeballing" it lends itself to uneven cake layers.

3. Invest in cake strips to go around your pans when baking so they will bake evenly and not be domed on top.

4. Fruit powder can be hard to find. However, I found packaged freeze dried slices of peaches that were called "fruit crisps." They are perfect for grinding into powder. Do not make the mistake of buying just dried fruit-the consistency is too gummy.

5. Chilling the two layers together with the filling helps prior to icing to stabilize the layers.This is good to do with any cake that has a filling different from thick buttercream.

6. This recipe was made with fresh Florida peaches. It has not been tested with frozen peaches, which may have excess water so more of the cornstarch/water mixture may be needed. You may need to experiment a bit when using frozen peaches.
                                    **LAST YEAR:Raspberry Picnic Pie**

Sunday, April 24, 2016

Hawaiian Breakfast Rolls


This is a great spin off recipe from the original cinnamon rolls.  Instead of cinnamon and pecans or raisins, these rolls have a delicious filling of coconut and ground macadamia nuts rolled up into a sweet dough. The extra zing is the icing on top that can be flavored with coconut or pineapple extract.

The alterations I did on this recipe was to use pineapple coconut juice in the dough instead of milk. Also, I brushed it on the dough prior to layering the filling. The end result was that it added more of a tropical flavor to the filling, but did little to flavor the actual dough. Also, I found that the filling develops more flavor with time, so these rolls were better the day after baked. I used an unsweetened organic juice, so using something like "Coco Lopez" may offer more strength in the flavor category.

These do look like they take a lot of time, but the looks are deceiving. The two "time consumers" are grinding the nuts and the rise time. There is only 1 rise time (1- 1/12 hrs) and no kneading of the dough. I ground my nuts in a blender and they turned fine but not into nut butter (see sprinkled nuts on top of the rolls above). This recipe makes about 1 dz rolls.

Hawaiian Breakfast Rolls
adapted from Fleischmann's Yeast

Ingredients/Dough Roll
1/4 cup shortening
1 cup scalded milk (cooled to lukewarm) or lukewarm coconut/pineapple juice
1 egg
1/4 cup lukewarm water
1 tsp salt
3 1/2 cups flour
1/4 cup sugar
1 package yeast

Ingredients/Filling
zest of 1 orange
2/3 cup sugar
1 tsp cinnamon
2/3 cup flaked coconut
2/3 cup finely chopped macadamia nuts
2 tbs melted butter
2 tbs coconut pineapple juice (optional)

Ingredients/Icing
2 tsp honey
2 tbs softened butter
3 tbs milk or juice
1 tsp coconut or pineapple extract
2 cups powdered sugar
1/4 cup ground macadamia nuts (optional)
pinch of salt

Start on the dough by sprinkling yeast into the bowl of warm water. Then fill the bowl of a stand mixer with the sugar, salt, juice or milk and shortening. Beat on low for about 15 seconds. Stir the bowl of yeast and then pour into the sugar/shortening mixture. Add the egg and 1/2 cup of flour.  Beat on low again until blended. Remove the bowl from the stand mixer. Using a wooden spoon, fold in the flour in half cup increments until all is incorporated into the dough.

Grease the interior of a small bowl. Form the dough into a ball and place it in the bowl. Lightly cover and let rise in a warm place until doubled in size. This should take 1-1 1/2 hours if you are using regular yeast (rapid rise would naturally be faster).

While the dough is rising, you will make the filling. Measure out the juice and melt the butter. Set aside. Then whisk together all the other filling ingredients.

After the dough has risen, prepare one 11.5 x 14 inch pan by greasing the interior. Also, preheat the oven to 350 degrees. Then dust a flat surface lightly with flour. Roll out the dough onto the flat surface into a large rectangle, measuring 11x14 inches.

Brush the surface of the dough with the pineapple coconut juice (optional). Then brush on the melted butter. Sprinkle all of the filling evenly on top of the dough and press down lightly to adhere. Starting from one of the longest sides, roll the dough tightly and evenly in a jelly roll fashion. Pinch seam together and flatten. Fold each end under and pinch/flatten the seams.

Using a serrated knife, cut jelly roll into 12 even slices and place inside prepared baking pan.  Put pan in the oven and bake until golden brown and toasty on top, about 20-30 minutes. Remove and set pan on rack to cool.

While rolls are baking, prepare the icing. Add milk or juice, honey, softened butter and extract to small bowl. Beat until the butter is broken up. Sift in 1/2 cup of powdered sugar and beat again until smooth. Continue with the process until all powdered sugar is incorporated into the icing.

Once rolls cool to lukewarm, spread the icing on top of each, smoothing out. Then sprinkle with ground macadamia nuts.

Tips and Notes:

1. Make sure you give the filling a chance to soak up the juice and butter that was brushed on the dough. You do not want a lot of liquid flowing out when cooking and too much liquid keeps the dough from rolling tightly.

2. Instead of the sprinkle of nuts on the top,try mixing drained pineapple chunks and/or ground nuts into the icing.
                                   **LAST YEAR:Charlevoix Cookies**

Sunday, April 17, 2016

Banana French Toast Muffins


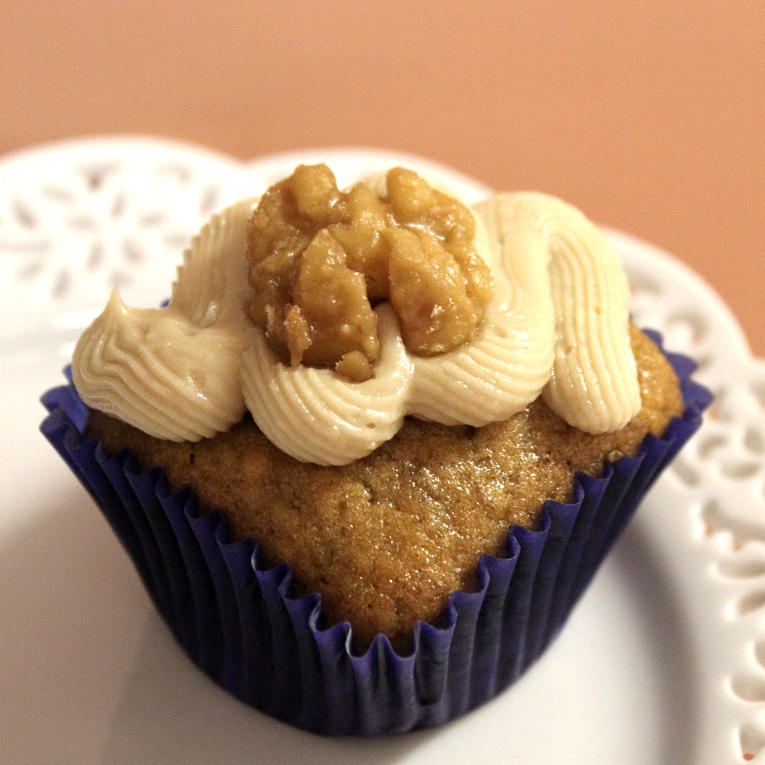
Let's face it, banana-nut anything is always a welcome treat. However, it is very difficult to achieve a cake like quality when using them in baking. That is why I refer to these as muffins instead of cupcakes. They are not as dense as banana bread, but they do not have the lightness of cupcakes either.

Is this just a lighter banana bread in muffin form? In some ways yes and some ways no. Included in the muffin is chunks of candied walnuts. Like French toast, the maple flavor is on top. Swirled with a mixture of maple flavored cream cheese frosting, the flavor pairing of these muffins is quite tasty. Biting into one of these treats is just a great way to start the day or perk you up in the afternoon.

Also, I know that candied nuts can be quite expensive. In this recipe is a very simple and easy way to make them. If you are not into the whole muffin thing, the sweet nuts make a great snack-so read on...

This recipe makes about 2 dz muffins.

Banana French Toast Muffins
adapted from Wilton

Ingredients/Muffins
1 3/4 cup mashed bananas
3/4 cup sour cream
2 tbs maple syrup
3 eggs
1/2 cup or 1 stick of butter (cut into 1/4 inch cubes)
2 3/4 cup of flour
1 1/2 tsp baking soda
1/4 tsp salt
1 cup sugar
3/4 cup packed light brown sugar
1 cup chopped walnuts

Ingredients/Topping
1/4 tsp maple extract
3 cups confectioners sugar
8 oz package of cream cheese (room temp)
4 oz or 1 stick of butter
24 whole walnuts
1/4 cup of maple syrup

To start, you will make 2 batches of the candied nuts. Pour the chopped nuts into a saucepan set over low heat. Let the nuts cook until toasty, stirring at random intervals. After about 5 minutes, the nuts will be done. Pour in the 2 tbs of maple syrup and mix with the nuts. As the syrup cooks it becomes more solid, looking somewhat like praline candy. Once the liquid syrup becomes solid, remove from heat and transfer coated nuts to a bowl. Set bowl aside.

For the whole nuts, lay a piece of parchment paper on a flat surface. Follow the same coating process as noted above, this time using 1/4 cup of maple syrup. Due to the higher amount of syrup, the cook time will take longer. Once coated and solid, remove each walnut from the pan and lay on parchment paper, spacing apart.

Preheat the oven to 350 degrees and fill the cavities of a muffin tin with paper liners.

Prepare the batter by filling the bowl of a stand mixer with both types of sugar and drop in butter cubes. Cream together with the paddle attachment, beating for about 2 minutes and stopping at intervals to scrape down the sides of the bowl. 

Pour in the vanilla extract and add one egg. Mix together for about 30 seconds, with mixer on medium speed. Add each additional egg, blending after each addition. Then pour in the mashed bananas and mix on medium until just incorporated into batter. Remove bowl from mixer.

In a separate bowl, sift together the flour, baking soda and salt. Fold in 1/3 of the sifted ingredients into the banana batter, using a wooden spoon. Add 1/2 of the sour cream, then stir to blend.  Repeat the process, ending with the last 1/3 of the dry ingredients. Then mix in the candied chopped walnuts.

Using a spoon or a scoop, fill the cavities of the prepared muffin tin with the batter. Fill approximately 2/3 full.

Put pans in oven and bake until tester comes out clean. Bake time is about 20-25 minutes, so rotate pans at the halfway point. Remove pans and let rest about 2 minutes. Then transfer to rack to finish cooling.

For the frosting/icing, start by beating the cream cheese with the butter until it is silky and smooth. Then beat in the maple extract until distributed throughout the frosting. Sift in 1 cup of confectioner's sugar and beat into the cream cheese/butter mixture. Repeat the process until all confectioner's sugar is blended in.

Once muffins have cooled, ice with frosting as desired and top with candied walnut.

Tips and Notes:

1. This frosting recipe had an error which I corrected above. It did not have butter listed as an ingredient but listed 2-8 oz packages of cream cheese. I followed the recipe, resulting in a quite tangy frosting. Cream cheese frosting I have seen with an equal ratio of butter to cream cheese and 1/2 the amount of butter to cream cheese. I would chose the ratio of 1/2 to one, but either way you only need one 8 oz package of cream cheese.

2. A note on the cute squares: I used a heavy duty, non stick square cavity baking pan. After researching, I read that the square liners have a tendency to fold into the muffins when baked. However, the round liners expand to fit the square. So, if you use the square cavity pan, skip buying the square liners.

3. The candied nut coating can be as thin or thick as you like. I much preferred the thicker, so you may want to use more maple syrup in the pan when using the chopped nuts. Keep in mind that with more syrup, the nuts have a tendency to clump together.

4. How ripe the bananas you use is personal preference. The more ripe the banana, the stronger the flavor. Also, be sure to use a fork and mash the bananas. This method gives the muffins a more pop of banana flavor than adding pureed bananas.
                                   **TWO YEARS AGO: Black Walnut Madeira Cake 

Sunday, April 10, 2016

Citrus Ginger Cookies


At this time, I find myself in a foodie dilemma. I am still drawn to the winter/fall type of recipes. I realize that there is less appeal when things are made out of season, so I should be focusing on the spring and summer recipes.

These particular "S" shaped cookies have helped out the situation. One type of dough is flavored with lemon and orange zest, which equates to tastes of the spring/summer. The other dough is a myriad of spices and some molasses, flavors of fall and winter.

The texture of the cookie reminds me of spritz, except they are not as crisp. The wonderful mix of the complimentary flavors is memorable and unique. As you bite into one of these, the heavy spices strike your taste buds only to have a chaser of citrus to tone it down. This delicious combo rolled together in a cookie makes them perfect for coffee or tea. In addition, they are pleasing to the eye, which makes a lot of people reach for them when served.

This recipe makes about 3-3 1/2 dz cookies.

Citrus Ginger Cookies
adapted from Gold Medal Cookie Contest 

Ingredients
1/3 cup milk
2 egg yolks (beaten together)
1/4 cup molasses
2 tsp vanilla extract 
1 cup or 2 sticks of butter, room temp
1 tsp orange zest
1 tsp lemon zest
2 tsp ground ginger
1 1/2 tsp cinnamon
1 tsp ground cloves
1/2 tsp allspice
2 pinches of nutmeg
2 pinches of cayenne
1 cup sugar
3 cups flour and 2 tbs flour (reserved separate)
1 tsp baking powder
1 tsp salt

Place butter inside the bowl of a stand mixer and beat until creamy, about 2 minutes. Add the sugar and beat again another 2 minutes or until mixture is light and fluffy. Add egg yolks and milk. Beat until mixture is thoroughly combined, it will result in a curdled-looking batter.

Take out another bowl and sift together 3 cups of flour, baking powder and salt. Add the sifted mixture in 1/2 cup increments to the butter/sugar batter, beating on low after each addition. Once the sifted ingredients are incorporated into the batter, divide batter in half. Each half should be about 2 cups each.

Remove one half of the dough from the mixing bowl and set aside. Add both types of zest and vanilla extract to the remaining dough in the mixing bowl. Blend on medium speed for about 1 minute to distribute the additions throughout the dough. Shape into 2 even sized balls and cover dough with plastic wrap and set aside.

Clean the mixing bowl and then place the other half of the plain dough inside. Add remaining ingredients (spices, molasses and 2 tbs flour) and mix on low until the add-ins are evenly distributed into the dough. Shape the dough into 2 balls of the same size (like the other) and cover with plastic wrap. Place all 4 of the wrapped dough balls on a plate and put in refrigerator to chill for 30 minutes.

Prepare a flat surface by covering with parchment paper. After chilling time is complete, remove one ball of the citrus dough. Place it on the parchment paper and cover with another piece of parchment. Roll dough out to form a a 9x6 rectangle. Do the same with one ball of the spice dough. Lift top piece of parchment off of both rectangles and stack one on top of the other, so all edges of the dough are flush with each other. Press or roll lightly to adhere the layers together.

Place the dough so the narrow ends are at the top and bottom and long edges left to right on the flat surface. Then, form part of a roll by using the parchment paper to help. Roll from the narrow edge over the top of the rest of the dough, stopping at the halfway point. Carefully flip the dough over, with the unrolled narrow edge at the bottom. Again, roll from the narrow edge over the top of the dough and stop, meeting at the same point as the rolled under portion of the dough (just on the backside). The end result will be a spiral log that is "S" shaped. Cover with parchment and place in refrigerator.  Repeat the same process with the remaining 2 rounds of dough.

Let both logs of dough chill for a minimum of 1 hour. 15 minutes prior to completing the dough chilling, preheat the oven to 350 degrees and line 2 baking sheets with parchment paper.

At the time the dough has chilled for 1 hour and the oven is preheated, remove one batch/ one log from the refrigerator. Slice the log into 1/4 inch-thick pieces and place each piece on prepared baking sheet. There are about 16-18 slices per log and each piece should be spaced about 1-1/2 inches apart on the baking sheet.

Place in oven and bake 8-12 minutes or until the bottom of the cookies have a light, golden hue. Transfer to rack to cool. Repeat the same process of slicing and baking with the remaining dough log.

Tips and Notes:

1. The spices were distributed evenly in the dough. However, the citrus zest may distribute better if the mixture is divided prior to adding the sifted ingredients. It is more liquid at that time and it keeps you from over-working the dough. Also, fresh zest has a tendency to cling together.

2. You may use a little flour in order to roll out the dough, but dampen the surface of the dough before you stack the other layer on top. A damp surface will keep the layers of dough from splitting when baking.
                                   **LAST YEAR: Chocolate Banana Muffins**

Sunday, April 3, 2016

Sawdust Pie


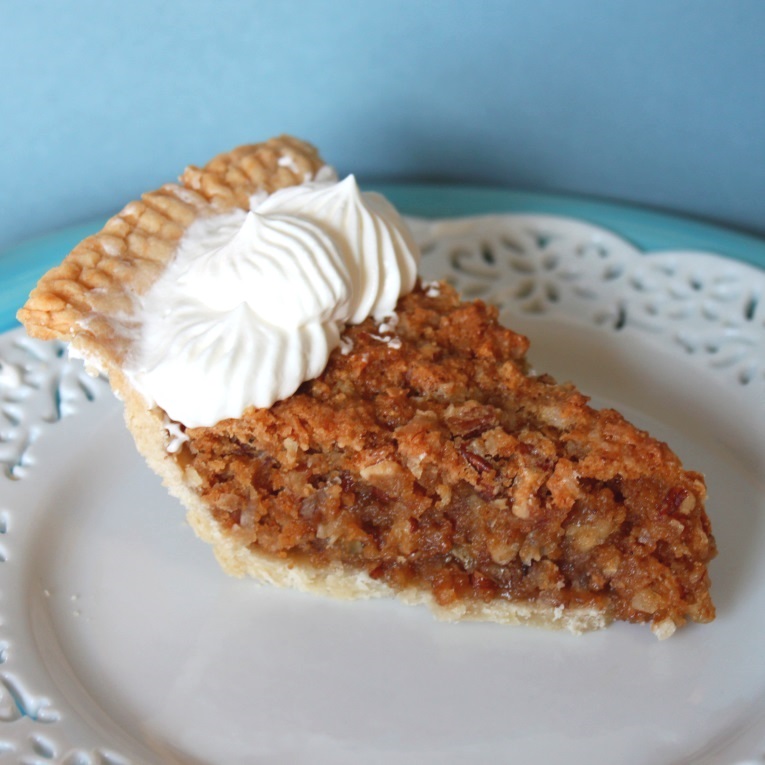
I have to admit, the name of this pie is not very appealing. I guess it got its name from the graham cracker crumbs used as an ingredient. The other theory is that someone wanted to keep the pie for themselves, hoping that the name would keep people from eating it!

This pie is very simple to make and has only basic ingredients, so I am surprised that it is unfamiliar to most people. The filling is held together with a blend of graham cracker crumbs and egg whites. For flavor, the recipe includes sweetened coconut and toasted pecans. It actually belongs in its own pie category because of the unique chewy texture.

Unlike most pies, the thick filling enables the pie to be shipped without falling apart. To ship, bake the pie in a disposable aluminum pan. After it has baked and cooled, slice the pie the night before and wrap in foil. Freeze until next day and then pack in a box, making sure it is well cushioned. Then you can ship to any college student or your favorite someone with a sweet tooth.

Sawdust Pie
adapted from Pie, 300 Tried and True Recipes

Ingredients
1 refrigerated pie crust (your preferred single crust recipe)
1 1/2 cups sweetened, flaked coconut
1 cup sugar
1/2 cup packed brown sugar
7 egg whites
1 1/2 cups toasted,chopped pecans
1 1/2 cups graham cracker crumbs

After you have made the pie dough, shape into a flat disc. Cover with plastic wrap and refrigerate for a minimum of an hour and up to overnight.

Once the chilling time is complete, prepare a flat surface by dusting with flour. Remove the dough disc from the fridge and unwrap. Roll out on the prepared surface, forming a 12 inch inch circle. Then curl the flattened dough loosely around a rolling pin and unroll over a 9 inch standard pie pan. Press and shape the dough so it is even and flush with the interior of the pan. Tuck top edges under and form the edge as desired (scalloped, fork pressed..etc). Then place in freezer for about 15 minutes.

Preheat the oven to 350 degrees.

Fill a large bowl with egg whites and both sugars and stir, making sure all is evenly combined. Add the rest of the ingredients. Mix until batter comes together, with a good distribution of pecans and coconut.

Empty the bowl of pie filling in the chilled crust. Smooth with a spatula until even. Place pie in oven and bake for 25 minutes. Rotate the pie, moving front to back. Bake for an additional 10-15 minutes or until crust is golden.

Let cool on a wire rack. It is good served warm or at room temperature. Now you get the real meaning of "easy as pie!"

Tips and Notes:

1. For an extra zing of flavor, there are many ways to top this pie prior to serving. Some of the suggestions are: drizzled melted dark chocolate, whipped cream and sliced bananas, ice cream and caramel...and the list goes on..

2. Take caution when blending the filling. The more you mix, the stiffer it becomes. The intention is to have a spreadable filling.

3. There is a recipe variation that uses no brown sugar and straight white sugar. I feel that the use of brown sugar creates a more golden hue to the filling when baked. Also, brown sugar is a standard flavor pairing with pecans.
                                   **LAST YEAR: Honey Bunny Crunch Frozen Custard** 

Sunday, March 27, 2016

Meyer Lemonade Cake


Citrus fruits really do remind me of spring and summer. I definitely have spring fever! Luckily I have a window at work, since it is getting more difficult to stay inside.

Lime and lemon are my favorite citrus flavors.  However, with the introduction of the Meyer lemons, I am more apt to use these in baking instead of regular lemons.  Since they are the result of a cross between lemons and oranges, the lemon flavor is less acidic but still prevailing. This recipes uses around 6-8 lemons. That worked out well, since Meyer lemons are sold by the bag around here.

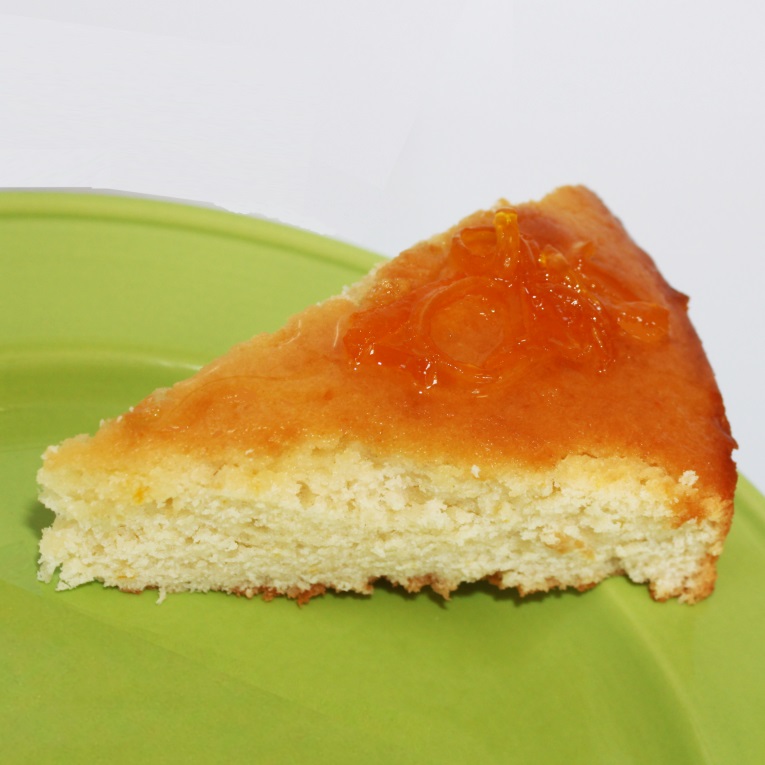
This cake is a perfect way to brighten up your day. I changed the recipe a little to make the lemon flavor stronger in the cake. With zest in the batter and a soaker on top with candied lemon peel, it really packs a lot of luscious lemon flavor in every bite.  The cake part is reminiscent of the texture that you find in a pineapple upside down cake.

This recipe makes 2 single layer, 8 inch cakes. One for you and yours and one for the neighbors or co-workers.

Meyer Lemonade Cake
adapted from Serious Eats website

Ingredients/Cake and Soaker
1 cup or 2 sticks of butter
8 oz  plain yogurt
4 eggs
3/4 cup lemon juice
1 tbs lemon zest (takes about 2-3 lemons)
1 tsp vanilla extract
1/4 cup candied lemon peel (takes about 4 or 5 lemons, recipe below)
2 1/2 cups sugar
3 cups flour
1/2 tsp baking powder
1/2 tsp baking soda
1 tsp salt

Ingredients/ Candied Peel
4-5 lemons
1 cup water
2 tbs corn syrup
1 cup sugar

The first step will be making the candied peel. Set up 2 pots full of water and a bowl or sink full of ice water. Also, have a strainer close at hand.

Place both pots of water over high heat. As you wait for the water to boil, take the lemons and peel off strips, using a potato peeler running it down the length of the lemon. Take care to get as little of the pith as possible. After all lemons are peeled, slice the peelings into thin strips.

The next process is to blanch the lemon strips. The blanching will be done three times. Put the strips in the first boiling pot of water and let boil for 20 seconds. Remove pot from heat and pour into a strainer. Then take strainer of strips and submerge in ice bath, just deep enough to cover and cool the strips. Take empty pot and refill with water. Place over high heat and let come to a boil. As it heats up, follow the same blanching process using the boiling water in the second pot and the recently heated water in the first pot. Leave strips in strainer.

For the candy syrup, put sugar, corn syrup and water in a pot over medium high heat. Stir occasionally, letting mixture come to a boil until sugar is dissolved. Add blanched lemon strips.

Correct the temperature of the liquid to a simmer mode, liquid should have occasional bubbles. Cook at this temperature for about 20 minutes. Liquid will be thicker and lemon peels will start to curl. Remove from heat. Let cool completely before using.

For the cake, prepare two 8 inch round cake pans by greasing the interior and lining with parchment paper. Preheat the oven to 350 degrees.

Using a stand mixer, cream together butter and only 2 cups of the sugar until mixture takes on a much lighter texture. This should take about 5 minutes. Add the eggs, one at a time, beating into butter/ sugar blend for about 30 seconds. Repeat the same process with each egg, until all are blended in. Sprinkle in zest and beat for another 30 second. Mix in the vanilla extract. Set aside.

In another bowl, sift together flour, baking powder, baking soda and salt. Mix the sifted ingredients into the batter in 3 stages, alternating with the yogurt. The start of the process as well as the end will be with blending in the dry ingredients.

Lastly, stir in only 1/2 cup of the lemon juice until completely blended into the batter. Divide batter equally and empty into each prepared pan. Place in oven and let bake for about 20 minutes and rotate pans then bake for an additional 20 minutes. Cake is done when it springs back when lightly touched in the center and turns a golden hue or use a toothpick to check if done. Remove pans and place on rack. Let cakes cool in pans 20 minutes.

As cakes cool, make the soaker by filling a pot with the remaining 1/2 cup of sugar and 1/4 cup of juice. Place over medium heat and cook, stirring occasionally. Once the sugar has dissolved , remove from heat. Brush mixture over cooled cakes. Let the cakes remain in the pan for another 10 minutes.
Invert the cakes onto a rack covered in wax paper and quickly invert again so drizzled side is face up. and cakes have cooled for 20 minutes. Then garnish with candied peel.


Tips and Notes:
1. The cakes are very sticky so springform pans would insure the appearance of the surface,removing the cakes prior to soaking is a good idea.

2. The soaker has too much syrup compared to the actual peels, so cutting the liquid ingredients  in half would be better.
HAPPY EASTER!!
                            **LAST YEAR: Havana Cupcakes**


Sunday, March 20, 2016

Chocoberry Cupcakes


Like most bloggers, it is hard for me to make something "plain", especially when it comes to cupcakes. I cannot remember the last time I made a cupcake that was just one flavor. Since the opportunity is there to combine flavors, I take full advantage of it.

Take these cupcakes, for instance. They are a double-decker of chocolate and strawberry flavors, in the cake part as well as the icing. Fruit, due to their acidity, do not make a good addition to cake batters. Unless I am making a bread or fruit like cake- I never use fresh fruit in cake batters. Imitation fruit flavor is also something I try to refrain from.

In order to get a good fruit flavor, there are 2 choices. You can either use dried fruit powder or natural extract. For these cupcakes I used natural extract, Olive Nation brand. Regarding the chocolate, there are many brands to choose from...., Valrhona, Ghirardelli, Callebaut..etc. As usual, quality ingredients mean quality taste.

The cupcakes are moist and airy, and deliver that chocolate covered strawberry flavor that we all love. The topping is a repeat of the same flavors-just a bit stronger and sweeter. The chocolate ganache swirled with strawberry icing adds the right touch of sweetness to the cupcake. Since it is lighter than regular buttercream icing, the cake flavor stands out more.

This recipe makes about 24-28 cupcakes.

ChocoBerry Cupcakes
by Flourtrader

Ingredients/Cupcakes
1 1/3 cup buttermilk
1 1/2 tsp vanilla
4 egg whites, room temp
1/2 cup butter, room temp
1/2 tsp salt
1/2 tsp baking soda
1 tsp baking powder
1 3/4 cup sugar
1/2 cup butter
3 oz melted and cooled bittersweet chocolate
2 tsp strawberry extract
red food coloring ( optional if you want a pink tint)

Ingredients/Topping
1 cup plus 2 tsp heavy cream
1 tbs butter
8 oz bittersweet chocolate, chopped into pea sized chunks
1 tsp strawberry extract
1 cup confectioners sugar
milk (measurement based on desired consistency)

Preheat oven to 350 degrees. Grease the top edge of muffin tins and line the cavities with baking cups.

Start on the cupcakes by filling a medium bowl with the butter.  Beat, occasionally scraping down the sides of the bowl, until smooth. Add the sugar and vanilla.  Blend the mixture on low speed until evenly distributed. Set aside.

Using another medium bowl, sift together the flour, baking powder, baking soda and salt.  Set aside.

Then pour 1/4 of the egg whites into the sugar butter mixture and beat for 30 seconds. Repeat this process until all egg whites are incorporated into the batter. After this, you will blend in 1/3 of the sifted ingredients, running the mixer on low speed. Then pour 2/3 cup of buttermilk into the batter and beat on low. Follow the same stages with the sifted ingredients and buttermilk, ending with the the dry ingredients folded into into the batter.

At this time, measure out half of the batter and put into a clean bowl. Using 1/2 of the batter, mix in the melted chocolate until evenly blended. For the other half of the batter, add 2 tsp strawberry extract or dried fruit powder and stir. If desired, mix in a few drops of red food coloring until the pink hue meets your expectations.

Take out 2 scoops for spooning the batter into the cupcake cavities. Use one scoop for the chocolate and one for the strawberry batter. You can spoon the chocolate batter on the bottom and strawberry on top, like I did or do side by side batters, whichever you prefer. The cavities should be filled to the 2/3 mark, with an even distrubution of strawberry to chocolate batter.

Bake for about 20 minutes or until tester comes out clean.  Remove and place pan on rack for 5 minutes and then transfer cupcakes to rack to finish cooling.

To make the chocolate ganache, place chopped chocolate in a heat proof bowl with a wide bottom, I used a pasta bowl. Spread the chunks out to a even layer on the bottom of the bowl.Then, place a saucepan over medium high heat and pour in heavy cream and add butter. Cook until butter is melted and mixture comes to a boil. Once boiling, remove and pour over chocolate chunks. Let sit undisturbed for about 5 minutes and then stir mixture is smooth.

At this point, you can dip the tops of the cupcakes into the chocolate. Make sure that you take time to let the chocolate drip off before standing upright and that the cupcake paper does not get any chocolate on it. Once all the cupcakes are covered with the ganache, then start on making the strawberry swirl.

Sift confectioners sugar into a medium size bowl. Add 1 tsp strawberry extract or dried strawberry powder and 1 tbs of milk. Whisk until a smooth icing is formed and stir in a few drops of red food coloring (if desired). Continue to work to achieve a piping consistency to the icing, either by adding more confectioners sugar or more milk. Once the consistency is right, fill a piping bag and pipe a decorative line or swirl on top of the cakes.

Let stand at room temperature for about an hour before serving or storing so topping will set.

Tips and Notes:

1. Due to the egg whites and the baking soda/powder, act quickly when creating the separate batter and spooning into the cavities.  My two layers came out with some air between the two when baked.

2. The thickness of the ganache is a personal preference, so how much liquid you use can be altered. However, bear in mind that you want to "dip" the tops, not have to use a knife to cover the cupcakes.
                                             **LAST YEAR: Alfredo Bread**


Sunday, March 13, 2016

Bajan Sweet Bread


This particular recipe I found tasty and interesting. Some of the instructions were a little vague, but I would like to think that it was due to the fact the person made this hundreds of times since it is a traditional recipe. Based on that, I have changed up the method as well as the ingredient list to help improve upon the recipe.

One of the things I am aware of when creating any kind of dough is that texture can be altered by how much you work with the dough. Over working dough can change cut out cookies from crisp to tough. Regarding this particular bread, if not kneaded it is very crumbly. The more you knead it, the firmer it becomes.

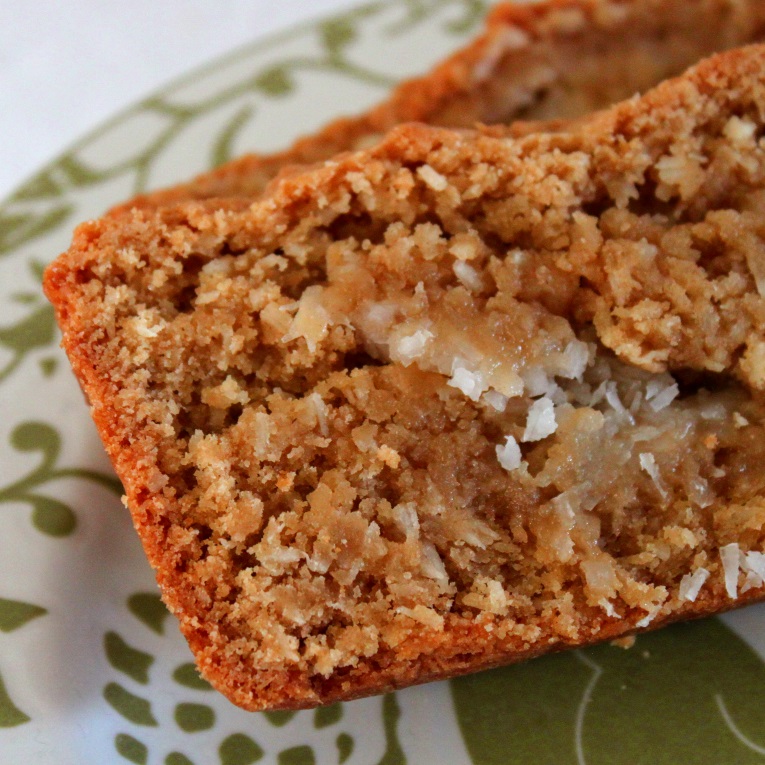
My loaf resulted in a crumbly texture, however, it had a wonderful flavor. The combo of brown sugar, nutmeg and coconut is worth trying and is sure to be remembered after you take one bite.

Before we get started, note that this recipe makes three 8 inch loaves.

Bajan Sweet Bread
adapted from Just Bajan

Ingredients/Bread
1 grated coconut or 3 cups unsweetened coconut
1 tsp nutmeg
2 tsp vanilla
1 tsp salt
1 1/2 cups butter
1/4 cup shortening
4 cups or 2 lbs self rising flour
2 cups or 1 lb brown sugar
1/2 cup milk
1 cup chopped nuts or chopped glace cherries or raisins (optional)

Ingredients/Filling
1/2 cup unsweetened coconut
2 tbs sugar
1 tsp coconut extract
2 tbs water

Grease the interior of 3 loaf pans and line 2 sides and bottom with parchment paper, leaving overhang on the sides.  Preheat the oven to 350 degrees.

Start by making the filling. Fill a saucepan with sugar, coconut extract and water and place over medium heat. Add the coconut and stir. Let cook for about 5 minutes, stirring constantly. This is in order to make the coconut more tender. Remove from heat and let cool. 

The next step in making the bread is to cream the butter and shortening together in a large bowl.  Once smooth, beat in the brown sugar, scraping down sides occasionally, until completely blended into the butter mixture.

Fill a small bowl with the milk and stir in the vanilla. Also, using a separate bowl, sift the flour, salt and nutmeg together.

 Using a wooden spoon, mix in one cup of the sifted ingredients into the sugar/butter mixture. Then blend in 1/2 of the liquid. Next, mix in 2 cups of the flour. Add the rest of the liquid and fold in until no liquid remains. Pour in the remaining sifted ingredients and blend until all binds with the dough. Lastly, if you are using the add in options of nuts or fruit, fold into the dough. The dough will be heavy, like cookie dough, so you may choose to mix with clean hands.

At this point, you will need to decide if you want a firm type of bread or crumbly. The recipe recommends kneading it for about 2-3 minutes.

Then divide dough into 6 even pieces. Place 1 piece in the bottom of each prepared pan and smooth out evenly, making a bottom layer. After each loaf pan contains a bottom layer of dough, empty saucepan of coconut filling into a sieve and drain off any liquid. Divide the filling into 3 equal amounts and spoon an equal amount of filling in a thin line, lengthwise, down the center of the dough. Then put remaining dough on top, smoothing out evenly.

Bake for about 30-45 minutes until the center comes out clean.

Tips and Notes:

1. The dough was very heavy to work with, not like regular dough. If there was to be a next time on this recipe, I would experiment by making the dough into cake-like cookies instead of loaf bread.

2. I love coconut so I doubled the filling ingredients. If you choose to do this, be aware that it may cause some sinking in the middle.

3. I did knead the dough to keep it from being crumbly and it did not help. Perhaps adding more liquid would be beneficial. This recipe just said add liquid until dough is formed. There were not any measurements given, it was not even listed on the ingredient list. The recipe however states use milk, coconut water or regular water.
                                **LAST YEAR: Celtic Celebration Cake**                                  

Sunday, March 6, 2016

Peanut Butter Oatmeal Cookies


Eating or even smelling foods can bring you back to a certain memory or place in time. To most people, homemade cookies remind them of their childhood. Back then, our palates craved the simple flavors. We were not quite ready for Chili Chocolate Macarons and mom was not about to spend a lot of long hours in the kitchen making cookies.

Of course, the cookies that were in the cookie jar were drop cookies. We all know they are about the easiest cookies to make. They may be easy, but these type of cookies are traditional favorites, such as chocolate chip or oatmeal. This particular recipe is a delicious blend of two classic kind of cookies: chocolate chip oatmeal and peanut butter.

They are not heavy on the oatmeal like a standard oatmeal cookie, but the end result is a good balance between both textures and flavor. Also, they stand up well when shipped or dunked in a glass of ice cold milk.

The instructions below are for about 4 dozen cookies. Enough to spread around or to store for later, depending on the size of your family.

Peanut Butter Oatmeal Cookies
adapted from The Ultimate Cookie Book

Ingredients
1 tsp baking powder
1 tsp baking soda
2 1/4 cup flour
1/2 tsp salt
2 cups oats (old fashioned)
1 cup butter, room temperature
1 cup creamy or chunky peanut butter
2 cups brown sugar, packed
1 cup chopped milk chocolate bar or chips
2 eggs
2 tsp vanilla

Preheat the oven to 350 degrees and line baking sheets with parchment paper.

Sift together flour, baking soda, baking powder and salt. Set aside. Fill the bowl of a stand mixer with peanut butter and butter. Beat until fluffy and smooth. Scrape down the sides and add the brown sugar and continue to beat until thoroughly blended.

Add both eggs and vanilla to the butter mixture. Then mix at medium speed for about 1 minute. After blended, beat in 1/2 cup of sifted ingredients and scrape down the sides of the bowl. Continue with the process until all the dry blend is incorporated into the cookie dough. Remove bowl from stand mixer.

Using a wooden spoon, mix in the oats and then the milk chocolate chips/chunks. Using a scoop or a spoon, drop dough onto prepared baking sheet. Space about 2 inches apart.  Place in oven and bake until edges of cookies are golden brown, which is about 10-12 minutes.

After you remove them from the oven, place baking sheet on rack to let rest for 1 minute. Then transfer cookies to cooling rack and let cool completely.

Tips and Notes:
1. I use parchment to preserve my cookie sheets, however, this recipe states use un-greased baking sheets-so either is an option.

2. Natural peanut butter can be used, however, it does not have a stabilizer to keep the oil from separating. Therefore, it will need to be well blended before adding it as an ingredient.
                                     **LAST YEAR:Pineapple Macadamia Tart**


Sunday, February 28, 2016

Cherry Almond Cobblestone Muffins


This recipe is actually a spin off of the original Monkey Bread recipes that showed up in women's magazines in the 1950's. While it is popular in the US still, it never seemed to take off globally.  If you are not familiar with this delicious treat, it is basically bread made up of round dough pieces that are dipped in butter and rolled in sugar. If you are not into sweets, you can easily change it to savory by using garlic butter and cheese.

The idea of converting a large Monkey bread coffeecake into individual servings using a jumbo muffin pan is a very smart and tasty way to go when you have a large gathering. The other thing that I liked about this recipe was that it rounded out things by adding fruit.

I tweaked the recipe a little by developing my own flavor combination. Originally, the fruit was to be a mix of apples and raisins. Instead of that, I used cherries soaked in amaretto and added some almond with extract, paste and flour.

My taste testers were very pleased with the results. These jumbo muffins have the trademark of Monkey Bread with their caramel chewy coating of the brown sugar/butter mixture. In addition, you have the a subtle hit of almond in the dough. The almond does become more prominent when you taste the filling of almond paste which mingles deliciously with the amaretto spiked dried cherries.

The recipe below is not the original, but my version. It makes about 2 dozen jumbo muffins, depending on the size of the pieces of dough.

Cherry Almond Cobblestone Muffins
adapted from Panera Bread at Home

Ingredients/Bread
8 cups of flour
4 eggs
1 tsp salt
1/4 cup and 2 tablespoons granulated sugar
1 tablespoon of almond extract
1/2 cup or 1 stick of butter, melted
2 cups lukewarm milk
2 tablespoons of yeast

Ingredients/Coating
2 cups brown sugar
1/3 cup almond flour or ground almonds
1/2 cup butter, melted

Ingredients/Filling and Topping
1 cup of sifted powdered sugar
1 tsp almond extract
milk (enough for desired consistency of icing)
2- 7oz packages of dried cherries
1-7 oz package of almond paste
1/4 cup amaretto
water (enough to cover dried cherries)

4 hours prior to starting on these muffins, empty the dried cherries into a bowl with a wide bottom, like a pasta bowl. Add cherries and amaretto. Mix in enough water so the cherries are covered. Set aside.

After the 4 hours has expired, fill the bowl of a stand mixer with eggs, sugar and salt. Beat until thoroughly combined. Pull out a small bowl and combine the almond extract, butter and milk. Pour the almond/butter mixture into the egg/sugar batter and mix together.

Running the mixer at low speed, slowly add one cup of flour. Once blended, add an additional cup and continue with the process, one cup at a time until 4 cups of flour is mixed into the dough. Sprinkle the yeast on top and mix on low speed for about 1 minute. Add the additional cups of flour, using the same method as the first 4 cups. Form dough into a ball.

Oil the interior of a large bowl and empty dough into bowl. Cover and let rise in a warm place until double in size.

Preheat the oven to 350 degrees. Grease the top edge of the muffin cavities and line with jumbo muffin papers.

While the dough is rising, drain the liquid from the cherries. Then, take the almond paste and form into several little pebbles and place in a bowl. There should be about 10-12 pebbles per muffin. Set both aside.

At this time, you can make the coating by mixing the brown sugar and almond flour together.

Once the dough has doubled, punch down and form into balls. As you form them, consider that it will take 8 balls to make one muffin. After all the dough balls are made, dip each into melted butter and roll in brown sugar/almond flour. Work quickly, you do not want the surface of the dough to dry out.

To assemble the muffins, start by making the bottom layer. Place 4 dough balls into the bottom of the muffin cavity, all the sides should be touching, none should be stacking. Then, take about 8-10 dried cherries and press lightly into the top of the dough. Repeat this process with about 5 or six pebbles of almond paste. After this, do another layer on top with dough, paste and cherries. For the top layer, it is best that the cherries and almond pebbles are more towards the center of the dough. The muffins will rise and you want the cherries on the muffin not on the pan or bottom of oven.

After all cavities are filled, bake muffins for about 25-30 minutes. Let cool for 10 minutes in pan and transfer to cooling rack. Mix up the topping by combining extract, sifted powdered sugar and milk. Add enough milk to desired consistency and drizzle on to cooled muffins.

Tips and Notes:
1. If you only have 1-12 cavity or 1-6 cavity muffin pan, make only half a batch since this is a yeast bread. You do not want it sitting a long time between baking batches.

2. Due to the way in which these muffins are formed, they are made to eat by plucking off each ball and popping it into your mouth, not by cutting with a fork or taking a bite out of the muffin like you normally would. The dough balls adhere lightly to each other due to the butter/brown sugar mix.

3. If I did this again, I would try to put the dried cherries and almond pebbles into the ball of dough. This way the filling is inside. The adhesion of the filling with the dough balls were not as much as I wanted in the above recipe.

4. You made need to make more coating, depending on how much you want on each dough ball. Not difficult to mix up and better to be in a situation making more than having way to much.

5. You will find that the dough is sticky when forming the dough balls. That is to be expected.

6. The muffin papers do not adhere to the muffins, so they are served without papers. The use of them was only to make clean up easier and keep the brown sugar mixture from getting too hard on the outside.
                           **LAST YEAR: Butternut Maple Blondies**

Sunday, February 21, 2016

Caramel Pecan Silk Supreme Pie


Sometimes people wonder how I choose what particular items to post.  There are days when I am searching for something in particular and other days of "you will know it when you see it".  This one definitely falls into the second category.

When I saw this deliciously stacked pie, I was hard to pass up. There are not may pies out there that can deliver the number of textures and flavor that this pie offers. It may require a big bite in order to get every layer into your mouth, but I assure you- it is the best way to enjoy a bite of this pie.

Flaky crust is topped with chewy caramel and pecans. Then it is layered with a fluffy cream cheese mixture. The layers continue with chocolate cream and then airy, vanilla whipped cream. I usually prefer a fruit pie over any other type of pie. After trying a slice of this dessert, the taste really gave me an attitude adjustment, so now I have a more open mind when it comes to pies.

The recipe below is not an exact original. The reasoning being is that I do not like the idea of using cool whip-which was an ingredient listed for the second layer of this pie. I think it was the commercial in which they ask "oil or cream?" that started my ban of cool whip. I made a whipped cream/cheesecake blend for the second layer that worked out quite well.

If I had to make the pie again, I would have to tweak the caramel layer more to make it a little more creamier. It was a little too thick, but it did not deter from the taste.

Caramel Pecan Silk Supreme Pie
adapted from Bakers Square Copycat Recipes

Ingredients/First layer
1 blind baked deep dish pie shell
4 tbs butter
1/4 cup heavy cream
1 cup pecans (chopped and toasted)
7oz unwrapped caramels

Ingredients/Second layer
1/2 cup heavy cream
4 oz softened cream cheese
1/2 cup confectioners sugar
1/2 tsp vanilla extract

Ingredients/3rd layer
2 squares unsweetened chocolate
1/2 cup or 1 stick of butter
1 cup sifted confectioners sugar
2 eggs
1/4 tsp vanilla extract

Ingredients/Topping
2 cups whipping cream
2 tbs confectioners sugar
mini chocolate chips (optional)
to drizzle: melted chocolate and caramel sauce (optional)

For the first layer, place butter and cream in a saucepan over low heat. Stir until all the butter is melted into the cream. Add the caramels and whisk until those have melted and mixture is smooth. Mix in the pecans and pour into the blind baked pie shell. Place in the refrigerator until the layer firms up. This may take a few hours. In order to speed up the process, you may place in freezer.

Once this layer is firm, start on the second layer. Fill one bowl with the cream cheese, sugar and vanilla extract. Beat until soft and fluffy. Set aside. Using another bowl and clean beaters, beat the heavy cream until stiff peaks form. Gently fold the cream cheese mixture into the whipped cream. Smooth evenly,over top of the caramel layer and place pie in refrigerator.

Start the third layer by melting chocolate in a double boiler. Once melted, remove from heat and set aside. Let cool for 30 minutes.

Fill a large bowl with the butter and sugar and cream together until light and fluffy. Add one egg and beat for 30 seconds. Repeat the process with the other egg. Continue to beat and slowly stream in the cooled melted chocolate and add the vanilla extract.  Remove the pie from the refrigerator and smooth the chocolate mixture evenly over the cream cheese. Place pie back in the refrigerator.

In a large bowl beat the whipping cream on medium speed until foamy. Continue to beat and add the confectioners sugar. Turn the speed up to medium high and beat cream until stiff peaks form. Pipe whipped cream on top of chocolate layer and decorate the top as desired.

Chill pie until ready to slice and serve.
                                     **LAST YEAR: Taffy Treats***

Sunday, February 14, 2016

Raspberry White Chocolate Cookies


As a kid, we all loved monster cookies with lots of flavor. This particular cookie is swirled with raspberry preserves and chock full of decadent raspberry dark chocolate chunks and white chocolate chunks. Rich, flavorful and satisfying- all that we want in a cookie and then some.

These monster treats are sure to bring back memories. Kids at school were always curious and sometimes jealous of another's lunchbox treats. Some treats fell victim to the barter system and some were never traded. In addition, there was always one particular house that all the kids would
flock to after school due to the wonderful homemade treats and snacks  Be assured that these saucer cookies will not be traded. Also, presenting these are a sure fire way to meet all the friends of your son or daughter- even the ones you would rather not...

They have have a tri-texture from edge to center: crispy, cakey and chewy. One bite reveals raspberry and sweet chocolate. These are sinfully rich, perfect for your Valentine or just for yourself (I will not tell anyone). The recipe makes 12-14 very large cookies.

There are many adaptations of this cookie on the net, but the most helpful by far was Disney Chef. These require a little extra work in order to be successful, so be prepared to spend some time.

Raspberry White Chocolate Cookies
Adapted from Disney Chef, Baker Lady, Rumblytumbly..etc

Ingredients
10 oz seedless raspberry preserves
1 cup raspberry chocolate chips or chopped bar
1 cup white chocolate chunks
1 tbs water
1 egg
1 tsp raspberry extract
1 tsp vanilla extract
1 cup butter
1 cup light brown sugar, packed
3/4 cup confectioners sugar
1 tsp salt
1/2 tsp baking powder
2 3/4 - 3 cups flour

Prepare 2 baking sheets by lining with parchment paper.

Sift together baking powder, 2 3/4 cup flour and salt into medium sized bowl. Take out a small bowl and fill with egg, water and extracts, whisk all together. Set both bowls aside.

Fill the bowl of a stand mixer with butter, confectioners sugar and brown sugar. Run the mixer on medium high speed and beat until mixture becomes fluffy. Continue to beat and pour in whisked mixture, running mixer until thoroughly blended.

Remove bowl from stand mixer and fold 1/2 cup of sifted ingredients into batter. Continue with this process until all is folded together. Then, evaluate the dough. The dough should be thick and heavy.  If you find it too dry, add some water or too wet, add additional flour (up to 1/4 cup). Fold in both types of chocolate chunks, making sure chunks are blended evenly throughout the dough.

Separate out 1/4 of the batter and place the rest in the refrigerator. Prepare a piping bag by fitting with a large tip. Fill the bag with 2 oz of preserves. Drizzle some of the preserves into the batter and use a pastry cutter to fold and cut the dough. Repeat the process until all the preserves have been incorporated into the dough. You want swirls or spots of raspberry, so you are not to mix it so much that it changes the color of the dough.

Form the dough into 4 equal balls and place on a plate. Cover with plastic wrap and freeze for 15-25 minutes. While the dough is chilling, preheat the oven to 400 degrees. Also, prepare a baking sheet by lining with parchment paper.

Once oven is preheated and dough is properly chilled, place 4 dough balls on baking sheet. Space evenly on sheet. Let cookies bake at 400 degrees for 2 minutes. Lower the oven to 350 degrees and let them continue to bake for another 14 to 17 minutes or until done. Remove from oven and let
cookies rest on pan for 10 minutes, then transfer to a cooling rack to remain for another 30 minutes to completely cool.

Repeat the same process with the rest of the dough, which will be 3 more batches.

Tips and Notes:

1. These cookies are better the next day due to the texture.
2. Do not use raspberry jam, it will make your batter too watery and cookies brown too much
3. Doneness of cookie is a little difficult since cookies retain a shiny, sticky appearance, so monitor closely. A golden hue on the bottom as well as edges is a good sign.
4. If you are using a stronger flavoring for the raspberry (Lorann brand) than the vanilla, make sure you adjust the amount so the flavor is balanced between the two.
5. Because the success of this recipe depends very much on consistency of the batter, it took me more than 1 batch of four to have these come out correctly (not so much taste wise, but appearance wise)
6. Raspberry chocolate chips are not easy to find, yet if you go to a place that has specialty food items (I went to World Market) you can find dark chocolate with raspberry bits. Make sure you buy bars with the bits, not the ones with a raspberry liquid center.
                                  **LAST YEAR: Lemon Pull Apart Coffee cake**

Sunday, February 7, 2016

Blackberry Hazelnut Torte


I do envy those that have wild blackberries growing in their yard. Not just blackberries, but any type of fruit. Just the idea of going outside and getting something that fresh to bake with is a wonderful thought. Unfortunately, the convenience of the grocers has stomped out any idea of me creating a garden. My busy lifestyle is no help either.

However, when it comes to baking, I more motivated to set aside a lot of time. It was not only the flavors in this recipe that inspired me, but also the presentation. I call them the "wow" factors. Let me explain here...

Imagine a 4 layer, spongy cake made with ground hazelnuts soaked with hazelnut liqueur. Then add the building block filling: the first being the blackberry coulis, the second-white chocolate  buttercream and the last is a combo of the two; blackberry mousse. If that does not excite your taste buds, then they are officially dead.

I knew at the start that this cake was going to be a major project, not only requiring a lot of time, but numerous eggs. This still did not deter me, I was dead set on making it. When I was done and tasted the cake, I had no regrets. Also, my taste testers gobbled up slice after slice, so I knew it was a success.

The only issue with the original recipe was that the white chocolate icing had too many ingredients and came out very liquid-so I knew it was missing something. I added powdered sugar to achieve the correct consistency. Due to this problem, I have supplied a link in the ingredients list to a Wilton recipe for white chocolate buttercream.  It is less labor intensive and requires less ingredients, which makes for a happier baker.

There are also some other tips and notes at the end to help you succeed in making this cake.

Blackberry Hazelnut Torte
adapted from Razzledazzle Recipes

Ingredients/Cake Layers
2 tbs hazelnut liqueur and extra for soaking
12 eggs, separated and 3 additional egg whites
1/2 cup butter
1 1/3 cup sugar
12 oz toasted and peeled hazelnuts
2/3 cup flour
1 1/4 tsp salt

Ingredients/Filling & Frosting
1 1/4 lb or 20 oz frozen blackberries
2 tbs corn syrup
1/4 cup sugar
1 recipe white chocolate buttercream
chopped, toasted hazelnuts (as much as desired for topping and or sides of cake after frosted)

Prepare four 9 inch cake pans by buttering the interior. Then line the bottom with parchment paper and butter the face up side. Preheat the oven to 350 degrees. Place the frozen blackberries in a saucepan to thaw.

Pour hazelnuts in a food processor and pulse until chopped. You want them chopped, but not so much that they start to form a paste. Add the flour to the hazelnuts and mix until evenly distributed.

In the bowl of a stand mixer, cream together the butter and 1/2 cup plus 3 tablespoons of the sugar. Once the consistency is fluffy, add one egg yolk and beat until combined. Continue adding each egg yolk, beating after each addition, until all egg yolks are blended into the butter mixture. Pour in the hazelnut liqueur and beat for 20 seconds on medium. Then fold in the hazelnut/flour blend. Empty batter into another bowl and set aside.

Clean and dry the bowl of the stand mixer and fit the mixer with the whipping attachment. Fill the bowl with all the egg whites and add salt. Beat until it reaches a stiff peak consistency. Continue to run the mixer and slowly pour in remaining sugar (1/2 cup plus 2 tablespoons and 1 teaspoon). Combine until sugar is evenly distributed. The mixture should still retain the stiff peak consistency when done.

Take 1/4 of the egg white blend and fold into the hazelnut batter. Then fold the rest of the egg white mixture into the batter in increments, taking care to retain the fluffy consistency. After all is blended, fill each of the prepared pans evenly with the batter and smooth the top. Bake for about 15-20 minutes or until tester comes out clean. The top should have a golden hue when done. Place cake pans on rack to cool completely. Cake must be completely cool in order to remove from pans.

While the cakes are cooling, start making the blackberry coulis. Take the saucepan with the blackberries and place over medium heat. Add the sugar and corn syrup. Stir until sugar is dampened by the blackberries. Let the mixture cook and continue to stir. As it cooks, the liquid will reduce down. Let it cook down until it is about 1/3 less than the original amount. Remove from heat and pour mixture into a sieve placed over a heatproof bowl. Rub the inside with the back of the spoon, pushing all the blackberry through the sieve, letting the seeds remain inside the sieve. Set the blackberry coulis aside to cool to room temperature and discard the seeds.

Now, move on to the white chocolate buttercream recipe and create the frosting. Once this is made, take out 2 cups of the buttercream and empty into a smaller bowl. Then mix 1/2 cup of the blackberry coulis into the 2 cups of buttercream.

The end result is 3 separate bowls for the filling and frosting of the cake: blackberry coulis, white chocolate buttercream and blackberry mousse. 

After the cakes have completely cooled, you can start on the assembly process. Invert the cakes onto a flat surface and remove the parchment paper. Evaluate the shape and thickness of each cake and decide in which order to stack.

Start with the cake chosen for the bottom layer and place on a cake board or serving plate. Pour some of the hazelnut liqueur into a small bowl and dip a pastry brush into the liqueur. Brush on the surface of the cake. Let sit for a few minutes to soak in. Then spread the blackberry coulis over the top of the layer, taking care to leave a small border on the edge. Top with the next layer of cake and brush with hazelnut liqueur, giving a few minutes to soak in. Spread some of the white buttercream evenly on top and again leaving a small border edge. Place the next layer over this and do the same process with the hazelnut liqueur. Then evenly cover the top with the blackberry mousse, leaving a border. Then add the last cake layer and frost with the white buttercream.

Once the cake is frosted, you can mask the sides with chopped hazelnuts or sprinkle on top.

Tips and Notes:
1. Skinning hazelnuts is a tedious process. You are welcome to substitute with hazelnut flour, however, the cake will have dark specks in it. I have yet to find solid white hazelnut flour, it usually includes the dark skin of the nut.

2. I used fresh blackberries for the coulis, but that did require a lot more work. I am sure the recommended frozen fruit dissolves into the sugar much easier than whole berries.

3. For the best buttercream frosting, be sure to use clear vanilla extract (if you want it very white) and white bar chocolate-not white chocolate chips.

4. When reviewing the frosting recipe, remember that this is a four layer cake and make any adjustments as needed to be sure there is enough to cover the cake with the thickness you desire.
                                    **LAST YEAR: Brooklyn Blackout Cupcakes**

Sunday, January 31, 2016

Caribbean Bars


When you look up butterscotch, you will see that it is a mixture of brown sugar and butter. There are many recipes that include those ingredients, but they do not refer to "butterscotch flavor". On the other hand, several recipes including butter will refer to it as a flavor..butter cake, butter cookies. This does not make much sense, since butterscotch does have a more distinctive flavor than butter.

These little bars do contain that distinctive flavor in the form of butterscotch chips. They also contain bananas and nuts. The pairing of this trio does make for some tasty bars. The texture is less dense that chewy cookie bars, but more dense than a cake.

Having them as an snack or with tea in the afternoon makes for a nice treat. The squares are best defined as a little sweetness that is not heavy or rich.

Caribbean Bars
adapted from Recipe Link

Ingredients
3 eggs
1-6 oz pkg of butterscotch chips
1/2 cup chopped nuts
1 tsp vanilla
1 cup mashed bananas
3/4 cup butter
1 1/2 cups brown sugar
2 1/2 cups flour
2 1/2 tsp baking powder
1/2 tsp salt
3/4 cup melted chocolate or powdered sugar icing for topping

Preheat oven for 350 degrees. Grease the interior of a 10x15 inch baking pan and line bottom and 2 sides with parchment paper, allowing for overhang on the sides. Grease the surface of the face up side of the parchment. Also, place a cooling rack over a flat surface covered with wax paper.

Sift together the salt, baking powder and flour. Set aside. Fill another bowl with the brown sugar and the butter. Beat until fluffy, scraping the sides of the bowl occasionally. Continue to run the mixer and add one egg. Blend with the mixer on medium for about 30 seconds and scrape down the sides of the bowl. Repeat the process with each of the remaining eggs, adding them one at a time. Remove bowl from mixer stand.

Using a wooden spoon, add the mashed bananas and mix until completely blended. Fold in the sifted ingredients until no dry streaks remain. Lastly, fold in the nuts and butterscotch chips, making sure they are evenly distributed throughout the batter.

Empty the batter into the prepared pan and smooth out, covering the bottom and all 4 corners evenly.

Place pan in oven and bake for 15 minutes, rotate pan and bake for additional 15-20 minutes. Bars are done when tester comes out clean.  Place pan on cooling rack and cool completely in pan. Run a knife between the unlined sides of the pan and the cake bar. Then, pull on the parchment overhang to loosen.Then invert the pan over a platter and remove the parchment paper. Invert again onto the cooling rack. Drizzle 3/4 cup melted chocolate or powdered sugar icing over top. Cut and serve once topping is set.

Tips and Notes:
1. Bear in mind that the degree of ripeness of the banana will impact the flavor. As the banana ripens, the flavor gets stronger-so over ripe will make it a more prominent flavor. I just used a ripe banana so the flavor was subtle. The recipe did not refer to either, it just stated banana. If you choose an over ripe banana you may need to increase the amount of flour.

2. The average baker does not have a 10x15 inch baking pan. You can use 2 mini loaves and one 9x13 inch baking pan. Those are the pans I used.


                                    **LAST YEAR:Figgy Dickens Cookies**


Sunday, January 24, 2016

Eggnog Rum Muffins


Sometimes the best recipes are the ones with little ingredients and little time in the kitchen. I have been in the kitchen this morning working on a baking project. It is a nice break to come back and post this easy muffin recipe.

Sometimes homemade muffins can be a bit dry. I guess that is to make sure you want to put a slather of butter on it. These muffins, on the other hand, have oil in them which promotes a moist texture- so you can pass on the butter. 

Regarding flavor, one bite reveals a burst of that "special" holiday taste of eggnog and rum. As a blogger, sometimes leaving a recipe "as is" is does not exactly match my idea. This was one of those times. I decided to add another flavor layer and a little crunch by putting in some cinnamon coated pecans.

Below is the recipe. After enjoying some of these as a snack, I now think that eggnog should stick around longer than just the holiday season. After trying these, you may want your signature included on the petition! This recipe makes about 2 dz muffins.

Eggnog Rum Muffins
adapted from recipelink.com

Ingredients
2/3 cup canola or vegetable oil
1/2 cup rum
1 1/2 cups eggnog
2 eggs
1 tsp nutmeg
4 cups flour
1 tsp salt
2 tbs baking powder
1 1/3 cups sugar
1 cup chopped cinnamon coated pecans (optional)

Grease the top edge cavities of 2-1 dz muffin pans and line with baking papers. Preheat oven to 350 degrees.

Sift together flour, baking powder, nutmeg and salt in a large bowl.Stir in the sugar. Make a well in the center of the dry blend. In another bowl, whisk the two eggs together. Then stir in the eggnog and rum into the eggs. Once combined, whisk in the oil. Pour the mixture into the well of the sifted ingredients and fold together until no dry streaks remain. Lastly, fold in the pecans.

Using a scoop, fill the muffin cavities evenly with the batter. Let bake about 15-20 minutes or until tester comes out clean.
                                          **2 YEARS AGO: Creme Brulee Chocolate Bundt**


Sunday, January 17, 2016

Apple Dulce De Leche Empanadas


While little hand held pies are delicious, actually eating them by hand is quite messy. The filling usually runs out. Then you are left with the flaky crust, crumbling with each bite. I still like them, but it is best to use a plate and a fork. If you really want something to eat and hold in your hand, the solution to that is to make empanadas.

These particular empanadas have a bread-like exterior.  In addition, the filling has chunks of applies and thick dulce de leche. As you can see in the picture above, the interior has little liquid in it.  Based on this, you can eat these by hand on the run.

Should you want an additional texture, use a plate an add some ice cold vanilla ice cream to one of these warm empanadas. It makes for a more complete dessert and nicer presentation. Also, the "a la mode" option is hard to resist.

Apple Dulce de Leche Empanadas
adapted from Central Market

Ingredients/Pastry
6 beaten egg yolks
1 beaten egg white
2 cups water
4 cups flour
1/2 tsp baking powder
1 tsp salt
1/4 cup and 2 tbs lard
3 tbs sugar

Ingredients/Filling
5 medium tart apples (cored/peeled and diced)
1 tbs brown sugar
1 tbs butter
juice from 1/2 a lemon
1 tsp cinnamon
1/2 cup of dulce de leche
1 egg white (beaten) with 1 tsp of water
Vanilla ice cream (optional as topping)

For the dough, whisk together the egg white, yolks and sugar in a small bowl and set aside. Then, sift together the flour and baking powder into a large bowl. Add the lard in small chunks to the sifted ingredients. Using a pastry cutter, blend the two together. The mixture should now be like sand and should clump together when mashed in your hand. Form a well in the center and pour in the egg/sugar blend. Mix together using a large fork.

The mixture will be a bit dry, so combine the water and salt in a separate bowl. Add the water in small increments to the batter and combine to help get the mixture to a doughy consistency. Be careful, all you want is just enough to hold the dough together without any dry streaks or remaining loose flour. Pour out or discard the excess water/salt liquid.

Lightly flour a flat surface and roll out the dough into 1/8 " thickness. Place a sheet of parchment paper down on the bottom interior of 2 baking sheets. Cut out 6 inch rounds from the dough and place on cookie sheet.You will have between 12-18 discs. Cover and put in refrigerator.

In a large bowl, mix together the lemon juice and 1/2 tsp of cinnamon.  Stir in the diced apples until all pieces are damp from the lemon/cinnamon blend. Place a saucepan over medium high heat and add the apple mixture. Stir and let cook for about 3-5 minutes or until the apples become soft. Remove from heat.

Preheat the oven to 400 degrees. In a small bowl, blend the remaining 1/2 tsp of cinnamon with the brown sugar. Then take out one pan of the discs from the refrigerator and stack the discs together on the floured surface. Stretch or roll out one disc (if needed) on the flat surface then place on the parchment lined baking sheet.

Place a heaping tablespoon on the one half of the disk, spreading evenly and leaving a border. Top with a dollup of dulce de leche (about 1 tbs). Flatten the dollup of dulce de leche out over the apples with the back of a dampened spoon. Brush the face up border section of the dough with the egg white and fold the plain half of the dough over the filling and pinch the edges together. Using the tines of a fork, make ridges along the sealed edge of the dough. Sprinkle the surface of the empanadas with the sugar/cinnamon blend.

Repeat the assembly and sprinkling the top until both pans are filled with empanadas spaced about 1 inch apart. You may have more discs, so keep them the refrigerator until ready to fill and bake. Bake empanadas for about 20 minutes or until edges turn a golden brown, rotating pans at the halfway point.
                                    
Tips and Notes:

1.These are best served warm from the oven when the Dulce de Leche is melty. Once the empanadas get cold the dulce turns back to its original thickness.

2. I have seen various dough recipes for empanadas. Some are made with masa flour and some are fried. With each difference comes a a difference in flavor, texture and calories.

3. I would have liked these to get more golden brown on top, but tried even an egg wash which did not help.  The only part that turned brown was the edges.
                                        **LAST YEAR: Lime in the Coconut Cake**

Sunday, January 10, 2016

Pistachio Financiers


The name of financiers may not bring anybody running to the table for these, for the name is not commonly used here in the US. However, if you call them nut tea cakes, the item will be much more recognized.

If tea cakes do not peak your interest, then let's get into more detail. Imagine a moist mini cake that has the nutty flavor of both pistachio and almond. This flavor is not derived from extracts, but from nut paste. Now, add just a touch of dark chocolate and you have something more than any name can convey.

Making these as mini cakes and not cupcakes or a layer cake is the way to go. The high volume of nut paste makes these tidbits dense. In other words, Goldilocks (as the story states) would find the size of these as "just right."

I baked these in mini muffin papers, yet "true" financiers are baked in special molds. The instructions noted using silicon molds as the preferred pan. The financier molds are strictly for aesthetic purposes, so don't feel that purchasing them is necessary. However, the special purchase that is required is the pistachio paste. You can find it in specialty grocers or on line.

The recipe hails from Francois Payard and makes about 40-50 financiers.

Pistachio Financiers
adapted from Payard Cookies

Ingredients
4 eggs
7 tbs butter
1 1/2 tbs dutch processed cocoa powder
5 tbs pistachio paste
14 oz almond paste

Fill a small saucepan with the butter and place over medium high heat.  Let the butter melt and cook until it reaches a light brown color. Remove from heat and set aside.

Take the almond paste and grate into a bowl, then empty the bowl into a food processor. Add the pistachio paste. Process the two together for about 30 seconds or until the mixture is evenly blended. Leaving the food processor running, add one egg. Once the egg is completely mixed into the batter, repeat that step with the remaining eggs, adding one by one. Then drizzle in the butter, processing the batter as you pour. After it thoroughly blended, switch off processor.

Measure out 3/4 cup of the batter into a small bowl. Whisk the cocoa powder into the 3/4 cup of batter. Cover bowl with plastic wrap and place in refrigerator. Empty the food processor bowl with the plain batter into a medium size bowl and also cover with plastic wrap. Place in refrigerator to chill. Both batters should chill for a minimum of 3 hours. However, overnight is the preferred amount of time.

When the chilling time is complete for the batter, preheat the oven to 350 degrees. Prepare the silicon molds by spraying with nonstick spray and place on baking sheets . If using a mini muffin pan, grease cavity edges and line with paper baking cups.

Take out a 2 pastry bags and assemble with a coupler and 1/4 inch round tip. As an alternative, you can snip the tip off the both bags or the corners off of 2 small plastic sealing bags. Fill one bag with the plain batter and the other with the chocolate batter.

Fill each of the cavities with the plain batter, using a piping method. Each cavity should be about three quarters of the way full. After they are filled, then pipe 3/4 tsp of the chocolate batter into the top center of each.

Place pans in oven and bake until tester comes out clean, which is about 20-30 minutes. When done, financiers will spring back to a light touch and have a golden brown hue on top. Let financiers cool completely in pan (regardless of type of pan) before serving or storing.

Tips and Notes:
1. Batter is thick, so the piping method keeps them from having bubbles in the center of the batter/cake. It is not recommended to spoon the batter into the pan.

2. The silicon molds will result in small cakes with a flat surface. Baking with mini muffin pans yield a puffy surface like small cupcakes.

3. Almond paste is much thicker than pistachio, so the grating method is necessary to insure that the two nut pastes are easier to blended together.
                              **LAST YEAR:Schnecken or Pecan Cinnamon Buns*


Sunday, January 3, 2016

Orange Liqueur Bundt Cake

I hope everyone had a wonderful holiday! I remember my last New Year's post, stating that I would make it my best year ever. It was full of changes, however all of those changes have enriched my life and I am so thankful. 2016 has me looking forward to less changes, but just as much enjoyment as 2015.

It is cloudy and overcast, but I am lighthearted so I have my own sunshine. The perfect match to my mood is this citrus cake. Infused with orange liqueur and orange zest, it brings something lighter to the holiday table.

The recipe includes a topping with marscapone cream and blackberry compote, but I choose something simpler to drizzle on top. The extra options are not included in the instructions below, but I am sure you can come up with a suitable topping for your taste. I chose to enhance that sweet orange flavor with fresh squeezed juice and chunks of oranges.

I really loved how the juice soaked into the cake a little, giving it a different texture. Also, the juicy orange chunks were a refreshing addition.

Orange Liqueur Bundt Cake
adapted from the Cooking Channel

Ingredients
4 eggs
1 cup of milk
1/2 cup of orange liqueur
1 tbs vanilla extract
1 cup or 2 sticks of butter, softened and cubed
3 cups of flour
2 tsp baking powder
1/2 tsp salt
zest of 1 orange
1 cup sugar
orange juice, peeled orange segments (optional)

Grease the interior of a 12 cup bundt pan and preheat the oven to 350 degrees.

Sift together the flour, baking powder and salt into a medium size bowl. Fill another bowl, smaller in size, with the orange liqueur and milk and stir. Set both bowls aside.

Place the butter chunks into the bowl of a stand mixer and beat until smooth. Then add the sugar and beat for 3 minutes, creating a thick, fluffy mixture. Add the vanilla extract and one egg. Beat until all is evenly combined. Add, one by one, each egg and beat for 30 seconds at a time, scraping down the sides after each egg is beaten into batter.

Continue to beat the mixture, this time on low, and add the flour in 1/2 cup increments. After all the flour is added, change the speed to medium and stream in the milk/liqueur mixture. Once it is all blended and batter is smooth, transfer to prepared bundt pan. Smooth the top and make sure batter is level inside the cake pan.

Place pan in oven on center rack and bake for about 50 minutes and check with tester. The recipe states 1 hour and 10 minutes, but it will vary depending on the color of your pan. After baking, let cool in pan for about 20 minutes and invert onto rack to finish cooling.

Once cool, slice and serve with topping of your choice.

Tips and Notes:
1. Proper baking time is important for the texture of the cake, so keep a watchful eye out.
2. Even though beating the batter works better than folding the dry mixture in, be careful not to over beat.
3. I contemplated mini choc chips in this cake, but I feel it would have over powered the light orange flavor.
                                    **LAST YEAR:Candy Bar Tart**