Foodbuzz

Monday, August 6, 2012

Almond Breakfast Scones

This post is part one of two.  This part is the base for an upcoming dessert I have planned.  However, do not let that make you wait, these scones do make for a great breakfast.

There are many different types of scones but I would say that these fall into a sweet bread category.  They are moist and have a crunch of almonds.  As you can see in the picture, I do like my scones very toasty.  Any type of bread or pastry, I think is much better with a toasty crust.

So, if you are looking for something sweet but are not quite up to the sugar high from a donut, these would surely hit the spot. This recipe makes 30 scones, about 2 1/4 inches.  Or if making the dessert to follow, it makes 8-10 that are 4 inches in diameter.

Almond Breakfast Scones
adapted from Dessert Circus at Home
Ingredients
1 cup blanched chopped almonds
3/4 cup golden raisins (optional I did not include)
3 tbs and 1 tsp baking powder
generous 1/2 cup of sugar
2 tsp salt
3 1/2 cups of heavy cream
4 cups bread flour
1 1/2 cups cake flour
1 egg mixed with 1 tsp water (for egg wash)

Preheat the oven to 400 degrees and line 2 baking sheets with parchment paper.

Sift together flours, baking powder and salt.  Mix in sugar and pour in heavy cream.  Using a wooden spoon, mix together until a dough is formed.  Add the almonds and the raisins (optional) and stir.  Once everything is evenly distributed through the batter, turn dough onto a lightly floured surface.

Knead for one minute until the dough is smooth.  Be careful not to overwork the dough, or it will shrink up during baking.  Using a floured rolling pin, roll out the dough into a rectangle that is 1/2 an inch thick.    Cut out scones using a 2 1/4 inch cutter for regular scones and a 4 inch cutter for dessert preparation. Continue to cut out the scones, re-rolling and cutting the remaining scraps until all dough is cut out.  Place on baking sheets about 1 inch apart.

Using a pastry brush, brush the surface of the scones with the egg wash. Place pans in oven and bake for about 15 minutes for the smaller and 20 minutes for the larger scones , rotating and changing racks halfway in between baking time.  Remove from oven and transfer scones to rack to completely cool.
                       **LAST YEAR: Pink Squirrel Cheesecake** 


Monday, July 30, 2012

Juniors Triple the Fudge Brownies

A friend of mine recently had her 19th birthday and I had asked her what she wanted and the reply was brownies.  I had made a big batch, so there was plenty to go round.  They were well received by the whole crowd.  Even someone commented that they would have to take them home first and count all the nuts in them before anyone else can have them. I think I saw them scooping up on their fifth piece later that day, with no shame in admitting that they would not be sharing any pieces!

I would say after trying one of these rich and fudgy brownies, they even had me shamelessly reaching for a second piece.  The thickness as well as the layer of chocolate chips in the center really makes these perfect for the chocoholic in all of us.  These days it is hard to consider a plain brownie. The without nuts and without chocolate chips version does nothing but make me recall the word bland.

I have included the frosting recipe here, but I did not include these in the batch I made.  Considering it makes 6 cups to put on 24 brownies that are 2 1/2 inch square by 1 1/2 inch high, I did not want to induce anyone into a sugar coma.  Just by looking at the list of ingredients for the brownies, you can make a good determination about if you need to move on with the 1/2 inch layer of frosting on top.

Juniors Triple the Fudge Brownies
adapted from Juniors Dessert Cookbook

Ingredients/ Brownies
12 oz of mini semisweet chocolate chips
10 oz of bittersweet chocolate (at least 60% cacao)
4 cups coarsely chopped walnuts
2 tbs of vanilla extract
9 eggs
1 lb butter
4 cups sugar
2 tsp salt
3 1/4 cup of flour

Ingredients/Fudge Frosting
1 cup or 2 sticks of butter
1/4 cup vegetable shortening
1 tbs vanilla extract
3-4 tbs heavy whipping cream
2 tbs dark corn syrup
10 oz bittersweet chocolate (melted in double boiler)
1/4 tsp salt
4 cups or 1 lb confectioners sugar
1 tbs dark cocoa powder
whole pecans (optional)

Prepare two 8 or 9 inch square baking pans by buttering the insides.  Then line the bottom and two sides of the pans with parchment, leaving an overhang on the two sides.  Butter the face up sides and bottom of the parchment paper.  Preheat the oven to 325 degrees.

Place the butter and the chocolate in a large heavy saucepan and place over low heat.  Using a wooden spoon, stir until all chocolate and butter is melted and smooth.  Remove from heat to cool slightly.

In another bowl, sift together the flour and salt.  Set aside.  Place all eggs in the bowl of a stand mixer and beat with wire whisk blade for 3 minutes on high.  The eggs will turn a light yellow and thicken.  Keep the mixer running and add the sugar.  Once blended, turn the speed down to low and add the butter/chocolate mixer and beat until smooth.  Then add the vanilla extract.

Unhook bowl from mixer and take wisk blade out.  Pour in flour and mix with a wooden spoon until no dry streaks remain.  Then fold in walnuts until evenly mixed into batter.

Pour 1/4 of the batter into one pan and tilt pan until evenly spread.  Do the same with the second pan. Take the bag of mini chocolate chips and sprinkle them evenly over the batter in each of the pans.  Layer each pan again with 1/2 of the remaining batter.

Place in oven and bake for about 40-50 minutes, depending on the size of the pan.  Brownies are done when they are almost set in the center.  A tester should come out moist with some batter still clinging to it. Remove pans and place on rack to cool for about 1 hour.

Then run a knife down the two unlined sides of the brownies. Invert the pans and peel off the parchment.  Then invert onto cutting board to completely cool.

For the frosting, place the butter and shortening in the bowl of a stand mixer.  Cream together with the mixer on high for about 3 minutes.  After each minute, stop and scrape down the sides of the bowl.  Continue to beat and add the vanilla, cocoa and corn syrup.  Once blended, add the melted chocolate.

Sift together the salt and confectioners sugar in another bowl.

After the chocolate is evenly distributed into the batter, turn the mixer down to low.  Pour in 2 cups of sifted ingredients and beat on low until no dry streaks remain.  Add the rest of the sifted ingredients and blend.  Once smooth, beat in 2 tbs of cream for 3 minutes on high.  Continue to add the cream and beat until desired consistency is achieved.  Frosting should become very airy with a rich chocolate color.  Spread on cooled brownies.  Refrigerate for 1 hour so the frosting can set.

Then, if you prefer, top with one pecan half, rounded side up.  Press slightly into the frosting. Cut into squares with a serrated knife and serve.

Tips & Notes:
1. Like with most brownies, you want to avoid overbaking.
2. It is important that you divide the batter equally to make sure there is coverage of the chocolate chips.
3. For the top layer of the batter, it is best to spoon it on top and then smooth, that way there is less of a chance of shifting the chocolate chip layer.
4. I used two 8 inch square pans to achieve the thickness as shown in the picture.
                                  **LAST YEAR: Ivory Monkey Parfait**


Monday, July 23, 2012

Pineapple Polenta Cake


I have made a few recipes with pineapple.  However, I have always used canned and as we all know, fresh cut pineapple is more flavorful and juicy. So, after seeing fresh pineapple at the grocers, I could not resist buying some.

I am still perusing through Johnny Iuzzini's cookbook and I came across a recipe for pineapple-polenta cakes.  I do like the standard cake base for pineapple upside-down cake, but this recipe was a delicious step outside the box. The texture of the polenta cake made a great foundation for the juicy chunks of pineapple and was a smart choice for making individual cakes.

The best bite in this cake is when you get all three components: juicy pineapple, sweet polenta and a caramel topping.  I made sure that my pineapple pieces were nice and thick, so it would be evident in every bite.  Also, to really get the most out of this dessert, serve it warm.

This recipe requires four 3 1/4 inch or ten 2 1/4 inch rings.

Pineapple Polenta Cake
adapted from Dessert Fourplay

Ingredients/Fruit Layer
1/2 ripe pineapple
1/2 cup sugar
2 tbs water
pinch of salt

Ingredients/Cake
1/4 tsp salt
1/4 cup plus 2 tbs yellow cornmeal
1/4 tsp baking powder
1/3 cup flour
4 tbs or 1/2 stick unsalted butter
1 egg
2 large egg yolks
7 tbs sugar

Prepare the ring molds by covering the bottom with foil and wrapping up around the outside edges, so you have a little cake pan.  Place foil side down on baking sheet.  Set aside.

For the fruit layer, cut 1/2 pineapple into quarters vertically.  Then take each quarter and cut into 8 pieces and place in bowl.

Take a saucepan fill with sugar and water.  Place over high heat.  Let the sugar melt and cook until it starts to turn color.  Remove and swirl the pan so the sugar will brown even and place back on burner.  Continue with this process until the sugar mixture is a dark amber.  Remove from heat and fill one mold with about 1 1/2 tbs of sugar mixture for large and 2 tsp for small.  Lift and tilt mold so that all the sugar mixture evenly coats the bottom foil from edge to edge. Repeat the process so that all of the molds are bottom lined with the sugar mixture.

For the small molds, place one piece of pineapple on top of the sugar layer.  For the larger, use two pieces of pineapple. Preheat the oven to 375 degrees.

To make the cake batter, cream together the sugar and butter with a stand mixer fitted with the paddle. Mixture should be fluffy.  Scrape down sides and add one egg.  Beat for 30 seconds and scrape down sides.  Add one egg yolk and beat for another 30 seconds.  Then add the last egg yolk and beat until well blended.

In a separate bowl, sift together the flour, cornmeal, baking powder and salt.  Pour into the wet batter and stir with a spatula or wooden spoon until no dry streaks remain.  Take a small zip loc back and snip the corner.  Fill bag with batter and pipe between and over pineapple pieces in mold.  Then for larger molds add two more pieces of pineapple and smaller add one.  Then cover this layer with the batter as well.

Then pipe another layer of batter, smoothing out tops, molds should be 3/4 full.  Place in oven and bake for 8 minutes for the small cakes and 10 for the large.  Make sure the pan is rotated at the halfway point.  The cakes are done when a tester comes out clean.   Let cool for about 1 minute.

Remove from oven and run a knife around the inner edge of the mold.  Ivert mold onto serving plate and remove the foil and then remove the ring mold.  Then serve.

Tips and Notes
1. I used such big chunks of  pineapple that I needed an additional 1/2 recipe of the batter to fill mold and cover pineapple chunks.
2. Do not lift ring off of cake without taking off the foil, it will cause you to pull caramel as well as pineapple pieces off the cake.
3. I used a fork to help when peeling off the foil to make sure the topping came off the foil
4. Due to using more batter in my molds, the cakes took about 20 minutes to bake for 3 1/4 inch molds.
5. I made sure that the pineapple pieces were not stacked one on top of each other.  My first layer had two pieces placed vertically and the second had two pieces placed horizontally.
                            **LAST YEAR: Sunshine Grove Cookies**


Monday, July 16, 2012

Brown Sugar Peanut Squares


If you know me, then you know that I favor peanut brittle as well as pralines.  I was wanting to make some cookies and I did come across a few recipes, one had praline chunks mixed in and the other had crunched up caramelized peanuts on top.  Since the ones with the topper seemed to have more of the nut crunch for each cookie, I chose the ones with the topper.

These particular cookies hail from Columbia and are called "cucas" in their country.  The blend of brown sugar as well as peanuts are ingredients that seem to pop up a lot when it comes to baked goods for Central as well as South America.

The cookies, even though flat, have a soft texture.  They are basically a brown sugar
cookie and would be appropriate for high tea as well as brunch.  However, adding the frosting and caramelized peanuts on top, really turn them into an all around cookie.  It is those extras that really make me consider this recipe to be a definite keeper. Also, the texture contrast of the soft cookie with the crunch of the peanut topping makes for a great bite. This recipe makes about 30 cookies.

Brown Sugar Peanut Squares or Cucas
adapted from International Cookie Cookbook

Ingredients/Cookies
1 cup or 2 sticks of butter
1 egg
1 egg yolk
1 cup of packed dark brown sugar
2 1/3 cup flour
3/4 tsp baking powder

Ingredients/Topping
2 tbs packed dark brown sugar
3 tbs granulated sugar
1 cup finely chopped skinless unsalted peanuts
1/4 cup or 1/2 stick butter
1 1/4 cup powdered sugar

In one bowl, sift together the baking powder and the flour.  Set aside.  Fill another bowl with the butter and dark brown sugar and beat until smooth.  Add the egg and egg yolk and beat for about 1 minute.

Take out a wooden spoon and mix the sifted ingredients into the butter mixture until no dry streaks remain.  Place the dough between two long sheets of wax paper.  Roll out to a rectangle that it 1/4 inch thick.  I ended up with a rectangle 10X17 inches.  Place wax paper covered dough in the fridge to chill for 15-20 minutes.

During the chilling time, preheat your oven to 350 degrees.  Also prepare 2 baking sheets by lining with parchment paper.

Once chilled, remove the dough and lift off top sheet of wax paper.  Place back on top and flip dough over and then peel off the wax paper on the face up side.  Using a knife or pastry wheel, cut dough into rectangles, measuring 1 1/2 X 2 1/2.  Place each rectangle on a baking sheet about 1 1/4 inch apart. Continue to cut and place on sheet and then re-roll scraps, following the same instructions.

Place pan in oven and baked 8-10 minutes or until edges have turned more golden than the color of the cookie dough. Remove pan and let cool for 3 minutes and then transfer to rack to finish cooling.
 
For topping, place granulated sugar in a small saucepan over medium heat.  Once sugar has melted, stir in the peanuts.  Continue to stir and let cook until peanuts turn brown, crispy and fragrant.  If it starts to smoke and overheat, lift pan off burner to cool slightly and then place back on heat and stir. Do not let burn or over cook.  Empty contents into a heat proof bowl when done and let cool completely.  Once cool, you can break up any big clumps that formed.

In a small bowl beat together butter and brown sugar together until smooth.  Then beat in the powdered sugar until no dry streaks remain.

Then ice cooled cookies and immediately sprinkle the caramelized nuts on top and press them lightly into the icing.

Tips and notes:
1.  The nut mixture seemed too dry to me, so I added 1 tbs of glucose and let cook for about 15 seconds while stirring.
2. The frosting was too thick to spread, so I added some water and put in in a squirt bottle instead of spreading with a knife.
3. I used a 2 inch square cookie cutter, which was easier and insured straight edges.
                               **LAST YEAR- Black Casino Cake**

Monday, July 9, 2012

Croissant Pockets with Apricots and Brie

It has been some time since I have posted any bread type of recipe, so I decided I would try my hand at making croissants.  Since croissants do require some time, I wanted to make something out of the ordinary instead of the standard.

Since the details of the whole process is lengthy, I have done one post for the dough and this post here for the filling baking and assembly.  The dough in the ingredients is linked back to the original process of making it.

The filling is what really puts these over the top. Brie and walnuts are a pretty tasty blend.  However, this recipe does not stop there, it also includes brandied apricots.  These do have a way of really making your taste buds come alive.  In one bite you get buttery pastry, melted brie, apricots,walnuts and brown sugar.

A perfect treat for brunch, special occasion or just to brighten up any morning.

Croissants Pockets with Apricots and Brie
adapted from Great Coffee Cakes

Ingredients
1 batch croissant dough
8 oz ripe Brie Cheese, cut into 16 slices, 1/4 inch thick and 3 inches long
9 oz dried apricots, each piece cut into 1/4ths
1-2 tbs brandy
1 cup water
2 tbs sugar
4 tbs butter (softened)
1/2 cup toasted walnuts
1/4 cup and 2 tbs light brown sugar
1 egg beaten with 1 tsp water (egg wash)
1/4 cup milk
powdered sugar (for dusting)

Put the apricots and water in a small saucepan and bring to a simmer.  Cover and cook for about 20-25 minutes.  Your apricots will turn soft and some of the water will evaporate.  Drain the apricots and reserve the liquid.

Pour the liquid back into the saucepan and add the brandy and sugar.  Cook over medium heat until sugar has dissolved and brandy has evaporated, which should take about 3-5 minutes.  Remove from heat.  Put the apricot pieces back into the liquid and stir to coat.  Transfer mixture to a heatproof bowl and let cool.   Once cooled, stir in the walnuts and set aside.

Place the butter and sugar in a small bowl and blend with a fork until the mixture has a paste like consistency.  Set this item aside also.

Line 2 baking sheets with parchment paper.

Take out the dough and cut it in half and return one piece to the fridge.  Place the other piece on a flat, floured surface.  Roll the dough into a rectangle, measuring 10x12 inches with the 12 inches horizontal to the counter.  Then cut the dough into 8 rectangles, measuring 3x5.

Working with one small rectangle at a time, even out the shape to an even 3x5 size with the 3 inches horizontal to the counter.  Spread one teaspoon of the sugar/butter blend over the center of each piece, leaving a 1/4 inch border around the edges.  Then cover with one tablespoon of the walnut/apricot blend.  Take a slice of brie and place in center of dough so each end touches the edges of the 3 inch width. The folding with be much like a letter.  Fold the bottom of the dough up and over, with the end covering the brie.  Then brush the top dough edge not covered by the filling with the egg wash.  Fold this end of the dough so it overlaps the other and pinch to seal.  Place seam side down on prepared baking sheet.

Continue with the process for the additional 7 pieces of dough and the remaining dough in the fridge.  The end result should be 16 filled croissants, 8 placed on each sheet.  Brush the tops and sides with milk and let rise 20 minutes.  Repeat the brushing and rise time for 1 more time and preheat the oven to 400 degrees.  Brush again with the milk and let rise for another 20 minutes.

Brush pastries with egg wash from bottom to top, being careful not to get any on the parchment or baking sheet.  Place pans in the oven and bake for 10 minutes.  Reduce the oven temperature to 350 and bake for 5 minutes and turn.  Bake for an additional 5 minutes.

Remove and place pan on racks to cool for about 20 minutes.  Dust with powdered sugar prior to serving.

Tips and Notes:
-after filling and folding you can freeze for later baking, just be sure to thaw it at room temperature before baking
-sides are not to be sealed, however, if you see that some cheese has melted out, you can take a spatula and push it back inside.  Just do it right after removing from oven.
-The Brie might not measure out perfectly to 3 inches for every piece, so you can put pieces together to make the strip the right size.
-try not to flatten your croissants when assembling, it impedes the rising.
-do not over fill.  Too much butter/sugar will cause pools to run out and make your croissants soggy 
                           **LAST YEAR:Honey Bee Cookies**

Croissant Dough

This is the first part of a recipe for filled croissants.  Since the dough requires a long chilling time, I have made a separate entry here, just to create the dough.  There is another post on this day which completes the full recipe for the filled pockets. This makes 16 croissants.


Dough For Croissant Pockets
adapted from Great Coffee Cakes

Ingredients/Croissant Dough
For Sponge
1 1/8 tsp yeast or 1/2 package
1 1/2 tsp sugar
1/2 cup flour
1 cup milk

For dough
2 cups flour
2 tbs plus 2 tsp sugar
1 tsp salt 
1 tbs soft butter

For butter blend
2 sticks of butter
2 tbs flour

For the sponge, warm the milk in a saucepan over low heat until it reaches a temperature of 110 to 115 degrees.  Mix in the sugar and remove from heat.  Sprinkle the yeast over the top and cover. Let sit for 5 minutes.  Mix with a fork.  Then cover and let sit for another 5 minutes. By this time, the yeast should be dissolved and foamy.

Stir in the flour.  It may be lumpy, but thats ok.  Cover the mixture and let stand for 25-30 minutes.

To prepare the butter, take out a piece of wax paper and place it on a flat surface.  Dust the wax paper with 1 tbs flour.  Then place the sticks of butter on top and press together.  Sprinkle more flour on top and then pat it into the butter.  Using a rolling pin, roll the butter into one big 4 inch square, using additional flour as needed.  Cover with plastic wrap, place on plate and put in refrigerator.

For the dough,  sift together the flour sugar and salt.  Then pour the dry mix into a bowl of a stand mixer fitted with a paddle attachment.  Then add the tablespoon of the soft butter and blend on low for 30 seconds.  Turn off the mixer.  Pour in the sponge and mix on low until no dry streaks remain.  Be careful not to over mix.

Place the dough on a floured surface and knead for six turns.  Pat it into a 4 inch rectangle and let rest for a few minutes.  Then, using a rolling pin, roll the dough into a 6X8 inch square.  The six inch side should be horizontal with the counter.  Take out and place the butter in the center of the square of dough.  Fold the bottom portion of the dough over the butter, then fold down the top portion of the dough and pinch the seam together.  Also, seal the side edges of the dough together.

This dough will require 4 quarter turns and a roll out as follows:

Going in the clockwise direction, give the dough a quarter of a turn. Roll it out to a 10x6 rectangle with the 6 inch side horizontal to the counter top.  Any butter that seeps through should be coated with flour to seal.  Flip the dough over and fold the dough into thirds, letter style. Make sure all your edges are even.  Cover in plastic and place on cookie sheet in refrigerator.  Let chill for 20 minutes.

Take the dough out and start with having the open seam to your right.  Repeat the above process 3 times.   Chill for at least 6 hours or up to 3 days before moving on to the filling and baking stage.

Monday, July 2, 2012

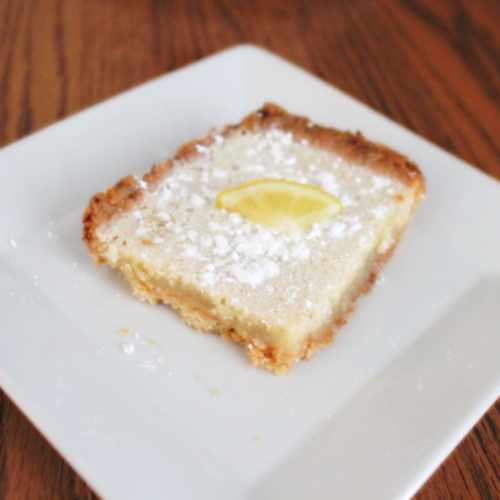
Lemongrass Bars

I still had some lemongrass left over from my last creation, so I decided to make these lemongrass bars.  The good thing about lemongrass is that it does last for about 10 days in the fridge.

This particular bar has a coconut shortbread base and a lemony topping.  The filling texture does resemble more like a key lime pie than a baked bar.  The usage of lemongrass does make these bars quite different from the standard.  It reduces the tartness of the lemon and adds hints of mint and ginger.

While I do like lemon bars, I am pretty picky.  I do not like them to be dry, nor do I like them to be too strong.  Some I have tasted have been pretty bitter.  These bars do not have those issues.  Also, the extra flavors do bump them up to more of a gourmet quality dessert.

Lemongrass Bars
adapted from Bon Appetit

Ingredients/Crust
1 cups sweetened coconut
1/2 cup plus 3 tbs butter (room temp)
1/2 cup powdered sugar
1 1/2 cups flour
1/2 tsp salt

Ingredients/Filling
1/4 cup flour
1 1/4 cup sugar
3 finely chopped lemongrass stalks (outer layer removed, bottom 4 inches only)
3 eggs
5 tbs lemon juice
powdered sugar (for dusting)
pinch of salt

Preheat the oven to 350 degrees.  Prepare 9x13 inch pan by buttering the interior.

To create the crust, mix together powdered sugar, coconut, salt and flour.  With an electric mixer on medium, beat in the butter until the mixture clumps.  Pour into your prepared pan.  Place waxed paper over the dough and flatten it evenly into the bottom of the pan as well as about 1/2 an inch up the sides.  Bake for about 25 minutes.  Crust will be golden brown with darker edges.  Remove pan from the oven and place on cooling rack.

Reduce the oven temperature to 325 degrees.  Using a food processor, pulse together the lemongrass and the sugar.  The lemongrass should be finely ground with the sugar, which should take about about  a minute.  Add the lemon juice and process again for 30 seconds.  Put the eggs into the mixture and run the processor for about 10 seconds.  Lastly, pour in the flour and salt and pulse until smooth.

Pour the filling over the hot baked crust and place in oven.  Bake for about 22-23 minutes.  Remove and place on rack to cool completely.  Cut into pieces and dust with powdered sugar.
                                    **LAST YEAR: Austrian Apple Twists** 


Monday, June 25, 2012

Key Lime Parfaits

This particular recipe requires special equipment as well as special ingredients.  The recipe comes from a pastry chef and was quite challenging.  However, this does prove that with the proper instructions from a book, a person without any culinary training can create an incredible dessert.

This dessert is a very special spin on key lime pie.  The base is a graham cookie that is crispy and subtly sweet. That frozen layer is a mixture of dairy and tart key lime juice.  It is also garnished with sliced plums and surrounded with a unique sauce flavored with ginger, lime leaves and lemongrass.

This serves ten and requires that you have 10 ring molds, measuring 2X2.  Also, a scale is required to measure out the italian meringue.  Items with an asterisk are linked back to another post, which is the detail of dessert components that need to be created in advance of preparing this recipe.

I did find that the cookie stayed crisp as expected.  The custard topping really does have that unmistakable tart flavor of key lime that citrus lovers look for in a lime dessert.  It also has a silky smooth mouth feel, so I would say that the invert sugar ingredient was an asset.  The juicy plum slices on top compliment the custard nicely with their fleshy sweet interior and tart skin.  Also, I really liked the flavor notes in the sauce, so I am storing it for future use on fruit desserts.

Key Lime Parfait
adapted from Dessert Fourplay by Johnny Iuzzini

Ingredients/Italian Meringue
pinch of cream of tartar
2 egg whites
1/4 cup sugar
1 tbs water

Take 1 tsp of sugar out of the 1/4 cup and put into bowl of a stand mixer.  Add the 2 egg whites and beat at low speed.

In a small saucepan, add the water and the rest of the sugar.  Mix until all there is no dry sugar.  Place over medium high heat until the syrup reaches 250 degrees.  I used a microwave and checked the temperature after 30 second intervals.  It took about a minute and 1/2 to reach the temperature.

Turn the mixer up to medium speed and beat until the consistency barely makes soft peaks.  Then, continue to beat and pour the water/sugar mixture into the egg whites.  Try to avoid getting it on the inside edge of the bowl and on the beater.  Turn the speed up to high and continue beating.  Once the outside of the bowl has cooled, the meringue has reached the correct consistency.  Set aside. There will be some excess left over after completing recipe.

Ingredients/Lime Parfait
1 1/2 cups of heavy cream
2/3 cup fresh key lime juice
1 split/scraped vanilla bean or 1 tbs vanilla extract or paste
1 cup milk
9 egg yolks
1/2 cup plus 3 tbs sugar
1 tbs invert sugar*

Place 10 ring molds (2X2) on top of a parchment or silpat lined baking sheet.  Put baking sheet in freezer.  Prepare a double boiler by filling bottom with water and heating until water comes to a simmer.  Also, fill a big bowl with ice and some water for a water bath to cool the parfait mixture after it cooks.

Fill the top of the double boiler with key lime juice, milk, vanilla, granulated sugar,yolks and invert sugar and mix together until all is blended.  Place over the bottom of the double boiler with simmering water.  Let the mixture cook, stirring and scraping sides occasionally.  Mixture will need to thicken and cook up to a temperature of 181 degrees.  Once it reaches that point, transfer the saucepan to water bath to cool off.  Mix often to help cool down to lukewarm then transfer to a large bowl.

At the lukewarm state, take out another bowl and fill with the whipped cream. Beat cream until it reaches the soft peak stage. Set aside.

Go back to the Italian meringue and measure out 50 grams and fold it into the lime custard.  Then add all of the whipped cream and gently fold it into the batter until no streaks remain.

Take the baking sheet of molds out of the freezer.  Using an ice cream scoop or pastry bag without a tip, fill the molds.  Cover the molds with plastic wrap and freeze for a minimum of 4 hours or up to 3 days.

Ingredients/Sauce
1/2 ounce chopped lime leaves
1 lemongrass stalk crushed and chopped
1/2 oz or 1 tbs fresh ginger (peeled and sliced)
1 1/4 cup simple syrup*
1/2 cup verjus

Place all ingredients in a small saucepan and bring to a simmer.  Continue to cook for 25 minutes or until mixture is reduced by 1/2. I measured 2 cups initially and cooked down to 1 cup.  Pour mixture into a strainer set over a heatproof bowl.  Let cool for 15 minutes and cover with plastic wrap and chill for a minimum of one hour or maximum of 3 days.

Ingredients/Assembly layers
3 or 4 ripe plums
10 graham cracker cookies*
 
Split plums and remove pits. Cut each half into thin slices and put on a plate. The task of cutting takes a very sharp knife and some dexterity.  Also, the ripeness of the plums will be a factor as well.

To assemble, place 1 graham cracker cookie on each serving plate. Remove baking sheet of frozen ring molds.  Using your hands, rub around the outside ring to help warm the interior.  Push the inner parfait out on top of the center of the graham cracker cookie.  Arrange the plum slices in a circle, starting with the outside going in.  Then drizzle a little of the sauce around the dessert.  Enjoy!
                            **LAST YEAR: Sweet Lemon Nut Bread**

Sunday, June 24, 2012

Dessert Components

This particular post is the recipe for several components used in a recipe that I will be posting tomorrow.  The recipes have been halved from the original since they make an excess of what is called for.  Even when halving and I still had some inverse sugar left overs.  This component does come in handy when making other things, so I am sure there will not be any waste. These recipes hail from Johnny Iuzzini, a famous four star pastry chef.

The first is the cookies.  These cookies are good for use as a garnish for frozen treats and a base for sorbet, uncooked cheesecake, whipped cream with fruit-and the list goes on.  In using this dough, I found it to be very sticky.  Instead of cutting out the dough and placing it, I had to improvise.  Below are the instructions on how I handled the process.  I used this recipe to make 10 cookies, 2 1/2 inches in diameter, even though the stated amount should have been 8, according to halving exactly.

Graham Cracker Sable Cookies
adapted from Dessert Fourplay

Ingredients
3 tbs flour
1 beaten egg
3 tbs butter, melted
1/2 cup plus 3 tbs plus 1 1/2 tsp graham cracker crumbs
2 tbs sugar

Mix together the melted butter, graham cracker crumbs and sugar until even distributed and crumbly. Stir in the eggs until blended.  Lastly, fold in the flour, making sure no dry streaks remain.  Place on a floured surface and shape into a brick.  Then wrap in plastic wrap and chill for at least one hour.

Preheat the oven to 350 degrees and line a baking sheet with parchment paper.  Once the dough has chilled properly, remove and shape into 10 equal and round balls.  Place one ball on the parchment lined baking sheet and place a 5 inch square of parchment paper over the ball.  Using a small pastry roller, roll the ball out into a circle, about 1/8 inch thick.  Then remove the top parchment sheet and place your cutter over the surface.  Press down and remove excess from around the cutter.  Continue
with the process until all cookies are formed.

Place baking sheet in the oven and bake for 12-13 minutes or until golden brown.  Remove and let cookies cool on pan for about 3 minutes then transfer to rack to finish cooling.

The second is the simple syrup.  This is a great item to dip fruits in when you want an extra sweetness without impacting the texture and the freshness of the fruit. Also, this syrup does have a long life if kept covered tightly and stored in the refrigerator. The recipe below makes 1 1/4 cups.

Simple Syrup
adapted from Dessert Fourplay

Ingredients
1 cup sugar
1 cup water

Combine both ingredients in a saucepan and place over medium heat.  Let come to a boil and cook until the sugar is dissolved.  Pour into a heatproof bowl and let cool completely before using.

The third is the invert sugar, which is actually a homemade version of invertase. Invertase is used commercially in the creation of frozen desserts.  At one time, I had posted a note that all homemade ice cream does have a tendency to get icy after a few days in the freezer.  This recipe states that this ingredient is the key to creating a smoother texture in frozen desserts as well as keeping water crystals from forming.  In the recipes I have seen, it does not require very much.  I saw 4 teaspoons or 1 tablespoon per quart of ice cream on a few ice cream recipes.  The recipe below makes a little under 1/2 cup.

Invert Sugar 
adapted from Dessert Fourplay
(below is 1/4 of original recipe measurements)

Ingredients
1/2 cup plus 1 tbs sugar
1/4 cup water
1/2 tsp lemon juice

Place all ingredients in a small saucepan and bring to a slow boil.  Then turn down the heat and let the mixture actively simmer for about 30 minutes.  This cook time should rid the sugar of any acid taste from the lemon.  You can attempt to taste, but it is very hot.  Let cool for 15 minutes and then taste.  If still acidic, place back on stove and let simmer 5-10 more minutes.  Remove and pour into a heatproof bowl or container.  Let cool completely before using.

Come back tomorrow to see what I make from these components.

Monday, June 18, 2012

Fuyu Persimmon Cake


Well I have decided to cut back on blogging and make some changes to embark on some new interests in my life.  It has been a wonderful ride, but this blog will become more of a personal diary than a public feed.  In review I would say that blogging does have a way of enriching your life but it can take over your life as well.  I will be posting quite a bit less and will not be visiting blogs anymore.  I will miss some of it, but I am sure my next endeavor will be just as rewarding.
 
This particular recipe has floated around to many places through the years, but it still remains an unique recipe in my book.

Since it is heavy on the spices, it is considered a winter cake.  However, since I did spy persimmons at the market, I could not pass them up.  Apparently there are two types, the Hachiya and the Fuyu.  This particular cake is made with the harder persimmons, the Fuyu.

I found it reminiscent of almost a gingerbread cake.  It was very moist with chunks of persimmons and walnuts throughout. Then it was all topped with a maple glaze.  Definitely something that will get you started thinking about the fall holidays and spicy treats.

Fuyu Persimmon Bundt Cake
adapted from Sunset Magazine, 1978

Ingredients/Cake
1/2 tsp nutmeg
1 tsp cinnamon
1 tsp salt
1 tsp ground cloves
1 tsp baking powder
2 tsp vanilla extract
2 tsp lemon juice
2 eggs
1 cup chopped walnuts
3/4 cup raisins (I omitted)
1/2 cup butter
2 cups flour
3 cups peeled and chopped fuyu persimmons
2 tsp baking soda
1 2/3 cup sugar

Ingredients/Glaze
adapted from Food Librarian

1 cup confectioners sugar
2 tbs maple syrup

Prepare a 10 cup bundt pan by coating all the insides with butter.  Then dust with flour, tapping out excess.  Preheat the oven to 350 degrees.

Sift together the flour, salt, baking powder, cloves, cinnamon and nutmeg in a medium bowl and set aside.

Then beat together the butter and the sugar until light and fluffy.  Add the eggs, one at a time beating after each addition. Mix in the lemon juice and vanilla and beat until fluffy. In a separate bowl, mix the baking soda with the persimmons and then fold them into the egg/butter/sugar batter.

Fold the sifted mixture into the batter until no dry streaks remain.  Then stir in the walnuts.  Spoon the batter evenly into the cake pan and smooth the top.  Bake for about 55-60 minutes until tester comes out clean.

Let cool for about 20 minutes and then run a knife around the top edge and invert to finish cooling.
Mix together the glaze ingredients and drizzle over cooled cake.
                               **LAST YEAR: Shrimp Po' Boys**

Friday, June 15, 2012

Persephone's Winter Cake

There is a myth surrounding how wintertime actually came about.  Apparently Hades, God of the Underworld, stole someone's daughter named Persephone to keep her and make her marry him.  Her mother was Demeter, goddess of the harvest.

Once Demeter heard about her daughters fate, plants stopped growing.  The lack of food did take its toll on several people as well as animals.  Then her husband Zeus advised that as long as Persephone had not eaten any food in the underworld, she could go free.  Based on this, Persephone was released back to her family.

However it did not take long for a servant of Hades to arrive and advise the parents that Persephone did in fact eat.  It was only 7 pomegranate seeds, but it still was food.  The family was devastated, so much so that it was finally ruled that Persephone could stay with her parents 9 months out of the year. The other 3 months she would have to stay in the underworld.  As a result, plants would die during the 3 months, hence the season was to be called winter.  This cake does have some summer flavors, but the name reflects the tie in to the myth.

This particular cake has is a unique flavor combination, pomegranate and white wine. It came out very moist with a subtle tartness from the pomegranate.  The layers are filled with lime curd and the cake is frosted with sweetened whipped cream.  The curd really does give an extra pop of flavor against the subtle flavor of the cake. Also the whipped cream just pulls it all together in one tasty bite.  

Persephone's Winter Cake
by flourtrader

Ingredients/Lime Curd
1/2 cup sugar
3 eggs
2 tbs lime zest
1/3 cup lime juice
1/2 cup or 1 stick of butter, 1/4- 1/2 inch cubes


Ingredients/Cake
1/2 cup vegetable oil
1/2 cup water
1/4 cup & 2 tbs white wine
1/4 cup & 2 tbs  pomegranate juice
2 tsp vanilla extract
5 egg yolks
red food coloring (optional)
2 tbs freeze dried pomegranate
1 tsp lemon zest
1/2 tsp salt
1 tbs baking powder
2/3 cups sugar
2 1/4 cups flour
1/2 tsp cream of tartar
8 egg whites
1/2 cup sugar

Ingredients/Whipping Cream
1/2 tsp whipping cream stabilizer (I used Whip it brand)
2 cups heavy whipping cream
8 tsp sugar
3/4 tsp vanilla

For the lime curd, beat together eggs, lime juice, lime zest and sugar.  Pour into small saucepan and cook on low heat, stirring constantly until the mixture thickens and lightly coats the back of a spoon.  It should reach a temperature of about 160 degrees.  Then add about 3-4 cubes of butter and stir until it melts.  Continue with this process until all butter has been melted and mixed in.  Remove from heat.  Place a sieve over a heat proof bowl and pour the curd into it.  Make sure all curd is pushed through strainer, leaving the zest behind.  Let cool for about 5 minutes, then cover the surface with plastic wrap and place in the refrigerator.

Prepare two 9 inch cake pans by greasing the interior with melted butter.  Then line the bottom of the pans with parchment paper and butter the surface.  Dust bottom and sides with flour.  Preheat the oven to 325 degrees.

Sift together 2/3 cup of sugar, flour, baking powder,freeze dried pomegranate and salt.  Set aside.

In a large bowl, beat together yolks, water, oil, vanilla and lemon zest.  Stir in the wine and pomegranate juice.  Add the optional food coloring, being aware that the egg whites will lighten the batter color.  Mix until blended evenly.

Take out a mixer bowl and fill with eggs whites and cream of tartar.  Beat until it turns into soft peaks.  Then add 1/4 cup of sugar and beat for 1 minute and add another 1/4 and continue to beat until stiff peaks form.  Fold the egg white mixture into the pomegranate batter.

Pour the batter into the two cake pans, making sure each is filled evenly.  Put each pan in the oven, one on the top left and one on the bottom left.  Baked until tester comes out clean, which is about 25 minutes.  Remove pans and run a knife around the edges.  Place pans on rack and let cool for 10 minutes.  Then invert and peel off parchment and let cakes cool completely.

Once the cakes are cool, place in fridge for 15 minutes.  Then remove and trim domed tops to make each cake even and flat on top.  Then with cut dome side up, smooth the lime curd on top evenly.  Then top with other cake layer.

To make the whipped cream, place all ingredients in a small bowl and beat until soft peaks form.  Be careful not to over beat, you do not want it stiff, just thick.  Frost the top and sides of cake and pipe a border if desired.  Store in fridge until ready to serve.

Tips and notes:
1. deflating the whites when folding in can make for a dense cake, so take care in this process
2. Straining out the zest in the curd is optional, you can leave it in for extra tartness.
3. The stabilizer does help whipped cream from being runny at room temperature for extended times. If you do not have stabilizer, it is best to use a version with gelatin but it will give it a more spongy texture.
4.  This is another one in which I did not like the taste of the cake the first day but on the second day the flavors had developed into something very tasty.
                   **LAST YEAR: Maple Pumpkin Bars**

Wednesday, June 13, 2012

M & R Pie

Well I have been looking all over the net concerning pies trying to come up with a name for this one.   Interestingly enough, I came across a site called Pies Across America.  It is actually a program set up by two people, Micah and Rick with the idea of sending pies out to people that are in need of some uplifting, such as those affected by natural disasters.  Their base site is in Facebook which I am not a member of, so I am not sure how active the site is.

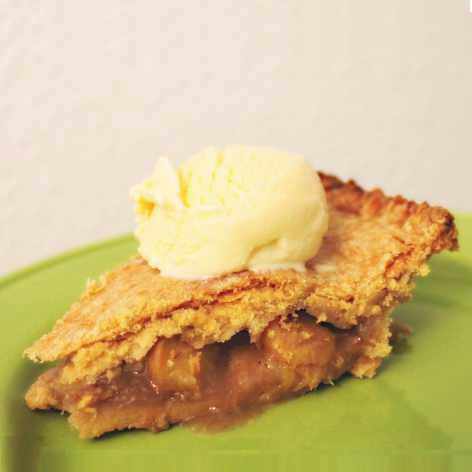
I have really been on a peach kick lately, I think it was all started with a mixed drink called a Peach Freeze.  Frozen pureed peaches was the base of the drink and it was heavenly.  This particular pie is full of spices and sliced ripe peaches.  In addition, for a little extra zing, I have added some peach schnapps as well.  Also, pecan pieces were lightly pressed into the bottom of the pie crust before filling.  One slice topped with a scoop of vanilla really makes for a great summer dessert.

M&R Pie
by flourtrader

Ingredients
Pie crust for 9 inch double crust pie
1/4 cup chopped pecans
8-10 peaches, peeled and cut into chunks
1/2 cup sugar
2 tbs flour
1 tsp ground cinnamon
1/2 tsp ground nutmeg
1/4 tsp ground cloves
3 tbs peach schnapps
3 tbs cold unsalted butter, cut into small pieces
sugar for sprinkling

Prepare pie crust dough as directed and cover and place dough disks in the fridge to chill prior to rolling.  Place a sheet of wax paper on a flat surface and lightly dust with flour.  Using a rolling pin, roll dough out to a 13 inch circle.  Then invert and center dough over pie pan and peel off wax paper and tuck the pastry into the pan.  Do not stretch the pastry, but flatten against the pan.  Then lightly press the pecan pieces into the bottom of the dough.  Leave overhang and place back in fridge for 15 minutes.

Then fold the peaches, cinnamon, nutmeg, cloves, sugar and flour together in a separate bowl.  Stir in the peach schnapps.  Take the pie pan out of the fridge and fill the pie pan with the mixture, making sure it is all even.  Then drop the small pieces of butter in places on top of the filling.

Take out the the second piece of dough and place on floured wax paper. Roll into an 11 inch circle.  Moisten the top edge of the dough in the pie pan and invert 2 piece of dough over the top.  Press to seal.  Make a decorative top edge according to your personal preference.

Sprinkle sugar over the top of the dough.  Then make steam vents in the top of the pie with a paring knife.  Place in oven and let bake for 30 minutes.  Then lower heat to 350 degrees and rotate pie 180 degrees and bake for an additional 30 minutes.

Remove and place on rack to completely cool.
                       
Tips and Notes:
1. amount of filling will vary, depending on the size of your peaches.  Mine were fairly small
2. Peach flavors develop more within time, so waiting a day before serving would be better
                        **LAST YEAR: Aztec Treasure Cookies**
 

Monday, June 11, 2012

German Carmelite Sister Cookies

These particular cookies get their name from 2 Carmelite sisters or nuns that were in hiding during the French revolution.  They actually made these cookies for money to support themselves.  In time, these women were called the "Macaroon sisters" and then later on the recipe was passed onto the Jewish community.

These particular cookies are a macaroon base, however, they have a twist that is reminiscent of the frosting on a German chocolate cake.  They have a chewy pecan filling and are dipped in German chocolate.  They are quite moist and remind me more of a candy than the typical dry macaroons that you often find at the store.  With the humid weather in Texas, I found them to be particularly tasty after refrigeration or even freezing.

If you are like me and love the icing on German chocolate cake, then you will enjoy these.  This recipe makes about 1 1/2 dz macaroons about 2 inches in width.

German Carmelite Sister Cookies
by flourtrader

Ingredients/Filling
2 tbs butter
1 tbs bourbon
1/4 cup corn syrup
1/4 cup sugar
1/2 cup chopped pecans
1 egg
1/8 tsp vanilla extract

Ingredients/Cookies
1 1/2 cups sweetened shredded coconut
1 1/2 tsp vanilla extract
3 egg whites
1/3 cup sugar
1/2 tsp cream of tartar

Ingredients/Topping
1 cup chopped German chocolate
4 tsp butter

To make the filling, melt butter in a small saucepan on medium heat.  Then stir in corn syrup and
sugar.  Cook the mixture, stirring constantly until the sugar has dissolved.  There will no longer be a grittiness at the bottom of the pan when scraped with a spoon.  Remove from heat and let cool for about 15 minutes or to lukewarm temperature.

Preheat the oven to 350 degrees.

Fill a bowl with egg and beat it with a fork.  Stir in the vanilla extract and bourbon.  Then mix in the pecans and corn syrup mixture.

Line the bottom of a pie pan or 9 inch cake pan with parchment.  Pour pecan batter into pan and place in the oven to bake for 10-15 minutes.  Mixture is done when it has turned foamy on top, much like the top of a pecan pie.  The mixture should be able to be scooped up with a spoon and fairly solid. Set aside and let cool.

To make macaroon batter, turn the oven down to 325 degrees.  Line two baking pans with silpat liners.  Beat together egg whites until foamy.  Sprinkle in the cream of tartar and beat again until soft peaks form.  Continue to beat and add one tablespoon of sugar.  Continue with this process until all sugar has been incorporated into batter.  Beat until mixture is shiny and very stiff.

Then carefully fold the vanilla and coconut into the batter, making sure that the egg whites keep their consistency.

Pipe or spoon the coconut mixture into mounds on the silpat.  Then place about 1/2 tsp of pecan mixture on the center of each mound.  Pipe or spoon more of the coconut batter on top of the mound, smoothing to make sure that the pecan center is completely covered.

Bake macaroons for 18-22 minutes, keeping a careful eye out during the time beyond 18 minutes.  You want them to be golden brown but not over baked.  Remove pan and let cool for about 5 minutes, then transfer to rack to finish cooling.

For the topping, melt chocolate and butter together in a double boiler.  Lay out 2 sheets of wax paper.  Dip cooled cookies halfway into chocolate and then place on wax paper and let set.

Tips and Notes
1. I used parchment as well as a silpat and found that the silpat worked better.  If you have the patience for peeling these carefully off the parchment, it will work.
2. Make sure that your coconut mound is at least 1/2 inch high before adding the filling because the pecan mixture does sink.
3.  You will have some excess of the filling, but you can always top ice cream with it or double the macaroon cookie recipe.
                          **LAST YEAR: Alpine Easter Bread**

Friday, June 8, 2012

Michel's Spa Muffins

Well its finally Friday and today I am off to Dallas for some appointments as well as visits to a few specialty stores.  After that indulgence on Wednesday, I decided I would turn to something a bit more on the healthy side.

The particular recipe comes from a chef at spa located north of San Diego called Cal-a-Vie and found in the RSVP section of Bon Appetit.  The muffins are a good example of some of the healthy cuisine that this place has.  I have been looking around at the spa's website.

If you glance at the ingredient list below, you will realize that they are packed with all that a person needs to get going in the morning and to stay satisfied until lunch.  The muffins really do have some great textures and flavors.   A few things that you really will not miss with these is the butter, eggs and sugar.

I am particular about "healthy" muffins and too much grain or bran can really be a turn off.  However, this muffin does have a good balance, so it will be added to the healthy favorites here.  Also, they are a cinch to make, which is even more of a motivator to pull this recipe out.  This recipe makes about 14-16 muffins.

Michel's Spa Muffins
adapted from Bon Appetit, prior to 2005

Ingredients
1/4 cup honey
2 tbs vegetable oil
2/3 cup plain non fat yogurt
1/2 cup fresh orange juice
1/2 cup mashed ripe banana
1 1/2 cups finely shredded carrots
1/2 cup dried cranberries or raisins
1 tbs lemon zest
2 tsp cinnamon
1 tsp baking soda
1 tsp baking powder
1/4 tsp ground cloves
1/2 tsp ground allspice
1/3 cup sesame seeds
1 cup shredded bran cereal (I used all bran)
1 1/2 cups whole wheat flour

Preheat the oven to 350 degrees.  Prepare your pans according to your preference.  You can grease the top edges and line, grease the whole cavity or use a non stick pan.

Boil about 1 1/2 cups of water and place raisins or dried cranberries in a bowl and pour over the top.  Let sit to soften for about 15 minutes.  Then drain and use a paper towel to pat dry.  Set aside.

In a medium size bowl, sift together the flour, baking soda, baking powder, cinnamon, cloves and allspice. Stir in the bran and sesame seeds.  Form a well in the middle of the dry mixture.

Then take out a smaller bowl and mix together the first eight ingredients listed above.  Pour this mixture into the well of the dry mix.  Fold together until no more dry streaks remain.

Using an ice cream scoop or spoon, fill muffin cavities with batter.  Place pan in oven and bake until tester comes out clean.  Baking time is about 18-20 minutes.  Remove and let cool for one minute then transfer to rack to finish cooling.  These can be served warm or at room temperature.

Tips and Notes:
1.  I found that these do stick to the liners, so when baking you may want to opt not to use liners.
2. The batter does not rise like cake batter would, so you can fill the cavities full.
3. I mashed my banana but I think it would be better distributed throughout the muffins if the banana was pureed.
                         **LAST YEAR: Amaretto Choc Chip Bundt Cake**

Wednesday, June 6, 2012

Cherry Surprise Cupcakes-Delicious Recall #2

If you have been following my blog, you know that I do like cherries and chocolate.  When I came across this recipe several years ago, I saved it but have never made it until now.  I guess that is one of the reasons why I came up with this series.

These particular cupcakes are really rich in flavor.  The cake part is made with cherry brandy, cocoa and chocolate chips.  Also, they are doused with chocolate liqueur.  These elements really do make for a tasty combo.  In fact, the cake part was so delicious on its own, I opted not to fill these with the cherry and whipped cream.  I just topped them with a butter cream frosting that has cherry juice and brandy in it. I have included the instructions for the filling below as in the original recipe.

This recipe hails from a blog called The Cheeky Kitchen hosted by Brooke.  This was a recipe that came from a baking challenge between her and a friend that owns a cupcake shop.   This recipe makes about 15 cupcakes.  Make sure you read this whole recipe before proceeding, especially the tips at the end.

Cherry Surprise Cupcakes
adapted from The Cheeky Kitchen

Ingredients/Cake
1 tsp cherry brandy
1 egg
2/3 cup milk
1/4 tsp vanilla extract
1/4 cup butter
1/2 cup sugar
1/2 cup light brown sugar
3/4 cup self rising flour
1 1/2 tsp baking powder
1/4 tsp salt
1/2 cup cocoa powder
1/2 cup chocolate liqueur
1/2 semi sweet chocolate chips

Ingredients/Filling
2 cups pitted cherries
1/4 cup cherry brandy
1 cup heavy cream
1/4 cup sugar
1 tbs vanilla extract

Ingredients/Cherry Buttercream
3 tbs and 1 tsp reserved cherry juice
1/4 tsp cherry extract (optional)
1/2 cup butter
2 tbs vegetable shortening
5 cups powdered sugar
1/4 tsp vanilla extract
15-18 whole cherries with stems (optional)

If you are going to fill the cupcakes, the prep work will need to be done first.  Fill a bowl with the cherries and pour in the brandy.  Cover and place in fridge until all cupcakes have been baked.

To make the cake part of the cupcakes, preheat the oven to 350 degrees.  Grease the upper edge of the cupcake cavities and fill with paper liners.

Sift together the cocoa, flour, salt and baking powder and set aside.  In another bowl cream together both sugars and butter.  Beat in the egg, cherry brandy and vanilla extract.

Fold in 1/2 of the sifted ingredients into the batter.  Then add the milk, stirring until blended.  Fold in the last of the sifted ingredients until no dry streaks remain.  Mix in the chocolate chips.

Using an ice cream scoop, fill each lined cavity about 2/3 full.  You should have about 15 cupcakes.  Put pans in oven and bake for 15-18 minutes or until tester comes out clean.  Remove pans and poke holes in the top of the cupcakes.  Then brush chocolate liqueur over the top.  Let set in pans for an additional 10 minutes and then transfer to rack to cool.

While they are cooling, the filling can be made.  Take out the bowl of cherries with brandy. Reserve the juice in a separate bowl and chop the cherries into 1/4 inch pieces and place back in fridge.

In another bowl, whisk the cream until it becomes a little bit thicker than its original state.  Add the sugar and the extract, then beat until the cream reaches a soft peak stage.  Take the chopped cherries out of fridge and fold into whipped cream.  Cover and refrigerate.

Once the cupcakes are cool, take and core out a center piece about 1/2  to 3/4 inch wide and 1 1/2 inch deep.  Then fill the hole with the whipped cream mixture.

For the buttercream, beat butter and vegetable shortening together until smooth.  Then add one cup of powdered sugar, mixing at medium speed.  In one cup increments add the sugar and beat after each addition.  Lastly, add the cherry juice, cherry extract (optional) and vanilla extract and beat on high speed until frosting is light and fluffy.

Fill piping bag with tip and decorate to your preference.  You can place a whole cherry on top or place a chocolate dipped cherry on top, if you desire.

Tips and Notes:
1. If you do not do the filling, the reserved juice will not be available. Maraschino juice can be used in its place with the cherry extract for your buttercream frosting..
2. These cupcakes are very delicate because of the liqueur brushed on top.  Based on that it is important that you do not overfill and that the top edges of your muffin cavities are well greased.  Original instructions said fill cavities 3/4 full, which was too much due to the rise factor.
3. I found the buttercream to be too thick.  You can add more cherry or maraschino juice until you reach the right consistency.
4. Taste your frosting before adding the cherry extract, to make sure you want to add any more flavor.  The longer the cherries sit in the kirsch, the stronger the flavor of the juice.
                         **LAST YEAR: Italian Dippers**

Monday, June 4, 2012

Orange Crisps

I made about 14 dozen of these cookies.  One thing about making something in such large quantity, is that your kitchen equipment really does get a workout. Also, since these were spritz cookies and my press is not electric-my left hand has a much stronger grip now!  The press I was using had plastic templates.  Needless to say two split.

This particular recipe is a recipe specifically made for a press, so obviously this press is fine if you want to make a few dozen cookies for a brunch with a few friends.  Not for cranking out several dozen.  I am now wondering why I did not get a press with metal templates.  Anyhow, this recipe did have one obvious error, it advised to use parchment paper.  The dough did not stick to the paper, but remained on the press.  They did fine on an un-greased baking sheet.

The cookies are pretty much your standard spritz with an orange flavor.  They were some of the ones I made for a grand opening for a new hospital at Ft Hood Army Base.  I had to consider something that would present well and would hold up to Texas heat since these cookies were being transported.  However, if I was in Alaska, I would not have hesitated to dip these in chocolate!

I had some taste testers in house this weekend that really did like them, so I am confident that these will go over well.

Orange Crisps
by Recipelink.com   (recipe makes 6-7 dz)

Ingredients
1 egg
1/2 cup sugar
1/2 cup brown sugar
1 tbs orange juice
1 tsp grated orange zest
2 1/2 cups flour
1/4 tsp baking soda
1/4 tsp salt
1 cup shortening

Preheat the oven to 375 degrees.  Sift together the flour, salt and baking soda in a medium size bowl.  Set aside.

In another bowl, beat together both sugars and shortening until smooth.  Then add egg, zest and orange juice.  Mix ingredients until all is evenly distributed.  Then fold in the sifted ingredients.

Fill cookie press and form cookies on baking sheet according to press manufacturer's directions.  Bake for 10-12 minutes.

Transfer to rack and let cool.

Tips and Notes:
1. no matter how long it takes to form and bake these cookies, do not refrigerate the dough.
2. To make sure that dough continues to stick to the baking sheet and come off the press, wipe off the grease from the baking sheet between uses.
                           **LAST YEAR: S'more Ice Cream**

Friday, June 1, 2012

Ginny Bee Breakfast Cake

Well I am sure one thing that comes to mind is who is Ginny Bee?  Ginny Bee is actually the creation of  John Edwards.  Ginny is a citrus picker, mostly used for oranges.  Before Johns invention, there were other pickers on the market but they were plagued with the problem of  causing tree damage when harvesting. However, in 1976, John came up with a well functioning machine that did not damage any part of the tree or limbs.  With the tree damage not being an issue, his machine was found to be quite handy to have in the groves.  It could pick a 90 lb box of oranges in one minute, which was a real time saver.

This particular recipe is basically an orange breakfast cake.  The cake part has a citrus tang and is moist, having both sour cream and yogurt as ingredients.  Also, there is no skimping on the streusel-it is thick crunchy and has a drizzle of orange glaze.  Since we all seem to enjoy orange juice in the morning, I thought that orange in a breakfast cake would be a good way to start the day.

Ginny Bee Breakfast Cake
by flourtrader

Ingredients/Streusel
1 cup or 2 sticks melted butter
1 tbs plus 1 1/2 tsp cinnamon
1 cup packed dark brown sugar
1/2 cup sugar
1/2 tsp salt
2 1/2 cups flour

Ingredients/Cake
2/3 cup orange yogurt
2/3 cup sour cream
4 tbs orange zest
1 tsp orange extract
2 eggs
3/4 cup or 1 1/2 sticks of butter, room temp
1 1/2 cups sugar
2 1/2 cups flour
1/2 tsp salt
3/4 tsp baking powder
1 tsp baking soda

Ingredients/Drizzle
1 cup powdered sugar
1 tbs orange juice

To make streusel, stir together the cinnamon, both sugars and salt.  Then pour in the melted butter and mix until all is blended.  Then blend in the flour until no dry streaks remain and the mixture clumps together.  Set aside.

For the cake, preheat the oven to 350 degress.  Butter the inside of a 9X13 baking dish.  Then line the bottom and along 2 sides with overhang.  Butter the face up side of the parchment.

Beat the butter in a large bowl until creamy.  Add the sugar, beating again until mixture is completely blended.  Add one egg and blend, running mixer for about 30 seconds.  Repeat the process with the other egg.

Put the sour cream, yogurt, orange zest and orange extract into the batter and blend until all is smooth.  Set aside.

In a different bowl, sift together the flour, salt, baking powder and baking soda. Then, in increments of 1/3, fold the ingredients into the wet batter.  Mix until no dry streaks remain.

Spoon batter into prepared pan and smooth with spatula so bottom of pan is evenly covered.  Take some streusel into your hand and clump together, then sprinkle on batter.  Continue with the clumping and sprinkling until all the batter is covered.

Place in oven and bake for about 1 hour or when tester comes out clean.  Streusel should be a deep brown and be crisp.  Let cool in pan on rack for 30 minutes.

While cooling, you can prepared the drizzle.  Beat the ingredients together until the texture becomes a smooth glaze.  You can add more of either ingredient until you reach the desired consistency.

After the cake has cooled for 30 minutes, drizzle glaze on top.  Cake is tasty served warm as well as cold.  Use parchment handles to lift out of pan and cut into squares.

Tips and Notes:
1. I like streusel and the recipe here probably yields over 4 cups, so if you are not that big on this topping, you can cut down the recipe.
2. You can add nuts to the streusel if you want.
3. The topping is very crumbly, so it will be hard to get a clean cut..
4. Bake time is for a glass pan, other pans may have some variance in the baking time.
                     **LAST YEAR: Jamaican Coin Cookies**

Wednesday, May 30, 2012

Cherry Sachet Cookies

 Today sachets are known for just making things smell sweet. Basically like a bag of potpourri to place in your drawer. Now they are not only for that, but there are several different type of fillings as well.  The variety has most likely come about with potpourri being introduced into the market.

Early on, they were considered a love token.  Then with the medievil era, they were considered "plague bags" to ward off insect and disease.  In the 19th century, Prince Albert had some which were filled with hops and used them to help induce him to sleep.

These particular cookies are like a filled pouch,  much like a sachet. Also, the filling does have its own special aroma when cooking-however the alcohol fumes can be overwhelming!

The outside cookie is made with cream cheese and cooks up very crisp.  Inside is a chewy mixture of cherries and almonds.  The cherries are cooked in a blend of creme de cacao and creme de noyaux.  This is kind of like a fig newton with its own unique filling and a crisper cookie shell.

Before we get to the recipe I have a few bloggers to thank:

CJ at Food Stories: She was so nice to award me with not just one but three awards!  CJ started her blog in January and has really bounded onto the scene.  She has a great angle of creating something with the same ingredient as called for on that particular national food day.  Also, she created her own special award for bloggers.  A few of my food pics from her site are the deep dish chocolate chip cookies and cauliflower rice.

Ambreen at Simply Sweet and Savory:She passed the Versatile blogger award to me. Her blog does showcase her skill for both sides of the fence.  With stunning photos, you will be enticed by a number of her posts.  Not only can you find delicious recipes, but a lot of them you cannot find anywhere else.

Stop in and say hi, you will be glad you did.

Cherry Sachet Cookies  -makes about 2 dozen cookies
by flourtrader

Ingredients/Filling
3/4 cup creme de cacao
3/4 cup creme de noyaux or amaretto (almond liqueur)
2/3 cups of  chopped dried cherries
1/3 cup chopped almonds
1/4 cup sugar

Ingredients/Cookie
1/2 tsp vanilla extract
1/2 tsp almond extract
3 oz softened cream cheese
1/4 cup or 1/2 stick of butter
1 egg
1/4 cup sugar
1 1/2 cups flour
3/4 tsp baking powder
pinch of salt

To make the filling, pour liquid filing ingredients into saucepan and add sugar.  Place over medium high heat and stir until sugar has dissolved.  Then add the cherries.  Let simmer and come to a low boil, stirring occasionally.  Cook for 15-20 minutes.  You want that the mixture to become syrupy and most of the liquid to evaporate.  Remove from heat and stir in chopped almonds.  Let cool to room temperature.

The cookie batter can be made while the filling is cooling.  Beat together the cream cheese, butter  and flavor extracts until light and fluffy.  Add the sugar and the egg and mix until completely blended.  Set aside.

Sift together the flour, baking powder and salt.  Then fold into cream cheese batter until no dry streaks remain.  Refrigerate dough for 30 minutes.

Preheat oven to 350 degrees and butter the inside of one baking sheet.

Once the dough has chilled, roll it out on a floured surface  about 16 x 5 inches and 1/4 inch in height. Then cut in half, making 2 rectangles 8X5.  Then spoon filling down the length of the bottom half of each rectangle, leaving a 1/4 inch border on the right/left and bottom. Use a knife to smooth it out evenly.  Fold dough over and seal edges.  Then push bottom length and folded edge closer together so there are no air pockets and fold sealed edges under.

Place each on a baking sheet about 3-4 inches apart.  Then bake until the edges become crispy, about 25-30 minutes.  Remove and quickly slice into pieces and place on rack to finish cooling.

Tips and Notes:
1. When chopping, use your judgment on size of pieces.  The smaller the pieces are the more of a clean cut you will get.
2. You want to make sure that the filling is distributed evenly, so you do not have a big chunk of cookie without filling.
3. Feel free to use cherry juice or other liquids if you want this to be non-alcoholic.
                         **LAST YEAR:Passion Fruit Cupcakes**
 

Monday, May 28, 2012

Elixir Wage Cake

Back in the 15th Century in Britain the labor force was under a truck system. The truck system was a manner in which payment was made for services in the form of commodities.  This in turn meant that those commodities had to be exchanged for the actual true needs of the laborer.  Also, the place of exchange would be a company owned store that controlled the value.

However, when it came to farm workers and cider, the average wage was 4-5 pints a day.  This system soon was became a way to rate a laborer. The more a man could drink, the more valuable he became. So a man that put away 2 gallons a day was considered a great worker.  Then in 1887 came the Truck Act which put a stop to payment in commodities and the drink fest came to a close.

Perhaps payment in the form of hard cider was a bad thing, but I decided that this particular cake would make for a nice company bonus!  This spicy cake takes a whopping 1 1/2 cups of hard cider.  Along with that, you include dark brown sugar and some apple juice.  The rich moist crumb of the cake is delicious enough on its own, but I couldn't just leave it at that.  Hard cider does deserve an apple chaser, so I included a tunnel of apples as well.

Elixir Wage Cake
by flourtrader

Ingredients/apple tunnel
1 cup dried apple pieces, coarsely chopped
1/4 cup water
1/4 cup apple juice
1/4 cup orange juice
1/4 cup granulated sugar
1 1/2 tsp lemon juice
1/4 tsp ground cinnamon
1/8 tsp ground nutmeg

Ingredients/Cake Batter
2 eggs
2 tsp vanilla extract
1 1/2 cups hard cider (open can or bottle and leave sit overnight, covered, to get flat)
1/2 cup apple juice
1/2 tsp ground cloves
1 1/2 tsp cinnamon
1/4 tsp nutmeg
1 tsp salt
3/4 cup or 1 1/2 sticks of butter
3 1/4 cups cake flour
1 1/2 tsp baking soda
1 1/2 cups dark brown sugar

To make the filling, fill a saucepan with the apples, water, orange juice and apple juice in a medium size saucepan and place over medium heat and stir.  Let mixture come to a simmer and then cover and let cook for about 10 minutes.  You want the apples to become very soft and a lot of the liquid to be absorbed.  Then add the sugar, lemon juice, cinnamon and nutmeg.  Simmer uncovered, stirring constantly for about 5-8 minutes, the water should now be very thick and syrupy.  Remove and set aside to cool to room temperature.  After it reaches room temperature, cover and refrigerate for at least 30 minutes.

Preheat the oven to 350 degrees.  Generously grease the inside of a 10 cup bundt pan.  Then dust with flour.   Sift together baking soda, cinnamon, nutmeg, cloves and flour and set aside.

In a large bowl, cream together the butter and sugar.  Then beat in vanilla extract and salt.  Add one egg and beat for 30 seconds and then do the same with the second egg.  Using a wooden spoon, fold 1/3 of the sifted ingredients into the batter.  Then add 1/2 cup apple juice and 1/2 cup hard cider, stir until blended.  Add 1/2 of the remaining flour mixture and blend with wooden spoon.  Pour the last of the hard cider (1 cup) into the bowl and mix.  Follow with the rest of the sifted ingredients and blend until no dry streaks remain.

Now, to fill the cake pan.  I used 3 cups for the first layer, but you can see how much sinking the apples did.  I would say put 5 or 6 cups of batter into the pan.  Then take out the apple mixture and spoon it around in a circle in the center of the batter, making sure none touches the edges.  Spoon the rest of the cake batter on top and smooth out evenly.

Place pan in oven and bake for about 55 minutes or until tester comes out clean.  Place pan on a rack and let cool for 20 minutes.  Then invert and let completely cool before slicing.

Tips and Notes:
1.  Cake is better the next day because the spice flavor develops more.  I liked mine served slightly warm.
2.  The sinking factor is unpredictable,  but the apples may land dead center even if you place them on top of all the batter before baking-the process does need some experimenting for placement..
3.  Caramel sauce would be a great accompaniment.
                         **LAST YEAR: Triple Quake Bars**
                                 

Friday, May 25, 2012

Pecan Chocolate Squares

Well since it is Friday, I wanted to make something that was tasty but not too difficult.  Something that would be good as an afternoon snack.  I started looking at the recipes for squares and bars.  Most of them I had already seen or tasted before.  That is until I landed on this one.

It was fairly easy to prepare, with a cookie base and a pie top.  Also, the squares do have a special twist of the cinnamon in the base with a thin layer of chocolate, which brings you back to the thought of Mexican chocolate.  The pie topping is made with dark brown sugar and toasted pecans.  Actually, 3 cups of pecans and the pan is only 9 inches square.  No skimping in that respect!

These are great served with coffee as well as tea.  Also, if you find yourself lacking in calcium, a dollop of whipped cream on top would also be good!

Pecan Chocolate Squares
adapted from Fine Cooking Cookies

Ingredients/Cookie Base
2 cups flour
2 oz grated bittersweet chocolate
1/2 cup packed light brown sugar
2 tsp cinnamon
1/2 tsp salt
3/4 cup cold butter cut into cubes

Ingredients/Pecan Topping
1/3 cup honey
2 tbs heavy cream
1/2 cup butter
1 cup dark brown sugar
3 cups toasted chopped pecans
1/2 tsp salt

Preheat the oven to 350 degrees.  Fill food processor bowl with all the cookie base ingredients except chocolate.  Pulse about 15-20 times until mixture becomes crumbly. Empty food processor bowl into 9 inch square pan.  Press crumbs into pan, forming an even crust over the inside.

Place pan in the oven and bake about 25 minutes.  Crust should be firm and golden when done.  Remove pan and place on rack.  Then evenly sprinkle the grated chocolate all over the top of the crust.  Set aside.

For the pecan topping, fill a saucepan with butter  and place over medium heat, stirring until melted.   Add heavy cream, salt, brown sugar and honey.  Mix together as it cooks, letting it come to a simmer.  Then cook for and additional minute, stirring occasionally.  Remove from heat and fold  in the pecans.  

Pour pecan mixture over the chocolate coated crust.  Smooth out so layer is even.  Place in oven and bake about 16-18 minutes.  It is done when you open the oven and see all the topping bubbling-not just the edges.  Place pan on rack and let cool completely before cutting and serving.
Enjoy!

Tips and Notes:
The method of sprinkling the grated chocolate is not good enough for even distribution, I took a spatula and smoothed it out after it melted a little.

                           **LAST YEAR: Cajun Chicken Carter**