Foodbuzz

Monday, October 31, 2011

Penguin Eggs

I have had the idea of this frosty treat floating around in my head for awhile.  The whole thing that was causing the delay was how to assemble these.  I first tried to do them on cones which ended up kind of a mess.  In the end I did them as scoops. However, next time around I will try using a mini ball pan for a better shaped dessert.

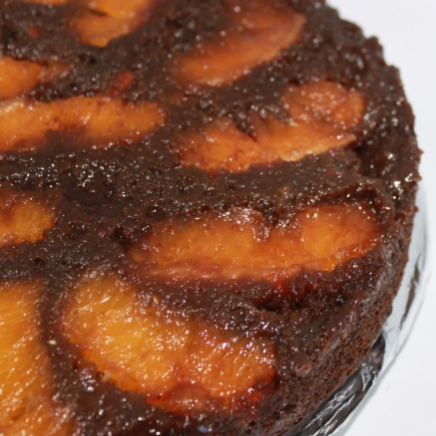
You are probably wondering exactly what these are.  They are a scoop of vanilla cream cheese ice cream with a lemon curd center.  The shell is a mixture of dark chocolate and pecans.  The ice cream is not that far from cream cheese, so it does have a smoother consistency than regular ice cream.  I really like how well the flavors go together in this dish.  The creamy inside with a burst of tart lemon is wonderful enough, but add the rich nut studded chocolate coating and you really have the makings of an awesome treat.  This recipe makes 10 servings or half "eggs".

Penguin Eggs
by fhourtrader

Ingredients/Ice Cream
8 oz softened cream cheese
2 egg yolks
1 cup heavy cream
1/3 cup sugar
1 tbs vanilla extract or 1 1/2 tsp ground vanilla beans
3/4 cup lemon curd

Ingredients/Coating
1 12 oz bag semi sweet chocolate chips
1 tbs shortening
3/4 cup chopped toasted pecans

 For ice cream, prepare a baking sheet by lining with wax paper and placing in freezer.
Pour the heavy cream into  a medium size bowl and whip until soft peaks form and set aside.  In another bowl, beat egg yolks and sugar together.  Then add the cream cheese and vanilla extract, beating until all is blended.  Lastly, fold in the heavy cream until evenly distributed.  Place in ice cream machine and follow manufacturer's instructions.

Once the ice cream is thick enough to scoop (I did not have to freeze after using my machine, it set up pretty fast), take the baking sheet out of the freezer.  Then use an ice cream scoop and scoop the ice cream and smooth the top level with the edges of the scoop.  Take the end of a wooden spoon and make a big hole in the center of the ice cream, about 1/2 the depth of the scoop.  Then fill with the lemon curd.

Invert the scoop and place the mound of ice cream onto the baking sheet.  Continue with this process until all the ice cream has been placed in mounds.  Then put baking sheet back in freezer.

After the scoops have been in the freezer for an hour, you can make your topping. Place all topping ingredients in the top of double boiler and stir until all the chocolate is melted. Remove top pan from boiler.

Then remove baking sheet from the freezer and spoon chocolate topping on the mounds, covering completely.  Place back in the freezer for at least 3 hours.  To serve, peel mound off of wax paper and place on chilled plates.
                                    **LAST YEAR: Sugar Shuttle Cookies**


Friday, October 28, 2011

Chocolate Yam Cake

Yes, I still am lacking in my pumpkin posts, but at least I am getting closer.  This particular cake is made up of sweet yams and cocoa.  One moist bite of the cake reveals a tasty balance between the two flavors along with a nice undertone of cardamon spice.  This is a cake I will definitely be making again.

The frosting, however, did disappoint.  It was one of those with buttermilk that you cook and stir forever.  It never got to the right consistency and there was not enough to frost the whole cake. The taste was good, but that did not make up for the consistency.  I am not sure if I was too impatient (cooked for 1 hr) or what the issue was.  Based on that, I will not post the frosting, but I am sure you will have no problem finding a suitable one.  The first choice that comes to my mind is a cream cheese frosting. The cake is not real sweet so that frosting would be a great choice.

I have always believed that a holiday meal is not to be forgotten as the plates are cleared, but it is to be remembered as an essential part of a special moment in time with family and friends. So if you are looking to bake something different this holiday season, you might consider making this cake.

Chocolate Yam Cake
adapted from The Festive Table Cookbook

Ingredients
1 sweet potato (12-14 oz)
2 cups flour
1 tbs baking powder
2 tsp ground cardamon
1/2 cup plus 1 tbs unsweetened cocoa
2 cups sugar
1 cup or 2 sticks plus 3 tbs unsalted butter, room temp.
4 eggs, room temp,whites and yolks separated
1/2 cup milk
2 tsp vanilla extract

Prepare two 9 inch round cake pans by greasing the inside and lining the bottom with wax paper.

Preheat the oven to 450 degrees.  Cover the yam in foil and pierce with a fork in 3 or 4 places.  Put in oven to bake until done, about 45-60 minutes.  Yam will be done when a fork can be inserted easily, indicating tenderness.  Remove foil and peel cooked yam.  Let cool completely.  Then mash with fork by hand or use a ricer. Avoid using the food processor or blender.  Those machines will make the yam too gummy. Measure out 2/3 cup of the yam and set aside.  Turn off oven. You may have a little more yam than measured out, but that you can snack on or eat later.

In a medium bowl, sift together the flour, cardamon and baking powder.  Set this aside also. In a large bowl, cream the butter and only 1 3/4 cup of sugar. Add the vanilla extract, 4 egg yolks and beat for about 1 minutes, until all is blended.  Using a wooden spoon or spatula, fold in the yam puree and cocoa powder.

Once all the ingredients are incorporated, stir in 1/2 of the flour mixture until no dry streaks remain.  Pour in the milk and mix until blended.  Fold the remaining flour mixture into the batter and then set aside.  Then preheat the oven to 350 degrees. 

Using clean beater blades, beat egg whites until they form a stiff peak.  Then slowly add the remaining 1/4 cup of sugar and beat again, back a the stiff consistency.  Fold half of the egg white mixture into the batter until dispersed,  Repeat with remaining egg whites.

Evenly fill cake pans with batter and smooth the top.  Bake cakes for about 40-45 minutes or until done as determined by a cake tester.  Let cool in pan on rack for 5 minutes.  Then invert onto rack and remove wax paper.  Let cool completely, then frost as desired prior to serving.
                    **LAST YEAR: Kentucky Pecan Chocolate Cupcakes**

Wednesday, October 26, 2011

Malted Nougat Cookies

Well I have been in the challenge playground with the recipe for these cookies.  It may not be as hard as the food network challenge, but it does improve your problem solving skills..

The website I got this particular recipe from does give you a choice of just recipes or recipes tested.  Apparently the one I picked was tested by one person who stated they turned out good.  Well, I did not like the result.  They tasted good enough but they were a bit greasy and flat as pancakes.  Since I have scheduled a delivery for 12 dz cookies tomorrow, I could not just say "bad recipe" and forget about it.  I had to make it work and I did have to purchase a few things to make these.

I am a firm believer in reading the recipe all the way through before you make it.  The first wierd thing I noticed was that you have to space the round balls of dough far apart-so far apart that 6 can only go on one baking sheet.  Well if these were supposed to be round balls that you could roll in confectioners sugar-why the spacing?? Apparently some of the instructions were intermingled with the recipe for the same cookie but these were shaped in a round ball.

The one on the left is the improved one.  The change was the result of adding an extra 1/2 cup of flour.  The cookies were chewy with a subtle taste of malt, so I was happy that I was able to make my deadline with some tasty, better looking cookies.  I certainly did not like the frisbees. This recipe makes about  2 1/2 dozen cookies.  Also, if you are wondering what the decoration is on top-it is chocolate sprinkles.


Malted Nougat Cookies
adapted from Recipe Links

Ingredients
1 cup finely chopped, salted Brazil nuts
chocolate sprinkles (optional)
1 cup or 2 sticks of butter 
1 egg
1 tsp vanilla extract
2 1/2 cups of flour
1 tsp baking soda
1 1/4 cups of light brown sugar
1/2 cup of malted milk powder (I used Horlicks brand)

Preheat oven to 350 degrees.  Line 2 baking sheets with parchment paper.

Sift together the flour and the baking soda and set aside.

In a large bowl, cream together butter and sugar.  Then beat in the malted milk powder and vanilla extract.  Add the egg and beat for about 2 minutes, stopping occasionally to scrape down sides of bowl.  With a wooden spoon or spatula, fold in the flour mixture.  Lastly, mix in the Brazil nuts.

Shape dough into balls, about two inches in diameter.  If you opted to use the chocolate sprinkles, pour some in a small bowl.  Then take each ball of dough and dip the top in the sprinkles.  Place each ball of dough onto the prepared baking sheet (sprinkles face up), spacing evenly apart, about 2 1/2 to 3 inches.  One baking sheet should hold about six balls of dough.

Place cookies in oven and bake for 12-15 minutes. Make sure you do not overcook, they will become very hard.  I baked mine for 12 minutes.  Remove from oven and let cool on pan for about 5 minutes and then transfer to rack to finish cooling.
                                  **LAST YEAR: Three Cup Chicken**

Monday, October 24, 2011

Chestnut Chocolate Chunk Muffins

I have finally made a list of ingredients that I have that I need to use up.  Some are everyday items and some are unusual items that you can only get in specialty stores or on line.  One of the items on my list is chestnut flour.  It is a specialty ingredient that I had ordered on line in order to make a cake sometime ago.

In researching the internet, I came across these muffins on an Italian blog. In addition to the chestnut flour, it calls for finely shredded coconut or coconut flour.  I do have the coconut, so I decided that I could grind it up some more instead of purchasing the specialty flour.

The pairing of the chocolate and chestnut flavors makes for a delicious muffin.   Also, you get three textures when eating, moist fluffy cake with a slight chew from the coconut and a crunch of a big chocolate chunk.

Some of these were baked with a paper liner and some without.  I found that using a paper liner is better because the muffins brown too much before getting done and the chocolate chunks make the muffins stick (even though the pan was greased).

Also, I misunderstood the recipe and thought it was for jumbo muffins and made 8 muffins.  The recipe actually is for 1 dozen large muffins, meaning large standard muffins.

Chestnut Chocolate Chunk Muffins
adapted from Ms Adventures in Italy 

Ingredients
3/4 cup dark chocolate chunks
3/4-1 cup coconut flour or ground coconut (I used a blender to finely grind and measure of 1 cup)
3/4 cup dark brown sugar
1 stick or 1/2 cup butter (room temp)
2 eggs
3/4 cup milk
1 tsp vanilla
1/4 tsp salt
1 tbs baking powder
1/2 tsp baking soda
2 cups chestnut flour

Preheat oven to 375 degrees and prepare a muffin pan by placing paper liners in the cavities.

Sift together the flour, baking powder, salt and baking soda in a medium size bowl.  The chestnut flour is not the same as regular flour, so you might have to push some of it through the sieve.  After sifting, stir in the coconut flour/shreds.   Set aside.

Cream together the brown sugar and butter in a bowl until light and fluffy.  Add the eggs, one at a time.  Beat each egg into the batter for about a minute.  Then mix in the vanilla extract.

Using a wooden spoon, add half of the flour mixture and stir until no dry streaks remain.  Add the milk, blending all the liquid into the batter.  Stir in the rest of the flour mixture. Lastly, fold in the chocolate chunks.

Using an ice cream scoop, put the batter in the lined muffin cavities, making sure all cups are evenly filled, about 3/4 full.  Bake until tops are a golden brown and tester comes out clean, about 15-20 minutes.  Let muffins sit in pans for 2 minutes, then remove paper coated muffins and sit on rack to finish cooling.
                                **LAST YEAR: Coconut Dinner Rolls**

Friday, October 21, 2011

Snappy Rhizome Cake

A rhizome is defined as a horizontal, usually underground stem that often sends out roots and shoots from its nodes. Also called a root stalk.  One type of rhizome is ginger which is the main flavoring for this cake.

Ginger does have a very distinct flavor and I feel it is one of the stronger spices in my spice rack.  I was reading an inquiry about the taste of ginger. This spice would be one you have to taste for yourself, there is no proper description since it is so unique.  The replies on the inquiry were not so great-someone said that it tasted like soap and there was one weird reply saying it tasted like shame and self loathing.  Well Queen Elizabeth would not have been happy with that comment-history has it that she invented the "gingerbread man" cookies for gifts!

Anyhow, besides ginger, I have managed to squeeze in cinnamon chips, molasses and a few other spices.  The top is laden with orange segments and brown sugar.  This cake is moist and has a deep rich spicy flavor that does linger after eaten. I used regular molasses, but for those fans of the strong stuff, you are welcome to use "blackstrap" style.  Cream or ice cream on the side is a great pairing against the strong spices. 

Snappy Rhizome Cake
by flourtrader

Ingredients/Topping
2 oranges (separated into segments, seeds and membrane removed)
2/3 cup brown sugar
1/4 cup butter melted

Ingredients/Cake
3/4 cup of buttermilk
3/4 cup molasses 
6 tbs maple syrup
1 tsp vanilla extract
1/2 cup butter, melted
2 eggs
1/2 tsp nutmeg
1 tsp baking soda 
3/4 tsp salt
1 1/2 tsp ground ginger
1 tsp ground cinnamon
2 cups plus 1 tbs flour
3/4 cup cinnamon chips


Preheat the oven to 325 degrees.  Pour the melted butter into a 10 inch cake or springform pan.  Sprinkle the inside of the pan with brown sugar.  Then lay the orange segments in a circular pattern (see picture above) on top of the brown sugar.  Set aside.

Sift together 2 cups of the flour, baking soda, cinnamon, salt, nutmeg and ginger.  Set this aside also.

Using an electric mixer, beat together molasses, egg, extract, butter and maple syrup until well blended.  This should take about 2 minutes.  Fold in half of the flour mixture.  Then mix in the buttermilk and fold in the remaining flour mixture until no dry streaks remain.

In a small bowl, mix the remaining 1 tablespoon of flour with the cinnamon chips.  Then fold into the batter. Spoon out the batter into the pan, smoothing it evenly over the orange segments.

Place in oven and bake until tester comes out clean, approximately 40 minutes.  Remove pan and let cool for 5 minutes.  Then run a knife around the edge and invert onto a platter.

Cake tastes best served the next day slightly warmed up with a dollup of whipped cream or ice cream on the side.
                          **LAST YEAR: Teriyaki Pork Sliders**

Wednesday, October 19, 2011

Tribal Spirit Squares

One of the main ingredients in these squares is pecans.  In reading about the history on this nut,  I found out that Native American Indian tribes thrived on these, sometimes eating nothing but pecans for a solid two months. They also believed the pecan to have spiritual value.

Now that you know the origin of the name, the start of this recipe was an intention to make a breakfast type of dish. I came upon some butter pecan syrup in the store and  I could not resist, so I purchased it. Syrup on pancakes is not really that creative, so I went to work on trying to incorporate the syrup in a baked good and that is the starting point of the recipe.

In addition to syrup, there is ground toasted pecans as an ingredient.  The squares are baked in an 8x8 pan.  Due to the high amount of liquid, it sunk slightly in the middle.  That was ok, because it created a variety in the texture.  The servings cut from the edge were more fluffy while the inner ones turned out to be more moist, almost like a bar type of baked good. It is a cross between a cake and a bar.  If you like all things pecan, then I am sure that you will enjoy these squares.

Should you have another favorite nut in mind, feel free to substitute it along with the matching flavor syrup.  These syrups are the ones marketed for flavoring coffee, but I am sure they will do fine in this recipe.

Tribal Spirit Squares
by flourtrader

Ingredients
1 cup ground toasted pecans
1 cup of butter pecan syrup
1/2 cup butter
2 tsp vanilla extract
1 egg
1/4 cup brown sugar
2 tbs sugar
2 cups flour
1/2 tsp baking soda
confectioners sugar for dusting

Preheat the oven to 325 degrees.  Grease the inside of an 8X8 pan, line the bottom with parchment paper and grease face up side of parchment.

Cream together butter and both sugars.  Then add the syrup, vanilla  and egg and beat until well blended and smooth. Set aside.

In another bowl, sift together the flour and the baking soda.  Then fold the flour mixture and pecans into the batter until just combined.  Pour batter into pan and smooth the top, so the batter is even.

Bake for 40-45 minutes or tester comes out clean.  Cool cake in pan for 45 minutes.  Then invert onto a platter, peel off parchment paper and flip cake back over onto a rack to finish cooling.  Once completely cool, dust with confectioners sugar.  Now it is ready to cut into squares and serve. 
                           **LAST YEAR:Steakhouse Beer Bread**

Monday, October 17, 2011

Cinnagrog Pie

 When I saw vanilla spice eggnog in the grocery store, I could not pass it up.  Regular eggnog is good by itself but the extra spice sounded like it would be better.  Also, for the same cost as plain, why not?

I decided that I would make an eggnog pie, but I wanted to have another extra flavor in there.  I started considering all the fall spices and decided on the cinnamon.  Instead of just adding this spice to the pie, I thought about a layer of a cinnamon cream pie.  The best ingredient for that would be Biscoff spread.

After trial and error, I came up with a pie that has a Biscoff cream cheese layer topped with an eggnog rum cream.  The crust is made out of ground Biscoff cookies and I sprinkled the top with the crumbs as well.

My original intent was to swirl the two, however, the consistency variation did not allow for that, the eggnog cream is lighter than the biscoff. That is how I arrived at the layers.  I was a little worried about the eggnog layer, because when I tasted the batter before putting it on the pies the rum was very strong.  The chilling overnight cause the flavor to dissapate, so the true flavor comes with time. I have included the measurement for rum extract for those that do not like alcohol. This recipe makes 6 mini pies, 4 1/2 inch in diameter or one 9 inch pie.

Cinnagrog Pie
by flourtrader

Ingredients/Crust
1 1/4 cup ground Biscoff cookies (plus 1/2 cup extra for sprinkling on top)
1/4 cup plus 2 tbs melted butter
2 1/2 tbs sugar
3/4 tsp nutmeg

Ingredients/Biscoff Filling
8 oz cream cheese (softened)
1 cups  heavy cream (whipped)
1/2 cup sugar
1/3 cup Biscoff spread

Ingredients/Eggnog Filling
1 1/2 tsp of unflavored gelatin
1 tbs conrstarch
2 tbs cold water
1/4 cup sugar
6 tbs rum or 3/4 tsp rum extract
1 cup heavy cream, whipped
1 cup eggnog

For the crust. Preheat the oven to 375 degrees. Mix together cookie crumbs, sugar and nutmeg.  Then stir in the melted butter.  Press the crumbs evenly into the bottom and up the insides of your pie pan(s).  If making mini pies, place pies on a baking sheet.  Place baking sheet or 9 inch pie pan in the oven and bake for 10-15 minutes.

Remove pie pan(s) and let cool on rack.

For the Biscoff filling, beat together the cream cheese, Biscoff spread and sugar until smooth.  Then fold in the whipped cream.  Fill each of the cooled pie crusts halfway with the filling, smoothing the top.  Place in fridge to chill while you prepare the next layer of filling.

For the eggnog filling, put the water in a bowl and sprinkle the gelatin on top and set aside.  In a medium saucepan, stir together the cornstarch, sugar and eggnog.  Place over medium heat and cook, continuing to stir.  Once you can run your finger through the mixture on the back of a spoon and it leave a streak, it is done cooking.  My cook time was about 8 minutes.

Remove from heat and stir in the gelatin. Then use a sieve placed over a heat proof bowl and pour the mixture into the sieve.  You may have some cornstarch and/or gelatin that is left in the bottom of the sieve but push it through with a spoon and scrape all off of the bottom outside into the bowl.  Chill the mixture in the fridge until it turns into a pudding like consistency, about 30-40 minutes.

Then fold in the whipped cream and rum.  Take this batter and finish filling the pies.  Sprinkle the cookie crumbs on top of the pie(s). Let chill overnight before serving.
                             **LAST YEAR:Almost Tortuga Rum Cake

Friday, October 14, 2011

Earl Grey Cookies

When I first saw this recipe, I was a little bit skeptical.  I like tea, but not really a strong brew.  As far as "exotics" about as far out as I will venture is cinnamon tea.  No green, no chamomille and no chai.  However, I decided to be open minded and try these cookies with Earl Grey tea added into the cookie dough prior to baking. The amount of tea leaves I noticed is not real specific.  You can use anywhere from 1 to 2 tablespoons.  Since I am not the tea connoisseur, I opted for 1 tablespoon. The original recipe listed Lady Grey as the tea to use, which I could not find.  The only difference between the two is that Lady Grey also has a little citrus in it.

These resulted in a shortbread cookie with nice overtones of tea.  You can taste the tea in the cookies but not like you ate a bushel of tea leaves.  I will be making these again, but until then, this particular batch will be enjoyed with the tea beverage. What kind of tea? Why a hot cup of Earl Grey- since I have some tea bags left. This recipe makes about 3 dz cookies.

If you do make these, you do not have to stick with the "grey" teas, feel free to try your favorite! The book also suggests using flower or fruit teas.

Earl Grey Cookies
adapted from  Perfect Afternoon Tea Recipe Book

Ingredients
1 3/4 cup of flour
1/2 cup of light brown sugar
1-2 tbs of Lady Grey or Earl Grey tea leaves
1 beaten egg
1/2 cup or 1 stick of butter plus 2 tbs (cubed and softened)
sugar for sprinking

Prepare 2 baking sheets by lining with parchment paper.

Cream the butter and sugar together until light and fluffy.  With a wooden spoon, stir in the tea leaves and the beaten egg.  Once distributed, fold in the flour until it turns into a solid cookie dough.

With your hands, shape the dough into a log about 9 inches long and about 2 1/2 inches wide.  Press down on the top of the log so it is slightly flattened.  Wrap the dough in plastic wrap and refrigerate for at least one hour or longer.  The dough will need to be firm enough to be easily sliced.

45 minutes into the chilling time, preheat the oven to 375 degrees.  Once the chilling time is complete, take out the dough log and cut into 1/4 inch slices on the width.  Place the slices on a baking sheet about 1/2 inch apart. Then sprinkle with sugar.

Bake cookies for about 10-15 minutes or until the edges are golden.  Remove and let cool on pan for 1 minute and then transfer to rack to finish cooling.
                                          **LAST YEAR: Butterscotch Cashew Cookies**

Wednesday, October 12, 2011

Elsa's Apple Slices

For me, fall flavors conjure up recipes that were put in cookbooks years gone by. I imagine that on certain days, you could roll into a small town where the air would be filled with the aroma of sweet apples baking as women prepared desserts for the upcoming fair or bake sale.  Families would gather their generations together and take off to the pumpkin fields to make sure that they got the best pick that resulted in the most amazing pie baked by their mothers or grandmothers.

Even though it is an era gone by, treasured pumpkin and apple pie recipes continue to be handed down and made year after year.   This particular recipe stems from the pages of a faded brown notebook that was created around the turn of the century.  The notebook was owned by a Baroness of high society that lived in Vienna.

One of the reasons that I made this was because having a whole pie around the house is too much for our small family, so the slice is a better way to go.  I did enjoy the taste and texture of this dessert.  The outside is like a thin cookie instead of a flaky pastry.  In regards to the filling, I like it because it has very little ingredients. That short list makes for a fairly pure taste of apples, which is exactly what I was looking for.

I changed the original order in which the components are made.  Since it is important that the dough be the right temperature,  it is best that the filling is made and cooling first. If the dough spends too much time in the fridge (waiting for the filling to get cool) it will crack when you roll it out.  This recipe results in about 15-20 slices, depending how thick you cut the slices.

Elsa's Apple Slices
adapted from Viennese Kitchen Cookbook

Ingredients/Filling
2 oz raisins
grated zest of one lemon
1 2/3 lb of apples (peeled cored and grated)
1/2 cup sugar

Ingredients/Dough
5 1/2 tbs unsalted butter (cubed)
1/4 cup sugar
1 tsp baking powder
1 1/2 cups flour
1 egg

Ingredients/Assembly
1 beaten egg white
powdered sugar for topping
whipping cream (optional)

To make filling, place grated apples in a fry pan over medium to low heat.  Stir and let apples cook until all moisture is gone.  This took about 8-10 minutes.  Remove from heat and place in heatproof bowl and place on trivet in fridge to cool.

Now you can start on the dough.  Firstly, make sure all your ingredients are cold.  Sift together the flour and baking powder into a food processor bowl.  Add butter cubes and pulse food processor several times, until mixture turns into coarse crumbs.  Pour sugar into the processor bowl and pulse until evenly blended.  Lastly, pulse the egg into the batter until it turns into a dough.  Remove dough and shape into a ball.  Cover with plastic wrap and place in fridge to chill for 30 minutes.

During this time, take out a baking sheet (approx 10X15) and cut a piece of parchment to line the sheet.  Lightly flour surface of parchment and set aside.  You will not line your pan with it just yet. Preheat the oven to 325 degrees.

Once the dough is properly chilled, remove from fridge and place on the parchment paper. Roll dough out to a thickness of 1/4 inch.  You should have a rectangle that is about 7X16.  Take the sheet of parchment paper with the dough on top and lay it on the baking sheet.  You will have a little overhang on the length.

Remove the apples from the fridge and stir in sugar, lemon zest and raisins.  Spread the apple filling down the center of the dough, leaving a one inch border on the short ends and a 1 3/4 inch border on each side of the length.  Your filling should measure about 3 X 14.

Fold in the 1 inch border on the short ends. Then fold one long end of the dough over the center of the filling.  Brush all folded in edges with egg white.  Fold the remaining end over the first, overlapping in the center.  Press down center seam to seal.  Make sure all the filling is sealed well on the center and ends.  You do not want the filling to seep through any openings while baking.

Place baking sheet in oven and bake for 40-45 minutes.  Surface will have a golden hue when done. Remove pan and let pastry cool on baking sheet.  Once completely cooled, sprinkle with powdered sugar and cut into slices with a sharp knife.  If desired, spoon a scoop of whipped cream on top when serving.
                              **LAST YEAR: Kahlua White Chocolate Brownies**

Monday, October 10, 2011

Curry Crackers

After all those sweets last week, I decided I would start with one that is a shout out to all my savory foodie friends.  Believe it or not, I do eat something other than sweets.  We all need some square meals and that is why I peruse around looking at savory stuff.  I have made a lot of great dinners thanks to their posts and my husband is happy that I am expanding his range of food, he grew up on steak and potatoes.  Not that those things are bad, there is just so much more out there.

I keep my spices in a closet in tins along magnetic strips.  Apparently, those tins are not air tight because you get a lot of spicy aroma when you open that door.  After smelling that aroma a few days, I decided it was time to make use of them. This cracker recipe was perfect for that.

These crackers have a lot of great flavor when you bite into them.  After you swallow your first bite...wait for it...then comes the heat in the back of your throat.  Now, do not get me wrong-these are not so hot that you sweat when you eat them, but they have a pleasant amount of heat.  I am not a big habanero fan, but I did like these.

This recipe states that it makes 90 crackers 2 inch in diameter.  When I made them, I ended up with about 65 crackers, 2 1/4 inch in diameter.  The most important thing with this recipe is to make sure the crackers are cooked thoroughly, the center should be crisp before you remove from the oven.  The small batch I cooked to test was about 6 crackers and they did not get done all the way through, but a little while in the microwave saved them.  The rest I cooked longer than the first batch and they turned out fine.  The recipe is below, I hope you enjoy this savory snack!

Curry Crackers
adapted from Fun and Easy Recipes for Delicious Crackers

Ingredients
1/2 tsp cayenne pepper
1 1/2 tsp tumeric
1 1/2 tsp ground cumin
1 1/2 tsp ground coriander
1 1/2 tbs onion,finely minced
1 tsp garlic, minced
3/4 tsp grated ginger
3 tbs butter or margarine
approximately 1/2 cup water
2 cups flour
1 tsp salt and more for sprinkling

Lightly grease 2 baking sheets and set aside.

Melt butter or margarine in a small frying pan over medium heat and then add onion, garlic and ginger. Stir and cook mixture for about 3 minutes or until onions are translucent. Then add the spices(cayenne, cumin, coriander and tumeric) and stir until evenly distributed for about 1 minute.  Remove pan from heat.  Using a spatula, scrape all the ingredients from the pan into a heat proof bowl.  Let mixture cool to room temperature.

Preheat oven to 325 degrees.  Sift together the flour and salt in a medium size bowl.  Mix in the cooled spice mixture.  Once mixed, flour should be a yellowish color.  Add 1/4 cup of the water and mix.  Then add a tablespoon at a time, stirring until mixture becomes a dough.

Divide dough into 2 equal pieces.  Roll out on a flat surface (flour is not required, dough is not sticky) until it is 1/16 of an inch in thickness.  Using a cutter, make 2 to 2 1/4 inch crackers and place them on the baking sheets.  Prick each with a fork to keep from bubbling up when baking. At this time, you can opt to brush with margarine or butter and sprinkle with salt.  I prepared half of mine with and half without.  The "with" is good for snacking by itself and the "without" is good if you are using with a dip or having with soup.

Bake for 20-25 minutes or until crisp and slightly toasted.  Remove from sheets and cool on wire rack.
                                   **LAST YEAR: Pretzel Bites**

Friday, October 7, 2011

Midnight Tropic Cupcakes

I know, taking a picture of a single cupcake is getting old, but I do have some photo changes in the works that I am excited to bring you later on in the month, but until then the single cupcake will have to do.

This is a double cocoa cupcake with a coconut cream filling.  The cupcake is moist and rich while the filling is much like a coconut cream pie.  I topped it all off with a light whipped cream icing.

To be honest, I was contemplating leaving the filling out because the cake part was so delicious by itself, almost like a chocolate brownie.  However, I do like coconut cream pie, so I went ahead with the filling.  If you like those two flavors, I am sure you will enjoy these cupcakes. This recipe makes two dozen cupcakes.

Midnight Tropic Cupcakes
 by flourtrader

Ingredients/Cream Filling
2 cups sweetened shredded coconut
3/4 cup sugar
1/2 stick or 4 tbs butter
1 tbs cornstarch
1 cup heavy cream
1/4 cup buttermilk
1/4 tsp salt
1/2 tsp vanilla extract
1/4 tsp coconut extract
1 1/2 tsp milk

Ingredients/Cupcakes
3 eggs, room temperature
1 1/2 tsp vanilla extract
1 2/3 cups water
1 cup butter
2 cups sugar
1/2 cup unsweetened natural cocoa
1/2 cup dutch processed cocoa
2 cups flour
1 1/2 tsp baking soda
1/2 tsp salt

Ingredients/Whipped Cream Icing
1 eight oz package of cream cheese
1 tsp vanilla extract
1/2 tsp coconut extract
1/2 cup granulated sugar
2 cups heavy whipping cream

The coconut cream filling will need to chill at least 6 hours before using, so you might want to make it the night before. The first thing you will need to do is check your coconut.  The brand I got had strands up to 2 1/2 inches long.  Since the coconut is a part of the filling, you do not want the strands that long.  Take 1/4 cup of the coconut and place in blender or small food processor and pulse about 10 times.  Then empty into a bowl.  Continue with this method until all coconut has been processed into smaller strands. Set bowl of coconut aside.

Fill a saucepan with the buttermilk, cream, sugar, butter and salt and place over medium heat.  As the mixture comes to a simmer, stir periodically until all the sugar has dissolved.  Take out a small bowl and whisk together the cornstarch, milk and both extracts.  Once mixed, pour into cream/sugar mixture and stir constantly.  The mixture should thicken in about 2 minutes.

Remove from heat and pour through a sieve into a  shallow heat proof bowl.  Push out any cornstarch lumps through the sieve with a spoon. Then stir in the coconut.  Let cool for 15 minutes, stir and then cover the surface of the filling with plastic wrap and place in fridge to cool for 6 hours or overnight.

To make the cupcakes, preheat the oven to 325 degrees.  Grease the top edges of 24 muffin cavities and then line with cupcake papers.

Measure out both types of cocoa into a small bowl. Bring the water to a boil and whisk into the cocoa.  Cool the cocoa mixture to room temperature.  To speed up the process, I placed the bowl in the fridge on a trivet and checked the temperature every 15 minutes.  The cocoa cooled off in about 30 minutes.

In another bowl, sift together the flour, baking soda and salt.  Set aside.  Using an electric mixer, cream together butter and sugar until fluffy.  Then add extract and beat for 30 seconds. Lastly, beat in the eggs, one at a time until completely blended.

Fold 1/3 of the flour mixture into the butter/sugar batter.  Then fold in 1/2 of the cooled cocoa mixture.  Repeat process, ending with the flour mixture.

Pour batter into prepared muffin cavities, making sure that each cavity is 3/4 full.  Bake cupcakes for about 15-20 minutes or until tester indicates done.  Let cupcakes cool in cavities for about 3 minutes, then remove and place on rack to finish cooling.

After the cupcakes and the filling have cooled, core the center out of the cupcake using a corer or a pairing knife.  Then take a ziplock bag and snip off the corner.  Put filling into bag and then pipe filling into the center of the cupcakes.

Once they are filled, you will need to make the icing.  Fill a bowl with all the ingredients except the whipping cream.  Using an electric mixer, beat until smooth. Slowly add the whipping cream, beating constantly until stiff peaks form.  Frost cupcakes as desired.

                                              **LAST YEAR:Brookies**

Wednesday, October 5, 2011

Georgia Tunnel Cake

The one thing I really like about this cake is that it is versatile.You can make it without the filling and let peach schnapps soak into the cake while warm or you can prepare it with the tasty cinnamon nut filling.  Either way, it makes for a wonderful dessert.

My first trial resulted in too much filling and too much batter.  Second time around I used a 12 cup bundt and half the filling recipe.  It yielded much better results, even though I still had a little batter left, which you can use to make some cupcakes.  That way if you are bringing this cake to a party or giving it, you still will be able to have a taste without cutting into the cake.

The cake part is a moist crumb with chunks of peaches in it.  The filling part is a cinnamon walnut mixture which is much like a pie filling.  The flavors really compliment each other, so I will be making this again.

My sister says she is making a request list of things on my blog she would like to see on a dessert table for around the holidays, so we will see if this ends up on the list!

Georgia Tunnel Cake
by flourtrader

Ingredients/Filling
1/2 cup cinnamon chips
1/2 cup chopped walnuts
1/8 tsp salt
1/4 cup butter
1/2 tsp vanilla extract
1/2 cup sugar
1/2 cup light corn syrup
2 beaten eggs

To make the filling: Place butter in a small saucepan over medium heat.  Once melted, stir in sugar, salt and corn syrup.  Continue to stir as mixture cooks and sugar dissolves.  The sugar is completely dissolved when there is no gritty consistency at the bottom of the pan.  Remove pan from heat and place in fridge on a pot holder or trivet to cool.

In a large bowl whisk together vanilla, eggs and salt until combined.  Then preheat the oven to 350 degrees and line a baking sheet with parchment paper.

Continue to check the temperature of the sugar mixture periodically.  Remove the bowl once it reaches a lukewarm temperature.  Stir it a few times and then pour it into the vanilla/egg mixture.  Use a spatula to get all the sugar mixture out and mix the ingredients together until evenly distributed.  Then fold in the cinnamon chips and the nuts.

Pour the mixture onto prepared baking sheet and place in oven for 5-7 minutes.  The mixture will foam up a little while baking and you should make sure it does not become hard like candy. Remove and let the filling cool.  The filling should become thick and be able to be spooned up without any watery drips.

Ingredients/Cake
4 1/2 cups of flour
1 1/2 tsp baking powder
1 3/4 cup plus 2 tbs butter
7 eggs
1 1/2 tsp vanilla extract
3 3/4 cup sugar
1/2 cup milk
1/2 cup peach schnapps
3 cups chopped peaches

To make cake: preheat oven to 350 degrees and grease 12 cup bundt pan and then dust with bread crumbs.

In a large bowl, cream together butter and sugar until light and fluffy.  Beat in eggs one at a time, beating for 30 seconds after each addition.  Then beat in the vanilla extract and set aside.

Sift the flour and the baking powder together in another bowl.  Then take out a small bowl and whisk the peach schnapps with the milk.

Fold in 1/3 of the flour mixture to the butter/sugar batter until no dry streaks remain.  Stir in half of the peach schnapps slurry.  Repeat the process, ending with the flour mixture.  Lastly, fold in the peaches.

If you are using the filling, put half of the cake batter into the pan and even it out.  Then spoon filling mixture into the center of the batter, being careful not to let it touch the sides of the pan.  After the filling is all used, pour the rest of the batter on top and smooth it out.  If not using the filling,  just pour all of the batter into the pan and smooth the top.

Let bake for 45-55 minutes or until tester comes out clean and batter is pulling away from the sides of the pan.  Remove pan from oven and place pan on rack to cool.  If you have not filled the cake, you might opt to pour 1/4 cup of peach schnapps on the cake and cover so it will sink in and not evaporate.  Let cake cool in pan for 20 minutes, then invert onto a rack to finish cooling.  Below is a picture of a slice of this cake, but note that this was the recipe before I cut back on the amount of filling.

                             **LAST YEAR: Jumbo Harvest Squash Muffins**

Monday, October 3, 2011

Dirty Flamingo Freeze

This does look like ice cream.  However, since it has such a zing of tart raspberries in its flavor and does not have a lot of dairy or egg, I hesitated to call it ice cream or custard.  Now, I have never tasted ice cream made with a berry puree, so maybe the tartness is acceptable and still labeled ice cream. To me this it is more like a frozen smoothie since the fruit stands out so much in the flavor.  It does have the texture of ice cream and is not icy.

The raspberry flavor is amped up with Chambord (black raspberry liqueur). When tasting this you get the smooth texture of the raspberry and the crunch of deep dark chocolate bits.  The flavors of tart and bitter sweet go very well together. This recipe makes 1 quart.

Fresh raspberries are recommended as well as a quality dark chocolate (72% or more cocoa). 

Dirty Flamingo Freeze 
by flourtrader

Ingredients
1 lb raspberries
1/2 cup Chambord or raspberry liqueur
1 cup sugar
1 cup heavy cream
1/2 cup sour cream
1/8 tsp lemon juice
1/4 tsp vanilla extract
3.5 - 4 oz chopped bitter sweet chocolate

In a medium sauce pan add raspberries and liqueur.  Cook over medium heat, stirring occasionally, for about 10 minutes.  Berries should be very soft at this point.  Remove from heat and stir in sugar. Set aside to cool to room temperature.

Once the mixture has cooled, add the heavy cream and puree in a food processor.  Then push mixture through a sieve to get all the seeds out.  This is a long process, but well worth it.

Pour the smooth raspberry mixture back into a clean food processor bowl. Add the sour cream, vanilla extract and the lemon juice.  Blend ingredients in processor for about 15-20 seconds. our mixture into a bowl and place in refrigerator for 6 hours.

After 6 hours, place in ice cream machine and follow manufacturers instructions. 5 minutes prior to the end of the churning time mix in the chocolate pieces.  Once the machine is done, you can serve at that time or freeze for additional hours until the preferred consistency is achieved.
                             **LAST YEAR: NY Cowgirl Cookies**