Foodbuzz

Monday, May 26, 2014

Hawaiian Loaf


I can recall the show "The Golden Girls" which had a daily ritual of the ladies gathering around a table and eating cheesecake in the afternoon.  Even though I enjoy a good slice of cheesecake every now and then, I would not choose it for a daily ritual.  In my opinion, biscotti or sweet loaf bread is more appropriate for an afternoon get together.  Cheesecake is a little bit on the heavy, rich side of the dessert family.

While there are lots of sweet loaf bread recipes out there, my pantry had some macadamias that beckoned to be used.  Also, I still had some pineapple left from the recent trifle I made.  This narrowed down the choices to something in the Hawaiian category.

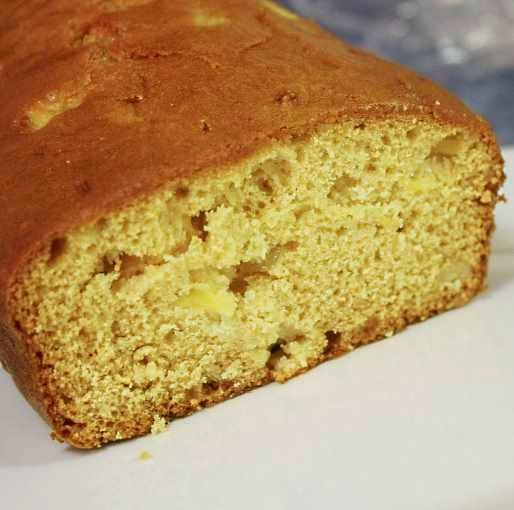
After working with this particular recipe, I found a few flaws. If I made it again, I would probably add more cream cheese than recommended.  It is actually the cream cheese and the sour cream components that aid in keeping this bread from being dry. However, I still thought it could be more moist. This recipe calls for 1 pkg or 3 oz of cream cheese, which is quite a bit smaller than the standard 8 oz that we are used to. Also, I had a dark pan, which may have impacted the bake time.  Instead of the recommended 70 minutes to bake in a nine inch loaf pan, mine was finished in 55 minutes - this may have been another factor that affected the texture.  It may have already been done a little prior to me removing it from the oven.

All in all, this is one that you will need to tweak a little to get it to your liking in texture.  The recipe is below, as originally stated.

Hawaiian Loaf
adapted from My Great Recipes/ Card222 

Ingredients
1/2 cup chopped macadamias
2- 8 oz cans crushed pineapple, drained
1 pkg (3 oz) softened cream cheese
1/2 cup sour cream
1 egg
2 cups flour
1 tsp baking soda
1 tsp salt
1 cup sugar
1 1/2 tsp vanilla

Prepare 2- 7 inch loaf or one 9 inch loaf pan by greasing the interior and lining the bottom and two long sides with parchment paper.  Grease face up side of paper.  Preheat oven to 350 degrees.

Sift together flour, baking soda and salt.  Set aside.  In another bowl, beat cream cheese until smooth.  Continue to beat and slowly pour in sugar.  Once all is blended add vanilla extract and the egg.  Beat for 30 seconds on medium high.

Fold in 1/3 of the dry ingredients to the cream cheese mixture.  Then mix in half of the sour cream.  Repeat the process and end with folding in the last 1/3 of the sifted ingredients.  Add the nuts and pineapple and stir until evenly distributed.  Spoon into pan(s) and smooth the top.

Place in oven and bake.  Recipe recommends 45 minutes for the small pans and 70 minutes for the 9 inch pan.  Test for doneness after 30 minutes on the small loafs and 50 on the larger.  Bread is done when tester comes out clean.

Remove and place pan on rack for 10 minutes to cool.  Remove loaf (loaves) and let completely cool before slicing.
                                       **LAST YEAR: Mint Chocolate Cupcakes***


Monday, May 19, 2014

Buckeye State Ice Cream


Buckeyes are actually nuts that grow on trees that are related to the chestnut.  Many of these trees grow in Ohio and that is how Ohio got to be tagged as the buckeye state.

Even though the nuts are considered poisonous, Ohio is also home to the candy confections called buckeyes.  These are basically a fudge-like ball made up of peanut butter and honey, then dipped in dark chocolate.  If you are a fan of Reese's, you will love this candy as well as this ice cream.

An ice cold mouthful of smooth peanut buttery ice cream with the occasional crunch of chocolate does hit the spot on a hot humid day.  In order to insure the best flavor, stick with the natural peanut butter and quality dark chocolate in this recipe.  You will be glad you did.

Why not break out some homemade ice cream this Memorial Day? This peanut butter and chocolate combination is sure to get everyone's approval.

Buckeye State Ice Cream
adapted from Jeni's Splendid Ice Cream at Home

Ingredients
2 tbs light corn syrup
2 tbs honey
1 1/4 cups cream
2 cups whole milk
1 1/2 oz or 3 tbs cream cheese
2/3 cup of sugar
1/2 cup natural peanut butter
4 oz chopped chocolate ( preferably dark chocolate 55-70% cocoa)
1 tbs plus 1 tsp cornstarch

In a medium size bowl, mix together the cream cheese and peanut butter. Set aside.  In another bowl, combine the cornstarch with 2 tbs of milk (taken out of the original 2 cup measurement), stirring until smooth.

Fill a saucepan with the cream, milk, sugar, honey and corn syrup.  Place over medium high heat and stir.  Continue to stir as the mixture comes to a boil. Set the timer for 4 minutes and let the cream cook, mixing constantly.  Remove from the heat.  Stir the cornstarch mixture one last time and then pour into the cream in a small stream while mixing.  Transfer saucepan back to the heat and let cook for about a minute until thickened, then remove.

Place ice in kitchen sink and fill with water.

Put the cream cheese/peanut butter mixture in the cream and stir until smooth.  Then pour ice cream into a zip lock bag and seal.  Place the sealed bag in ice bath.  Let mixture cool for about 30 - 45 minutes.  While this is cooling, melt dark chocolate in top of a double boiler.  After melting, remove top pot from boiler pot and set aside. Let chocolate cool until just warm, but not solid.

Once cooling time is complete for the ice cream, pour into an ice cream maker and follow manufacturer's instructions.  Right before you reach the stage of transferring the ice cream to another container, pour in the chocolate and spin or mix the ice cream.  After all chocolate is mixed in, then put ice cream in another container and press a piece of parchment on the surface.  Then seal with a tight lid and place in freezer.  Ice cream should be firm in about 4 hours.

Tips and notes:

1. The peanut butter/cream cheese mixture is thick.  In order to mix it in after it was added to the cream, I placed the saucepan once again over medium heat.  Using the back of the smooth, smash the large clumps against the side of the saucepan and swish from side to side.  Then scrape down with the spoon.  Continue until there are no lumps that float to the top.  Once the process is complete, pour into zip lock bag.

2. Drizzling is the best method to insure even distribution of the chocolate in the ice cream.  On my second round of making this ice cream, I used a squirt bottle and drizzled thin lines on top. Once the chocolate got hard, I used a butter knife to break it up and mix it into the cream.

3. The recipe stated use unsalted, natural peanut butter but also listed 1/2 tsp of sea salt as an ingredient to add to the cream cheese.  I skipped the salt ingredient by using regular, natural peanut butter, not the unsalted kind.
                                            **LAST YEAR: Midnight Delights**


Monday, May 12, 2014

Pineapple Rum Trifle Cake


This particular dessert is for those who like fruit and cream.  The recipe, having less than one cup of sugar, lets the sweetness of the pineapple shine through.  The nutty pistachio cake and the rum custard are the other two elements which come together to create this tasty dessert.

The issue I had in preparing the recipe was that the batter is baked in a jelly roll pan and then the cake is cut in half and then split horizontally after baked.  I did not have a 10 1/2 by 15 1/2 inch pan (my pan was larger), so in order to compensate, I actually baked 2 cakes and skipped the step in splitting horizontally.  Be sure to read the tips and notes, for the recipe below reflects the original instructions.

The tropical flavors as well as the lightness of this dessert make this cake a perfect ending to a summer meal.

Pineapple Rum Trifle Cake
adapted from the Best of Gourmet 1999

Ingredients/Cake
5 eggs
2/3 cup of sugar
1/4 cup shelled pistachios
1/2 tsp salt
3/4 cup plus 1 tbs flour 

Ingredients/Filling
1/4 cup rum
1/4 cup sugar
4 egg yolks
1 cup heavy cream
2-20 oz cans of crushed unsweetened pineapple

Ingredients/Topping
1 cup heavy cream
2 tsp sugar

Prepare 10 1/2 by 15 1/2 inch jelly roll pan by oiling the interior and lining bottom and sides with parchment paper.  Preheat the oven to 350 degrees.

Fill a food processor with the pistachios, flour and salt.  Grind ingredients to a fine powder.  Set aside.  In the bowl of a stand mixer, beat eggs for 30 seconds on medium.  Then increase speed to medium high and slowly pour in sugar while the batter continues to be beaten with the blade.  Continue to beat for an additional 10 minutes.  The end result should be a pale yellow batter that is light and thick.  Remove bowl from mixer and fold in dry ingredients from the food processor in 1/4 cup increments.  Make sure it is all mixed in but do so gently so as not to deflate the thickness of the egg batter.

Spread batter into prepared pan and smooth the top.  Bake for 10 to 15 minutes.  Cake is done when edges are slightly toasted and top springs back when lightly touched.  Cool cake completely by letting sit in pan on top of a rack.

While cake is cooling, prepare the pineapple filling layer.  Empty both cans of pineapple into a food processor (juice and all).  Pulse mixture for 3 seconds.  The pineapple will have more of a pureed look when done.  Pour pineapple into sieve set over a small bowl.  Set pineapple aside, juice can be reserved for another use.

To make rum custard filling, set up a double boiler on the stove. Also fill a sink 1/4 full of ice and cold water.  Heat up water in double boiler to a steady simmer.  In a small bowl, add first 3 filling ingredients on the list above plus only 1/4 cup of the heavy cream. Mix together and then pour into the top saucepan of the double boiler.  Stir constantly with a wire whisk while mixture cooks.  Once it reaches a pudding-like consistency and the whisk leaves marks in the custard, transfer the saucepan of custard to the prepared ice bath in the sink.  Let cool to room temperature.

Take the remaining 3/4 cup of heavy cream and beat until you reach the stiff peak stage.  Fold the cooled custard into the cream.  Set aside.

Invert cake layer onto flat surface and remove parchment paper. Trim edges to create a size of 7X14, reserving trimmings.  Cut cake in half and then split horizontally.

For assembly, place 1 cake layer onto cake plate.  Spread with 1/2 cup of pineapple and then 1/2 cup of rum custard. Place the next cake layer on top and repeat the process until layers are stacked and filled.  After the last layer, use the cake trimmings to piece together the final, 5th layer.  Chill cake covered in refrigerator for at least 1 hour.

Make the topping by beating the cream and sugar together.  Once soft peaks are formed, spread evenly over cake top and sides.

Tips and Notes:
1. When adding dry ingredients to cake batter, do not dump in.  Instead, pour a steady stream as the folding is done.  Dumping in will cause clumps, which in turn will require more mixing which will deflate the texture of the batter.  That lesson is reflected in the cake layer thickness differences in the picture above.

2.  On the egg batter for the cake, it is important that you run the mixer for the full 10 minutes to insure the proper height of the cake layers.

3. My cake was a little bigger and did not have the pieced cake trimmings on top.  The whipped cream topping is forgiving when it comes to covering jagged uneven edges and, so that will not be noticed.  When cut, it is the cake layer thickness which is the most noticed.

4. I used 1 1/2 times the recipe for the topping on this cake.  Also, if doing again, I would probably do the same with the custard filling. Bear in mind that my cake was a little bigger due to my pan used.

5. Without the whipped topping, cake can be prepared and refrigerated up to 2 days.  If you prepare ahead with the whipped topping, make it no more than 1 day in advance.  Either way, let cake come to room temperature before slicing and serving.

                                             **2 YEARS AGO:Monticello Pride Tart**


Sunday, May 4, 2014

Vienna Chocolate Bars


I do realize that I have quite a number of posts out there with raspberry and most of them are bars.  However, when a dessert recipe calls for jam, it is first to come to my mind.  Probably goes back to the cake with apricot filling...it is a long story, so all I will have to say is do not let decorative colors of a party make you sacrifice anyone's favorite flavors. If the guest of honor at a baby shower loves chocolate, do not make a strawberry lemonade cake to match pink.  A chocolate cake would make your guest happier.

Chalk up another raspberry dessert for me, but this recipe can be made with any of your favorite fruit jam.  You can even choose apricot, but do not look to me to make a trade.

These particular bars have a shortbread crust baked and layered with jam, chocolate chips and a nutty walnut fluff on top.  I know you are wondering where the chocolate is and I admit that the name of this recipe does not really match this bar.  The chocolate is not a primary flavor.  The fruit flavor is dominant, while the chocolate is a subtle undertone. 

For as little as the time it takes to make these, the end result is quite worth it.  We have all been in the situation where we have a commitment to bake but the clock indicates we are short on time.  This is a good one to pull out to resolve the situation.

Vienna Chocolate Bars
adapted from Oh Fudge by Lee Benning

Ingredients
4 egg whites
2 egg yolks
1 cup or 2 sticks butter
2 cups finely chopped walnuts
10 oz jelly (raspberry or your choice)
1 cup choc chips
2 1/2 cups flour
1 1/2 cups sugar
1/4 tsp salt

Line a cookie sheet with parchment paper and preheat the oven to 350 degrees.

In a stand mixer, beat the butter with 1/2 cup of sugar for 3 minutes on medium high speed, scraping down the sides of the inside of the bowl at one minute intervals.  The mixture should be smooth and creamy when done.  Then beat in one egg yolk for 30 seconds and repeat with 2nd egg yolk.

In a separate bowl, sift together flour and salt.  Pour 1/3 of this into the butter mixture and fold the dry ingredients into the dough until no dry streaks remain.  Repeat same process with the 2 other batches of the sifted ingredients.

Once dough is thoroughly mixed, dump onto the prepared cookie sheet.  Pat dough out in the form of a rectangle, measuring 8 inches by 10 inches.  Place in oven and bake for 15-20 minutes.  This layer is done baking when the edges turn a golden brown.

Remove pan from oven and then spread with the raspberry. There is no cooling time, start as soon as it comes out of the oven. Take care to spread evenly and not to let go over the edge.  Then top the raspberry layer with chocolate chips.

The last layer of this dessert, is the nutty topping. Beat the egg whites until stiff.  Gently stir in the nuts and sugar.  Spoon it on top of the chocolate chips and use a spatula to smooth the top.

Place in oven and bake for about 25 minutes. When done, the top is like a hard shell but it still is very light in color.  Remove and let cool completely before cutting into squares.

Tips and Notes:
1. The egg whites can be beat while streaming in the sugar and then the nuts get stirred in.  The recipe states that this method will make the topping a little but like divinity.
2.  Try a low sided 8X10 pan if you want the shape more precise.
3.  I placed my chocolate chips on the jelly one by one spacing and making several lines. It is more exact than sprinkling the chips.  Placing the chips evenly guarantees chips in every bite.
                                 **LAST YEAR: Midnight Delights**