Foodbuzz

Sunday, February 19, 2017

Snickerdoodle Pie


There are certain food smells that make us instantly hungry. With me, there is not a lot of foods that fall into this category, but this one definitely qualifies. As this baked, the smell of buttery brown sugar and cinnamon wafted through the house. It was hard to wait until the pie cooled before trying a slice. Since I do not work in the food industry, I have enjoyed the luxury of experiencing a variety of different scents of food while it is baking-unlike the person that fries chicken all day. Rather than smelling of grease and chicken, I much prefer to smell like cookies, much like John Travolta in the movie Micheal.

As you can see, pie is not really the end result of the recipe. Instead, the result is a big fluffy Snickerdoodle cake sitting in a flaky crust. The crust at the bottom is coated in butter and cinnamon sugar and it has a brown sugar syrup poured on top of filling prior to baking.

The moist cake teams up with a flaky crust to create a nice contrast in texture. Also, no one can deny the delicious classic flavors of butter, brown sugar and cinnamon. This cake is light enough to have for tea or an after dinner dessert. Another nice point is that it is appropriate for any season.

Snickerdoodle Pie
adapted from Better Homes and Gardens

Ingredients/Crust
1 recipe for single crust pie
1 tablespoon raw or coarse sugar
1/2 tsp cinnamon
2 tsp butter, melted

Ingredients/Syrup
1/2 cup brown sugar, packed
3 tbs water
2 tbs light corn syrup
1/4 cup butter
1/4 tsp cinnamon
1/2 tsp vanilla

Ingredients/Filling
1/2 cup granulated sugar
1/4 cup powdered sugar
1 tsp baking powder
1/2 tsp salt
1/4 tsp cream of tartar
1 1/4 cup flour
1/4 cup butter
1 egg
1 tsp vanilla
1/2 cup milk

Start by taking the dough for the crust and lining a 9 inch pie plate. Form the decorative top edge according to your preference. Whisk the cinnamon and sugar together a small bowl. Using a pastry brush, butter the surface of the formed pie dough with the melted butter. Then sprinkle the surface of the dough with one teaspoon of the cinnamon/sugar mixture. Set aside.

The next component is the syrup. Melt the butter in a saucepan over medium heat. Add the remaining syrup ingredients and whisk together. Continue to whisk until sugar is dissolved. Let mixture come to a boil and let cook, boiling for about 2 minutes. Remove from heat and set aside.

Preheat the oven to 350 degrees.Then start making the filling. Sift together salt, cream of tartar, flour and baking powder in a medium size bowl. In another bowl, cream together butter and both types of sugar. Beat in the egg and the vanilla. Once blended, mix in the milk until the mixture turns into a batter. Lastly, use a wooden spoon and fold in the sifted ingredients.

Spoon the batter into the prepared crust and smooth out evenly. Then pour the syrup in a thin stream over the surface of the batter. Sprinkle the last of the cinnamon/sugar mixture over the surface of the
filling.

Cover the crust edges of the pie with foil. Place pie in oven and let bake for 25 minutes. After this baking session is complete, remove the foil from the pie edges and place pie back in oven. Bake for about 20-25 minutes or until tester comes out clean. Put pie plate on rack to cool. After 30 minutes cooling time, slice and serve. This pie should be served warm.
                                          **LAST YEAR:Caramel Pecan Silk Pie**

Sunday, February 12, 2017

Mulled Wine Jammers


Due to social media, there is a lot of focus on image. I am sure that if you are on the social sites a lot, you will find the projected image of that perfect life for a lot of people. It may be instagram pictures that show someone's exotic travels in which they are always rubbing shoulders with the rich and famous. Also, it maybe on Google reiterating the phrase "oh it's such a wonderful life."

We all know that these pictures and/or comments just barely skim the surface of people's real life.  It is just projecting the best part of it. The person that travels may hate it and the person with a so called wonderful life may truly be miserable. However, no one wants to project a bad/sad image, so we are not informed of the other side.

I have more interest in people that project reality-someone that is middle ground and down to earth. I consider the source of this recipe to be just that type of person, Dorie Greenspan. I have read quite a bit about her and how her career has developed. It is nice to bake something once in a while that was created by someone that you like and can relate to. Which brings me to this wonderful recipe.

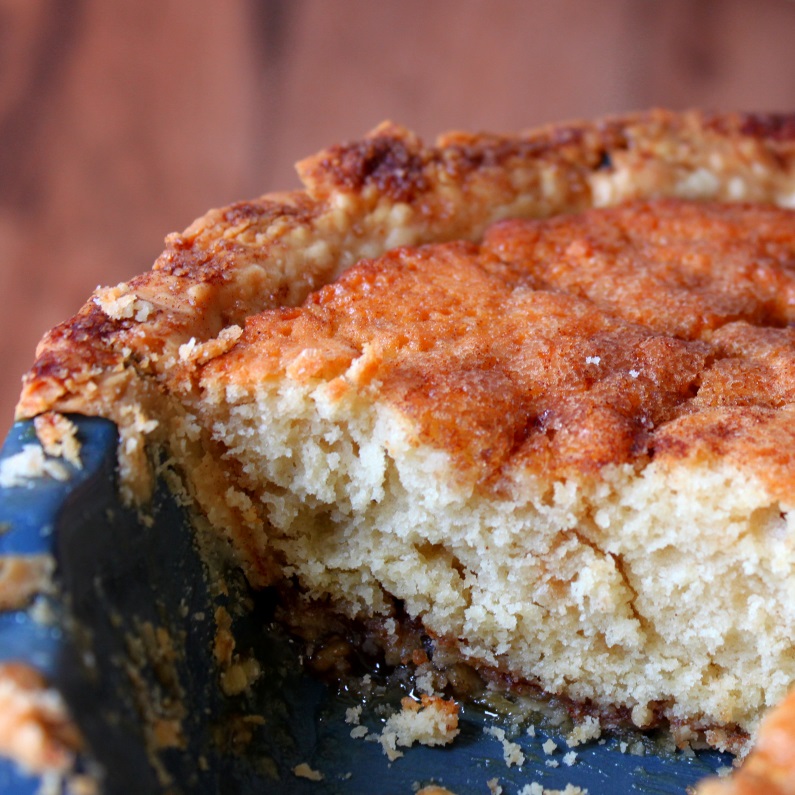
This cookie is made up of 3 components, which makes it unusual as well as delicious. The base is a butter or sable cookie. On top of the base sits a sweet, yet spicy, mix of wine, fruit and jam. Lastly, the top of the stack is scattered with streusel. The textures and flavors make it a perfect accompaniment to hot tea or coffee.

These cookies can be baked in a muffin tin, but if you are all into appearance (which I am), try the 2 inch pastry rings. While they are not cheap, I loved the look of these and will probably use the rings again and again for other types of things. This recipe makes 2 dz cookies. if you plan on making these, consider the hours of chilling time required for each component.

Mulled Wine Jammers
adapted from Dorie Greenspan 

Ingredients/Streusel
1/2 tsp vanilla extract
5 tbs cold butter (cubed)
1/3 cup cornmeal
2/3 cup flour
1/4 tsp ground cinnamon
1 tbs light brown sugar
3 tbs granulated sugar
1/4 tsp sea salt

Ingredients/Filling
1/2 cup dried cherries, chopped
1/2 cup dried cranberries, chopped
3 tbs dried raisins
1/3 cup cherry jam
1 1/4 cups fruity red wine
2 strips of orange or tangerine peel (3-4 inches long 1/2 inch wide)
1 tbs honey
2-3 inch stick of cinnamon
2 points from star anise
2 whole cloves

Ingredients/Cookie Base
2 cups flour
1/2 cup sugar
1/4 cup confectioners sugar
2 egg yolks (room temp)
2 sticks (1 cup) butter (cubed/room temp)
1/2 tsp sea salt
2 tsp vanilla extract

The first step is to make the filling. The spices need to be enclosed so they can soak in the wine. You can use a small tea strainer or or a sachet made with cheesecloth. Fill the container with the spices (cinnamon stick, anise and cloves) and close. Place the filled container in a small saucepan and add wine, honey and fruit peel. Cook the ingredients over medium heat until boiling. Once it boils, turn the heat down so the mixture is only simmering. Let cook for an additional 10 minutes.

Add all the dried fruit and stir as it continues to cook. As it cooks, the liquid will evaporate. Evaporation should take about 8 minutes. Then remove saucepan from heat. Take the sachet of spices and citrus peel out of the mixture and discard. Lastly, stir in the cherry jam. Empty into a heat proof bowl, cover and place in fridge to cool.

As the filling is cooling off in the fridge, the streusel can be made. Place the flour, cornmeal, both sugars, cinnamon and salt in a food processor and pulse until all is blended. Then drop in the cubes of butter and pulse mixture until it becomes like wet sand and clumps together. Add the vanilla extract and pulse again. Empty mixture into a bowl, cover and place in fridge to chill for at least 1 hour. For better results, 3 hours is recommended.

The last component is the cookie dough. Start by whisking together both sugars and salt in the bowl of a stand mixer. Then use the beater blade attachment and turn the mixer on medium speed. As it mixes, drop in cubes of butter in 3 separate intervals, each interval beating for about 1 minute. After every interval stop and scrape down the sides of the bowl. Turn the mixer down to low and add 1 egg yolk and beat until yolk is completely mixed in. Repeat with the 2nd egg yolk and then mix in the vanilla extract.

Remove bowl from stand mixer. Add flour to batter and stir it into the dough using a wooden spoon. Once the flour is completely mixed in, cut 4 sheets of parchment paper about 10 inches wide. Place 2 sheets side by side on a flat surface. Divide divide dough in half and placing each half on one sheet of parchment paper. Cover top of each dough mound with the other parchment sheets. Flatten with your hands and then take a rolling pin and roll out each piece to a 1/4 inch thickness. Place on baking sheet, stacking if needed. Then put in refrigerator and let dough chill for 2 hours.

For the baking step, butter the interior of muffin tins or pastry rings. If using pastry rounds, line 1 baking sheet with parchment paper and butter the interior of each ring. Preheat the oven to 350 degrees.

Take out one slab of dough from refrigerator and peel off top sheet of parchment and then peel dough off of bottom sheet and lay back on bottom sheet. Use a 2 inch cookie cutter and cut dough into circles. Place dough in each cavity of the muffin tin. If using pastry rings, cut out dough with ring and place dough filled ring with dough down on baking sheet. Continue until muffin tin is full or all 12 pastry rings have a dough layer in the bottom. In the process you may have to re-roll the scraps and cut out dough circles.

The next layer is the filling. Place one teaspoon of the filling in the center of each circle, leaving an edge border of dough. After filling, use the back of a spoon to slightly flatten any tall mounds on the dough circles. Take the streusel out of the refrigerator and crumble up any big chunks that may have formed. Sprinkle streusel over the top of the filling, making sure the dough circle and the filling are completely coated. After coating all the dough circles, place pan in oven and bake for about 10-12 minutes and rotate pan. Bake for an additional 10-12 minutes. If making with pastry rings, the baking time may need to be increased a few minutes.

Cookies are completely done when the streusel is golden. The cookies in the muffin tins require a cooling time of 15 minutes before transferring to a rack to completely cool. The ones baked in pastry rings require 20 minutes.

Let baking equipment completely cool, then wash and dry for the next batch. The 2nd disc of dough is cut, layered and baked in the same manner.

Tips and Notes:
1. Since jam fillings have a tendency to dry and get gummy when exposed, be careful not to go the the dough edge when placing the filling on the dough circle.

2. Evenly rolled dough is the key to getting the exact amount of cookies noted. I ended up with more cookies. The end result was I had to make more streusel and used all the filling. The recipe stated there would be some extra filling.

3. The streusel, when I made it was not dry and crumbly at that stage. The chill time does dry it out a bit.

4. While the dried fruit is not to be pulverized, keep in mind the size of these cookies when you are chopping the cherries and cranberries.

5. To truly experience the best texture and flavor of these cookies, warm them slightly in the microwave prior to eating or eat after they bake once removed from the tin or pastry rings.

6. If you want to make quick work of these, prepare streusel and filling components in advance and refrigerate. Making the dough, assembling and baking the next day will reduce prep time. The filling, if kept covered in the fridge, lasts for 2 weeks. The streusel has the same refrigeration time, but you can also freeze for up to 2 months. In addition, cookies can be completely assembled and frozen in the raw state. Just make sure they are wrapped tightly. The maximum freeze time would be 2 months. To bake, take cookies right from the freezer and bake as directed, adding a few minutes to cover for the frozen factor.  
                                **LAST YEAR: Raspberry White Chocolate Cookies**

Sunday, February 5, 2017

Cappuccino Cheesecake


This particular dessert had me thinking of a special Viennese coffee house that I had read about that spans back to the 1800's called Cafe Central. The interior architecture is made up of archways and columns, which makes for a wonderful atmosphere. Also, on certain days a piano player is there to insure that you can enjoy your coffee, pastry or dessert while you mellow out with the music. Now that I have transported you there, do not forget to find the exact spot where Sigmund Freud actually sat and drank his coffee back in the day...

The reason for these thoughts is because this cheesecake is not your average. The three flavor combo is well balanced and it has that wonderful creamy texture that we all look for in a slice of cheesecake. The almond crust adds just the right amount of nutty, crunchiness to each slice.

I am sure you are wondering what the three flavors make up the cheesecake filling. The filling has espresso powder-which I know you expected. The other flavor additions are what makes this cheesecake exceptional- the hazelnut liqueur and Irish Cream liqueur. With the amount used in this recipe, there is no fear of the flavor baking out of this dessert. The recipe makes one 9x13 inch cheesecake.

Now let's get into the kitchen....

Cappuccino Cheesecake
adapted from Edible Communities

Ingredients/Crust
3 tbs melted butter
2 tbs granulated sugar
2 cups ground nuts (almonds, pecans or walnuts)

Ingredients/Cheesecake
1/4 cup granulated sugar
1/2 cup packed brown sugar
2 tbs instant espresso powder
4 eggs
2 egg yolks
1 1/2 lbs cream cheese
8 oz mascarpone cheese
1/3 cup Irish Cream liqueur ( I used Bailey's brand)
1/3 cup hazelnut liqueur ( I used Frangelico brand)
2 tbs hot water

Ingredients/Topping
2 cups sour cream
1/2 cup granulated sugar

Start on the crust by preheating the oven to 350 degrees. In a small bowl, whisk together the ground nuts and the sugar. Then stir in the melted butter, making sure that all the dry ingredients are dampened with the melted butter.

Empty the mixture into a 9x13 inch pan. Press evenly into the bottom of the pan. The crust mixture should be compact. You can use your palms, a smaller pan that fits inside the pan, a pizza dough roller or other utensils in order to make it compact.

Place pan in oven and bake until golden brown. This should take about 10-12 minutes. Remove pan from oven and let cool.

Turn the oven down to 325 degrees. Stir together the espresso powder and hot water in a small bowl and set aside.

Empty the mascarpone cheese into the bowl of a stand mixer. Then open one package or separate out 8 oz of cream cheese and cut into 1/2 inch cubes or divide into 1/2 inch lumps. Turn on the mixer and add cubes and mix on low speed for 3 minutes, stopping occassionally to scrape down the sides of the bowl. Then cube the rest of the cream cheese and continue to drop pieces into the mixture while mixer is still running on low speed. After incorporating all the cream cheese, add both types of the sugar and let mixer run, again stopping to scrape down sides and bottom of bowl. Once smooth and blended, add one egg and mix for about 10 seconds. Continue with this process for each of the remaining eggs, one at a time. After mixing all the eggs in, blend in the 2 yolks.

Lastly, stir in the espresso mixture, Irish cream and hazelnut liqueur. Pour batter into pan over the almond crust and smooth the top. Place pan inside another pan, such as a roasting pan or any pan that is lower or the same height as the pan with the cheesecake. Boil some water and pour it into the roasting pan and place in oven and let bake 50 minutes.

As it bakes, mix together granulated sugar and sour cream. Once the 50 minute bake time is completed, remove pan from oven and smooth sour cream mixture evenly over the top. Place back in oven and let bake until the majority of the cheesecake is firm with only about a quarter size center that still jiggles when moved, about 10 more minutes.

Take out of oven and remove cheesecake from the roasting pan. Run a knife around the interior side edges between the cheesecake and the pan. Let cool to room temperature and place in refrigerator for at least 8 hours before serving.

Tips and Notes:
1. Since I used a pastry frame to bake this in there were issues. The water bath pan was higher than the frame, so there was a certain steamy factor on the surface of the cheesecake. The pastry frame was not a good idea.

2. The cheesecake took double the amount of time to bake and got too toasty on the edges. I attribute this to the pastry frame and over mixing the filling. Overmixing must have whipped too much air into the batter or made it too runny. In spite of the edges and the extended bake time, the cheesecake was still delicious.

3. In order to make sure the surface does not brown too much before the cheesecake is thoroughly baked, I recommend to bake it until a 3 inch circle in the center remains jiggly. Then put the sour cream topping on and bake the the extra 10 minutes.

4. The recipe states that the crust can be run up the sides of the pan as well as in the bottom. The bottom only crust may take some bake time adjusting to get crispy and golden.
                                   **LAST YEAR:Blackberry Hazelnut Torte**