Foodbuzz

Sunday, September 29, 2013

Chocolate "Ding Dong" Cake

We all remember the Hostess ding dongs..cakes shaped like hockey pucks filled with cream and coated in rich chocolate.  This is basically a large 2 layer cake version of that.

The name of this cake is actually called a "Salted Caramel Ding Dong Cake."  However, when I think of caramel I do not think of chocolate.  The "caramel" ganache is made with chocolate but it does cook up to a caramel-like consistency. 

One slice proved to be a tasty combination.  Also the sight of the rich chocolate layers filled with a fluffy whipped cream filling did attract a lot of attention.  The last piece of this cake created a secondary request from a group that missed out on the first one, so I went ahead and made it a second time.

Note that this cake is 9 inches in diameter and requires 2 nine inch layer cake pans and also one nine inch springform pan.  Even though it has chocolate in it, melting does not require a double boiler. The cake does have to rest in the fridge for 6 hours or overnight.  This process is prior to the last coat of ganache.

Chocolate "Ding Dong" Cake
adapted from Bon Appetit Oct 2012 Issue

Ingredients/Cake

1 cup hot strong coffee
1 1/2 tsp vanilla extract
3 eggs
3/4 cup buttermilk
1 cup or 2 sticks of butter (room temp)
4 oz chopped semisweet or bittersweet chocolate
2 cups cake flour
1 cup unsweetened natural cocoa powder
2 cups sugar
1 tsp salt
1 tsp baking soda
1 tsp baking powder

Ingredients /Ganache

1 1/2 cups heavy cream
1 tsp vanilla extract
9 oz chopped semisweet or bittersweet chocolate
1 1/8 tsp salt
1 cup sugar
1/4 cup water

Ingredients/Filling

1/2 cup powdered sugar
1 vanilla bean
1 1/4 tsp unflavored gelatin
1 1/2 cups heavy cream

Prepare all three pans by spraying the interior with non stick spray or oil.  Line the bottom of each with parchment paper and then oil or spray the paper.  Preheat the oven to 350 degrees.

Start making the cake layers by filling a medium size bowl with the hot coffee.  Then add the 4 oz of chopped chocolate, making sure it is even along the bottom of the bowl and not piled in the center. Sprinkle the cocoa on top and let the mixture sit for about 1 minute.  Stir until all the chocolate is melted and the cocoa is evenly distributed.  Once the mixture is smooth, blend in the buttermilk and vanilla extract, set aside.

Using a stand mixer on medium speed, cream together the butter and sugar.  The mixture should become light and fluffy after about 4 minutes.  Then beat in one egg at a time, running the mixer for about 1 minute for each egg and scraping down the sides prior to adding the next egg.

In a separate bowl, sift together the cake flour, salt, baking powder and baking soda. Add one third of the sifted ingredients to the butter/sugar batter.  Stir with a wooden spoon until the dry ingredients are completely blended.  Pour in half of the chocolate batter and mix together.  Repeat the process, adding the last third of the sifted ingredients at the end.

Fill the cake pans with the batter, making sure the batter is measured evenly into each pan.  Place pans in oven and bake until tester indicates done.  Cakes should take about 35 minutes to bake.  Remove pans and let cool for 10 minutes.  After the 10 minutes, run a sharp knife around the edge and invert the cakes onto a cooling rack.  Peel off parchment paper and let cool completely and flip over again prior to assembly.  If cakes have a dome or are uneven, trim to a a flat, even surface.

For the ganache, fill one bowl with the 9 oz of chopped chocolate and salt.  Then fill a saucepan with sugar and water, place over medium low heat.  Stir mixture until the sugar dissolves.  Increase the heat to medium high and stop stirring.  Let the sugar cook for about 9 minutes.  At one minute intervals, swirl a wet pastry brush along the upper side edges of the ganache, preventing it from becoming a hard sugar layer.  Also swirl the pan at each interval.  Once the sugar becomes a deep amber color, removed from heat.

Add the cream to the sugar mixture, pouring it in a steady stream and mixing it at intervals. Since the cream is cold, the batter will seize into caramel.  Place the pan back on the medium heat and stir until it reaches a smooth consistency.  Add the caramel mixture and the vanilla extract to the reserved bowl of chocolate and salt.  Let cool for about 5-10 minutes.  The ganache is ready to use once it reaches the consistency of honey.

Place one cake layer in the springform pan and pour 1 cup of ganache over cake.  The ganache will need to set up.  Place the pan with the coated cake layer in the refrigerator for about 30 minutes.  Let the remaining bowl of ganache sit at room temperature, covered with plastic.

While the ganache is setting up, the filling can be made.  Fill a heatproof bowl with 2 tbs of cold water and sprinkle the gelatin evenly over the water.  Let rest for 10 minutes.  Take out a small saucepan and fill it 1/2 inch deep with water.  Place it over a medium high burner and place the bowl of gelatin into the water.  Stir and cook for about 2 minutes.  The two minutes should be long enough for the gelatin to dissolve.  Remove small bowl from saucepan and set aside.

Fill the bowl of a stand mixer with powdered sugar and heavy cream.  Then split the vanilla bean and scrape the seeds into the same bowl.  Using the whisk attachment, beat the ingredients together until soft peaks form.  Continue to beat, pouring in gelatin in a steady stream.  Once the mixture reaches a firm consistency, the filling is ready.   Spoon out all the filling and place on top of the chilled ganache layer.  Smooth the filling over the top of the cake layer, making sure it is all even.  Carefully place the other layer on top.  Cover tightly with plastic wrap and place in refrigerator for a minimum of six hours or overnight.

Once that stage is completed, remove the cake from the refrigerator and open side latch of springform pan.  Run a spatula along the outer edge of the cake, making sure that the filling is flush with the edge of the cake layers.  Keep the cake stationed on the bottom of the springform pan but place it on a wire rack set over a baking sheet.

Check the consistency of the remaining ganache.  It should be the same state as when used on the first layer, like honey.  If too thick, rewarm in the microwave, stirring and checking every 30 seconds.  If to thin, place in fridge to thicken up a little.  Once the ganache is at the right consistency, pour over cake letting it drip down sides.  By tilting the cake and using an offset spatula on the sides, the ganache should evenly cover the whole cake.  Chill cake for another hour for the ganache to set up, then it is ready to slice and serve.

Tips and Notes:

1. This cake is moist and fragile when warm, so be careful when inverting after 10 minutes of cooling.
2. The recipe suggests semisweet or bittersweet chocolate, so if you like dark chocolate consider using special dark Hershey brand of cocoa.
3. The recipe states you can chill for 2 days before serving, but I think the chilling can make it dry.  For the best texture, serve it the same day as you pour the coat of ganache over the top.
4. The cake layers do deflate upon cooling.
5. The filling is quite thick but remember that it is sweetened whipped cream, not buttercream frosting.
6. I let the remaining ganache sit covered in the microwave overnight.  Since it is an extended amount of time, you may want to place it in the fridge and rewarm the next day.

                                    **LAST YEAR: Red Velvet Cake Roll**


Sunday, September 22, 2013

Dulce De Leche Cheesecake Bars

We all have those things that we have to have in the kitchen at all times.  For most bloggers, that item usually falls under a certain ingredient.  However, for people that do not cook, it is some type of choice food, beverage or sauce.

Whatever the choice may be, some will always perceive it as being strange. I heard of someone with a whole refrigerator drawer full of bouillon cubes.  That one, I think would probably fall into the strange category by many!  The latest I have come across inspired me to make this particular dessert.

Even though the dessert is made out of Dulce de Leche, it is not exactly what my friend requires to be in the kitchen at all times.  They must have the so called "magic shell" topping for ice cream, caramel flavor, of course.  I do like caramel, but the magic shell is not something that comes to mind when I think of caramel. However, dulce de leche always does.

Anyhow, on to the recipe.  The flavor of dulce de leche can be found in the cheesecake batter as well as the top layer of this dessert.  Besides the tasty double caramel flavor, the bars are a better way to go when serving a crowd.  You get all the taste of cheesecake without as much guilt as a 3 inch thick slice of a standard cheesecake....Oh and as for my friend who enjoyed the bars, they continue to stay in the foods of convenience area-which includes the magic shell.

Dulce de Leche Cheesecake Bars
adapted from Bon Appetit June 2010 Issue

Ingredients/Crust
1 1/4 sticks or 1/2 cup plus 2 tbs butter
1/4 tsp cinnamon
2 1/4 cups graham cracker crumbs
2 tbs sugar

Ingredients/Filling
2 tsp vanilla extract
3 eggs
24 oz of cream cheese (3-8 oz pkgs)
1/2 cup dulce de leche
1 cup sugar

Ingredients/Glaze
3 tbs heavy whipping cream
2/3 cup dulce de leche

Prepare a 9X13 inch pan by coating the interior with a non stick spray.  Then preheat the oven to 350 degrees.  For the crust, stir together all the dry ingredients until evenly mixed.  Place the butter in a saucepan over low heat or a microwave safe dish and melt it. Once completely melted,  pour it into the dry ingredients.  Mix until all the crumbs are coated with the butter.  The crumbs will easily clump together.  Empty the mixture into the center of the prepared pan.  Press the crumbs into the bottom of the pan, making sure it evenly covers the bottom interior of the pan.  Bake for about 10 minutes. It should have a golden hue when done.  Place pan on rack and let cool completely.

For the filling, beat together the cream cheese and sugar.  A hand mixer or food processor working for about 1 minute should thoroughly blend the two together.  Scrape down the sides of the bowl and then beat in each egg (one at a time).  Spoon in the dulce de leche and add the vanilla extract to the batter.  Beat for about 10 seconds until the additions are evenly distributed throughout the batter.  Spoon the batter over the crust, and spread until even.

Place pan in oven and bake for about 38 minutes.  The center will be set and the edges will be cracked once the bars are done baking.  Place pan on rack and let cool completely.

The topping starts out with heating together the dulce de leche and cream.  One option is to heat the mixture in a microwave in 30 second intervals, mixing with a spoon at the end of each interval. The other option is to melt the mixture together in a saucepan on low heat.  Once melted, the glaze should be pourable, if not, more cream is needed.  Add just one tsp of cream and then test its pourability. Continue with that process until you reach the correct consistency.  The variance of the cream can be attributed to the different brands of dulce de leche on the market.  Pour the glaze over the cheesecake and refrigerate for a minimum of 1 hour prior to cutting and serving.  For storing this dessert, cover pan and place in refrigerator.

Tips and Notes:
1. Dessert can be prepared 2 days ahead
2. Recipe recommends that the pan of bars be cut into 4 strips by 6 strips
3. Suggestion made to sprinkle each bar with sea salt.
                                **LAST YEAR:Rum Raisin Almond Tart**

Sunday, September 15, 2013

Peanut Butter Sandwich Cookies


Peanut butter is something that is always around in my kitchen.  I usually have not only the creamy but the crunchy as well.  With such an abundance of peanut butter, I thought it was fine time that I bake something with it.

Like most bloggers, we all have something in our mind of what we do like and what we do not like when it comes to certain baked goods.  Regarding sandwich cookies, these did have some good qualities.  The cookies were less greasy than most homemade peanut butter cookies.  I think this can be attributed to the dry oats in the cookie batter.  As far as the filling, it was very creamy-unlike the solid type of filling you get with oreo cookies.  Homemade should always be better anyway.

There are special steps in this recipe and the simple fact that they are sandwich cookies keep them out of the quick fix recipe category. However, I feel that the time is well worth the results.  Be sure to read through all the recipe so you will know how much time is involved in creating these delicious cookies. This recipe makes about 2 dz large sandwich cookies

Peanut Butter Sandwich Cookies
adapted from the Dahlia Bakery Cookbook

Ingredients/ Peanut Butter Cookies
2 eggs
1 tsp vanilla extract
1/3 cup natural chunky peanut butter (well mixed)
1 cup and 2 tbs butter (softened)
1 1/2 cups flour
1 tsp baking soda
1/2 tsp baking powder
3/4 cup sugar
2/3 cup packed brown sugar
1 2/3 cup old fashioned oats
1/4 tsp salt

Ingredients/Cookie Filling
1/2 tsp salt
2 tbs powdered sugar
1 1/2 cups creamy peanut butter (whichever brand-Jif, Skippy etc)
2 tbs honey
6 tbs butter (softened)

For the cookie batter, place butter and peanut butter in bowl of a stand mixer.  Add both types of sugars.  Then beat on medium high speed for 1 minutes.  Scrape down sides of bowl, beat for another minute and repeat for one last minute. 

Add one egg and beat on medium low speed for 30 seconds.  Do the same with the additional egg. Lastly, beat in the vanilla extract and set aside.

In another bowl sift together baking soda, baking powder, salt and flour.  Then mix in the oats. Using a wooden spoon, fold the dry ingredients into the wet batter until no dry streaks remain.

Prepare 2 baking sheets by lining with parchment paper.  Scoop out a heaping tablespoon of batter and place it on the prepared sheet.  Continue with this process, only making sure that the scoops of batter are not touching.  You will space them properly just prior to baking.  Chill the scooped batter by placing the pans in the fridge for at least 2 hours.

While the scoops are chilling, the filling can be made.  Place all filling ingredients in a bowl and beat for about 30 seconds with a hand mixer to make sure it is all blended.  Then cover bowl of filling with plastic wrap and also place it in the refrigerator to chill.

During the last 15 minutes of the chilling time, preheat your oven to 375 degrees.  Once the scoops have firmed up from the chilling stage, remove pans from refrigerator.  Place each scoop of batter on the parchment lined pan, filling each pan with 8 scoops.  Also, each cookie sheet should be double panned (one baking sheet inside another) prior to going in the oven.

Bake pans of cookies for about 10-12 minutes, stopping at the halfway point to rotate each pan set.  Once the cookie turns a golden hue, remove and place pans on cooling rack to sit for 10 minutes.  Then transfer cookies to the rack to finish cooling.  Once completely cool, they are ready to be sandwiched.

Match cookies by size in pairs.  Take the bowl of filling out of the fridge. Place a scoop of filling (measuring right under 2 tsp) on the flat side of one of the paired cookies.  Press the other, flat side down, on top of the filling.  Repeat the process until all the sandwich cookies have been assembled.

Tips and Notes:
1. Mixing up the natural peanut butter before measuring is important to the texture of the cookies
2. The longer the chill time for the filling the harder it becomes, which could make the assembly process more difficult.
3. Someone raided my stored cookies from the freezer and they still were soft enough to eat.
4. If you want a little extra with your cookie, try adding chocolate by drizzling it on top or dipping one half of each in chocolate before sandwiching.
                                           **LAST YEAR:Peach Tarte Tatin**
                                                     

Sunday, September 8, 2013

Brown Butter/Cream Cheese topped Carrot Cupcakes

Carrot cake is a classic favorite, yet because of the spices used I have always reserved it for the fall or winter time.  However, when I saw this particular recipe, I had no reservations to delay it until fall. Between the addition of the browned butter to the frosting and the use of curry in the batter, I would have to say this far from your grandma's recipe for carrot cupcakes.  As a food blogger, I try to go beyond the traditional and strive for something new and different.   After all, there is a reason for 31 flavors of ice cream-it would be a sad thing to just have a choice of vanilla, chocolate or strawberry!

This recipe makes 1 dozen cupcakes and be sure to plan for the 8 hours of chilling time for the batter.

Brown Butter Cream Cheese Topped Carrot Cupcakes
adapted from Dahlia Bakery Cookbook

Ingredients/Cupcakes
8 egg whites (room temp)
1 3/4 stick or 14 tbs of butter
1 cup finely shredded carrot
3/4 tsp ground cinnamon
1 tsp ground ginger
3/4 tsp curry powder
3/4 cup cake flour
1 cup almond flour
1 3/4 tsp baking powder
3/4 tsp kosher salt
1 1/4 cups packed brown sugar

Ingredients/Brown Butter Cream Cheese Frosting
1 cup powdered sugar (sifted after measuring)
3/4 tsp salt
1 cup or 2 sticks of butter
1 lb of cream cheese (softened)
2 tsp vanilla extract
sparkling or crystal white sugar (optional)

To make the cupcakes, melt the butter in a small saucepan on low heat.  Once melted, increase heat to medium and let cook, stirring periodically.  Cook for about 5 minutes or until the butter turns a golden brown.  Remove and pour into a heatproof bowl and let cool to room temperature.

In a large bowl, mix together the brown sugar and almond flour.  Set aside.  In a smaller bowl, sift the cake flour, spices (cinnamon, ginger, curry) salt and baking powder together.  Then add this to the brown sugar/almond flour mixture and stir until is evenly distributed.

Pour in the egg whites and blend with a wooden spoon.  Once blended, measure out approx one fourth of the batter and add it to the cooled brown butter.  Whisk together until smooth.  Pour the batter/brown butter mixture back into the original batter and mix together. Lastly, fold in the shredded carrot.

Cover and refrigerate batter for at least 8 hours or overnight.  Once the batter has been completely chilled, preheat the oven to 350 degrees.  Grease the top edge of the muffin cavities and line with cupcake liners.

Fill the cavities with the batter, using a bit less than 1/2 cup of batter per cavity.  Place pan in oven and bake until tester comes out clean.  Cupcakes should be done and golden brown on top in about 25 to 28 minutes. Remove when done and let pan rest on wire rack to cool.  Remove cupcakes once cool and let sit on wire rack until ready to frost.

For the frosting, brown the butter in same manner as stated in the cupcake recipe.  Set aside and let cool to room temperature.  In the bowl of a stand mixer, beat together all the other ingredients except the sparkling white sugar.  It should take about 2 minutes on medium high for all ingredients to be blended.  Then turn down the mixer to medium low speed and continue to beat while pouring a steady slow stream of the brown butter.  Once all the brown butter has been added, beat for 30 seconds and then scrape down the sides of the bowl.  Beat for another 30 seconds.  Then the frosting is ready to use.

Frost the cupcakes as desired.  Also, the recipe suggests turning the cupcakes upside down and rolling the frosted top in a bowl of crystal sugar.

Tips and Notes:
1. Just under 1/2 cup of batter almost fills the cupcake cavity to the top, but this is ok because the cupcakes do not rise very much.
2. Room temperature is important when it comes to the eggs and brown butter, your mixtures will blend together easier and better.
3. The amount of salt may seem like a lot for the frosting but that is what gives it the salty sweet flavor combo. However if you are using table salt and not kosher only use half the amount stated.
4. Due to the crystal sugar topping, I wanted a stiffer frosting to work with so I let it chill for about 20 minutes before frosting.
                                    **LAST YEAR: Apple Butterscotch Bundt Cake**


Sunday, September 1, 2013

Peach Amaretti Crisp

When I think of crisps, the oatmeal type is the first that comes to mind.  However, there really are too many other options out there to be limited to one type.  This particular recipe uses amaretti cookies in the topping, something which I had never even tasted until I made this dessert.

While almond is not a flavor that goes with all fruits, this particular topping will be one that I will use when making cherry or peach crisps in the future.  The almond is much more complimentary than any oat topping.

The cookie recipe makes 16 cookies and the crisp is baked in a 2 qt dish and serves about 8 people.

Amaretti Cookies
adapted from Ready for Dessert

Ingredients
1 egg white
1/2 tsp almond extract
1/2 cup toasted almonds
1/4 cup powdered sugar
3 tbs granulated sugar
1/2 tsp flour
pinch of salt

Preheat the oven to 300 degrees and prepare 2 pans by lining with parchment paper.

Place flour, almonds and powdered sugar in a food processor.  Grind the mixture together in the processor until the almonds become a powder.  Set aside.

Using a hand mixer on low speed, whip the egg white until foamy.  Add salt and put the mixer on high and beat until soft peak stage.  Add 1 tbs of granulated sugar and beat for 30 seconds.  Continue with the same process with the additional tbs of granulated sugar, then beat until stiff shiny peaks are formed. Fold in 1/3 of the almond mixture. Add the additional 3rds, beating after each addition. When adding the final measure of the almond mixture, pour in the almond extract before beating.

Then pipe or spoon the batter onto the prepared baking sheets.  They should be about 1 1/2 inches in diameter and be placed about 3/4 inch apart.  Bake for about 10 minutes, rotate pan and then bake for an additional 10 minutes.  Turn oven off and let the cookies sit in oven for 20 minutes.  Remove the pans and let cool until firm and then transfer cookies to a cooling rack to cool completely.

Peach Amaretti Crisp
adapted from Room for Dessert

Ingredients/Filling
1/2 tsp almond extract
3 lbs of peaches
1 tbs flour
2 tbs granulated sugar

Ingredients/Topping
crushed amaretti cookies from recipe above (about 3/4 cup)
1 cup toasted almonds
1 tsp cinnamon
1/2 cup packed light brown sugar
3/4 cup flour
1/2 cup butter (1/2 cubes, chilled)

Prepare the fruit by peeling and pitting the peaches.  Preheat the oven to 375 degrees. In a separate bowl, mix together the flour, sugar and almond extract.  Cut the peaches into 1/2 inch slices and toss in the flour/sugar mixture.  Place slices in a shallow 2 quart baking dish, making sure the slices are even and completely covering the bottom interior of dish. Set aside.

For the topping, set up a food processor with a metal blade in the bowl.  Fill the bowl with all the topping ingredients except the butter cubes.  Pulse the dry mixture until the almonds are in small bits with some larger chunks remaining. Drop in butter cubes and run the food processor until the ingredients can clump together in your hand.  Sprinkle topping evenly over peaches and place pan in oven.

Crisp should take about 40-50 minutes to bake.  When done, the crisp will bubble at the sides and the interior be easy to sink a knife into.  Serve warm with whipped cream, creme fraiche or vanilla ice cream.

Notes and Tips:
1. For the filling, the almond extract can be substituted with 1 tsp vanilla extract.
2. The crisp shown in the picture was baked in a 9x13 size cake pan and it only took about 40 minutes to bake.  Using this type of pan is good in a pinch if you do not have the right size dish.
3. The topping can be made in advance and frozen to save time.
                                    **LAST YEAR: Trucker Cookies**


Sunday, August 25, 2013

Creme Fraiche Coffee Cake


The "cake" in the word coffeecake can be a misnomer.  There are some coffeecakes that are made with yeast so they turn out to be more of a bread than a cake.  I like both, but I still favor the cake type.

While skimming through recipes, I came to a halt at this one.  The main point that attracted me was that this recipe included creme fraiche.  Having never made anything with that ingredient, I started wondering what impact this ingredient would have on the flavor and texture.

While the creme fraiche is a great component, the careful balance of the selected spices in the streusel does play an important role as well. The end result is a moist cake that stands between the tight crumb of a pound cake and the lightness of a regular cake.  The coffeecake has a mellow flavor of butter and vanilla that overlaps a crunchy pecan and cinnamon streusel.

The batter is placed in the pan first and the streusel is layered on top. In the baking process, the streusel sinks but leaves some brown sugar behind. The brown sugar bakes into a toasty sweet coating that covers the surface of the cake. This recipe makes one 10 round cake and uses a tube cake pan.

Creme Fraiche Coffee Cake
adapted from Flour by Joanne Chang

Ingredients/Streusel
1/4 tsp cinnamon
1/4 tsp ground ginger
1/8 tsp ground cloves
3 tbs packed light brown sugar
1/3 cup granulated sugar
3/4 cup chopped toasted pecans
3 tbs cake flour
2 tbs butter

Ingredients/Cake
3 eggs
1 egg yolk
2 tsp vanilla extract
3/4 cup creme fraiche
1 1/2 cups sugar
1/2 tsp salt
3/4 tsp baking powder
2 tsp baking soda
2 1/2 cups cake flour
1 cup and 2 tbs butter (cubed at room temp)

Prepare a 10 inch tube pan with a removable insert by buttering the interior and dusting with flour.  Preheat the oven to 350 degrees.

Blending of the streusel can be done with a food processor by pulsing or by using a pasty cutter by hand.  Place all the streusel ingredients in a bowl and blend by either method. The result will be a mixture that is crumbly in texture.  Set aside.

For the cake, sift together the flour, baking soda, salt and baking powder.  Then stir in the granulated sugar.  Pour into the bowl of a stand mixer.  Run the mixer on low and drop in cubes of butter at 30 second intervals.  The mixture will come together as a coarse meal or as a dough after about 3-4 minutes of beating.  The variation is based upon the temperature of the butter and either texture is acceptable.

In a separate bowl, mix the wet ingredients together ( eggs, egg yolk, creme fraiche and vanilla extract) until completely blended.  Add half of this batter to the flour/butter blend and mix on low speed.  Then turn the speed up to medium and beat for 1 1/2 minutes, scraping down sides at two intervals of mixing.  The texture of the batter will become more fluffy and the color much lighter.

Turn the mixer back to low and pour in the rest of the egg/ creme fraiche mixture. Beat for 30 seconds, stopping to scrape down sides a few times.   Scoop out 1 1/2 cups of the batter and fold it into the streusel.

First fill the tube pan with the non streusel batter.  Smooth the top and then layer the streusel batter on top, smoothing to an even layer.  Place pan in oven and bake until cake gets golden in color and springs back when you touch the top.  Cake should be done in about 1 hour and 10 minutes.   Remove and let cake cool in pan for 3 hours.  Then invert cake onto a plate and invert again.  Slice and serve.

Tips and Notes:
1.  My cake sunk in the middle, extra precaution must be made when smoothing on top layer making sure it is even.  The addition of the batter to the streusel prior to layering is supposed to keep this from happening.
2. Even though the streusel sunk to the very bottom of the cake, it did not cause any sticking to the pan.
3.   Do not let the pan size fool you, the cake does not rise as high as the pan.  The cake should range from 3 1/2 to 4 1/2 inches in height.
                                   **LAST YEAR: Banana Whipped Cream Pie**


Sunday, August 18, 2013

Blondie Pie

While this one will not really get the vote for the prettiest dessert, it can hold its own when it comes to chewy rich indulgences.  My first thought when coming across this recipe was that this was a blondie bar in a pie form.  However, it turned out to be much like the texture of fudge instead of cake like.

The two things that control the flavor in this pie is the white chocolate and the pulverized cashew brittle.  If you are one that loves nut brittles or pralines, than this is the recipe for you.  You may favor a different type of nut in this recipe, but be aware that other nuts do have a stronger flavor.  The author stated that the cashews were more of a balance with the white chocolate than other types of nuts.

A little slice of this goes a long way, so make sure your sweet tooth is ready for this one. This recipe makes one 10 inch pie.

Blondie Pie
adapted from Momofuku Milk Bar

Ingredients/ Graham Crust
3 tbs milk powder
1 cup plus 2 tbs graham cracker crumbs
4 1/2 tsp sugar
1/4 tsp salt
3 tbs melted butter
3 tbs heavy cream

Ingredients/Cashew Brittle
3/4 cup sugar
1/4 cup plus 2 tbs cashews

Ingredients/Pie Filling
1/3 cup flour
1 tsp salt
1/2 cup heavy cream
5.5 oz white chocolate
4 tbs butter
2 egg yolks
3 tbs sugar
pulverized cashew brittle (recipe included)

To make the crust, blend the milk powder, salt, graham cracker crumbs and sugar together in a medium size bowl.  In another bowl, mix the butter and cream together.  Pour the wet ingredients into the dry and stir until all is damp and no dry powder is left.  The end result should be a crumbly mixture that clumps together with pressure from a spoon or your hand.

Put the crumb mixture into a 10 inch pie tin.  Press crumbs evenly along the bottom and sides of the pan.  Then set aside while you make the other components of the pie.

For the cashew brittle, prepare a pan by lining with a Silpat or wax paper.  Pour the sugar into a small saucepan and place the pan over medium high heat.  Use a wooden spoon and stir constantly until the sugar becomes a dark amber color.  This should take about 3-5 minutes.  Remove from heat and stir in the cashews.  Make sure all are coated.  Then tip the saucepan over the baking sheet and scrape out all the contents using a heatproof spatula.  Smooth out the brittle onto the pan and let cool completely.

Once cool, remove the brittle from the silpat or wax paper.  Then break the brittle into big chunks and run thru a food processor.  Set aside until ready to use.

To start on the filling, take the white chocolate and break it into chunks.  Place it in a microwave safe bowl and add the butter.  Heat in 30 second increments in the microwave, stirring after each time.  Once all has melted, stir until the butter is fully incorporated into the chocolate.

Preheat the oven to 325 degrees.

In another bowl, whisk together the egg yolks and sugar until smooth.  Combine the melted white chocolate mixture with the egg yolks and sugar by stirring together with a wooden spoon. Continue to stir and drizzle in the heavy cream.  Set aside.

Sift together the salt and flour in a separate bowl.  Then mix in the pulverized cashew brittle.  Fold this dry mixture into the wet.

Place the prepared pie tin on a baking sheet and pour in the filling.  Bake for about 30-35 minutes.  When done, the pie will be a dark amber color and be slightly set in the center.  Let cool to room temperature.

Tips and Notes:
1. The recipe strongly recommends using a Silpat.  I used wax paper and had a little trouble peeling it off the underside of the brittle, so if you do not want to have that issue get a Silpat.
2. Use your judgement on the consistency of the graham cracker crust, if you feel it is not moist enough add an additional 1-1 1/2 tbs of melted butter.
3. Should you want to use hazelnuts or peanuts, your sugar to nut ratio of ingredients will be 1/2 cup to a 1/4 cup.
4. The brittle sets up in less than a minute, so act quickly to mix in the cashews and smooth onto the baking sheet.
                          **LAST YEAR: Chocolate Italian Wedding Cupcakes**                                   

Sunday, August 11, 2013

Orange Grand Marnier Cake

Out of the many cakes I have made, this particular one got the most compliments in regards to the lightness of flavor and texture. The icing is made with whipped cream and is less sweet than buttercream.  The orange flavor is a mix of orange juice, zest and grand marnier but it is not overpowering. Between the light icing and the chiffon layers, this cake would be good as a part of afternoon brunch or tea.

Orange Grand Marnier Cake
adapted from Sky High, Irresistible Triple Layer Cakes

Ingredients/ Cake
8 eggs, whites separated from yolks
1/4 cup vegetable oil
1/3 cup water
2 tbs fresh squeezed orange juice
1/2 tsp cream of tartar
1 3/4 cup cake flour
1/2 tsp salt
1/2 tsp baking soda
1 1/2 cups sugar
1 tbs grated orange zest
orange food coloring (optional)

Ingredients/Syrup
1/4 cup Grand Marnier
1/2 water
1/4 cup sugar

Ingredients/Frosting
1 tbs grated orange zest
6 oz chopped white chocolate
2 tbs Grand Marnier
2 1/2 cups cream
optional toppings- white chocolate shavings or candied orange peel

Prepare 3 nine inch cake pans by lining the bottom with parchment paper.  Leave the pans ungreased. Then preheat the oven to 350 degrees. 

Mix together the egg yolks, orange juice, orange zest and water, set aside.  In another bowl sift together the salt, flour, baking soda.  Stir in just 1 cup of the sugar until blended.  Pour the egg yolk mixture into the dry and whisk until all becomes a smooth batter.   Add the optional orange food coloring until desired color is met, bearing in mind that the egg white mixture will dilute the batter color.

Pour the egg whites into a bowl of a standard mixer. Sprinkle in the cream of tartar.  Beat egg whites until they reach a frothy consistency.  With the mixer on medium speed, continue to beat and slowly add the 1/2 cup sugar.  The mixture should reach a soft peak stage. This is important, any beating beyond this will insure that your cake will be dry.

Scoop out 1/4 cup of the egg white mixture and fold it into the egg yolk/flour batter.  Continue with this process, folding in egg whites to batter until no white streaks remain.  Pour batter in equal amounts into pans.

Bake the cakes until a tester comes out clean, which should be about 16-18 minutes.  Remove pans and run a butter knife around the inside eggs of the pans, releasing the edges of the cake layers. Cool cakes in pans.  As they are cooling, the syrup and frosting can be prepared.

For the syrup,  add the sugar and water to a saucepan.  Place the saucepan over medium heat and let simmer, stirring constantly.  Once the syrup has reduced to about 1/2 cup, remove from heat. Wait until syrup reaches room temperature and then stir in the Grand Marnier.

The frosting starts with a double boiler set up.  Add the white chocolate and 1/2 cup of cream.  Let the chocolate melt in the pan over simmering water. Remove from heat and let this also come to room temperature.  When the desired temperature is reached mix in the Grand Marnier and orange zest.

Then chill a bowl with mixer beaters. Fill the bowl with the remainder of the whipping cream and beat until almost a stiff consistency.  Then fold the whipped cream into the white chocolate mixture.

Peel off the parchment and invert one layer of cake onto cake round or cake plate.  Brush the face up side with 1/4 cup of the syrup and then follow up by adding 1 cup of the frosting on top, smoothing it out evenly. Place the second layer on top and repeat the process.  Then do the last layer and frost top and sides.  If desired, garnish the top with chocolate shavings or candied orange peel.
                               **LAST YEAR: Strawberry Shortcakes**

Sunday, August 4, 2013

White Velvet Cut Outs


After the recent extravagant dessert, I decided to go back to something simple like cut out sugar cookies.  These type of cookies are dad's favorite and make me think of Christmas because this is the only time we had these around the house when I was young.  My mom would always make these type of cookies in the shape of Christmas trees and decorate them with green icing.  My dad, as well as us kids would gobble these up in no time.

These type of cookies can be time consuming, but if you are not into cutting out the dough for these,  you can always shape into a log and slice them. This recipe makes about 7 dozen cookies.

White Velvet Cut Outs
adapted from Taste of Home

Ingredients/Cookies
4 1/2 cups flour
2 cups sugar
2 cups butter
8 oz cream cheese
2 egg yolks
1 tsp vanilla extract

Ingredients/Frosting
3 tbs butter
1 tbs shortening
1/2 tsp vanilla extract
3-4 tbs milk
3 1/2 cups powdered sugar
food coloring-optional

Using a stand mixer, beat together the cream cheese and butter until smooth.  Then add the sugar and beat again until mixture becomes fluffy and light.  Add one egg yolk and vanilla extract and mix on medium speed for 30 seconds and then add the additional egg yolk and mix again for 30 seconds.  Use a wooden spoon to fold in the flour, working in 1/2 cup increments.  Once all is blended, transfer dough to a smaller bowl and cover with plastic wrap. Place in refrigerator to chill for a minimum of 2 hours.

Once chilling time is over, preheat the oven to 350 degrees and prepare cookie sheets by lining with parchment paper.  Also set out a cooling rack for the cookies.

Take dough out of fridge and remove about 1/3 of dough from bowl to work with and place the remainder back in the fridge.  Lightly dust a flat surface with flour and roll out the dough to 1/4 inch thickness.  Cut into desired shape (number of cookies are based on using a 3 inch cutter) and place each on prepared cookie sheet about 1 inch apart.  Bake cookies for about 10-12 minutes, rotating sheets at halfway point.  The cookies are done when the dough is set, not when browned.  I removed the cookies when they just started to get golden on the edges.

Let cookies rest on baking sheets for 5 minutes before transferring to a cooling rack to completely cool. Continue with the rolling baking and cooling process for the remainder of the dough.

To make the frosting, cream together butter, shortening, 3 tbs milk and vanilla extract.  Then place a sifter over the batter and sift 1 cup of powdered sugar into the bowl.  Beat batter until smooth.  Continue to sift in and beat remaining powdered sugar in increments.  The end result should be a light fluffy frosting.  Beat in the optional food coloring until completely distributed for even color.  For a lighter frosting, mix in some additional milk for desired consistency.

Frost cooled cookies and let frosting set before storing.
                                 **LAST YEAR: Almond Breakfast Scones** 


Saturday, July 27, 2013

Fraisier (French Strawberry Cake)


Since the summer berries are in season right now, I wanted to make some type of strawberry dessert.  Also, this time I was interested in making something new instead of the old "tried and true".  I have recently been looking into a pastry cookbook and this particular recipe was one that I had remembered.

The recipe does have a lot of components, however once those have been made, the assembly goes by fast.  The recipe is made up of a sponge cake layer that is split.  The middle consists of an outer circle of sliced strawberries.  Inside is filled with whole strawberries that are covered in the crevasses and on top with a buttercream/pastry cream blend.  Then it is topped off with the other half of the cake layer and decorated with Italian meringue.

The hardest part of the recipe is gathering all the strawberries that are most consistent in size.  As you know, strawberries range from being the size of your fist to thumb size.  Since this dessert is being layered, the size is important.

Fraisier
adapted from Pierre Herme Pastries

Ingredients/ Cake                                            Ingredients/Pastry Cream
6 eggs                                                              3 egg yolks
5 tbs butter                                                      1 cup milk
1 cup sugar                                                      2 tbs butter (room temp)
1 3/4 cup flour                                                 1/3 cup sugar
                                                                        1/2 vanilla bean
Ingredients/ Kirsch Syrup                                3 1/2 tsp pastry cream powder
2 tsp kirsch                                                      or cornstarch
2 tsp raspberry liqueur                                     1 tbs flour
3 tbs water                                                      
3 tbs sugar                                                       Ingredients/Italian Meringue
                                                                        1/4 cup water
Ingredients/Buttercream                                  1 cup sugar
3 sticks or 1 1/2 cups butter plus 1 tbs            3 egg whites
6 tbs milk                                                        
4 egg yolks                                                       Ingredients/Mousseline Cream      
1/2 cup sugar                                                    10 cups strawberries, rinsed and hulled
1 batch of Italian meringue                               1 batch pastry cream (prev recipe)
(see previous recipe)                                         1 batch buttercream (prev recipe)

Ingredients/Less Sweet Italian Meringue
1/2 cup sugar
2 egg whites
2 tbs water

The first step in the process is making the sponge cake.  Prepare a 10 inch cake pan by buttering the interior.  Then dust with flour and set aside. Preheat the oven to 350 degrees.

Place the butter in a small dish and cover then melt in the microwave.  Set aside to let cool.  Set up a double boiler system by filling a pot with water over medium high heat.  Once it starts to simmer, sit the bowl of a stand mixer over the pot.  Put the eggs and sugar in the bowl and beat with an immersion blender or mixer until it registers a temperature between 130 to 140 degrees.  Return the bowl to the stand mixer with a whisk attachment.  Whisk the mixture on high speed.  Continue to beat until the batter is cool to the touch.  The end result should be a light batter that has tripled in volume.

Set aside 2 tbs of the batter in a small bowl.  Then add the flour to the large bowl of batter in increments, gently folding until no dry streaks remain.  Blend together the 2 tbs of batter with the melted butter by using a fork.  Pour into the large bowl of batter and stir until incorporated.  Fill the prepared cake pan with the batter.  Place pan in oven and bake until cake springs back when lightly touched.  Baking time should be about 25-30 minutes.  Remove pan and invert cake onto a rack to cool.

While the cake is cooling, prepare your other components.  To create the syrup, fill a small pot with the sugar and water.   Place over medium high heat and let come to a boil.  Remove from heat and stir in the kirsch and raspberry liqueur.  Set aside to cool.

Start making the pastry cream by beating together the egg yolks, flour and pastry cream powder (or cornstarch) until smooth. This process should be completed by use of a stand mixer and bowl. Set aside.  Then take the vanilla pod and split.  Scrape out all the seeds.  Put both the pod and seeds in a small saucepan.  Add the milk and sugar.  Place the saucepan over medium high heat and stir, letting the mixture come to a boil.  Remove from heat and separate out 1/3 of the hot milk blend. Also, take out the split vanilla pod.

Prepare a cooling bath of ice water about 5 or 6 inches deep in your sink. Go back to the egg yolk mixture at the stand mixer and turn on medium high speed.  With the mixer still running, slowly pour in the 1/3 of the milk blend.  Beat for about 2 minutes to temper the eggs.  Once the mixture is tempered, pour back into the saucepan that contains the remaining milk blend. Put the empty bowl of the stand mixer upright in bath of ice water.   Take the saucepan and place over medium high heat and stir, letting the mixture come to a boil. Once it reaches the boiling point, remove the saucepan and pour the batter into the bowl that is sitting in the ice bath.  Let mixture cool to about 140 degrees.  Place bowl in the stand mixer, cut in the butter and beat until smooth.  Transfer to a small bowl and cover surface of pastry cream with plastic wrap and place in refrigerator until needed.

For the Italian meringue, whisk the egg whites in a large bowl of a stand mixer until soft peaks form.  Set aside. Then heat up the sugar and water in a small saucepan, stirring until sugar is dissolved.  Let it come to a boil, watching the temperature.  Once it reaches 250 degrees, go back to the egg whites and turn the mixer on medium high speed. Continue to beat and slowly pour in a steady stream of the sugar syrup from the saucepan into the egg whites.  Turn the mixer down to medium speed and beat until meringue is cool to the touch. Set aside.

For the buttercream, an ice bath will need to be prepared again.  Using a stand mixer, beat together the egg yolks and sugar.  Set aside once the batter is light and fluffy.  Fill a saucepan with the milk and let come to a boil and remove.  Go back to the egg yolk batter and turn the mixer up to medium high.  While still beating, pour in a stream of all of the hot milk.  Return the batter to the saucepan and cook, stirring often until it reaches a temperature of 185 degrees.  Then place the saucepan of batter in the ice bath, letting sit until batter is cool to the touch.  Once cool, beat the batter with an immersion blender or small mixer for about 3 minutes.  Set aside.  In the bowl of a stand mixer, beat all of the butter until the consistency becomes very smooth and creamy.  Using a wooden spoon, stir the cooled milk blend into the butter.  After completely blended, fold in the Italian meringue.

Place the bowl back in the stand mixer beat the buttercream for about 30 seconds.  With the mixer on low, blend in the cold pastry cream until the batter is smooth. This makes up the mousseline cream. 

To assemble the cake, start by trimming away the top crust of the sponge cake.  Then split in half and place the bottom half (cut side face up)in a 9 1/1 inch flan ring set over a cardboard cake round of the same size.  The cake may need to be trimmed to fit.  Once fitted, brush with half of the kirsch syrup.

Take out the hulled strawberries and slice one in half.  Place each half upright inside the ring, forming an interior circle. The stem top should be face down and the cut side facing the inside of the flan ring. Smooth one cup of the mousseline cream over the split cake inside the flan ring.  The cream should cover all exposed cake.  Then place whole strawberries, stem side down, into the center of the ring.  They should be tightly packed together and all reach the same height in the ring.  Some of your strawberries may need to be cut at the pointed end to achieve that result.  Once all the strawberries have been packed inside, fill all crevasses with the mousseline cream by using a piping tip and covering until you reach the top of the flan ring. Then place the other cake half over the cream layer and brush the top with the remaining syrup.  Refrigerate for 30 minutes.

Make the less sweet meringue according to the same instructions as the Italian meringue.  Smooth or pipe the meringue over the cooled cake.  Removed the ring from the cake, pushing from the bottom up.  Then take a kitchen torch and toast the meringue layer on top.  Decorate the top by placing a ring of sliced strawberries in the middle.  Cake will need to be refrigerated until serving.

Notes and Tips:
1. There is a lot of mousseline cream so the pointed ends of the strawberries were not flush with the top cake layer.  For appearances, you may want to have just a layer of the cream to the point where you can still see a little bit of the pointed strawberries showing through.  If so you will have extra cream left over.

2. Should you not have a blow torch, you can achieve a quick toasting of the meringue by quickly cooking the cake under the oven broiler on high.  Watch closely-it browns quickly and remember this is to be a cold dessert. 

3. Filling of all the spaces in between the strawberries is important for the mouselline to pick up the flavor of the strawberries as well as to achieving a great look.  You do not want empty pockets of air inside.
                                     **LAST YEAR: Triple the Fudge Brownies**    


Saturday, July 20, 2013

Pecan Tassies

Pecan pie does vary quite a bit when it comes to the filling.  Some are sweeter than others and the filling can be runny or be pretty solid.  However, just like peanut brittle, there is never enough nuts there to satisfy.

These little gems turned out to be less like a pecan pie than I thought they would.  Instead of a nut topping with a filling, they were packed with pecans and the liquid filling baked up to be just enough to clump all the nuts together.  Between the taste and the size, these tarts are perfect for any get together or afternoon snack. The recipe below makes 24 tarts, 2 1/2 inches in diameter.

Pecan Tassies
adapted from The Essential Baker

Ingredients/Pastry Dough
1 cup flour
1/2 cup softened butter
3 oz softened cream cheese

Ingredients/Filling
3/4 cup light brown sugar
2 tsp vanilla extract
3 tbs dark corn syrup
1 egg
2 tbs melted butter
1/4 tsp salt
1 cup of pecans

For pastry dough, cream together butter and cream cheese until fluffy.  This should take about 2 minutes on medium speed using a stand mixer.  With the mixer still running, add the flour in 1/4 cup increments, beating until the mixture becomes a ball of dough.

Flatten the ball of dough, wrap in plastic wrap and place in refrigerator to chill for no less than 2 hours.  Remove and let stand for about 10 minutes until it becomes flexible.  The dough should be able to be rolled easily without breaking and should not require a lot of flour.

Lightly dust 2 wax sheets of paper with flour.  Then sandwich the dough disc between the wax paper with the flour side facing the dough.  Roll until dough is 1/4 of an inch thick.  Remove the top sheet of paper and dust off excess flour from the dough.  Cut out rounds in the dough measuring 3 1/4 inches in diameter.  Keep cutting and rolling scraps until there is no longer enough dough to cut out.

Place each circle of dough in the mini tart pans. Press and shape to fit all crevasses, making sure it clings to the bottom as well as the fluted sides. Smooth off the excess dough sticking above the top edges with your fingers.   Place the pans on a baking sheet and chill in the refridgerator while you make the filling.

Preheat the oven to 350 degrees.  Place the nuts in a shallow foil pan or on a baking sheet.  Let nuts toast in oven for 5 minutes.  Remove and once the nuts have cooled, coarsely chop and set aside.

Fill a medium bowl with the egg, vanilla, butter and corn syrup.  Whip together with a wire whisk.  In a separate bowl, mix the sugar and salt together.  Add this dry mix to the egg mixture, whisking until completely blended. Put mixture into a container with a pouring spout.

Take out the mini tarts.  Evenly fill each one with the chopped pecans. Then pour the sugar mixture into each, dividing the liquid filling equally.

Leave the tarts on the baking sheet and place in oven to bake.  Tarts are done when filling is set and crust is a light brown.  This should take about 25-30 minutes.  Remove pans and place on rack to completely cool.

Tarts should come out of pans easily by tapping on the bottom.

Notes and Tips:
1. The tartlet pans I used were not non-stick and the instructions stated they needed to be greased.  I used a paper towel dipped in oil to grease the inside of the tart pans
2.  Even with greasing the pans, the spilling of the filling on the top edge of the tart will cause it to stick, so be careful when pouring the filling.
                       **LAST YEAR: Brown Sugar Peanut Squares**


Sunday, July 7, 2013

Fudge Swirl Cheesecake Ice Cream


Well, I guess it is official when it comes to chocolate.  There is one person at work that states they do not like the taste of chocolate.  In most people's opinion, they are really missing out on a lot of wonderful desserts.  For some, eliminating chocolate from desserts would be like eliminating water from the ocean.

Between the food allergies and the person that does not like chocolate, finding that perfect dessert that would meet with everyone's approval is not an easy task.  However, majority does rule, so there was one person that was left out of the ice cream tasting at work.

This recipe comes from a resource book that is packed with lots of frosty desserts, but this one did sound interesting.  I have seen a lot of recipes that use different dairy products in ice cream but the the choice of cream cheese is still the most appealing.

The ice cream froze up nice and hard, not like grandma's runny homemade vanilla.  The cream cheese ice cream is rich as tasty as is. However, the extra flavor and texture added with the fudge swirl and graham cracker crumbs really compliments the cream cheese.  Definitely a very sweet way to celebrate the start of summer. Makes about 1 1/4 pints with some fudge left over.

Fudge Swirl Ice Cream
adapted from 500 Ice Creams, Sorbets and Gelatos

Ingredients/Fudge Sauce
1/4 cup light corn syrup
1/4 cup light brown sugar
1/4 cup unsalted butter
1/4 tsp vanilla extract
1/4 cup heavy cream
1/4 cup semi sweet choc chips

Ingredients/ Ice cream
1 cup heavy whipping cream
2 egg yolks
4 tbs melted butter
1/2 cup graham cracker crumps
8 oz package of cream cheese
1/3 cup sugar
juice and zest of 1 lemon or 3 tsp vanilla extract

For the fudge sauce, place corn syrup, brown sugar and butter in a small sauce pan.   Place over heat and let the mixture cook.  The sugar will dissolve and the mixture start to bubble.  Keep cooking until the consistency changes to a thick fudge type of consistency.

Take pan off of heat and stir in the remaining ingredients.  Stir until the chocolate melts and mixture is very smooth.  Let cool to room temperature.

To make the ice cream, start by making sure that your ice cream maker is ready.  Some require ice bags or frozen items to help keep things cool. In a medium size bowl, beat the whipping cream until thick and frothy.  Then add with egg yolks, sugar, zest,  and cream cheese. Beat ingredients together until smooth.  Pour into an ice cream maker and follow manufacturers instructions.

While that is getting cold, mix the melted butter with the graham crumbs.  When the ice cream maker process is complete, put ice cream in a storage container. Pour in the crumbs and the fudge sauce.  Then stir lightly to make sure that the flavors are mixed in just enough to make a swirl. You do not want fudge ice cream. Freeze until firm.

Notes and Tips:
1. feel free to add almonds to this recipe or eliminate the fudge and graham and use 1/2 cup of fruit (chopped strawberries, blueberries)
2. I did not use the juice and zest, just the vanilla extract but it is a great addition to use with fruit.
3. The ice cream is rich, so one serving will do for most people.  I made 2 batches for about 1 dz people.
                                **LAST YEAR: Croissant Pockets with Apricot and Brie**


Sunday, June 30, 2013

Peach Amaretto Bread Pudding


This recipe stems from Austria and it has a long Austrian name, but I decided it would be easier for all if I labeled it with an American name.  The original is more of a winter type of dessert consisting of apples and raisins, but I gave it a summer touch by using peaches.

The meringue topping really did make all the difference in the dessert.  I have made bread pudding before, but never had used this type of topping. Also, the peach and amaretto flavors have always been a favorite, so I was pleased with the final tasting of this desssert.

The change in the fruit to the original recipe as well as the type of bread only impacted the height of the dessert.  If I was to make it again I would probably use the more dense brioche than the Hawaiian bread.  While Hawaiian bread does taste sweeter, it just does not hold up to the soak as well as brioche.  At the time, I could not find any brioche and did not have the time to actually make any from scratch.

The original recipe is listed below, with notes of the changes that were made to create something for the summer season. 

Fruit Bread Pudding
adapted from Austrian Desserts and Pastries

Ingredients/Bread Pudding Base
3 eggs (whites separated from yolks)
1 1/2 cup milk
3 1/2 tbs clarified butter
pinch of salt
3 1/2 tbs butter (for pan coating)
1/2 cup bread crumbs
12 oz of brioche ( or Hawaiian Bread)
zest from 1/2 of a lemon ( not used in peach flavor)
1/3 cup of granulated sugar
1 tsp vanilla sugar ( or regular granulated sugar)
1/2 cup bread crumbs (for coating pan)

Ingredients/ Fruit Filling
3 tbs granulated sugar
1/2 cinnamon stick ( not used with peaches)
1/2 cup raisins (optional- not used with peaches)
1 lb peeled cored apples (or 6 peeled peaches)
1/2 cup white wine ( or 1/2 cup amaretto for peach dessesrt)

Ingredients /Meringue
3/4 cup granulated sugar
3 egg whites
powdered sugar for dusting

Cut the fruit into thin slices and set aside.  Place a saucepan over low heat.  For the original apple dessert, pour the white wine into the saucepan and add the apples, cinnamon and sugar.  For the peach, pour the amaretto into the saucepan,  stir in the sugar and then add the peach slices.  Let poach in alcohol for about 5 minutes and then remove fruit and and drain well.  If using raisins, wash in hot water and place on paper towel to dry.

Take out the bread loaf and remove all of the crust.  Then slice very thin, about 1/5 of an inch.  Place in a bowl and set aside.  Pull out another bowl and mix together egg yolks, lemon zest, milk, salt and 1 tsp vanilla sugar until blended. Pour mixture over the the cut up bread.

Take out another bowl and fill with the egg whites and 3 tbs of sugar.  Beat until the consistency becomes very stiff. Preheat the oven to 325 degrees.  Add the remaining sugar and beat for 1 minute. Fold this mixture into the bread pudding.

Once completed, grease a 9 X13 inch pan and dust with the bread crumbs. Then spread half of the bread pudding batter into the bottom of the pan.  Place the fruit slices evenly on top of the batter and sprinkle raisins on top (optional).  Smooth the additional batter over the top of the peaches, making sure it is even. Sprinkle the batter wth the melted butter. Place in oven and let bake for 1 hour.

While this is baking, place egg whites and sugar in top of a double boiler on low.  Beat until the temperature reaches 113 degrees.  Then pour egg whites into a regular medium size bowl and beat with mixer until they have a stiff consistency. 

Remove the pan from the oven once bread pudding is done.  Let cool and raise the temperature of the oven to 500 degrees.  Spread 1/3 of the meringue over the bread pudding.  Using the rest of the meringue, pipe long strips over the top.  Lastly, dust with powdered sugar.  Bake in the oven until lightly browned.  Keep a close eye on it, it browns quickly, about 2-3 minutes to reach the desired color.

Then take pan out of the pan and let cool for 5 minutes and slice and serve.
                                     **LAST YEAR: Lemongrass Bars**

Sunday, June 23, 2013

Chocolate Irish Cream Cheesecake


With the heat and humidity, I found myself in a mood to make something that would be served cold but would not be fast melting like ice cream.  Naturally I went to the next best thing...cheesecake.

Since the cheesecake was not going to sit around the house, but be devoured at work- I had my co-workers take a vote on the flavor and this one was chosen.  This particular cheesecake is good to make and serve, but even better after the flavors meld with another day.

I have made many desserts with the combined flavors of chocolate and coffee.  They all seem to go over with great reviews and requests for more of the same. This dessert was no different.  The recipe makes one 9 inch cheesecake.

Chocolate Irish Cream Cheesecake
adapted from Cheesecake Extraordinaire

Ingredients/Crust
3 tbs butter
11 milk chocolate sandwich cookies

Ingredients/Filling
1 1/2 tsp instant coffee
2 tsp hot water
3/4 cup irish cream liqueur
1 1/4 tsp vanilla extract
2/3 cup whipping cream
5 eggs
12 oz milk chocolate chips
18 oz cream cheese
2/3 cup sugar

Optional topping:
1/2 cup sweetened whipped cream
1/4 milk chocolate chips
powdered sugar

To make the bottom crust, pulverize cookies in a blender or food processor until it turns into fine crumbs.  In a small bowl, melt the butter in the microwave.  Pour the crumb mixture into the butter and stir until smooth.

Grease the interior of a 9 inch springform pan.  Then press the crumb mixture evenly into the bottom of the pan. For the filling, start by dissolving the instant coffee in a small bowl with the water. Also, melt the chocolate in a double boiler until smooth.  Remove the melted chocolate from over the water pan. Also set aside the springform pan and instant coffee mixture. Preheat the oven to 350 degrees.

 Using a stand mixer or handheld mixer,  beat  the cream cheese and sugar together in a large bowl, running the mixer at medium speed.  Once all the lumps are gone, add one egg and beat for 30 seconds.  Repeat the process with each additional egg.  Scrape down the sides of the bowl and add the vanilla extract, whipping cream and irish cream.  Beat for another 30 seconds.  Lastly, use a wooden spoon and stir in the melted chocolate.

Pour the filling over the crust in the springform pan.  Place pan in the oven and bake for 15 minutes. For the second baking interval, reduce the oven temperature to 200 degrees and bake for about 1 hour and 10 minutes.  The cheesecake is done when the filling is no longer glossy or shiny on top.

Remove the cheesecake from the oven and run a knife along the outside edge between the cheesecake and the pan. Put the cheesecake back in the oven and turn the oven off.  Let it continue to bake for about 2 hours.  After the baking time, cover the cheesecake with plastic wrap and place in refrigerator to chill overnight.

The next day, top the cheesecake as desired.  Whipping cream rosettes can be piped around the edge and each topped with a milk chocolate chip or you can use a stencil and dust with powdered sugar.  Then you are ready to slice and serve.

Tips and Notes:
1. Dark springform pans require less baking time, the rule of thumb on cakes is about 10 minutes.
2.Iif you cannot find milk chocolate sandwich cookies, Oreos will do fine.
3. Wrap the bottom half of the springform pan in heavy duty foil, otherwise butter will melt out and run all over the oven.
4. Make sure the eggs and cream cheese are at room temperature.  If it is too cold, the melted chocolate will seize.  Then you will have a cheesecake with flakes of chocolate in the filling.
5. How thick you want the crust is a personal preference, so you can alter by adding more crumbs and butter.  Increments of about 4 cookies to 1 tbs + 1 tsp of butter.
6. Do not delay on running the knife around the outer edge of the cheesecake after it is removed from the oven.  Delay will cause the cheesecake to crack when the filling contracts in the cooling process.
                          **LAST YEAR: Key Lime Parfaits**


Sunday, June 16, 2013

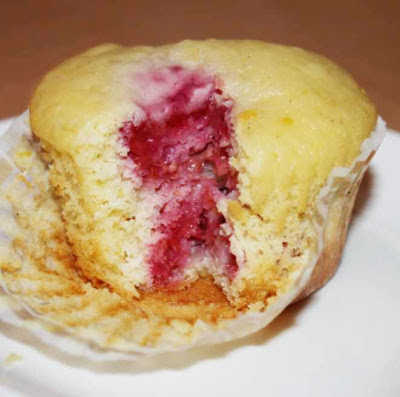
Raspberry Lemon Muffins

Well since the heat of the summer has hit, I have been on a berry kick lately.  Blackberries and raspberries have been populating the fridge for the last few months.  Luckily I had not eaten too many this time, so I did have some to bake with. 

I like the fact that muffins are so versatile.  I made them without a topping but a slather of cream cheese or honey butter would be good for those who want more to their muffin.  Also, being plain makes them appealing for those that are only craving a little sweetness to have with their morning coffee.  Eaten slightly warm or at room temperature, getting a big bite of a raspberry surrounded by lemony sweet cake hits the spot.

I have included the recipe for the limoncello glaze. The addition of that would make for a stronger lemony taste as well as add more sweetness.  Without it, the lemon flavor is very subtle in the muffins.  This recipe makes  about 1 1/2 dz.

Raspberry Lemon Muffins
adapted from Moufllet

Ingredients/Muffins
1 cup fresh raspberries
1 tbs lemon zest
1 cup buttermilk
1/4 cup melted butter
2 tbs oil ( vegetable or canola
1 tsp vanilla extract
2 eggs
1/4 cup sugar
1/2 tsp salt
1 tsp baking powder
2 cups flour
1/2 tsp baking soda

Ingredients/Limoncello Glaze
1/2 tsp melted butter
3 tbs limoncello
1/2 tsp vanilla
1 drop yellow food coloring (optional)
2 cups powdered sugar

For the muffins, prepare the pans by greasing the top edges of 18 cavities and line with paper liners.  Preheat the oven to 350 degrees.

In a small bowl, whisk together the eggs until frothy. Stir in the melted butter, buttermilk, zest, oil and vanilla extract.  Set aside.  In another bowl, sift together the salt, baking powder, baking soda and flour.  Then mix in the sugar.

Make a well in the dry ingredients and pour in the egg batter.  With a wooden spoon, mix the dry with the wet but only 10 strokes.  Over mixing will ruin the texture of these.  Fold the raspberries in with only 3 strokes.

Evenly fill the cavities of the pans with the batter.  Place in oven and bake for about 15 minutes and check with a tester to see if it comes out clean of any batter. Make sure it is not inserted into a raspberry when testing. Tops should spring back when muffins are done.  Note that the 15 minutes is a starting place and that the muffins can take up to 20 minutes.  The difference is due to the type of pan ( dark non stick, silicone and shiny metal).  

Let the muffins cool in pans for 3 minutes and then transfer to a rack to completely cool.  Glaze when completely cool.

For the glaze, start with mixing the melted butter with 1 tbs of limoncello.  Then sift in 1/4 cup of powdered sugar and mix until no dry streaks remain.  Continue with the process of sifting and stirring in the powdered sugar until all is mixed in.  Add more limoncello in small increments until the glaze has a syrupy consistency. Lastly, stir in the food coloring (optional) and the vanilla extract. 

Then dip the top of the cooled muffins into the glaze, being careful to immerse so that there is still 1/2 to 1/4 inch top edge border.  Let the extra drip off and set upright on the rack.  Glaze will need about 1 hour to set before serving.  The glaze can be stored up to 1 day prior to use.
                                      **LAST YEAR:Persephone's Winter Cake**

Sunday, June 9, 2013

Graham Cracker Madeleines


After the rich indulgence I posted last week, I was determined this week to make something lighter.  These cookies were a nice alternative.  Something a little sweet to have with tea or coffee.

Someone at work said that these were a pain to make, however, I beg to differ.  You can make the batter on one day and bake the next, so each process is easier to squeeze into the day. I actually made three different kinds, but this recipe turned out to be the favorite. 

Graham cracker flavored anything is hard to come by in baked goods, except for cheesecake crust and playing the part in a s'more type of treat. I did like the stand alone flavor of these, which is why they have no glaze on them.  You can take it up a notch and dip them in chocolate if you crave something a little sweeter.  As is, the cake-like, moist texture makes them perfect for dunking. The recipe makes about 2 dozen cookies.

Graham Cracker Madeleines
adapted from We Love Madeleines

Ingredients
1/2 cup or 1 stick melted butter
2 eggs (room temp)
3/4 cup flour
1/2 cup graham cracker crumbs
2/3 cup of sugar
 
Place the eggs and sugar in a bowl and beat on medium high speed for about 5 minutes.  The mixture should convert to a pale yellow, shiny batter and the sugar be totally dissolved. Using a wooden spoon, fold in the graham crumbs and the flour until all is blended.  Then stir in the butter until it is completely incorporated into the batter.

Pour batter into a shallow bowl and cover the surface with plastic wrap.  Refrigerate batter for at least one hour or the maximum, which is overnight.  After the chill time, preheat the oven to 375 degrees. Also, prepare your pans by greasing the cavities with melted butter and then dusting with flour.

Spoon or pipe the batter into the pan cavities evenly.  They should be about 2/3 full.  Place pans in oven, putting one pan on a rack to the right and the other pan on the rack below it to the left.  They should be staggered to bake evenly.  Bake for about 10-12 minutes, rotating pans at the halfway mark.  Madeleines are done when tester inserted into the thickest part comes out clean.

After the pans are removed from the oven, invert cookies onto wire rack for cooling.  These can be served warm or at room temperature.

Tips and Notes:
1. Regardless of pan type (shiny, silicone or non stick) the pans need to be greased and floured for every batch baked.
2. If using a non-stick pan, take note that it is darker so the cookies will brown faster.  In the non-stick pans, mine took about 7-8 minutes.
3. if you only have 1 pan, refrigerate the batter between batches.
                                 **LAST YEAR: German Carmelite Sister Cookies**         

Sunday, June 2, 2013

Cherry Ripe Cake


This is a recipe I have had tucked away for awhile.  I do like chocolate covered cherries and this is about as close as you can get to finding all that flavor in the form of a cake.

Between the big flavor and the wonderful texture, this is one is not easily forgotten about.  The great texture can be attributed to the coconut milk and vegetable oil. There is no butter in the cake.  Even a small slice can satisfy, with a hefty amount of cocoa laced with with cherry brandy, chunks of glace cherries and sweet coconut.  These same flavors are part of the assembly as well. Chocolate ganache covers the top and sides of cake while the other flavors make up a buttercream filling that sandwich the two layers together.

There are a lot of people employed where I work and it is good that there was more than enough cake for our department.  There were some intent stares from not in the department when this cake was being sliced so I could not help to offer them a piece!

Cherry Ripe Cake
adapted from Ledelicieux 

Ingredients/Cake
1 3/4 cup coconut milk
1/2 cup vegetable oil
1 tsp vanilla extract
1/4 cup cherry brandy
2 eggs
2 cups sugar
3/4 cup cocoa powder
1 tsp baking powder
2 tsp baking soda
1 tsp salt
1 3/4 cup flour
1 cup shredded sweetened coconut
200 grams or about 1 cup chopped glace cherries

Ingredients/Buttercream Filling
125 grams or about 1/2 cup butter
2 tsp cherry brandy
1 cup powdered sugar
1/4 cup shredded sweetened coconut
200 grams or about 1 cup chopped glace cherries
red food coloring (optional)

Ingredients /Chocolate Ganache
1 tbs cherry brandy
300 grams or about 1 3/4 cups chopped chocolate
1 cup heavy cream

Additional topping (optional)
1 cherry ripe chocolate bar, chopped
fresh cherries

Preheat the oven to 350 degrees.  Prepare two 8" round cake pans by buttering the interior and lining the bottom with parchment paper and buttering the face up side of the parchment..

For the cake, place the eggs in a small bowl and whisk until whites are completely blended with yolks. Then stir in the cherry brandy, oil, vanilla extract and coconut milk. Set mixture aside.

In the bowl of a stand mixer, sift together flour, cocoa powder, baking powder, baking soda and salt. Then mix in the sugar.  Turn the mixer on low speed and let run while slowly adding the wet mixture in 1/4 cup increments, scraping down the sides of bowl between each addition.  Lastly, add the coconut and the glace cherries, all while continuing to let the mixer run on low speed. 

Once all is evenly distributed into the batter, pour batter evenly into prepared cake pans.   Place in oven and bake until tester comes out clean.  Baking time should range between 35 to 40 minutes. The cakes should cool in the pans for 30 minutes and then transferred to a rack to finish cooling.

Start making the filling by beating the butter until light and smooth.  Then sift the powdered sugar into the same bowl and beat until mixture is fluffy and light.  If using the food coloring, add it and beat until icing has an even color with no streaks.  Lastly, stir in the cherry brandy and fold in the glace cherries and coconut. 

Remove the parchment from the cake. Place one cake layer on a cake stand. Place parchment or wax paper all around the split between the cake and the plate.  Then smooth the filling over the the top of one of the cake layers and stack the other cake layer on top. 

Place the chocolate and cream into a small saucepan over low heat.  Once it is all melted and smooth, stir in the cherry brandy.   Let ganache cool for about 5 minutes  Pour ganache over the center of the cake, letting it fan outward and drip down sides of the cake.  Use a spatula to even out the ganache on the top and sides of the cake.  Once the ganache is set, remove the wax paper from between the cake plate and cake.

To decorate further, recipe suggests to use fresh cherries on top or chopped cherry ripe chocolate bars.
                                   **LAST YEAR: Ginny Bee Bkfst Cake**


Sunday, May 26, 2013

Mint Chocolate Cupcakes


Lately I have been traveling around on the weekends so I have been hard pressed to be able to set aside some time for this blog.  That and in addition to the trial and error it took on this particular recipe, the month is nearly over and this is only my second post.

This particular recipe is one of the winners in the Cupcake Wars on Food Network.  I do love mint and dark chocolate, but I did not want anything green nor anything artificially flavored.  The real mint did add a slight earthy flavor to these cupcakes.  Also, if you take the flavor too far,then you are getting closer to more of a flavor that is close to toothpaste.  The amount of mint to chocolate flavor is very well balanced.

These cupcakes were a hit with the coworkers.  I was also very happy with the texture of the  cupcakes.  However, please note that the recipe below is in its original state.  Since I had a few issues with the original, my notes at the bottom are very helpful. This recipe makes 1 dz cupcakes.

Mint Chocolate Cupcakes
adapted from Food Network

Ingredients/Cupcakes
2 eggs
2 cups of light cream
6 tbs of butter
1/2 cup of sugar
1 tsp salt
2 tsp baking powder
1 1/2 cups flour
2 sprigs of mint
3.5 oz of dark chocolate mint (refrigerated or frozen)

Ingredients/Mint Buttercream
4 cups confectioners sugar
1 lb butter
1/4 cup mint infused cream

Prepare a 1 dz cavity muffin pan by greasing the top edges of the cavities and lining with standard cupcake liners.  Preheat the oven to 325 degrees.

Fill a saucepan with the light cream and add the mint sprigs.  Cook on medium heat for 5 minutes and remove.  Set pan aside and leave mint leaves in mixture and let cool.

Add the butter and the sugar to the bowl of a stand mixer.  Then beat on medium high for 2 minutes. Scrape down the sides of the bowl and beat for another 2 minutes.  Again, scrape down sides of bowl and beat for one minute. Add one egg and beat on medium speed for about 30 seconds.  Scrape down the sides of bowl and add second egg.  Beat again until all is blended. Set aside.

Pour the mint infused cream into a sieve with a bowl underneath.  Discard the mint leaves in the sieve.  In another bowl, sift together salt, baking powder and flour.

Using a wooden spoon or spatula, fold 1/3 of the sifted ingredients into the batter.  Then stir in 1/2 cup of the mint infused cream.  Add 1/2 of the remaining flour mixture and mix until blended.  Pour in another 1/2 cup of mint cream and stir. Reserve the rest of the mint cream for use in the frosting.  Add the last of the flour mixture to the batter and stir until no dry streaks remain.

Take out the chocolate and finely grate using a food processor with a grate attachment.   Fold the grated chocolate into the cupcake batter.  Then evenly fill the lined cavities of the muffin pan, they should be about 2/3 full.

Bake for about 25 minutes or until tester comes out clean.  Cupcakes should cool in pans for about 5 minutes before being transferred to cooling rack.  Frost when completely cooled.

For the frosting, cream the butter in the bowl of a stand mixer with the speed on medium high.  Run mixer for a total of 5 minutes, scraping down sides of bowl at the halfway point.  Then beat in the 1/4 cup of the mint infused cream until all is blended evenly.  Discard the rest of the mint cream.

Sift the confectioners sugar into a medium size bowl.    In 1/2 cup intervals, beat confectioners sugar into butter mixture with the mixer set on medium.  Continue to beat and add confectioners sugar until all is completely smooth.

Then pipe the buttercream frosting onto the cooled cupcakes and serve.

Tips and Notes:

1. I used several types of dairy ratios for the 2 cups of light cream.  Found that 1 cup of heavy whipping cream and 1 cup of 2% milk worked best.

2. Baking time in my oven was 20 minutes, so watch the time closely.

3. Original recipe was a little too dry in texture so 2 tsp of oil was added and beat into the batter right after the addition of the eggs.

4. Note that there is only a hint of mint flavor in the icing, but it paired well with the cupcake flavor and was not overpowering.

5. Do not use any type of dark chocolate with a mint filling.  It will not freeze solid, so it does not work for grating the chocolate.  The Divine brand of chocolate has a great solid dark chocolate mint bar.  As you know, the quality of the chocolate used promises the best flavor.

6.  The recipe states garnish with mint leaves.  You can make chocolate leaves with an extra mint chocolate bar.  Even better yet, mint leaves are edible so you can do both.
                             **LAST YEAR: Elixir Wage Cake**


Tuesday, May 7, 2013

Midnight Delights

The bite sized treats sure are rampant at the grocers.  Everything is mini, little and bite sized.  Also, there is an advantage to making things in that size.  Bite sized treats are easy to transport and are easy to serve.

These particular morsels contain what I call the magic trio.  They have espresso, dark chocolate and a little bit of Kahlua or coffee liqueur.  Also, I think the addition of the walnuts is a great choice.  The chocolate cookie cup acts as a vessel to hold and support the rich, fudgey filling. This recipe makes about 4 dozen.

Midnight Delights
adapted from Bon Appetit

Ingredients/Cookie Crust
3/4 cup (1 1/2 sticks) cold butter cut into cubes
1/4 cup strong espresso coffee (chilled)
1/4 cup sugar
1/2 tsp salt
1 3/4 cups flour
1/3 cup cocoa powder

Ingredients/Filling
12 oz or 1 1/2 cups semi sweet chocolate chips (melted)
2 tbs butter (melted)
2 tsp coffee liqueur (I used Kahlua)
2 eggs
1/2 cup chopped walnuts
1/2 cup sugar
2 tbs milk
48 walnut halves( for toppers)

Prepare miniature muffin tins by greasing each cavity.  In a medium size bowl, sift the flour, salt and cocoa together.  Whisk in the sugar.  Then pour into the bowl of a food processor.  Toss in the butter cubes and pulse with steel blade till mixture starts to come together.  Then add the espresso coffee.  Pulse again until the mixture forms a ball of dough.

Sprinkle a flat surface with flour and divide dough into 4 equal pieces.  Take one piece and roll it out to a thickness of  1/8 inch. Using a 2 1/2 inch cutter, cut the dough into 12 disks.  Place each disc in a cavity of the muffin tin, so that each lines the bottom and about 2/3 up the sides of the cavity.  Repeat this process for the rest of the 4 tins.  Place all 4 tins in the refrigerator for 40 minutes to firm up.

While the tins are in the refrigerator, preheat the oven to 350 degrees and start on the filling.    In a medium size bowl, whisk together sugar, milk, butter and coffee liqueur.  Then mix in the melted chocolate until all is smooth.  Using a whisk, blend 2 eggs into the batter.  Once completely blended, fold in the walnuts.

Once the chilling time is complete, remove the tins.  Fill each cavity with 1 1/2 teaspoons of the chocolate batter.  Place each tin in oven and bake for 20 minutes. The filling should be puffed and cracked in places when done.  Remove pan and lightly press a walnut into the center of each.

Let bites cool in pan for about 15 minutes and then transfer to a rack to finish cooling.

Notes and Tips:

1. My end result was too much dough.  I must confess that the filling was not measured out exactly when filling the cavities and the thickness of the dough was not exact either.

2. If you only have one muffin tin, you can bake in batches. Because of the chilling time, the process will take longer if you prepare and bake 1 dz at a time.

                                    ***LAST YEAR: Lemon Butter Fudge**