Foodbuzz

Monday, May 26, 2014

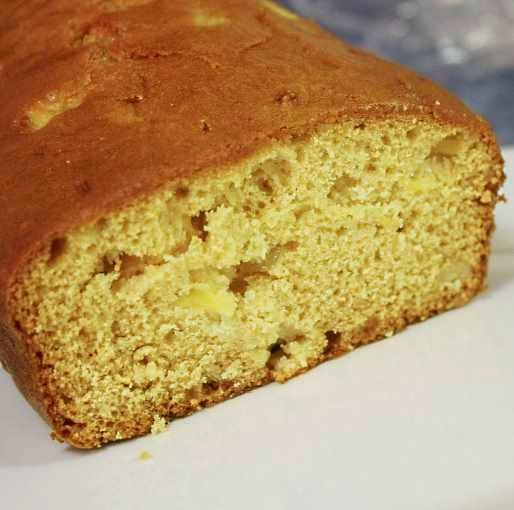
Hawaiian Loaf


I can recall the show "The Golden Girls" which had a daily ritual of the ladies gathering around a table and eating cheesecake in the afternoon.  Even though I enjoy a good slice of cheesecake every now and then, I would not choose it for a daily ritual.  In my opinion, biscotti or sweet loaf bread is more appropriate for an afternoon get together.  Cheesecake is a little bit on the heavy, rich side of the dessert family.

While there are lots of sweet loaf bread recipes out there, my pantry had some macadamias that beckoned to be used.  Also, I still had some pineapple left from the recent trifle I made.  This narrowed down the choices to something in the Hawaiian category.

After working with this particular recipe, I found a few flaws. If I made it again, I would probably add more cream cheese than recommended.  It is actually the cream cheese and the sour cream components that aid in keeping this bread from being dry. However, I still thought it could be more moist. This recipe calls for 1 pkg or 3 oz of cream cheese, which is quite a bit smaller than the standard 8 oz that we are used to. Also, I had a dark pan, which may have impacted the bake time.  Instead of the recommended 70 minutes to bake in a nine inch loaf pan, mine was finished in 55 minutes - this may have been another factor that affected the texture.  It may have already been done a little prior to me removing it from the oven.

All in all, this is one that you will need to tweak a little to get it to your liking in texture.  The recipe is below, as originally stated.

Hawaiian Loaf
adapted from My Great Recipes/ Card222 

Ingredients
1/2 cup chopped macadamias
2- 8 oz cans crushed pineapple, drained
1 pkg (3 oz) softened cream cheese
1/2 cup sour cream
1 egg
2 cups flour
1 tsp baking soda
1 tsp salt
1 cup sugar
1 1/2 tsp vanilla

Prepare 2- 7 inch loaf or one 9 inch loaf pan by greasing the interior and lining the bottom and two long sides with parchment paper.  Grease face up side of paper.  Preheat oven to 350 degrees.

Sift together flour, baking soda and salt.  Set aside.  In another bowl, beat cream cheese until smooth.  Continue to beat and slowly pour in sugar.  Once all is blended add vanilla extract and the egg.  Beat for 30 seconds on medium high.

Fold in 1/3 of the dry ingredients to the cream cheese mixture.  Then mix in half of the sour cream.  Repeat the process and end with folding in the last 1/3 of the sifted ingredients.  Add the nuts and pineapple and stir until evenly distributed.  Spoon into pan(s) and smooth the top.

Place in oven and bake.  Recipe recommends 45 minutes for the small pans and 70 minutes for the 9 inch pan.  Test for doneness after 30 minutes on the small loafs and 50 on the larger.  Bread is done when tester comes out clean.

Remove and place pan on rack for 10 minutes to cool.  Remove loaf (loaves) and let completely cool before slicing.
                                       **LAST YEAR: Mint Chocolate Cupcakes***


Monday, May 19, 2014

Buckeye State Ice Cream


Buckeyes are actually nuts that grow on trees that are related to the chestnut.  Many of these trees grow in Ohio and that is how Ohio got to be tagged as the buckeye state.

Even though the nuts are considered poisonous, Ohio is also home to the candy confections called buckeyes.  These are basically a fudge-like ball made up of peanut butter and honey, then dipped in dark chocolate.  If you are a fan of Reese's, you will love this candy as well as this ice cream.

An ice cold mouthful of smooth peanut buttery ice cream with the occasional crunch of chocolate does hit the spot on a hot humid day.  In order to insure the best flavor, stick with the natural peanut butter and quality dark chocolate in this recipe.  You will be glad you did.

Why not break out some homemade ice cream this Memorial Day? This peanut butter and chocolate combination is sure to get everyone's approval.

Buckeye State Ice Cream
adapted from Jeni's Splendid Ice Cream at Home

Ingredients
2 tbs light corn syrup
2 tbs honey
1 1/4 cups cream
2 cups whole milk
1 1/2 oz or 3 tbs cream cheese
2/3 cup of sugar
1/2 cup natural peanut butter
4 oz chopped chocolate ( preferably dark chocolate 55-70% cocoa)
1 tbs plus 1 tsp cornstarch

In a medium size bowl, mix together the cream cheese and peanut butter. Set aside.  In another bowl, combine the cornstarch with 2 tbs of milk (taken out of the original 2 cup measurement), stirring until smooth.

Fill a saucepan with the cream, milk, sugar, honey and corn syrup.  Place over medium high heat and stir.  Continue to stir as the mixture comes to a boil. Set the timer for 4 minutes and let the cream cook, mixing constantly.  Remove from the heat.  Stir the cornstarch mixture one last time and then pour into the cream in a small stream while mixing.  Transfer saucepan back to the heat and let cook for about a minute until thickened, then remove.

Place ice in kitchen sink and fill with water.

Put the cream cheese/peanut butter mixture in the cream and stir until smooth.  Then pour ice cream into a zip lock bag and seal.  Place the sealed bag in ice bath.  Let mixture cool for about 30 - 45 minutes.  While this is cooling, melt dark chocolate in top of a double boiler.  After melting, remove top pot from boiler pot and set aside. Let chocolate cool until just warm, but not solid.

Once cooling time is complete for the ice cream, pour into an ice cream maker and follow manufacturer's instructions.  Right before you reach the stage of transferring the ice cream to another container, pour in the chocolate and spin or mix the ice cream.  After all chocolate is mixed in, then put ice cream in another container and press a piece of parchment on the surface.  Then seal with a tight lid and place in freezer.  Ice cream should be firm in about 4 hours.

Tips and notes:

1. The peanut butter/cream cheese mixture is thick.  In order to mix it in after it was added to the cream, I placed the saucepan once again over medium heat.  Using the back of the smooth, smash the large clumps against the side of the saucepan and swish from side to side.  Then scrape down with the spoon.  Continue until there are no lumps that float to the top.  Once the process is complete, pour into zip lock bag.

2. Drizzling is the best method to insure even distribution of the chocolate in the ice cream.  On my second round of making this ice cream, I used a squirt bottle and drizzled thin lines on top. Once the chocolate got hard, I used a butter knife to break it up and mix it into the cream.

3. The recipe stated use unsalted, natural peanut butter but also listed 1/2 tsp of sea salt as an ingredient to add to the cream cheese.  I skipped the salt ingredient by using regular, natural peanut butter, not the unsalted kind.
                                            **LAST YEAR: Midnight Delights**


Monday, May 12, 2014

Pineapple Rum Trifle Cake


This particular dessert is for those who like fruit and cream.  The recipe, having less than one cup of sugar, lets the sweetness of the pineapple shine through.  The nutty pistachio cake and the rum custard are the other two elements which come together to create this tasty dessert.

The issue I had in preparing the recipe was that the batter is baked in a jelly roll pan and then the cake is cut in half and then split horizontally after baked.  I did not have a 10 1/2 by 15 1/2 inch pan (my pan was larger), so in order to compensate, I actually baked 2 cakes and skipped the step in splitting horizontally.  Be sure to read the tips and notes, for the recipe below reflects the original instructions.

The tropical flavors as well as the lightness of this dessert make this cake a perfect ending to a summer meal.

Pineapple Rum Trifle Cake
adapted from the Best of Gourmet 1999

Ingredients/Cake
5 eggs
2/3 cup of sugar
1/4 cup shelled pistachios
1/2 tsp salt
3/4 cup plus 1 tbs flour 

Ingredients/Filling
1/4 cup rum
1/4 cup sugar
4 egg yolks
1 cup heavy cream
2-20 oz cans of crushed unsweetened pineapple

Ingredients/Topping
1 cup heavy cream
2 tsp sugar

Prepare 10 1/2 by 15 1/2 inch jelly roll pan by oiling the interior and lining bottom and sides with parchment paper.  Preheat the oven to 350 degrees.

Fill a food processor with the pistachios, flour and salt.  Grind ingredients to a fine powder.  Set aside.  In the bowl of a stand mixer, beat eggs for 30 seconds on medium.  Then increase speed to medium high and slowly pour in sugar while the batter continues to be beaten with the blade.  Continue to beat for an additional 10 minutes.  The end result should be a pale yellow batter that is light and thick.  Remove bowl from mixer and fold in dry ingredients from the food processor in 1/4 cup increments.  Make sure it is all mixed in but do so gently so as not to deflate the thickness of the egg batter.

Spread batter into prepared pan and smooth the top.  Bake for 10 to 15 minutes.  Cake is done when edges are slightly toasted and top springs back when lightly touched.  Cool cake completely by letting sit in pan on top of a rack.

While cake is cooling, prepare the pineapple filling layer.  Empty both cans of pineapple into a food processor (juice and all).  Pulse mixture for 3 seconds.  The pineapple will have more of a pureed look when done.  Pour pineapple into sieve set over a small bowl.  Set pineapple aside, juice can be reserved for another use.

To make rum custard filling, set up a double boiler on the stove. Also fill a sink 1/4 full of ice and cold water.  Heat up water in double boiler to a steady simmer.  In a small bowl, add first 3 filling ingredients on the list above plus only 1/4 cup of the heavy cream. Mix together and then pour into the top saucepan of the double boiler.  Stir constantly with a wire whisk while mixture cooks.  Once it reaches a pudding-like consistency and the whisk leaves marks in the custard, transfer the saucepan of custard to the prepared ice bath in the sink.  Let cool to room temperature.

Take the remaining 3/4 cup of heavy cream and beat until you reach the stiff peak stage.  Fold the cooled custard into the cream.  Set aside.

Invert cake layer onto flat surface and remove parchment paper. Trim edges to create a size of 7X14, reserving trimmings.  Cut cake in half and then split horizontally.

For assembly, place 1 cake layer onto cake plate.  Spread with 1/2 cup of pineapple and then 1/2 cup of rum custard. Place the next cake layer on top and repeat the process until layers are stacked and filled.  After the last layer, use the cake trimmings to piece together the final, 5th layer.  Chill cake covered in refrigerator for at least 1 hour.

Make the topping by beating the cream and sugar together.  Once soft peaks are formed, spread evenly over cake top and sides.

Tips and Notes:
1. When adding dry ingredients to cake batter, do not dump in.  Instead, pour a steady stream as the folding is done.  Dumping in will cause clumps, which in turn will require more mixing which will deflate the texture of the batter.  That lesson is reflected in the cake layer thickness differences in the picture above.

2.  On the egg batter for the cake, it is important that you run the mixer for the full 10 minutes to insure the proper height of the cake layers.

3. My cake was a little bigger and did not have the pieced cake trimmings on top.  The whipped cream topping is forgiving when it comes to covering jagged uneven edges and, so that will not be noticed.  When cut, it is the cake layer thickness which is the most noticed.

4. I used 1 1/2 times the recipe for the topping on this cake.  Also, if doing again, I would probably do the same with the custard filling. Bear in mind that my cake was a little bigger due to my pan used.

5. Without the whipped topping, cake can be prepared and refrigerated up to 2 days.  If you prepare ahead with the whipped topping, make it no more than 1 day in advance.  Either way, let cake come to room temperature before slicing and serving.

                                             **2 YEARS AGO:Monticello Pride Tart**


Sunday, May 4, 2014

Vienna Chocolate Bars


I do realize that I have quite a number of posts out there with raspberry and most of them are bars.  However, when a dessert recipe calls for jam, it is first to come to my mind.  Probably goes back to the cake with apricot filling...it is a long story, so all I will have to say is do not let decorative colors of a party make you sacrifice anyone's favorite flavors. If the guest of honor at a baby shower loves chocolate, do not make a strawberry lemonade cake to match pink.  A chocolate cake would make your guest happier.

Chalk up another raspberry dessert for me, but this recipe can be made with any of your favorite fruit jam.  You can even choose apricot, but do not look to me to make a trade.

These particular bars have a shortbread crust baked and layered with jam, chocolate chips and a nutty walnut fluff on top.  I know you are wondering where the chocolate is and I admit that the name of this recipe does not really match this bar.  The chocolate is not a primary flavor.  The fruit flavor is dominant, while the chocolate is a subtle undertone. 

For as little as the time it takes to make these, the end result is quite worth it.  We have all been in the situation where we have a commitment to bake but the clock indicates we are short on time.  This is a good one to pull out to resolve the situation.

Vienna Chocolate Bars
adapted from Oh Fudge by Lee Benning

Ingredients
4 egg whites
2 egg yolks
1 cup or 2 sticks butter
2 cups finely chopped walnuts
10 oz jelly (raspberry or your choice)
1 cup choc chips
2 1/2 cups flour
1 1/2 cups sugar
1/4 tsp salt

Line a cookie sheet with parchment paper and preheat the oven to 350 degrees.

In a stand mixer, beat the butter with 1/2 cup of sugar for 3 minutes on medium high speed, scraping down the sides of the inside of the bowl at one minute intervals.  The mixture should be smooth and creamy when done.  Then beat in one egg yolk for 30 seconds and repeat with 2nd egg yolk.

In a separate bowl, sift together flour and salt.  Pour 1/3 of this into the butter mixture and fold the dry ingredients into the dough until no dry streaks remain.  Repeat same process with the 2 other batches of the sifted ingredients.

Once dough is thoroughly mixed, dump onto the prepared cookie sheet.  Pat dough out in the form of a rectangle, measuring 8 inches by 10 inches.  Place in oven and bake for 15-20 minutes.  This layer is done baking when the edges turn a golden brown.

Remove pan from oven and then spread with the raspberry. There is no cooling time, start as soon as it comes out of the oven. Take care to spread evenly and not to let go over the edge.  Then top the raspberry layer with chocolate chips.

The last layer of this dessert, is the nutty topping. Beat the egg whites until stiff.  Gently stir in the nuts and sugar.  Spoon it on top of the chocolate chips and use a spatula to smooth the top.

Place in oven and bake for about 25 minutes. When done, the top is like a hard shell but it still is very light in color.  Remove and let cool completely before cutting into squares.

Tips and Notes:
1. The egg whites can be beat while streaming in the sugar and then the nuts get stirred in.  The recipe states that this method will make the topping a little but like divinity.
2.  Try a low sided 8X10 pan if you want the shape more precise.
3.  I placed my chocolate chips on the jelly one by one spacing and making several lines. It is more exact than sprinkling the chips.  Placing the chips evenly guarantees chips in every bite.
                                 **LAST YEAR: Midnight Delights**

Sunday, April 27, 2014

Cherry Almond Cobbler Cookies


Here it is.  A good recipe for making individual cobblers without using ramekins.  Besides the assembly, just make the two cookies and the filling.  One pan to wash when it comes to the filling and only dessert plates and forks to wash when nothing is left to eat!

Sandwiched in between the cookies are whole cherries (bought frozen) flavored with cinnamon and lemon.  For the cookies, almond streusel is baked on to the top cookie and the bottom is plain.

I did have to tweak the recipe in regards to volume on both the streusel and the filling.  Even with the tweak , I was surprised at the amount of cherries needed for just a little over 2 dz sandwich cookies. More cherries than the syrupy liquid....hmmm...not really a bad thing!

These would be perfect for the 4th of July celebration.  That is if you can wait that long.

Cherry Almond Cobbler Cookies
adapted from the Cooking Channel

Ingredients/Cherry Crumble
1/4 cup chopped blanched almonds
1 1/3 cup flour
1/4 cup of sugar
1/3 cup packed brown sugar
1/2 tsp almond extract
1/2 cup or 1 stick of butter
1/8 tsp nutmeg
1 tsp gnd cinnamon

Ingredients/Cookie Dough
2 eggs
1 cup or 2 sticks of butter
1/4 cup corn syrup
1 tsp almond extract
1/2 tsp vanilla extract
4 cups of flour
2 tsp salt
2 tsp baking soda
1/2 cup chopped dried cherries
1/2 cup packed brown sugar 
1 cup granulated sugar
1/2 cup confectioners sugar

Ingredients/Cherry Filling
3 lbs frozen cherries, thawed and drained
2 tbs lemon juice
1 cup granulated sugar
1/4 cup cornstarch
1 tsp cinnamon
pinch of salt

Preheat the oven to 300 degrees.  Line 2 baking sheets with parchment paper.

Start with making the crumble.  Melt the butter in a small saucepan, remove from heat. Stir in the almond extract. Next, fill a medium size bowl with both sugars, cinnamon and nutmeg.  Mix until evenly distributed.   Pour the liquid into the sugar mixture, stir and then mix in the flour.  Then fold in the chopped almonds with a wooden spoon and set aside.

To make the dough, you will need 3 bowls: two medium size and one from a stand mixer. In the first bowl, stir together all the sugars.  In another bowl, sift together baking soda, flour and salt.  In the third and stand mixer bowl, add the butter.  Beat the butter on medium speed, stopping occasionally to scrape down the sides of the bowl.  Continue to beat until the butter has a smooth consistency.  Mix one egg into the butter, beating for about 30 seconds.  Repeat with the additional egg.  Then add the corn syrup and both extracts.  Beat for another 30 seconds.  Remove bowl from mixer and fold in the sifted ingredients.  When no dry streaks remain, stir in the dried cherries.

Separate dough into halves.  The first half will make up the bottom of the cookies. Scoop out a heaping tablespoon of dough and flatten it on the prepared cookie sheet. It should be about 2 1/2 to 2 3/4 inches in diameter.  Repeat with process, making sure the flattened cookies are about 1 inch apart on the baking sheet.  Bake for about 9-12 minutes or until cookies have a toasty or golden hue on the edges.  Let rest on baking sheet for 2 minutes, then transfer to rack to completely cool.  For the top cookie, follow the same instructions with one difference: before your dough is completely flattened to size, evenly sprinkle a heaping tablespoon of streusel on top.  Then press down lightly to flatten to desired size. Once all are baked, turn off the oven.

After all the cookies have cooled, match the tops with the bottoms.  Since they are free form, they will not match perfectly, but this task will keep you from having a big difference in size from top to bottom.

To start on the filling, you will need a cake pan (I used a 9X13 size) and foil to cover the top.  Preheat the oven to 325 degrees.  In a large mixing bowl blend the cinnamon, salt, cornstarch, lemon juice and the granulated sugar.  Then fold in the cherries.  Pour mixture into cake pan and spread evenly.  Cover tightly with foil and place in oven to bake for 30-45 minutes.  At 15 minute intervals, remove from oven, uncover and stir.  Then cover and place back in oven.  After baking, uncover and let cool for 15 minutes.  It should be like pie filling, not watery but not rubbery either. If it still has a watery consistency, cover and put back in oven to bake some more and check at 15 minute intervals.  Bear in mind mixture will thicken upon cooling. Let cherry mixture completely cool prior to using as filling.  My cook time was the full 45 minutes.

To assemble, spoon desired amount of filling on bottom cookie and top with streusel cookie.

Tips and Notes:
1.  Make sure your cherries are completely frozen and well drained.  Otherwise, filling cook time will be longer to eliminate the excess liquid.

2. I have thought that maybe rolling the dough between waxed paper and cutting it into circles is a way to go for a more exact match of top and bottom cookies, but the issue would be pressing the streusel on top. Also, I was very liberal with the streusel, making sure the cookie was completely covered, even the edges.

3. Other tweaks to the cookie part of this recipe include chopping dried cherries and almonds.  Also there was no reference to type of cherries (fresh, frozen, dried) used in the cookie dough so I opted for the dried.

4. The cookies are chewy and soft in texture which makes them a bit delicate.  Care is needed when handling. When assembling do not press down on the top cookie, just set on top.  The cookies can be eaten by hand, but due to the filling they are better served with a fork.

5. Since the filling is not completely enclosed in the cookie, assemble and serve the same day.
                                  **LAST YEAR: Ube Macapuno Cake**
 

Sunday, April 20, 2014

Minnie's Chocolate Chip Supreme Cookies

There are a variety of chocolate chip cookie recipes out there as there are different preferences.  So much that it is a task just to zero in on the most favorite type.  In scanning recipes, I came across a Disney recipe that encompassed some uniqueness to it that had wonderful results.

Kids do know a thing or two about cookies.  Also, who else but Disney to know kids and what kids like?   Let's talk size first.  These are not like grandma's dainty tea cookies.  They are big cookies, about the size of a DVD disc.  Also, much to a child's delight,they are packed with a myriad of different type of morsels in them.  Most of the add ins are some type of chocolate.  Also, that texture of crispy on the outside and chewy on the inside is another factor that brings out a smile.

Kids love these cookies.  No longer a kid?  Don't despair..these cookies will bring out the inner child, no matter what the age.  Oh and don't forget the milk. Chocolate chip cookies should always be served with milk or as Carl says "ice cream please!" This recipe makes 1 dozen large cookies.

Hope everyone is having a super Easter filled with family, friends and great food!

Minnie's Chocolate Chip Supreme Cookies
Adapted from Disney Diner

Ingredients
2 tbs water
1 egg
1/2 tsp vanilla extract
1 cup butter,  room temperature
3/4 cup semi sweet choc chips
6 oz bittersweet choc, chopped
3/4 cup milk choc wafers/candy melts
3/4 cup toffee bits
1 cup chopped pecans
3/4 cup powdered (not granulated) sugar
1 cup light brown sugar, packed
2 2/3 cup flour
1/2 tsp salt
1/2 tsp baking soda

Prepare two baking sheets by lining with parchment paper.  Fill bowl of a stand mixer with butter and both types of sugar.  Beat at medium high speed for 1 minute. The mixture should have a fluffy consistency.  Then beat in egg, water and vanilla. Set aside.

In another bowl, sift together flour salt and baking soda.  Using a wooden spoon or spatula, fold sifted ingredients into butter/sugar blend.  Once no dry streaks remain, then the add ins can be mixed in.  The recipe suggests adding each of the chocolate ingredients in separate batches, mixing in after each addition.  Then fold in the toffee bits and the last addition is stirring in the nuts.

Preheat the oven to 400 degrees.  While the oven is heating up, scoop out mounds of dough with an ice cream scoop and place on cookie sheets.  Remember that this recipe makes around 1 dz large cookies.  With correct spacing of the mounds, there should be about 5 to a pan.  After all the mounds are made, place baking sheets in the freezer to firm up for about 15-20 minutes.

Once chilling process is complete, place in oven to bake for two minutes. The flash bake is a technique for creating a crispy outside to the cookies.  After the two minutes, reduce temperature to 350 degrees and bake for about 15 minutes.  The cookies should be golden brown on the edges when done. Let cookies cool on pan for 5 minutes and then transfer to a rack to finish cooling.

Tips and Notes:
1.This is a good base cookie dough recipe, feel free to experiment with you own choice of add ins.
2. The cookie has a chewy interior which gives the impression of it not being done in the middle when they come out of the oven.  Be careful not to over bake.
                               **LAST YEAR: Peach Oatmeal Cookies**

Sunday, April 13, 2014

Black Walnut Madeira Cake

As most of us know, when dealing with a strongly flavored ingredient, there has to be another ingredient which mellows that flavor.  We all have choked at one time or another, when someone prepares something in which the flavor is overpowering.  My situation involved cilantro and I had a friend that stated hers was banana.  However, when reviewing strong flavors, black walnuts fall into that category.  The perfect offset for that slightly bitter taste of black walnuts would be something sweet.  In this particular recipe, Madeira wine is included in the batter and the cake is topped with an extra sweet icing and a sprinkling of more nuts.  They both play an important part in creating a good balance of flavors.

Black Walnut Madeira Cake
adapted from My Great Recipes

Ingredients/ Loaf Cake
1/2 cup chopped black walnuts
1/2 cup light brown sugar
1/4 cup granulated sugar
1/4 cup milk
1/4 cup Madeira wine
3 egg whites
1/2 cup butter
1 1/2 tsp baking soda
1 tsp cream of tartar 
1 1/2 cups flour

Ingredients/ Frosting
2 tbs butter
1 tsp vanilla extract
1/2 cup packed brown sugar
1 1/2 cups powdered sugar
2 tbs milk
chopped walnuts for sprinkling top

Prepare the 9X5 inch loaf pan by greasing the interior.   Also, line bottom and 2 sides (with excess overhang) with parchment paper.  Grease the surface of the parchment paper touching the sides and bottom.  Preheat the oven to 350 degrees.

Fill a bowl with butter and both sugars and beat on high speed for one minute.  Set aside.  Sift together the flour, cream of tartar and baking soda.  Fold 1/3 of the sifted ingredients into the butter/sugar mixture.  Pour in the milk and stir until smooth. Stir in the next 1/3 of the sifted ingredients and then mix in the Madeira wine.  Lastly, fold in the rest of the dry ingredients and set aside.

In another bowl, beat egg whites on high speed until it reaches the stiff peak stage.  Gently fold the egg whites into the prepared batter until evenly distributed.  Then mix in the walnut pieces.   Bake cake in oven for about 45-50 minutes or until tester indicates done. Cool 10 minutes in pan then run a knife between the cake and the pan on the sides without parchment.  Lift cake out of pan with excess overhang of parchment and place on rack to completely cool.

For the frosting, beat together the butter and brown sugar on medium high speed with an electric mixer.  Then add the powdered sugar, vanilla extract and milk, stirring to combine.  Once the frosting has the desired consistency, spread on the top surface of the cake.  Then sprinkle with walnut pieces, if desired.

Tips and Notes:
1.  Both the wine and the nuts are the stand out flavors in this recipe.  You can use Marsala and regular walnuts, but the flavor will not be the same.
2. Since the frosting is made with brown sugar, it does need some time to set.  As it sets, the texture will not be as gritty like the newly made frosting.  Be aware that it is very sweet, but the sprinkling of the nuts tones that down.
                                       **LAST YEAR: Chocolate Chunk Cream Cake**     


Sunday, April 6, 2014

Pecan Coffeecake

The thing that most people enjoyed about this coffeecake was the flavor of the cake part, not the filling or the topping.  The two pecan elements were good, but the extra flavor of the cake was a delicious surprise. Usually most coffeecakes are plain, letting the filling and topping be the highlight of flavor.  We all have experienced that plain bite of coffeecake, you know, the one that has no filling or much topping with it.  So, since filling and topping in every bite is hard to guarantee, the next best thing is to make the cake taste delicious on its own.

This recipe uses lemon zest in the batter, which paired nicely with the pecan filling.  Yet if that was not enough, the icing has espresso in it. So, if your standard breakfast has reached that blah stage, change it up with this coffeecake. It will definitely make for a better morning.

Pecan Coffeecake
adapted from My Great Recipe Cards

Ingredients/ Cake
1 egg
1/2 cup warm milk (105-115 degrees)
1/4 cup butter (room temp)
5 tbs cold butter, cut into cubes
2 tbs shortening
2/3 cup bread flour
1 1/4 cups bread flour
1 pkg active dry yeast
1/2 cup sugar
grated zest from one lemon
1/4 tsp salt

Ingredients/ Filling
1/3 cup butter
3 tbs shortening
1/3 cup flour
2/3 cup dark brown sugar (packed)
2/3 cup finely chopped pecans

Ingredients/ Topping
1 egg mixed with 1 tbs water (egg glaze)
2 tsp hot water
1/3 cup powdered sugar
1/2 tsp instant espresso powder
whole pecans for placing on top

For the cake, sprinkle yeast in warm milk.  Stir with a fork until yeast has dissolved.  Fold in 2/3 cups of the flour.  Cover and set aside.

Using a handheld or stand mixer, beat together butter, sugar and shortening until fluffy.  Add the egg, salt and lemon zest and beat for 30 seconds on medium speed.  Then stir in yeast/flour mixture, set aside. Fill another bowl with the remaining 1 1/4 cups of bread flour.  Using a pastry blender, cut the butter cubes into the flour until it is crumbly and the clumps are about pea sized.  Then add the yeast/flour mixture, stirring until all is blended and it forms a dough.  Cover and let dough chill for 2 hours.

While dough is chilling, the filling can be made.  Beat the butter and shortening together until light and creamy.  Using a handheld mixer on medium speed, mix in the dark brown sugar.  Then fold in the chopped pecans.  Lastly, stir in the flour until evenly distributed.  Also, prepare 2 baking sheets by lining with parchment paper.

Prepare a flat surface by dusting with flour.  Remove the dough from the refrigerator and knead dough on surface about 18 turns.  Divide dough in half.  Roll one piece of dough into a rectangle, measuring about 10X14 inches.  Take out 1/2 of the filling and spread down the center of the length of the dough, leaving about a 2 1/2 inch border on either side. Fold borders of dough over the top of the dough that is spread with filling.  Overlap each side by 1/4 of an inch, pinching the center of the dough together to seal.  Also, to further seal the dough, take a rolling pin and lightly roll over the top in a few strokes. Flip sealed dough over and center on a prepared baking sheet.  Repeat process with the remaining dough and filling.

Make 1/2 inch slashes on each side of the length of each coffeecake.  Use a knife and prick the top of the dough.  Brush with the egg glaze and place pecans decoratively on top.  Let cakes rise on baking sheets for 30 minutes.  During the rising time, preheat the oven to 350 degrees.

Once rise time is completed, bake cakes for 30-35 minutes until golden brown.  Remove and let cool for 15 minutes before icing.  Let cakes stay on baking sheet until completely cool.

The icing can be started by dissolving the espresso powder in the hot water.  Then stir in powdered sugar until smooth.  Drizzle over the top of each cake.

Tips and Notes:
1. This coffeecake can be made thinner by rolling out to a wider shape after the dough has been folded over the filling. This will create a thinner type of pastry that will be more crispy as compared to the one in the above picture.
2. Watch the hue of the dough while baking.  The first one I baked came out too dark.  The one in the picture was covered in foil halfway through baking so it would not get too brown. 
                                    **TWO YEARS AGO: Berry Meringue Slices**


Saturday, March 29, 2014

Biscotti Aloha

I will admit, I have not been a great fan of the biscotti-type cookies.  After baking these, I realized that there is a vast difference in the texture of homemade vs store bought. The store bought biscotti are not all that great, especially if you are not the type to dunk.  Simply put, they are too hard and dry.  These homemade biscotti have a cookie type texture, sort of the same as snickerdoodle cookies.

For traditional flavor and taste, homemade is the answer.  So if someone tells you they have tasted it from the grocers, they have yet to experience the true traditional, homemade flavor.  Some foods from the grocers come closer to hitting the mark than others, but when it comes to biscotti- the grocers version is way off.

Besides the nice texture, these biscotti bring forth the flavors of the tropics with with coconut amaretto, macadamia nuts and coconut. Also, the cookies are easy to make and easy to transport. This recipe makes about 3 1/2 to 4 dz cookies.

Biscotti Aloha
adapted from a little book called Biscotti by Lou Pappas

Ingredients
2/3 cup quartered or chopped macadamia nuts
1/2 cup shredded sweetened coconut
2 eggs
2 tbs coconut amaretto or 2 tbs milk
and 1/4 tsp almond extract
1/2 cup butter
1/4 tsp salt
1/4 tsp nutmeg
3/4 cup sugar
1 1/2 tsp baking powder
2 cups plus 2 tbs flour

Prepare 2 baking sheets by lining with parchment paper.  The preheat the oven to 325 degrees.

In a medium sized bowl, beat butter and sugar together for about 2 minutes on medium speed.  Then beat in the eggs ( one at a time) and continue to beat while adding in the coconut amaretto or milk and almond extract. Set aside.

In a separate bowl, sift together the salt, flour, baking powder and nutmeg.  Fold the sifted ingredients into the butter/sugar mixture.  Once dough is formed and no dry streaks remain, stir in the nuts and coconut.

Divide the dough into two batches.  Take each batch and form into a log.  Each log should measure 14 inches long, 1/2 thick and 1 1/2 inches wide.  Place each log 2 inches apart and side by side on the baking sheet.  The longest length of each should be parallel with the longest side of your baking sheet. 

Place in oven and bake for about 25 minutes, rotating at the halfway point.  Logs should have a golden crust when done.  Remove pan and place pan on rack.  Let cool for about 5 minutes.

Take one log and put on a cutting board.  Slice the log with a serrated knife on the diagonal, cutting into half inch slices at a 45 degree angle. Do the same with the second log.  Then take each slice and place cut side down on prepared baking sheet.

Place sheet in oven and let cookies bake for 2 minutes.  Then remove and flip over with second cut side facing down and bake for another 3 minutes.  Remove pan and place on rack for cookies to completely cool.

Tips and Notes:
1. coconut amaretto was not found at the liquor store so I used a mixture of 1 tbs and 2 1/2 tsp of amaretto and 1/2 tsp coconut extract.
2. For an extra special cookie, try coating one end in melted white chocolate.
                               **LAST YEAR: Pistachio Layer Cake**

Sunday, March 23, 2014

Lemon Tartlets with White Chocolate Sauce

We all have dealt with the problems with the first pie slice.  It usually falls apart and never comes out looking all that good.  Small tarts, on the other hand, do not have that issue.  Also, the people that are not into sharing that big slice of pie with anyone are always happy having their own individual dessert.

Last time I wrote on toasting meringue, I had advised that I had a welders torch.  It does the trick, but is difficult to maneuver.  So I gave in and bought a kitchen torch and am very happy I did.  I already have some people looking forward to using it for toasting marshmallows for s'mores.  A torch is nice but for this recipe, the oven can also do the toasting for you.

As you know, pie slices are much thicker than these tarts.  Based on this, I think that the tart filling is a bit stronger in citrus flavor than a regular meringue pie. Also, since the crust base is formed by hand, it will make for quicker preparation.  The flaky crust, citrusy filling and billowing meringue compliment each other in flavor as well as texture.  So good you may even forget about the white chocolate sauce!


Lemon Tartlets with White Chocolate Sauce
adapted from Ready for Dessert

Ingredients/ Filling
2 eggs (room temp)
2 egg yolks (room temp)
zest of 2 lemons
1/2 cup fresh lemon juice
6 tbs butter (room temp)
1/3 cup sugar

Ingredients/Dough
1/4 cup ice water
1/2 tsp salt
2 tsp sugar
5 tbs butter (cut into small cubes and chilled)
1 1/4 cups flour

Ingredients/Meringue
1 tsp vanilla extract
5 egg whites
pinch of salt
1/4 tsp cream of tartar
10 tbs sugar

Ingredients/White Chocolate Sauce
3/4 cup heavy cream
9 oz white chocolate bar/ chopped

The lemon filling starts with combining all the listed ingredients for this components in a medium saucepan. Once blended, place saucepan over medium heat.  Let the mixture cook, while constantly stirring.  The mixture will start to thicken.  Take care not to let the mixture boil.  Once the mixture reaches the consistency of pudding, pour through a sieve placed over a heat proof bowl.  Let cool to room temperature and cover with plastic wrap.  Chill filling in refrigerator while the rest of the components are being made.

For the dough, sift together the flour and salt.  Mix in the sugar.  Toss in the butter chunks and beat on medium speed until the mixture resembles small pebbles.  Pour in the ice water and mix with a wooden spoon.  When completely mixed, the dough should hold together when compressed with your hands.  Lightly dust a flat surface and place the dough on the surface.  Form into an even log, measuring about 5 inches long. Cover in plastic wrap and chill in refrigerator for at least 30 minutes prior to rolling and baking.

Prepare a baking sheet by lining with parchment paper. Preheat the oven to 350 degrees.  Remove the dough log from the refrigerator and slice into 6 even pieces.  Place each piece on the flour dusted surface.  Roll out each piece, one by one, into a circle about 5 inches in diameter.  Lay the pieces on the prepared baking sheet and bake until golden on the edges.  This should take about 20-25 minutes.
Remove pan and let crusts cool completely before using.

For the meringue, increase the oven temperature to 450 degrees.  Fill the bowl of a stand mixer with the egg whites and whip until foamy.  Sprinkle in the cream of tartar along with the salt.  Beat on high speed until the whites reach the soft peak stage.  Continue to run the mixer and slowly pour in the sugar and vanilla extract.  Beat the mixture until the meringue can form stiff peaks when the mixer blade is pulled away from the meringue.

To assemble the components, place an even amount of the filling on each crust.  It should be in the shape of a mound and leave a 1 inch crust border around the edge.  Divide the meringue into six equal measurements.  Then spoon it on top of each tartlet, making sure that the filling is completely covered.  Make decorative swirls and peaks in the meringue.  Place in oven for 3 minutes.  Then pull out and use a kitchen torch to evenly brown the meringue topping on the tarts.

Lastly, make the white chocolate sauce by heating the heavy cream over low heat.  At the point the cream comes to a boil, remove and add chopped chocolate pieces. Let sit for about 1 minute and then stir until all the chocolate is melted.

Serve tarts warm or at room temperature with sauce drizzled onto serving plate.

Tips and Notes:
1. Dough and filling can be prepared up to 4 days prior and kept in refrigerator.
2. If you do not have a kitchen torch, up the bake time from 3 minutes to 5 minutes.
3. The finished dessert should be served the same day as prepared.
                         **LAST YEAR: Pistachio Cake**

Saturday, March 15, 2014

Irish Cream Cookies


Sometimes I see recipes with liqueur as an ingredient but the quantity is very small.  As we all know, most of the liqueur will burn off while baking and, in turn, the end result is that the liqueur flavor disappears.

However, this particular recipe does not skimp on the liqueur.  The recipe makes about 3 dz cookies and requires 1/2 cup of Irish cream liqueur.  With that much liqueur, you can count on the flavor of the Irish cream still being there after baking.

Along with the Irish Cream, coconut, pecans and chocolate chips were also tossed into the dough.  Not many of us would object to these add ins.  Oh, and the liqueur...just enough to bring out the Irish in anyone this St Patricks day! 

Irish Cream Cookies
adapted from Cooks.com

Ingredients
1/2 cup chopped pecans
6 oz mini semis sweet chocolate chips
3/4 cup coconut (sweetened)
1 tsp vanilla
1/2 cup Irish cream liqueur
2 1/4 cup cake flour
1/2 cup butter
1 egg
1 tsp salt
1/2 cup granulated sugar
1/2 cup light brown sugar
1/2 tsp baking soda

Preheat oven to 375 degrees and line baking sheets with parchment paper.

Sift together flour, salt and baking soda. Set aside. Cream butter and both types of sugar together.  Then beat in egg, vanilla extract and irish cream. Using a wooden spoon, fold in the dry ingredients.  Lastly, mix in the coconut, pecans and chocolate chips.

Drop by heaping tablespoons onto prepared baking sheet, spacing about 1 inch apart.  Dip the tines of a fork in water and mash down each tablespoon of dough, repeating the dipping process when needed.  Bake for about 10-12 minutes.

Remove pan and let cookies cool for 1 minute on pan and then transfer to a cooling rack.
                                    **LAST YEAR: Belgian Blondies**

Saturday, March 8, 2014

Mochaccino Cupcakes


I have made many a cupcake in the years past on my blog and most of them had some type of "extra" to them.  When it comes to a cupcake, sometimes it is all about the extras.  No matter if it is fruit topped, caramel filled or split cake batter flavors, cupcakes are always welcomed in a crowd of people.  More fancy than cookies and easy to serve.

These particular cupcakes are a coffee chocolate combination.  The extra in this recipe is the chunks of dark chocolate cooked inside the cupcake.  It is the high quality chocolate that really made these extra special.  After baking and cooling, the big chocolate chunks remained just as solid as they were before baking so the texture contrast is noticed first and then the flavor second.  Also the dab of buttercream on top and the rolled fudge filled wafers made for a nice presentation as well as a great way to compliment the flavor of the coffee chocolate cupcake.  Also, left plain and slightly warmed with a cup of coffee suits my taste as well.

This recipe makes about 30 cupcakes, which is plenty for a crowd.  The people that enjoyed these never missed the few I held back for myself! I found this recipe in a special interest publication on cupcakes dated 2012 from Better Homes and Gardens. 

Mochaccino Cupcakes
adapted from Better Homes and Gardens

Ingredients/Cupcakes
1/2 cup strong brewed coffee (cooled)
2 tsp vanilla extract
1 cup milk
3 eggs (room temp)
3/4 cup butter (room temp)
2 cups sugar
1 3/4 cups flour
1/2 tsp salt
3/4 tsp baking powder
1 tsp baking soda
1 cup unsweetened cocoa powder
2- 4 oz chocolate bars chopped ( semisweet or bittersweet)

Ingredients/Topping
6 tbs cooled, brewed coffee
1 tsp vanilla extract
1/3 cup butter (room temp)
4 cups powdered sugar
30 cream filled wafers (I used fudge filled Pirouettes from Pepperidge Farms
cocoa or cinnamon (for dusting the frosting)

Preheat the oven to 350 degrees. Grease the top edge of 30 cavities of standard size muffin tins and line with cupcake papers.  In a medium bowl, sift together flour, baking soda, baking powder, salt and cocoa.  Then, in a separate small bowl, mix together coffee and milk.  Set both bowls aside.

Place the butter in the bowl of a stand mixer and beat on medium high speed until creamy.  This should take about 3 minutes.  Then add the sugar and beat mixture on medium high for 4 minutes, taking time to scrape down the bowl occasionally.  Continue to beat and add the eggs, one at a time.  Beat for about 30 seconds after each egg is added. Mix in the vanilla extract.

Then fold in 1/3 of the sifted ingredients.  Add 1/2 of the coffee milk mixture and blend until smooth.  Fold in the 1/2 of the remaining dry mixture and stir in the rest of the wet ingredients. Blend in the remaining sifted ingredients. Once no dry streaks remain, stir in the chocolate chunks.

Using a spoon or small scoop, fill each of the 30 paper lined cavities with the batter.  Each cavity should be about 3/4 full.  Smooth the tops of the batter and place in oven for about 18 minutes to bake, rotating pans at the halfway mark.  Cupcakes are done when tester comes out clean and tops are springy. 

Remove pans and let cupcakes rest in pans for 5 minutes, then transfer to a cooling rack to completely cool.

To make frosting, beat butter in bowl of a stand mixer for about 2 minutes on high speed.  Once nice and creamy, turn mixer down to medium and slowly pour in 1 cup of powdered sugar.  Beat for another 2 minutes, scraping down sides of bowl after 1 minute.  Add 3 tbs of brewed coffee and the 
vanilla extract.  Mix until all is blended well.  Then add the rest of the powdered sugar in 1/2 cup increments, beating on medium high.  Scrape down sides of bowl periodically during this process.  Should the end result be too thick, add some more brewed coffee until desired consistency is met.

Pipe a swirl or star of frosting in the center of each of the cooled cupcakes, leaving about 1/4 to a 1/2 inch uncovered along the edge.  Then sprinkle the frosting with cinnamon or cocoa.  Lastly, stick a cream wafer in the cupcake at a 45 degree angle.

Tips and Notes:
1. The cream wafer will turn eventually turn soggy if left in the cupcake at room temperature. You can refrigerate to prevent that, but the cupcake itself will dry out in the refrigerator.  The best thing to do is insert the wafer just prior to serving.
2. If you are not a big fan of buttercream, simple sweetened whipped cream with stabilizer does quite nicely as well.
                             ** LAST YEAR: Rasberry Cream Cheese Braid**

Sunday, February 23, 2014

Pecan Pie Cheesecake

There are lots of dessert recipes in which the item is stuffed or filled.  The recipes that are more commonly seen are cookies and cupcakes.  However, it is not all that common to have a stuffed cheesecake.

Upon first reading the title of this recipe, I thought that it would be a complicated task. Surprisingly, it was very easy.  The other thing that crossed my mind is how would an already cooked item do being cooked a second time inside a cheesecake?  The only thing I noticed different in the pie inside the cheesecake rather than outside is that it became more compact, but the same flavor remained.

After tasting one slice of this cheesecake, I wished I had been the one to think of this delectable combination!  Velvety vanilla cheesecake with a center of sweet caramel and crunchy pecans...enough said- it does need a place at the top of your "to make" dessert list.

Pecan Pie Cheesecake
adapted from 2002 Southern Living Cookoff Winning Recipes

Ingredients/Candied Pecans
3 cups pecan halves
2/3 cup dark brown sugar (packed)
1/4 cup golden syrup or light corn syrup
6 tbs butter

Ingredients/Cheesecake
One 8 or 9 inch pecan pie
1 cup sour cream
3- 8 oz packages of cream cheese
3 eggs
2 tsp vanilla extract
6 tbs butter (melted)
2 cups graham cracker crumbs
1 1/3 cups sugar
1 tsp cornstarch

For the candied pecans, preheat the oven to 350 degrees.  Cover a baking sheet with foil and place pecans in a single layer on top.  Toast pecans in oven for about 5-7 minutes. Remove baking sheet and transfer pecans to a heat proof bowl and set foiled baking sheet aside.

Reduce the oven temperature to 300 degrees. Then brush the foiled baking sheet surface with some melted butter. Add 6 tbs butter, sugar and syrup to a saucepan. Place saucepan over medium low heat.  Stir the mixture until sugar dissolves.  Increase the temperature to medium and let candy simmer for 2 minutes, stirring constantly. Remove from heat and mix in pecans till coated.  Pour mixture onto prepared baking sheet and spread evenly.  Bake for 5-7 minutes then transfer and spread out on wax paper to cool.

Start on the cheesecake by heating the oven to 350 degrees.  Fill a 9X13 inch pan with 3/4 cup of water. Also, take and chop up enough candied pecans to fill 1/2 cup and 1 tbs.  Place these items aside.

Wrap the bottom and sides of a 10 inch springform pan with foil.  For the graham crust, mix the graham cracker crumbs, melted butter and 1/3 cup of sugar together until blended.  Press the mixture evenly into the bottom and up 2 1/2 inches along the interior sides of pan.

In the bowl of a stand mixer, beat together the cream cheese, remaining 1 cup of sugar and vanilla extract on high speed for about 3 minutes or until completely smooth.  Add one egg and beat on low until blended.  Repeat process of beating in the rest of the eggs, one at a time.  Then blend in the sour cream and cornstarch.

Separate out 1 1/2 cups of cream cheese batter and stir in the chopped candied pecans.  Pour this batter into prepared crust.   Take the pecan pie and, if using an 8 inch pie, cut off the top border of the crust.  For a 9 inch pie trim 1/2 inch of the outer edge off.  Cut the pie into 6 pieces and invert each piece on top of the cheesecake batter, (crust side up) in the springform pan.  The pour the rest of the batter into the springform pan, covering the pie. 

Place the 9X13 pan of water on the bottom rack in the oven. Then put the cheesecake pan on the next rack up. Bake until the center of the cheesecake is set.  This should take about 70 minutes.   Once it is baked, turn off oven and leave oven door cracked open about 3-4 inches.  Let cheesecake rest in oven for an hour.

Remove cheesecake from oven and let cool.  Refrigerate overnight.  The next day, warm one cup of candied pecans in the microwave, just so the pecans are pliable and a little sticky.  Place candied pecan halves decoratively around the outer edge of the cheesecake.

Serve cheesecake slices with extra candied pecans. A scoop of whipped cream on top is also an option .

Tips and Notes:

1. To save time you can always purchase a pecan pie.  Usually the purchased ones flip out of their foil pans easily so there is no need to cut the slices to transfer, just flip into the center of the springform pan over the first layer of cream cheese batter.
2. Note that three cups of candied pecans is an abundance.  My pecans remained pliable in the candy coating at room temperature, so there was no need to microwave any to get them to stick to the top of the cheesecake.
3. The cheesecake did not crack, even though the 3/4 cup of water in the pan below evaporated at some time during the baking process.
                              **LAST YEAR: Chocolate Caramel Sandwich Cookies **


Sunday, February 16, 2014

Peach Brandy Pound Cake


Peaches may not be in season but with a little help from peach brandy, you can still have that flavor.  Mother nature does impact how good the fruit season is and after a slice of this, I have hopes that this summer has the tastiest, juiciest crop of peaches yet.

As you can see, I left this cake very plain.  No glaze and not even a side of whipped cream.  Like most good pound cakes, they are best served plain so you are sure to taste the true flavor of the cake.I think it is better served the second day, when the flavor has had time to develop more.

Since most of us may have indulged in some rich decadent desserts over Valentine's, a slice is a nice change of pace.  Also, this Bundt cake does seem to belong right next to a hot cup of tea in the afternoon.

Peach Brandy Pound Cake
adapted from Cakes, 1001 Classic Recipes

Ingredients
1 tsp lemon extract
1 tsp orange extract
1 tsp vanilla extract
2/3 cup peach yogurt (I used greek style with fruit on the bottom)
1/3 cup peach brandy
4 eggs
2 cups flour and more for dusting pan
2/3 cup butter and 2 tbs for pan preparation
1/2 tsp baking soda
1/2 tsp salt
2 cups sugar

Prepare a 9 inch Bundt pan by brushing the inside with 2 tbs of melted butter.  Then dust with flour, making sure all crevasses are completely covered.  Preheat oven to 325 degrees.

In a medium bowl, cream together butter and sugar until fluffy.  Then beat in the 3 different extracts.  Add one egg and beat for 30 seconds. Repeat the process with the other 3 eggs.  Set aside.

Sift together the flour, salt and baking soda.  Fold in 1/3 of this mixture into the butter/sugar batter.  Stir in the peach yogurt and fold in the next 1/3 of the dry mixture.  Add the peach brandy and mix until blended and fold in the last 1/3 of the dry, sifted ingredients.

Fill the prepared pan with the cake batter and smooth the top so it is even.  Bake until golden brown and tester comes out clean.  Baking time should be about 55-65 minutes.

Remove cake from oven and let rest in pan for 20 minutes.  Then invert onto rack to completely cool.  Once cooled, move cake to serving platter.  


                                         **LAST YEAR:Oatmeal Butterscotch Cookie Pie**

Sunday, February 9, 2014

Dutch Love Letter Cookies


With Valentine's coming up, I decided to take on a project.  Turning a tasty cookie recipe that is very basic in appearance to something more pleasing to the eye.  Granted these were not the easiest things to form and did take some practice batches, but I am happy with the end result.  If you are short on time, you can always just do these in logs or the "s" shape as the recipe instructs.

The cookies have a flaky, crunchy exterior with an almond paste filling.  The exterior is somewhat made like pastry dough, using water. Instead I used chocolate liqueur in its place.  However, there was no trace of this flavor in the cookie after baked.  Perhaps with something stronger like rum or bourbon, the flavor may remain.  I still want to experiment some more on these.  With regard to the the shaping of the dough, the filling does not ooze out when baking so cracks in the cookie dough is not a disaster.

The original recipe states to form these in large "S" shapes, brush with an egg wash and sprinkle with sugar.  As you can see, I dipped these in chocolate instead.  The recipe in its original state is below, but I encourage you experiment and add your own spin.  In making the large "S" shapes as per the recipe, it yields 16 cookies and takes about 2 1/2 hours to complete the process.

Dutch Love Letter Cookies
adapted from 100 Great Cookie Recipes/Ladies Home Journal

Ingredients/Cookie Crust
1 cup or 2 sticks cold butter, cubed
1 egg yolk
6-7 tbs ice water
3 cups flour
1/4 tsp salt

Ingredients/Filling
1/4 tsp grated lemon peel
8 oz can almond paste or 7 oz tube
1/3 cup sugar
1 egg

Ingredients/ Topping
1 egg white
2 tbs sugar

Sift together the flour and salt.  Then cut in butter with pastry blender or 2 knives until mixture is crumbly.  In a separate small bowl, whisk together 1 egg yolk and 2 tbs water. Drizzle mixture into the sifted ingredients and toss together with a large fork.  Add one tbs of water and toss together.  Repeat with additional tbs of water until the mixture comes together like pastry dough.

Separate dough into 4 equal sizes.  Place a square on lightly dusted wax paper and form into a 4 inch square.  Repeat with the other lumps of dough.  Peel wax paper off of squares and completely enclose in plastic wrap.  Refrigerate for 1 hour or overnight.

During chilling time, prepare the filling by beating together all 4 ingredients listed above.  Once it is blended into a fluffy mixture, scrape out of bowl with a spatula and transfer into a plastic zip lock bag.  Seal and chill for one hour or overnight.

After the chilling time, preheat the oven to 375 degrees and line 2 baking sheets with parchment paper.

Lay a 20 inch piece of wax paper on a flat surface and lightly dust with flour.  Remove one pastry square from the refrigerator.  Test the dough by kneading to make sure it is can be rolled out without breaking.   Once it becomes pliable, roll into a 9 1/2 inch square about 1/8 inch thick. 

Trim the edges until you have a straight edged, 9 inch square.  Cut into 4 strips, each measuring 2 1/4 by 9 inches.  Brush each strip with water.  Take filling out of refrigerator and cut off a small section of the corner of the bag.  Then pipe 1/2 inch strip lengthwise down the center of the dough, starting 1/2 below small top of strip and ending 1/2 above bottom of strip.  Roll up pastry strips lengthwise and crimp seam and ends.  Place seam side down on baking sheet in the shape of an "S".

Brush top with egg white and sprinkle with sugar.  Continue with the forming of the 3 remaining strips for this pastry dough and sugarcoat as instructed.  Repeat the rolling, forming and topping instructions for the remaining 3 squares of pastry dough in the refrigerator.

Cookies should bake for about 20 minutes.  The finished letters should have a slightly golden hue on the edges. Let cookies cool on pans for 2 minutes then transfer to a rack to finish cooling.
                                     **LAST YEAR: Lemon Limoncello Cupcakes**


Sunday, February 2, 2014

Cherry Mahlab Muffins


While cranberry and orange is a familiar flavor combination, there are few bakery items that combine cherries and oranges.  While the cherry and orange does make for a tasty muffin, there is a third subtle flavor in these- it is a spice called mahlab.

Mahlab is more commonly found in desserts in the Middle East and Mediterranean countries.  It is actually made up of a seed or pit from the Saint Lucie cherry.  The pit is actually dried and then ground to a fine powder.  Due to its short shelf life, it is best to purchase the seeds and grind them yourself.  Adding the ground spice to desserts imparts a cherry almond flavor to your baked goods.

I was pleased with the moist texture as well as the pop of flavor that the dried cherries added to the cake.  This recipe is a keeper in my book, but the recipe only makes 18 so you may want to consider doubling it if you have company over.

Cherry Mahlab Muffins 
adapted from Moufflet

Ingredients/Muffins
1/2 cup buttermilk
1 cup orange juice
1 tsp vanilla extract
2 eggs
1/3 cup butter melted and cooled
1 cup dried cherries
2 tsp orange zest
1 cup sugar
2 cups flour
1 tsp baking powder
1/2 tsp salt
1/2 tsp baking soda
1 tsp ground mahlab

Ingredients/Orange Glaze
2 tbs butter, melted and cooled
3 tbs orange juice
1 tbs orange zest
1 cup powdered sugar
1/2 tsp vanilla

Prepare muffin tins by filling 18 cavities with paper liners and greasing the top edge or spraying pan with non-stick spray.  Preheat oven to 350 degrees.

Sift together the flour, baking powder, baking soda, mahlab and salt.  Take 1/4 cup from mixture and place in small bowl.  Add the orange zest to the 1/4 cup of the dry ingredients.  Whisk or use a fork to blend, making sure that the zest is evenly distributed.  Then pour this back into the larger bowl of the sifted ingredients and add the sugar.  Mix until all is combined and set aside.

Fill a small saucepan with the orange juice and dried cherries.  Place over medium heat, stir a few times and then let mixture come to a boil.  Remove from heat and cover with lid.  Let sit for about 30 minutes so flavors will meld and cherries will soften more.  Then drain the cherries, reserving the cherries in one bowl and liquid in another.

In a medium size bowl add the melted butter, vanilla extract and buttermilk.  Whisk until smooth. Then add each egg, one at a time, continuing to whisk.  Once blended, stir in the orange cherry liquid.

Go back to the bowl of sifted ingredients and form a well.  Then pour in the wet ingredients and fold the both together until just combined.  To keep from over mixing, the recipe states that this process should take about 10 strokes. Fold in the cherries in 3 strokes.

Scoop the batter into the muffin cavities, taking care that they all are filled evenly.  Place in oven and bake until they are golden brown and spring back when lightly touched.  This should take about 18-20 minutes.  Let muffins cool in pans for 3 minutes and then transfer to a rack to completely cool.

To make the glaze, blend the melted butter with 1 tbs of the orange juice.  Sift the powdered sugar into the mixture and stir.  The glaze should be the consistency of corn syrup, so continue to stir in the additional orange juice until the right consistency is achieved.  Then stir in the vanilla and orange zest.  The glaze can be drizzled on the tops of the muffins or the muffin tops can be dipped into the glaze. The muffins will need to rest for 1 hour before serving in order for the glaze to set.
                                  **2 years ago: Coconut Macaroon Brownies**
 

Sunday, January 26, 2014

Gingerbread Whoopie Pies

The cold weather here has had me craving a rich and spicy dessert.  Gingerbread was definitely in order.  In scanning several recipes, it became clear that there are many different variations on this classic favorite.  Some recipes had pepper and espresso powder, while others had candied ginger.

I settled on a recipe that produced a deeply spiced cake, but only reflected the traditional flavor.  The unique thing about this recipe is the use of stout beer.  The cakes turned out crispy on the edges and very moist.  Perhaps it was the beer, but I believe that the oil was actually the main factor for the texture.  The filling may be a basic cream cheese frosting, but I could not think of a better pairing.

The recipe is actually one for a 2 layer, 7 inch cake but the batter turned out to be the perfect amount for 12 whoopie pies.  So dig out all those ground spices from your cabinet for this recipe, you will be glad you did.

Gingerbread Whoopie Pies
adapted from Miette

Ingredients/Cakes
1/2 cup vegetable oil
1/2 cup plus 2 tbs stout beer (Guiness is recommended)
3/4 cup molasses
2 eggs
1/4 tsp salt
1/8 tsp cardamon
1/4 tsp cloves
1/4 tsp nutmeg
3/4 tsp cinnamon
1 tbs and 2 tsp ginger
1 tsp baking powder
1/2 tsp baking soda
1/2 cup packed light brown sugar
3/4 cup granulated sugar
1 1/4 cup flour

Ingredients/ Filling

1/4 cup (1/2 stick) and 1 tbs and 1 1/2 tsp unsalted butter at room temp
1 cup cream cheese
1/2 cup sifted powdered sugar

Topping
Mini Honey Teddy Grahams
1 cup heavy cream
1 tbs powdered sugar

Preheat the oven to 350 degrees and grease the cavities of 2-12 cavity non stick whoopie pie pans.

Stir together the molasses and stout in a small saucepan.  Place over medium heat and continue to stir as the mixture comes to a boil.  While still stirring after the boil stage, sprinkle in the baking soda.  This will cause the consistency to become very foamy.  Remove from heat and set aside to cool.  Mixture is ready to use once it reached room temperature.

In a medium bowl sift together the dry ingredients: 5 different spices as listed above, salt, baking powder and flour.  Also put this aside.

In the bowl of a stand mixer, add 2 types of sugars and eggs.  Beat on medium speed until light in color, about 3 minutes.  Keep the mixer running and slowly pour in the oil.  Once the oil has been blended into the batter, change mixer speed to low.  Pour a steady stream of the molasses mixture into the batter.  Once blended, remove bowl from mixer stand.

Fold the sifted ingredients into the batter.  Once there are no streaks of flour, strain mixture into a bowl.  Then fill each pan cavity with 2 tbs of batter.  Place pans in oven and bake for 4 minutes, then rotate and switch racks with each pan.  Bake for an additional 4-6 minutes.  The cakes are done when they spring back when lightly touched in the center.

Remove pans and let cakes cool for about 10 minutes.  Then take a plastic fork and go around the edges of each cake and slip underneath to remove cake from cavity.  Place cakes on rack to cool.

Once completely cool, place 12 cakes on individual squares of wax paper.  Cakes will need to be refrigerated for at least one hour before filling.

To make the filling, beat together butter and powdered sugar until smooth and creamy.  This should take about 3 minutes on medium speed.  Then remove cream cheese from package and place in microwave safe bowl.  Microwave for 2 intervals of 10 seconds each.  Add cream cheese to butter mixture and beat for 2 minutes. 

Place 1 heaping tablespoon of filling on top of the cakes on the wax papers.  Smooth the filling evenly over the cake.  Repeat process until all cakes are filled.  Then place one cake on top, creating a sandwich.

Then beat the cream and sugar together until it becomes very thick and holds its shape.  Using a star tip, pipe the whipped cream in the seam of where the edges of the two cakes meet.  Then pipe a rosette on top and place 1 mini honey graham bear on top.

Tips and Notes:

1. These cakes are very moist and stick to parchment.  I served each of them on the square of wax paper and they did not stick.
2. The pans I used were non stick and the recipes with them stated grease and flour the pans. I did not want flour residue on cakes, so I just used grease in pans.
3. Use caution when removing cakes from pan, they are delicate and moist.
4. The cakes, without filling, can be stored tightly wrapped for up to 3 days in the refrigerator.
5. The filling, tightly covered, will last up to 2 weeks in the fridge.  However, it will need to be beaten for about 2 minutes prior to using.
6. The amount of filling for these cakes is based on personal preference, so feel free to increase it if you want more. 
                              **LAST YEAR: Tunnel of Fudge Bundt Cake**


Sunday, January 19, 2014

Creme Bruleed Chocolate Bundt

Devils food cake is something that most of us can hardly turn down.  It is always one that is guaranteed to take care of any chocolate craving.  It is such a wonderful cake, trying to make it even better can pose a bit of a challenge.

It seems as if this particular recipe did succeed in that respect.  In addition to a rich fudgy cake, you have raspberries filling the center hole that are mixed with raspberry liqueur.  Then a thick cream brulee covers the top which sprinkled with sugar and then caramelized with a blow torch to form a shell.

My only issue with the preparation was the caramelizing of the cream on top.  I have a welders blow torch, so it was difficult.  Even though the sugar was heavily sprinkled on top, all the torch seemed to do was melt the cream off of the cake.  I am sure with practice and an actual kitchen torch, the caramelizing of the sugar would be a easier task. 

However, the blow torch problem did nothing to impair the great taste of this cake.  I do love wine and dark chocolate, but after this, the raspberry liqueur is my first choice. Also, the cream brulee on top brings in the third flavor which comes directly from a vanilla bean, creating one tasty trifecta of a dessert.  Please note that this recipe is for a 10 cup capacity bundt pan.

Cream Bruleed Chocolate Bundt
adapted from Baking with Julia

Ingredients/Creme Brulee
3 tbs sugar
5 egg yolks
1 vanilla bean
3/4 cup heavy cream

Ingredients/Cake
4 eggs, separated
2 egg whites
1/2 cup vegetable oil
1 tsp vanilla extract
1/2 cup water
1/4 tsp salt
3/4 cup cocoa powder
2 tsp baking powder
1 tsp baking soda
1 1/2 cups sugar
1 cup flour

Ingredients/Filling and Topping
1/4 cup raspberry liqueur
1 1/2 cups raspberries
3-4 tbs sugar

For the cream brulee, start by filling a saucepan with the heavy cream.  Then split the vanilla bean and scrape out all the seeds into the cream and put the pod in the cream as well.  Place the saucepan over low heat and mix.  Once the mixture comes to a boil remove saucepan from heat and set aside.

Set up a double boiler and let water come to a simmer in the bottom pot.  In a small bowl, whisk together the sugar and egg yolks.  Pour mixture into the top pot of the double boiler that has already been placed over the simmering water.  Let the mixture cook while continuously whisking.  Once the mixture turns pale yellow and is very hot, remove the top pot from the simmering water and turn off the heat. Leave the pot of simmering water on top of the original heat source.

Then slowly blend the warm cream mixture into the yolks in intervals.  Pour in some of the cream and whisk until mixed and continue with this process until all the cream is blended.  Place this pot back on top of the one filled with warm water.  Let mixture sit for about 5-10 minutes, stirring every few minutes. In the meantime, fill a large bowl with ice.  Once the custard is very thick, place the pot of cream in the bowl with the ice.  After the mixture cools, remove the vanilla pod and strain into a small bowl. Cover and refrigerate for a minimum of 2 hours.

As the brulee is cooling, the cake can be made.  Preheat the oven to 350 degrees and prepare the bundt pan by buttering the inside and dusting with flour.  Take care to make sure all cracks and crevasses are covered.

Sift together flour, cocoa powder, salt, baking powder and baking soda in a medium size bowl.  Then mix in 1 cup of sugar.  In another bowl, blend together egg yolks, vanilla extract, water and oil.  Add the dry ingredients to the egg yolk mixture, stirring until no dry streaks remain.  Mixture will be very thick.

Fill the bowl of a stand mixer with the 6 egg whites.  Beat at low speed until they reach a foamy consistency and barely hold a peak.  Continue to run the mixer, but increase the speed to medium.  Slowly pour in 1/2 cup of sugar, beating the whole time.  As the mixer is running the consistency of the whites will change.  They will become glossy and hold their shape as stiff  peaks.

Take 1/3 of the whites and blend with the chocolate mixture.  Then fold the chocolate mixture into the remaining whites.  Once blended, pour batter into prepared bundt pan.  Place cake pan on a baking sheet or jelly roll pan and put in oven.  Set timer for 35 minutes.  Check cake at the end of this time to see if a tester comes out clean.  The cake should already have started to pull from the edges of the pan and there should be some small cracks on the surface.  If the tester does not come out clean, bake for another few minutes until tester indicates done.

Remove and place on rack to cool for 25 minutes.  Then invert onto rack and let cool completely.  Invert again onto cake plate so decorative side is face up.

Once the cake is cooled, place raspberries in a small bowl and toss with the raspberry liqueur.  Then fill the center hole of the cake with the raspberries and pour all excess liqueur from the bowl on top of the berries.

Spoon the cold custard over the center and top of cake, making sure the raspberries are completely covered.  Sprinkle on the sugar and take a blow torch to the custard and let the sugar brown and  caramelize to form a shell over the top of the cake.

Tips and Notes:
1. The cake by itself can be made a day ahead and kept at room temperature. However, if filled and covered in custard, it must be served immediately.
2. The custard can also be made a day ahead and kept refrigerated.
3. The recipe states to spoon the custard over the top and drizzle down the sides.  The drizzling effect is hard to achieve with cold custard, but piping the custard down the sides is an option.
4. If I was to make this again, I would probably increase the custard recipe by 1/2 to insure that there is enough to drizzle down the sides.
                                      **LAST YEAR:Aristocrat Cookies**


Sunday, January 12, 2014

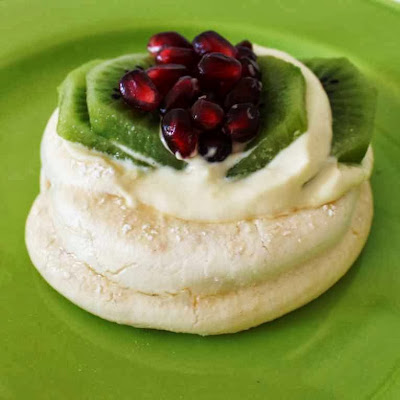
Kiwi Pomegranate Angel Pies


Ok, so now that most of the holiday cookie season has passed us, time to move on to something a little more different.  Time for winter fruit, but not apples or pears.  Looking at the list of seasonal fruits, kiwi and pomegranate jumped out at me.  Then the hunt was on for a dessert that incorporated both of these delicious lovely fruits.

Not only did I find a recipe, but it also put me to the challenge of making something fairly new.  I have made a few things with meringue, but never like this.  The meringues were not as fragile as expected.  Also, regarding the pastry cream, I found the instructions particularly easy. Unlike this recipe, others involve standing and whisking at the stove for up to 20 minutes in order for the pastry cream to thicken.  Even though this recipe takes time, it is actually wait time, not working time.

This tri-texture dessert does please the palate as well as the eye. The combo of juicy fruit, thick rich pastry cream and the crunchy meringue makes for a wonderful way to end a meal. This dessert is one that will make an impression and be remembered long after your the dinner party is over.

Kiwi Pomegranate Angel Pies
adapted from Gourmet Magazine/Nov 2006

Ingredients/Meringue
1/4 tsp cream of tartar
1/4 tsp salt
1 cup granulated sugar
4 eggs
1 tbs powdered sugar

Ingredients/Pastry Cream
2 tsp corn starch
1 1/2 tbs flour or 1 tbs and 1 1/2 tsp
1/4 cup granulated sugar
1 tbs butter, melted
1/2 cup chilled heavy cream
4 egg yolks (reserved from meringue)
1/2 tsp vanilla
1 cup whole milk

Ingredients/Fruit Topping
1/2 cup pomegranate(fruit from one whole peeled pomegranate)
8-10 kiwi fruit

The first part of this dessert is the meringue.  Preheat the oven to 200 degrees and prepare 2 baking sheets by lining with parchment paper.  Separate eggs by putting yolks in a small bowl, cover and place in refrigerator to reserve for pastry cream.  Pour egg whites into the bowl of a stand mixer.  Beat the eggs whites at medium speed until they reach the foamy stage.  With the mixer still running, add the cream of tartar and salt and continue to beat until you reach the soft peak stage.  Then start beating in the sugar in one tablespoon increments until a total of 8 tbs or 1/2 cup has been added.

Turn the mixer up to high speed and beat for 5 minutes.  The end result should be meringue with a stiff glossy consistency.  Using a wooden spoon, fold in the remaining 1/2 cup of sugar.

To form the meringues, you can use a pastry tip.  Make a circle of meringue (about 3 1/2 to 4 inches in diameter and then form another layer with a circle on top.  Then put a little meringue in the center and smooth it out so it forms a bottom, like an empty pool.  This creates a nice base to put your pastry cream into.  The other method is to spoon out the meringue and use the back of the spoon to make an indention. Continue to form the meringues, making a total of 10 meringues, 5 on each baking sheet.

Using a sieve, fill with powdered sugar and lightly dust the surface of each meringue.  Place each pan in the oven and leave door propped open about a 1/2 an inch.  A wooden spoon is a good item to use for this purpose.  Let meringues cook for about 2 1/2 hours.  They should be very dry and crisp.  Turn the oven off and allow for an additional hour in the oven to dry completely. During the last 15 minutes, remove the egg yolks from the refrigerator to get to room temperature. After the baking process, remove pans from the oven and carefully peel meringues off the parchment paper.  Place each meringue on a cooling rack.

To make the pastry cream, start by sifting together the flour, cornstarch and salt.  Then whisk in only 2 tbs of sugar and set aside.  in a medium size bowl, beat the egg yolks with a fork or wire whisk.  Add the dry ingredients and beat again until all is blended.

In a small saucepan, pour in milk and add 2 tbs of sugar.  Place over medium heat and stir until mixture comes to a boil and all sugar is dissolved.  Remove from heat.  Working quickly, pour half of the milk mixture into the egg/flour blend and stir with a wooden spoon until it forms a batter.  Pour this batter back into the remaining milk in saucepan.  Place saucepan over medium heat and stir constantly until custard comes to a boil.  Remove from heat and mix in vanilla extract and butter.

Push all the custard mixture through a sieve, using a spatula or wooden spoon. Cover bowl of custard with wax paper and place in refrigerator to chill for 2 hours.

During the last hour of the chilling process, peel and slice the kiwi into 1/4 thick slices. Also, whisk or beat the whipping cream until it reaches the stiff peak stage.  Once the custard cream is completely chilled, remove it from the refrigerator.  Using a wire whisk, mix up the custard to make sure there is nothing sticking to the edges of the bowl.  Fold the whipped cream into the custard and blend until smooth.  Again, cover and place in refrigerator for 1/2 hour.

To assemble the angel pies, remove the chilled custard from the refrigerator.  Spoon about 3 tbs of pastry cream into each meringue shell and smooth the top.  Place slices of kiwi decoratively on top of the pastry cream center.  Then sprinkle on the pomegranate and lightly press with a spoon to adhere.
       
Tips and Notes;
1. Dessert should be served as soon as possible, otherwise the meringue will lose their crunchy texture.
2. When forming the meringues, make that the interior of your meringue has a thick enough bottom
3. The meringue itself is very sweet, feel free to omit the powder sugar dusting
4.  The tartness of the fruit is what offsets the sweet meringue so a liberal use of fruit topping is fine
                                         **LAST YEAR:Spice Donuts**